Panoramic Images, Film & Digital – Part 1
This is a 2-part series covering the evolution of classic panoramic format images on film to the current practice of digitally stitching overlapping incremental exposures along either a horizontal or vertical axis (Part I); and the growing capability to produce ultra-high resolution files using digital stitching software to seamlessly create a two-dimensional “fabric” containing many exposures or segments (Part II).
Most avid photographers know that Louis Daguerre invented the first viable photographic process in 1839 and introduced the first commercial cameras and process materials to the market in 1840. Images made from his cameras were formed on silvered copper plates and were called Daguerreotypes.
What few photographers know is that the first commercial efforts to produce panoramic images took place only three years later in 1843, when a Daguerreotype camera was modified to serially photograph adjoining segments of a broad scene on individual Daguerreotype plates. The term “panorama” was used by Daguerre himself in the 1830s for advertising his exhibits, which featured a continuum of large dramatically-lighted country scenes that he painted, and which were arranged end-to-end to create broad vistas he called “Dioramas”. The early stages of the Industrial Revolution had drawn people to large cities and immersed them in a dense and often unpleasant urban lifestyle. And so, Daguerre’s Dioramas were well attended in Paris, producing a steady income for him.
As art and science often go together, it was Daguerre the artist who developed the technology for capturing likenesses of lighted subjects with a reasonable level of permanence. Though his first love was panoramic vistas, it was up to others to adopt his invention to accomplish this. And new inventions for this purpose accelerated through the years. In Photography’s first decade, there were two new camera designs to capture extra-wide vistas. In the first six decades of Photography’s existence, 1840 to 1899, there were 19 such inventions or about one every three or four years on average.
Most of these involved the use of “swing” lenses that rotated in some fashion to project precise increments of a vista onto either adjoining flat plates or onto one or more curved plates to record each segment individually. Remarkably, some of the curved media were actually fashioned from copper plates and even from glass plates. Curved plates helped reduce perspective distortion. But, in the 19th century, panoramas were mostly produced by professional photographers willing to put up with the crude equipment of that period.
However, flexible film became available in 1888. And, of equal importance, the development of the first well-corrected wide-angle lens designs took place between then and 1905. This enabled a simpler way of capturing panoramic images with cameras that framed the image to crop out unnecessary sky and foreground, producing extra-wide aspect ratios. Later, the photography world formally defined a panoramic image as having an aspect ratio of 2:1 or greater. (Aspect ratio is equal to the longer image length divided by the shorter length.)
In Photography’s next sixty-year period – 1900 to 1959 – there were 30 new panoramic camera designs, about one every two years on average. In the remaining forty years of the 20th century 28 new panoramic cameras were introduced, an even higher rate.
Two of the most successful cameras produced from 1976 to 1995 were the Linhof Technorama 617 that used a vertically cropped ultra-wide-angle 6 cm x 17 cm format (2.8:1 aspect ratio), and the Noblex rotating lens models with curved film planes (aspect ratios of 2.4:1 and larger).. I bought a Technorama 617 SII, while a good pro-photographer friend had a Noblex Pro, a camera design in which he participated. We often debated the merits of each camera.
In later years, I used a Hasselblad Pan F panoramic camera that used 35mm film, which was much more compact and convenient. Nevertheless, I made relatively few panoramic images on film, none of which were worth the time and expense to digitize for inclusion in this article.
However, this introduction sets the stage for what I consider to be the best panoramic photography era yet: The Digital Age, especially the past ten years, as the capabilities of digital-stitching software reached new heights. Current programs contain algorithms for more than just seamlessly blending overlapping images and smoothing out lighting differences for segments taken at different angles. They can also smooth out differences between segments caused by optical distortions, vignetting, and chromatic aberrations, though using highly corrected lenses is a far better choice.
Today’s digitally stitched panoramic images are greatly superior to panoramic images recorded on film regardless of format size. Another major advantage of modern image-stitching software is the ability to stitch 2-dimensional arrays including multiple horizontal rows and vertical columns of image segments. This capability can produce striking photographs with any aspect ratio, not just 2:1 and larger. This continues to be of particular interest to me. (More about this in Part II.) Following are some of the panoramas that I’ve made from 2009 to the present date.
Classic Panoramic Images – Single Row, Aspect Ratio 2:1 and Greater
The above image was made by stitching three horizontal medium format images together. They were taken with an 80mm normal lens equivalent to a 50mm lens in 35mm format. However, I wasn’t thinking about panoramic formats when I made these exposures. That occurred to me later while editing. Had I planned for this from the beginning I would have taken four or five overlapping vertical images to create this panorama. That would have yielded more space on top to allow for differences in composition between the three images, and also would have produced a smaller, more pleasing aspect ratio.
Ironically, this wasn’t the last time that a stitched panoramas resulted from one of my afterthoughts. This happened periodically until I added that alternative to my checklist.
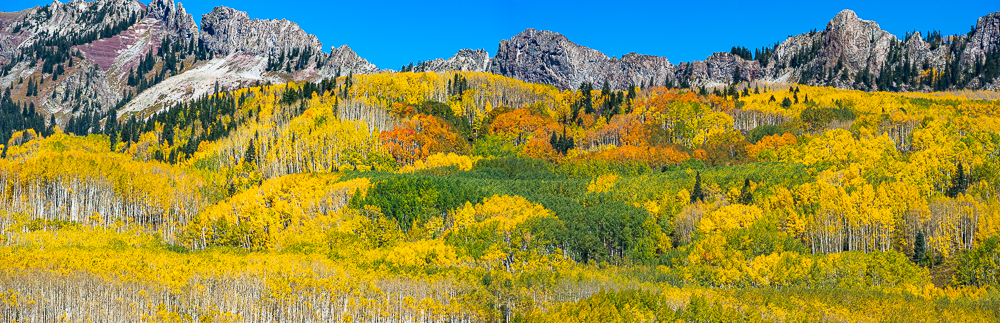
I made the above panorama in 2019. The original images were made in late September of 2010 during one of the best color seasons any local could remember. Every scene I saw was alive with color. And, this Aspen grove is 10 miles long! All of the Aspen trees in this grove are interconnected by one root system. Thus, this grove is the largest single living organism in the world. On the first day, all I did was take a few shots, drive a little further, and shoot some more.
On the next day, I found one stretch that had a wide color range and took a dozen shots with slightly varying compositions. Nine years later, when I re-edited many of my older files, I noticed that two of the Kebler Pass images had a 12% overlap. I didn’t think that this was sufficient but tried stitching them anyway. To my surprise, they blended very well. But, I had again taken horizontal images that left me without sufficient upper margin, causing the peak on the left to be cropped out. Again, had I shot overlapping vertical images, the composition would be better. But, the color is so vibrant that one hardly notices the foreshortened peak.
I use Lightroom Classic to merge my overlapping images. I like the results, though another stitching software app might correct the field curvature enough to salvage more upper margin. Yet, it is always better to resolve issues in the field rather than through software fixes later.
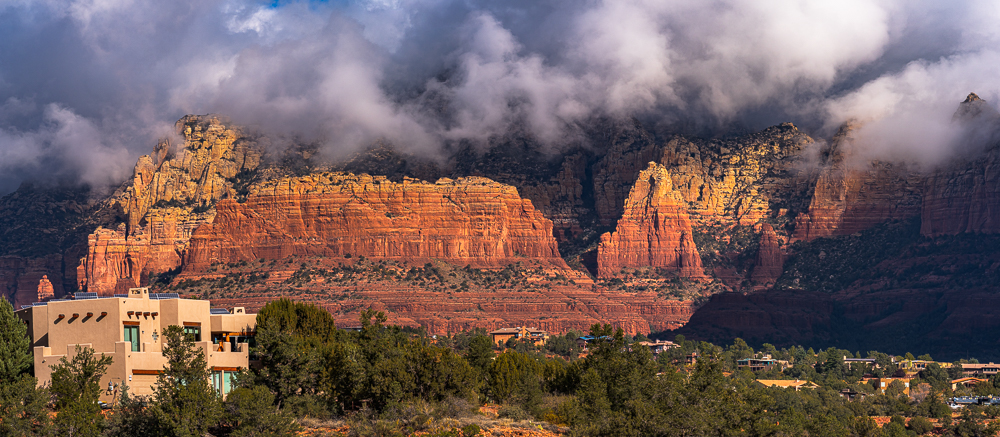
The preceding panorama was planned prior to exposure. Having photographed it from my house many times I already knew that a panoramic format fits it well. This image required only two horizontal exposures, which were made using a focal length of 108mm.

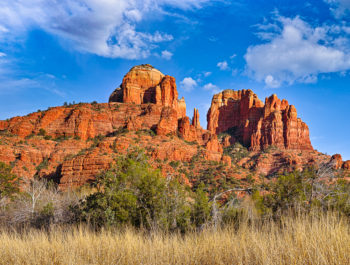
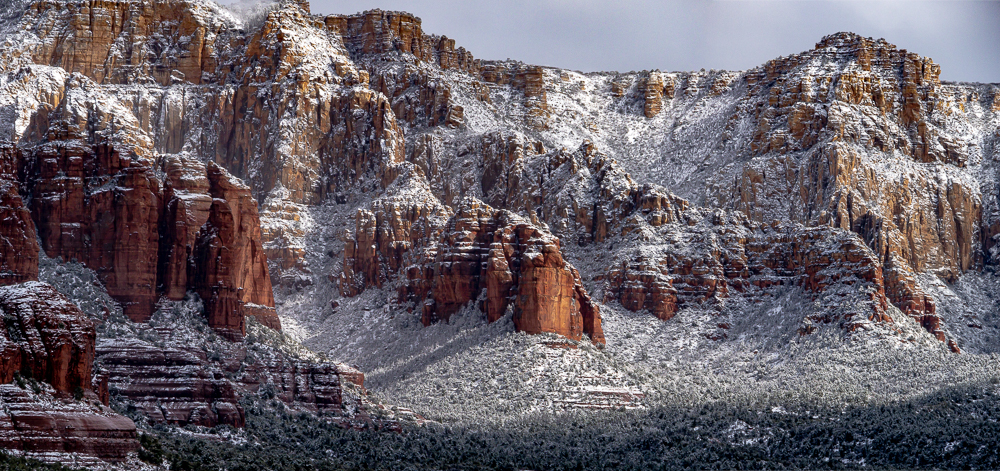
The above image was created with a panorama in mind prior to exposure. Water running along the Rte. 89 roadbed has eroded the adjoining sandstone rock for many years. This time through, I was intrigued by small regular reflections on the upper part of the arch. This image required stitching three horizontal images, which were taken with a focal length of 131mm.
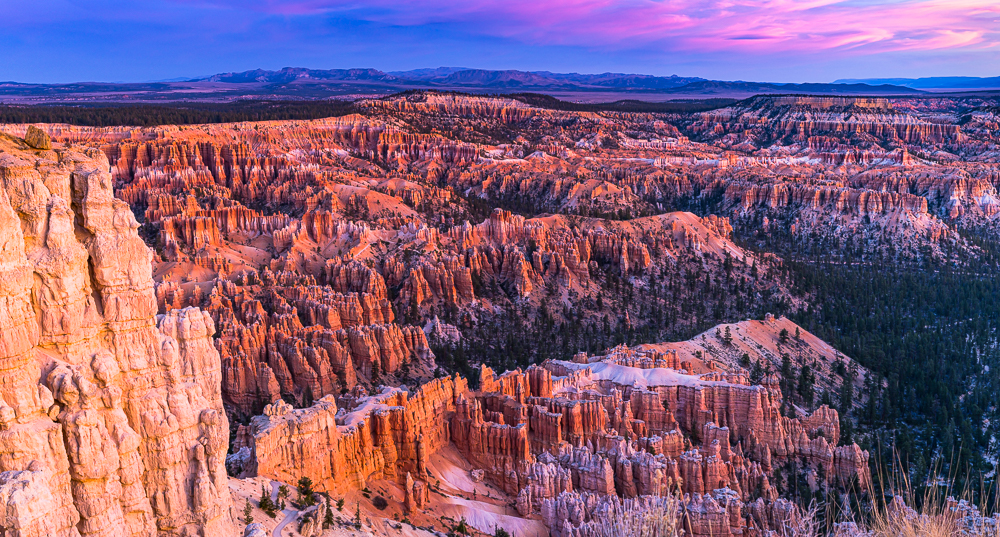
Once again, I failed to anticipate an opportunity for a nice panoramic image, this time waiting for the sunrise in Bryce NP. I stitched two horizontal images together in early 2018, over five years later. The original images were taken with a 55mm medium format lens which, in 35mm format, is the equivalent of a 35mm lens. This is one of only three times that I used a wide-angle lens to photograph the segments to be made into a panorama. One of the later images will illustrate why I don’t recommend using wide-angle lenses for this purpose.

In the case of the above panorama, there was never any doubt about shooting for this format. The most compelling aspect of this scene was the broad expanse of color developing throughout the large valley. A normal focal length was used to capture 7 vertical exposures.
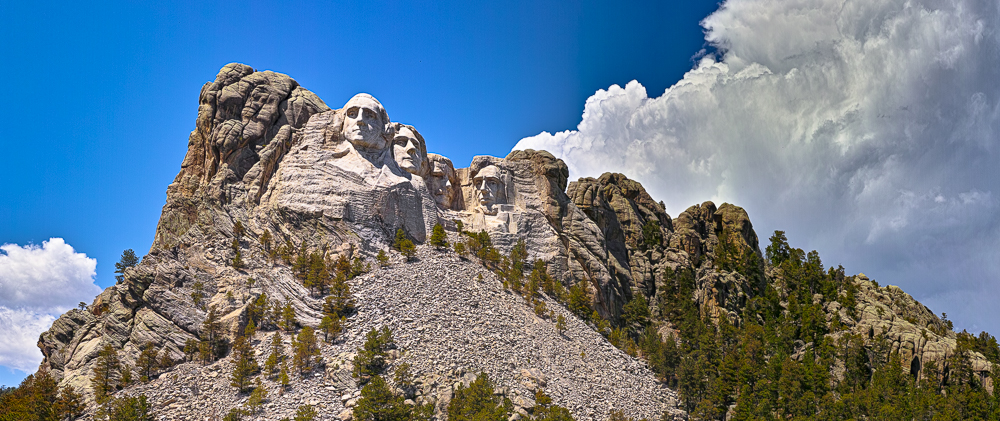
Rather than show the usual tightly cropped image of the four presidents’ likenesses carved from rock, I wanted to show them in the context of the rocky ridge from which they were carved. The strong diagonal contrasted nicely with the opposing diagonal created by the huge strato-cumulous cloud on the right. The final image was made by stitching six vertical segments, using a 50mm lens with a C-size sensor, giving a 35mm format equivalent focal length of 75mm.
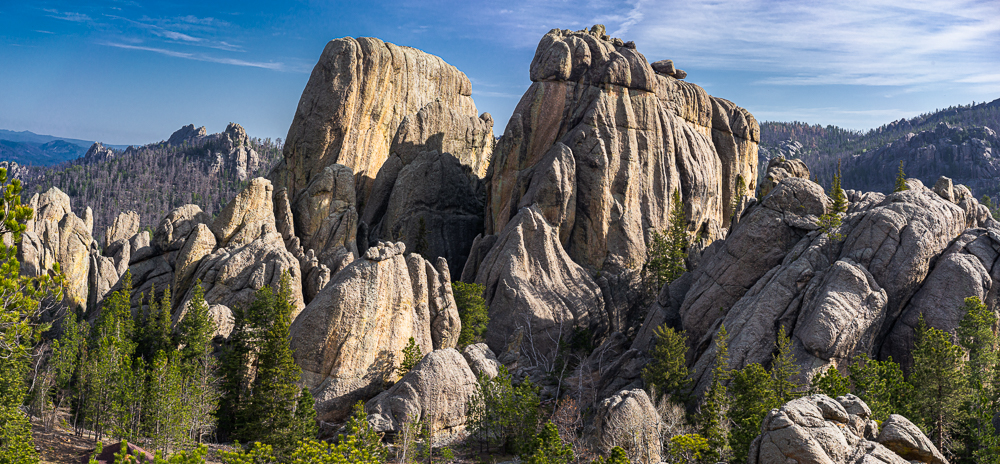
I didn’t envision the preceding image as a panorama in 2014, though I’m glad that I thought to take separate views that just happened to overlap. I first thought of joining the two segments in December 2020. Here, a Sony Zeiss 55mm f1.8 normal lens was used to take both segments.
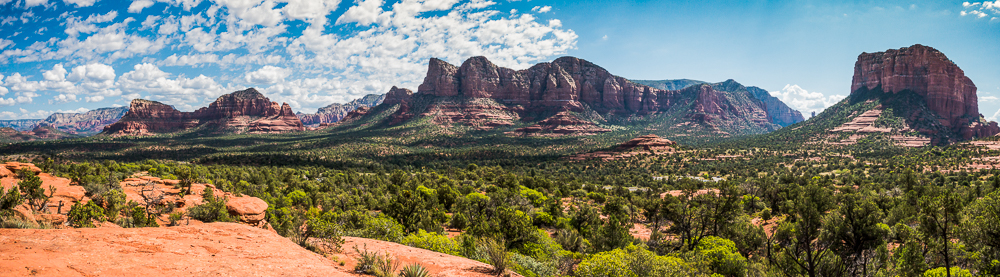
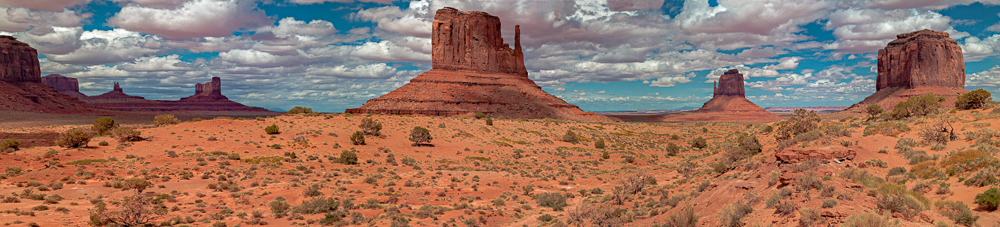
There was no question of which perspective to capture in the above image. Four overlapping horizontal exposures were digitally stitched using a 35mm lens that left substantial room around the major elements of the scene.
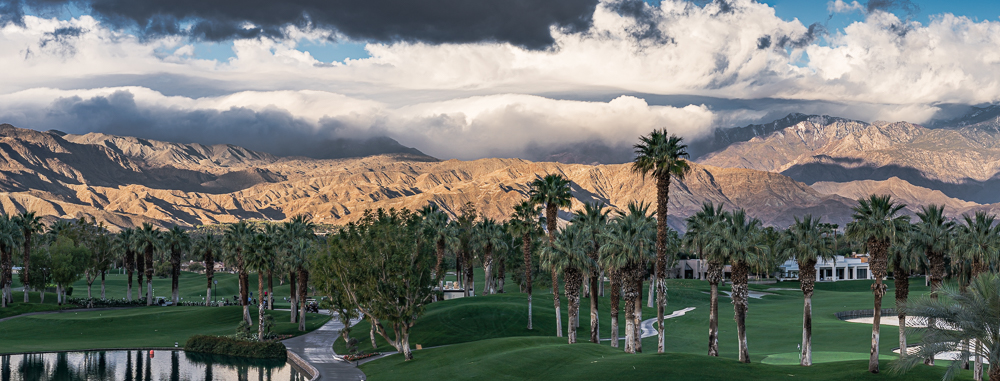
The rocky desert hills, and the mountains behind them, form the southwestern border of the Coachella Valley is often the anchor for dramatic cloud formations and lighting. With the lush vegetation of the Palm Springs Marriott grounds and golf course in the foreground, the scene above is natural for classic panorama images. The one above was made from three horizontal segments taken with a 55mm normal lens.
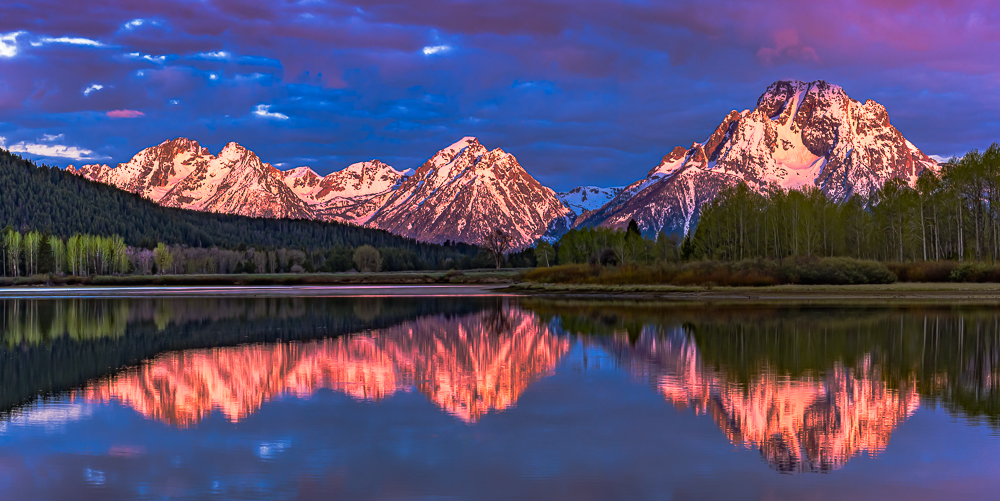
In order to ensure enough space in both the sky and reflection, four overlapping vertical images were taken using a 70mm focal length on a C-size sensor giving a 35mm format equivalent of 105mm (short telephoto).
It is important to note that both the vertical and horizontal field of view in a photograph are a function of both: the lens angle of view, and the distance from the subject. Whenever I make a landscape exposure, I select a lens that will give the amount of space that I want around the main subject both vertically and horizontally. In this case, I was sufficiently far away for a short telephoto focal length to leave all the space that I needed.
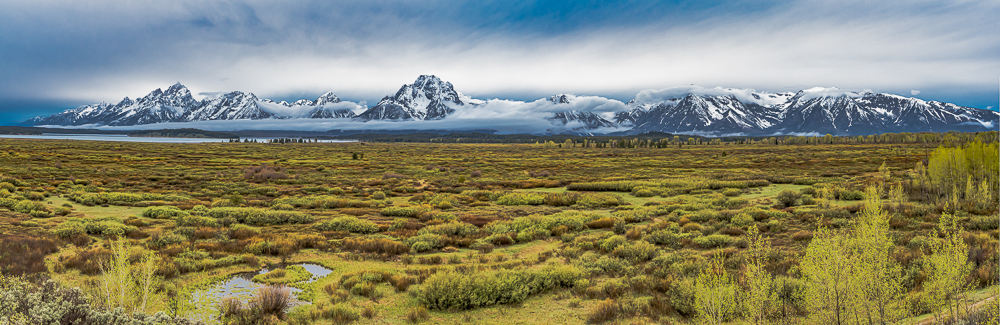
After two glorious sunrises, I shifted my perspective to capture the entire Teton Range as seen from Willow Flats. The sun never came out that morning. Instead, the dramatic peaks were mostly shrouded in low-lying clouds. After one hour, the ground fog lifted and the clouds became more defined. Using a panoramic format was the only approach that made sense.
The above panorama was made from three horizontal medium format images using a 45mm focal length that in 35mm format is equivalent to a 28 mm lens. This covered more of Moose Flats, but also diminished the size of the mountains. If I were to do this shot over in medium format, I would have taken five or six overlapping vertical images with an 80mm normal lens to minimize image size falloff at the ends of the image, and make the mountains larger overall.
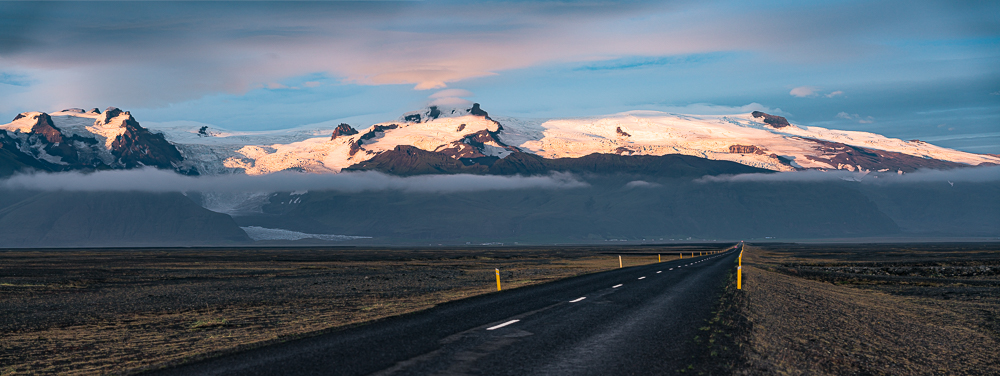
The sunsets late in the Icelandic summer. We saw this view as we were driving along the southern route to the East Coast. After taking some individual images of each of the visible glaciers visible from this perspective, I decided to take two successive horizontal images to form a panoramic perspective of the whole vista, including the highway, as our van was the only vehicle for miles. Taken with a handheld Sony A7rM2 camera and an 85mm f1.4 GM lens.
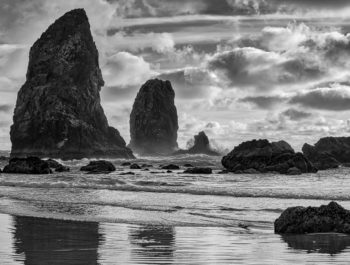
The preceding panorama was made from three vertical overlapping segments using a handheld Sony A7rM2 camera and a 90mm f2.8 short telephoto lens.
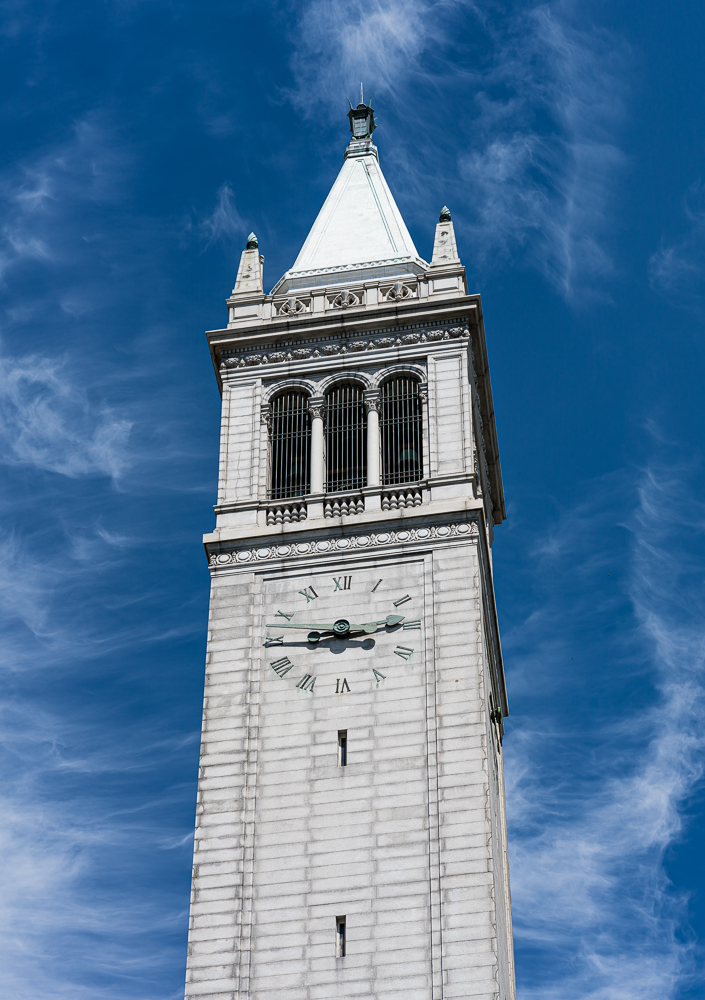
Probably more than 99% of all panoramic images are horizontal. However, there is no good reason not to use this format for vertical subjects. I took three overlapping horizontal images and stitched them vertically. I could have taken five or six to capture the whole tower. However, the Berkeley campus is almost always crowded and I really wanted to concentrate on the upper portions in any case. A Sony 85mm lens was used for the three segments.
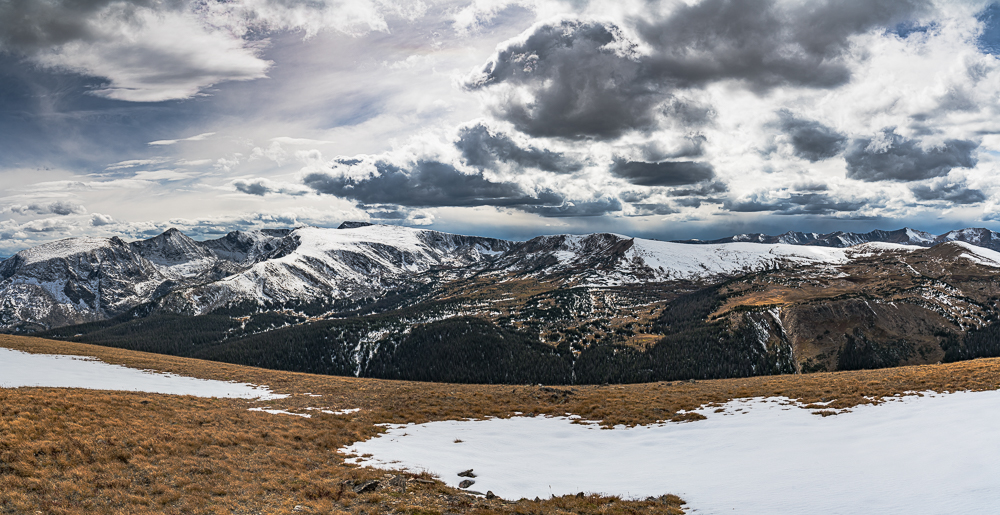
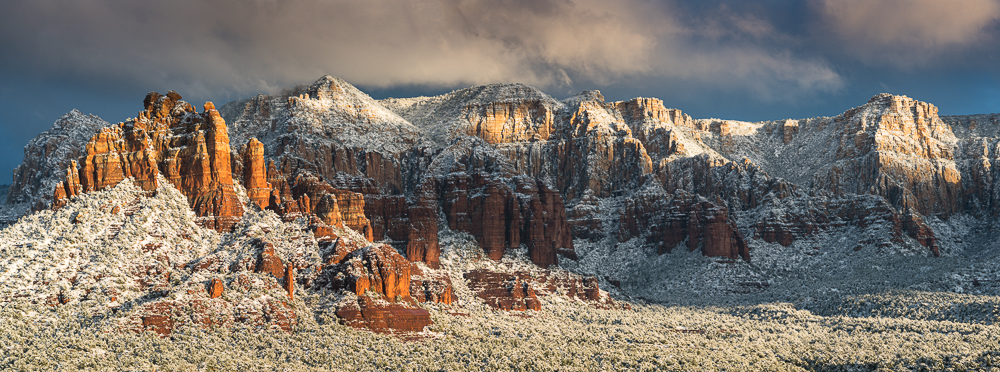
The dramatic view above was taken at an altitude of 12,183 feet. To capture this panorama, I made five overlapping vertical images using a 35mm lens. While that fully encompassed the dramatic sky, and the patches of snow in the foreground, it also introduced curvature in the foreground that actually wasn’t there, as I had to tilt the camera down for this composition. This is one reason why I prefer to use normal to short telephoto lenses for panoramic stitching.
I made two exposures of the above view from my home, but was not thinking “panorama”. Fortunately, they overlapped sufficiently to stitch them. The segments were made using a Sony A7rM4 camera, and a 135mm f1.8 GM lens known for its unmatched resolution (as of this date). The stitched panorama has more detail and crispness than any I have ever seen. That quality is the first thing that everyone mentions when they first see this image on my iMac 5K.
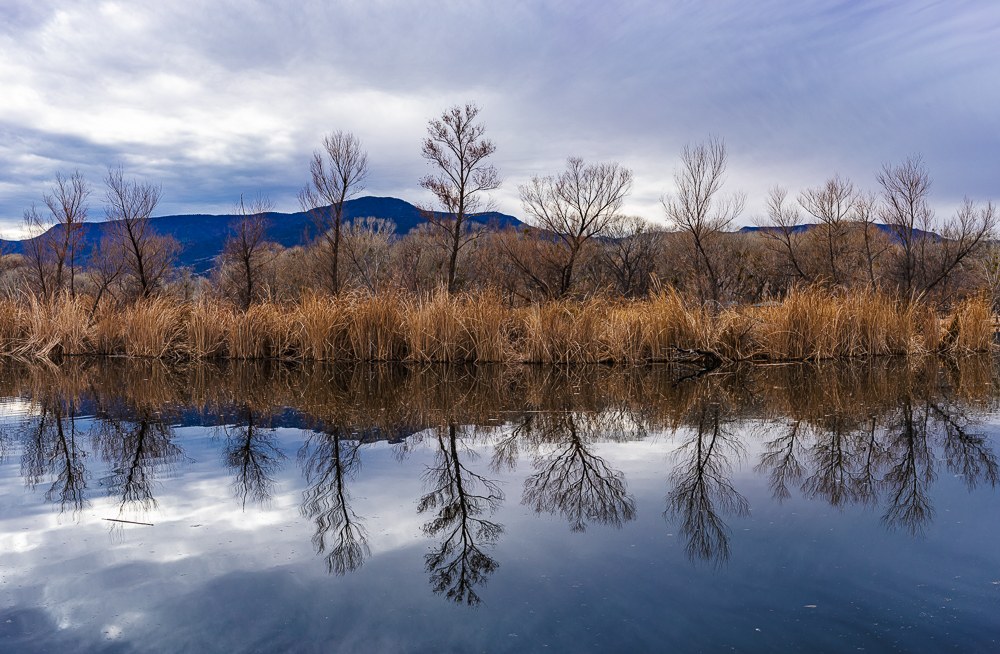
When I first saw the trees, bulrushes, and their reflections in the above image, the first thing that came to mind was “Panorama”. Safe to say that I am finally conditioned to considering that format before I start shooting landscapes. I took five handheld overlapping vertical segments to set up this image, using a Voigtlander 50mm f2.0 Apochromatic lens on a Sony A7rM4 camera. The image quality is lovely and captures the moodiness and nuances of the scene.
Conclusion
Most photographers quickly assess a scene to see whether they should frame it horizontally or vertically. Later, if a wider format is desired, the easy way is just to crop the image in post edit to accomplish that. However, if the scene is particularly strong and brilliant, a stitched panorama should be considered. That requires shooting multiple overlapping images for later stitching. It also means composing the image to leave extra space at the top and bottom. This is yet another reason to plan your shots carefully to maximize your opportunities.
All of the images shown above are traditional single-row panoramic formats. However, digital stitching now opens the door to many different possibilities because of the ease of creating large files by stitching segments arranged in both rows and columns. Part II will focus on 2-dimensional multiple-image stitching to accomplish several objectives.
Harvey Stearn
January 2021
Sedona, AZ
To see the scope and essence of Harvey Stearn's photographic art please visit www.CameraStops.com. Mr. Stearn began photographing Western landscapes and wildlife at the age of 13, spent 50 years pursuing his passion in the field and in the darkroom before fully converting to digital photography in 2002. He developed color prints as well as monochrome, but switched over to digital capture and editing in 2002. Though he was a top executive for two large scale land development and home building corporations, he always found time for his fine art photography which won many awards. His work was exhibited in art museums in Southern California and Arizona, and was also featured in billboard advertisements and published in magazines. Mr. Stearn served on the California Arts Council for nine years, including two years as Chairman and another two as Vice Chairman. In addition, he was the founding Chairman of the John Wayne Airport Arts Commission in Orange County, California. Mr. Stearn’s work was sold through Arizona galleries for 15 years. In recent years he wrote 33 illustrated articles for PhotoPXL.com and 14 articles for Luminous-Landscape.com. In 2013 he published a book entitled “In Search of the Old West” which has been widely acclaimed. He was a guest lecturer on photography on a cruise ship visiting Chile, Argentina, Uruguay and the Falkland Islands. His work was among the top 100 images printed in NANPA's Showcase publications in 2019 and 2020. Images have been edited and selected for two new books on Landscape photography which will be published in late 2024 and early 2025.