QImage Software For Printing
Some years ago, and even before the beginning of the Adobe Lightroom era, I used the Windows QImage software for my prints on a LargeFormat inkjet printer, more precisely the HP Z3100 model.
Even then, I regretted that this software was not available for Mac OSX at that time, so I printed first from a virtual machine with OSX installed, and later via a separate Windows XP PC, on which Xrite Profile Maker 5 was also running. This was because at that time, after an OSX update it was no longer possible to communicate directly with the XRite hardware.
Already at that time, the print results with QImage were convincing; the internal scaling algorithm gave especially good results, which were not inferior to scaling with Photoshop and other software algorithms.
QImage is not an RIP, as some people think. It uses the printer driver of the respective operating system and the specifically installed printer.
When Adobe Lightroom, a highly integrated Digital Asset Management tool with integrated image editing and printing functions, came onto the market in 2007, QImage became obsolete because Lightroom had an almost identical set of print functions. I say “almost,” because Lightroom had not yet implemented a “soft proof,” but this was later upgraded.
In this respect, I rarely used QImage anymore, also because it could no longer switch to Microsoft Windows.
QImage One for macOS

With QImage One for macOS (a spinoff of QImage Ultimate, which is still only available for Microsoft Windows), the version for Apple’s operating system, desired by many, was finally realized.
Almost all common file formats used for printing are supported (JPEG, TIFF, PNG, GIF, BMP, TGA, PSD, PCD, and raw images). PSD is limited to those saved from Photoshop with “maximize compatibility” enabled (the same requirement as Lightroom). As for the TIFF format, most formats are supported, including 16 bits/channel, and various encodings and compression rates. Transparency is not supported, with the exception that PNG photos with transparency will be transparent to the page background if you have selected a custom page background color.
I prefer to print files in TIFF (16 -bit format, ZIP compression), which were developed in the ProPhoto working color space.
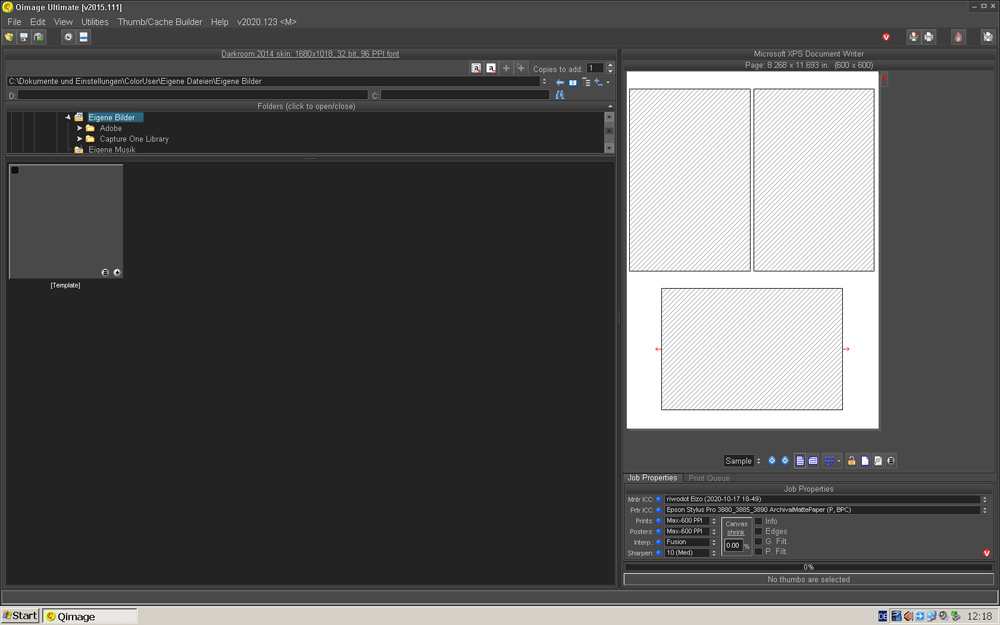
If you look at the user interface in comparison to the 2015 Windows version, you will notice the better clarity and clear structure.
However, QImage Ultimate has more functions to offer, such as various utilities and interfaces, which I rarely if ever used. Consequently, I am very satisfied with the scope and the functions that QImage One offers, and I can’t see anything I am missing at first sight.
At this point, I would also like to refer to the online help of the manufacturer, Binartem: https://www.binartem.com/q1winhelp/
For this purpose, QImage One can be used directly from Adobe Lightroom or Adobe Photoshop by using plugins, and images can be transferred from there directly to QImage One.
The user interface can be used in a bright mode, as shown above, or in a dark mode, which can also be set at runtime. Otherwise, it is structured in a way that on the left side you can see the photos of a selected directory, and on the right side are displayed the relevant print parameters, which can also be set there. In the middle of the screen, the print piece is displayed in the selected size, on which photo(s) can be placed accordingly.
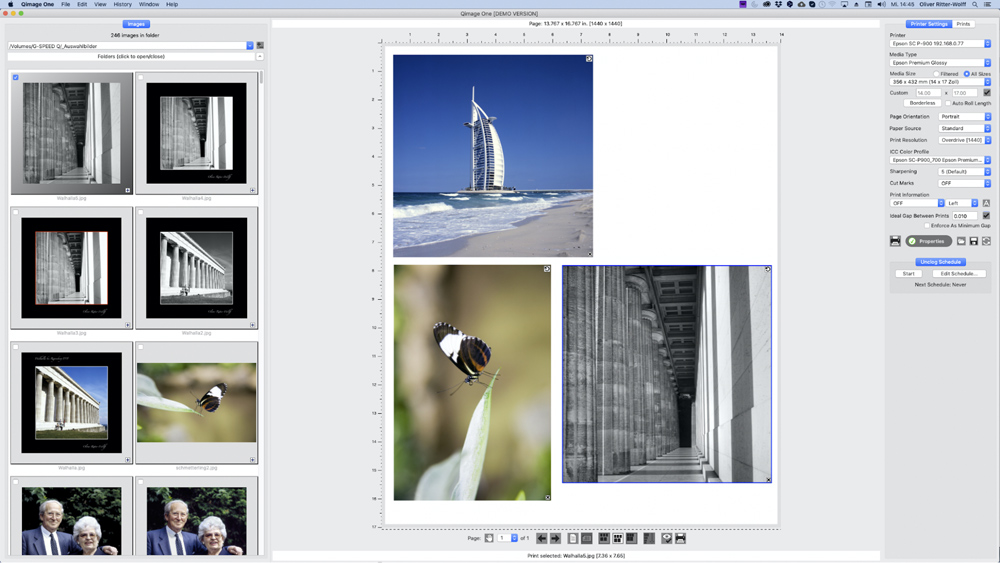
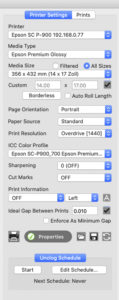 Under the Printer Settings tab, the printer must be selected at the top. Afterward, the installed paper types, as well as the corresponding media sizes and all other parameters, are available as set in the printer driver.
Then, you can select the ICC profile for the selected printer-paper combination, and decide if the print should be sharpened for output; and if so, how much. The default value is 5, so you have to experiment a bit to gain experience.
With QImage Ultimate, I mostly used Photoshop to sharpen my output in a 50% screen view. Here it is important to avoid oversharpening to avoid associated sharpness artifacts. However, the topic of sharpening could fill articles, if not books, so this will not be discussed further here. Jeff Schewe, among others, has written some very interesting articles in the Pixelgenius context. Another interesting source is the German magazine FineArtPrinter, in which Roberto Casavecchia has written some very interesting articles about sharpening, and has also developed some camera-specific Photoshop actions for it.
QImage One and QImage Ultimate rely on the same scaling and sharpening algorithms; the latter is called Deep Focus Sharpening (DFS), which works as artifact-free as possible. The scaling algorithm is called “Fusion Interpolation.” My test series at that time showed good results here.
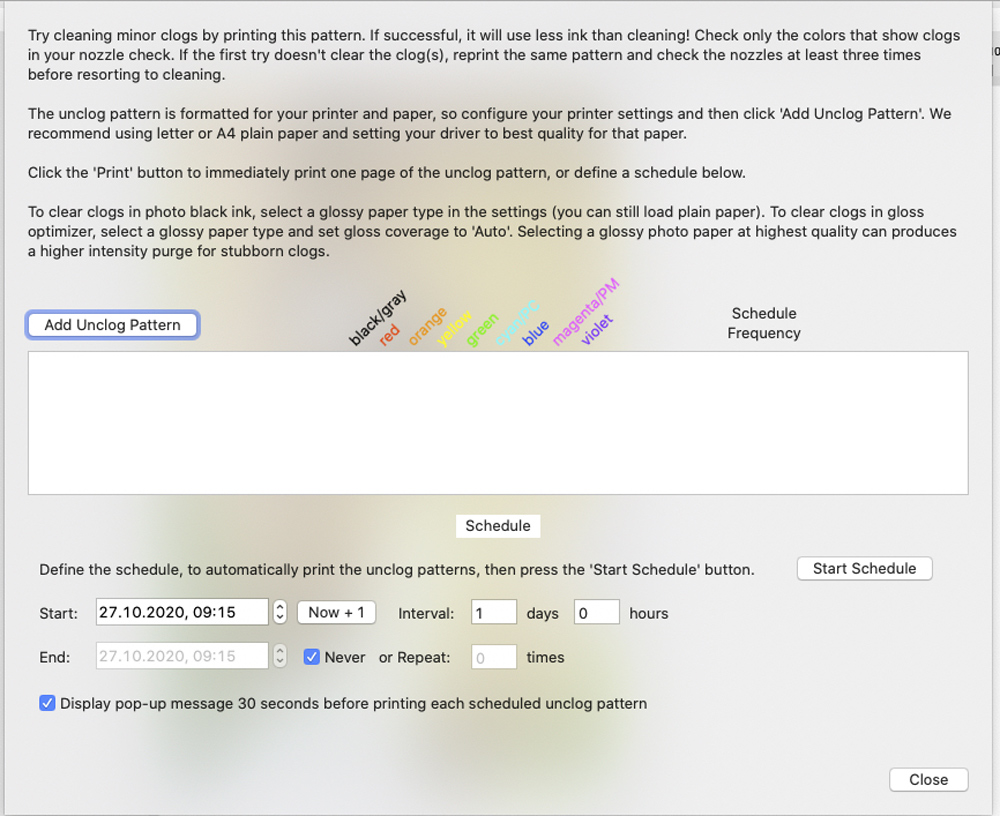
With the buttons to “Unclog Schedule” you can prevent the clogging of printer nozzles:
You can also place crop marks and EXIF information on the printout, and control the spacing between photos on a page.
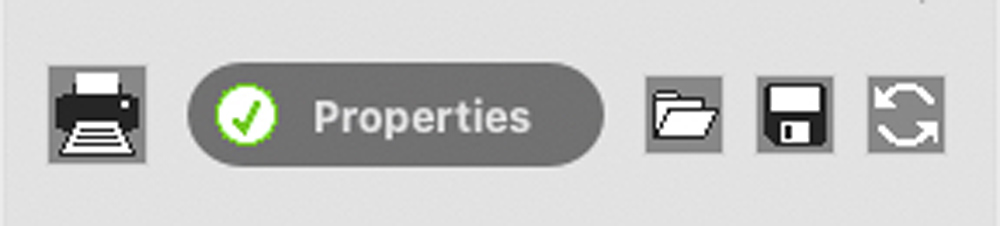
The following icons can be used to start the print, save, load or reset settings. Furthermore, there is a Properties button. If you see an exclamation mark here, settings in the macOS driver have to be corrected. If this is OK, a green check mark is shown here:
Under the Prints tab, you will find the settings for the size of the respective print and frames, (e.g. for canvas prints). You can also rotate the images, or add or delete your own image sizes.
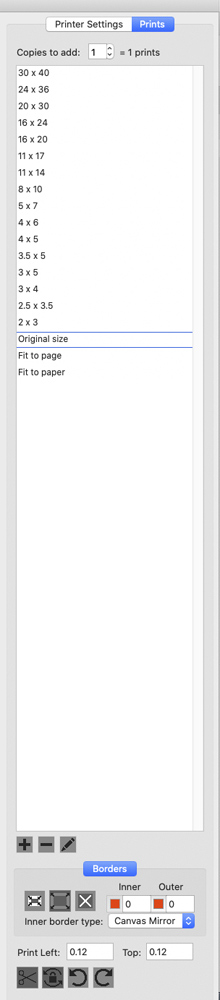
Some icons remain at the bottom of the screen, as follows:

The following three icons are responsible for the placement of images:
 Of particular interest is the icon which shows the soft proof with the selected ICC profile, rendering intent, out of gamut and black point control.
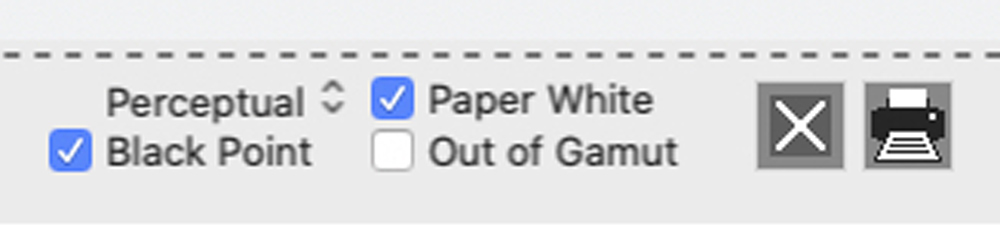
This is especially useful when, for example, a RAW converter such as DXO PhotoLab is used that does not have its own soft proofing.
Print jobs can be saved, loaded and deleted using the following menus:
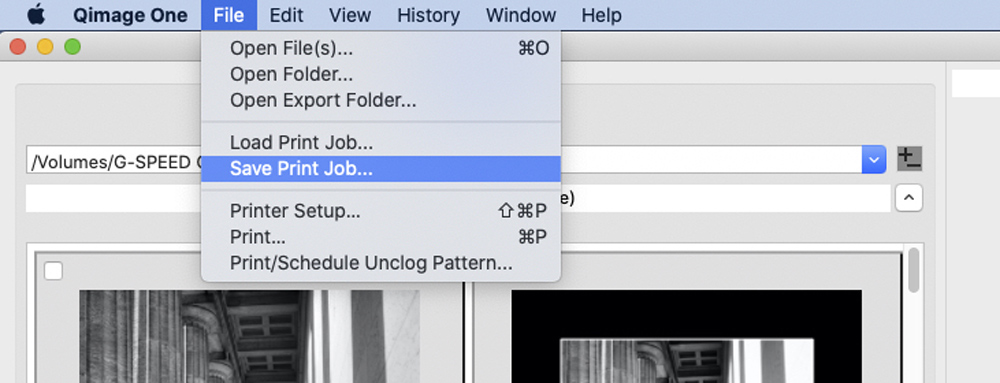
This has the great advantage that these jobs can be printed again at any time with the same settings, without having to go back to the image editing software.
In the other menus there are some more settings that are self-explanatory.
Conclusion
QImage One is a very good software option for printing with the printer drivers that run under macOS (or Microsoft Windows). Compared to QImage Ultimate, functionality has been reduced, but I don’t consider this a disadvantage for most workflows.
Since the same scaling and sharpening algorithms are used as QImage Ultimate, a very good print output is achieved.
Since I have been working more and more with Capture One instead of Adobe Lightroom for some time now, I will use QImage One for my prints again.
This added value is also available to other image editing programs, because the print jobs can be loaded and output at any time without having to define all the printing settings every time. From my point of view, QImage One is a very recommendable product.