Mastering The Art Of Photographic Composition – Part One
Anyone can take a snap, but it takes a little more care to frame and compose a photograph. But what is photographic composition and how do you learn it?
During the next two weeks while I am traveling and doing workshops in the Faroe Islands I’ll be publishing five articles by Peter Eastway from Australia. Peter and I are good friends and he is a master instructor. The series of articles is on Mastering The Art Of Photographic Composition. When I was a firefighter, we always were drilling so we could handle anything. We kept revisiting the basics. That is what this series is all about. Revisiting the basics and refreshing our skill set when it comes to photographic composition. I hope you enjoy this series.
How do you learn to point the camera in the right direction and press the shutter at the right time?
Experience and education. Some people can be lucky and take one or two excellent photographs, but the best photographers are committed. They have put in the hours to learn their art, to study the masters. And then they take lots of photos and look at their results – critically.
The great artists we revere today all started somewhere. Most of them went to art school where they learned the basics of drawing and painting. Many also studied under ‘the masters’ where they could develop their talent and grasp the thought processes behind ‘great art’.
So why do photographers think they can just pick up an automatic camera and take great photographs? Automation is one thing, but it doesn’t replace the thought processes. It can’t give you ideas or experience.
As we have suggested in Better Photography before, to become a more proficient photographer you need to expose yourself to a wide variety of ideas and images by other photographers, artists, and writers.
However, don’t just look at the photos or paintings, study them. Where has the photographer positioned the subject in the frame? What shape is the frame? What is the main light source? How does the light reveal the subject? Is color an important element? Why? How many colors are used?
Remember, you’re not looking at these images to copy them, but to learn about them. Decide what works and what doesn’t.
Although there are rules of photography, there’s nothing to stop you from breaking them. What’s important is to learn a variety of ways of analyzing and photographing a subject, and then applying it to your own work. Hence the need for practice.
Composition is a broad topic and there are lots of aspects to consider: framing, centers of interest, dividing the image area, color, lines, shapes, repetition, texture, and balance. All these concepts are as fundamental to art and cinematography as they are to photography.
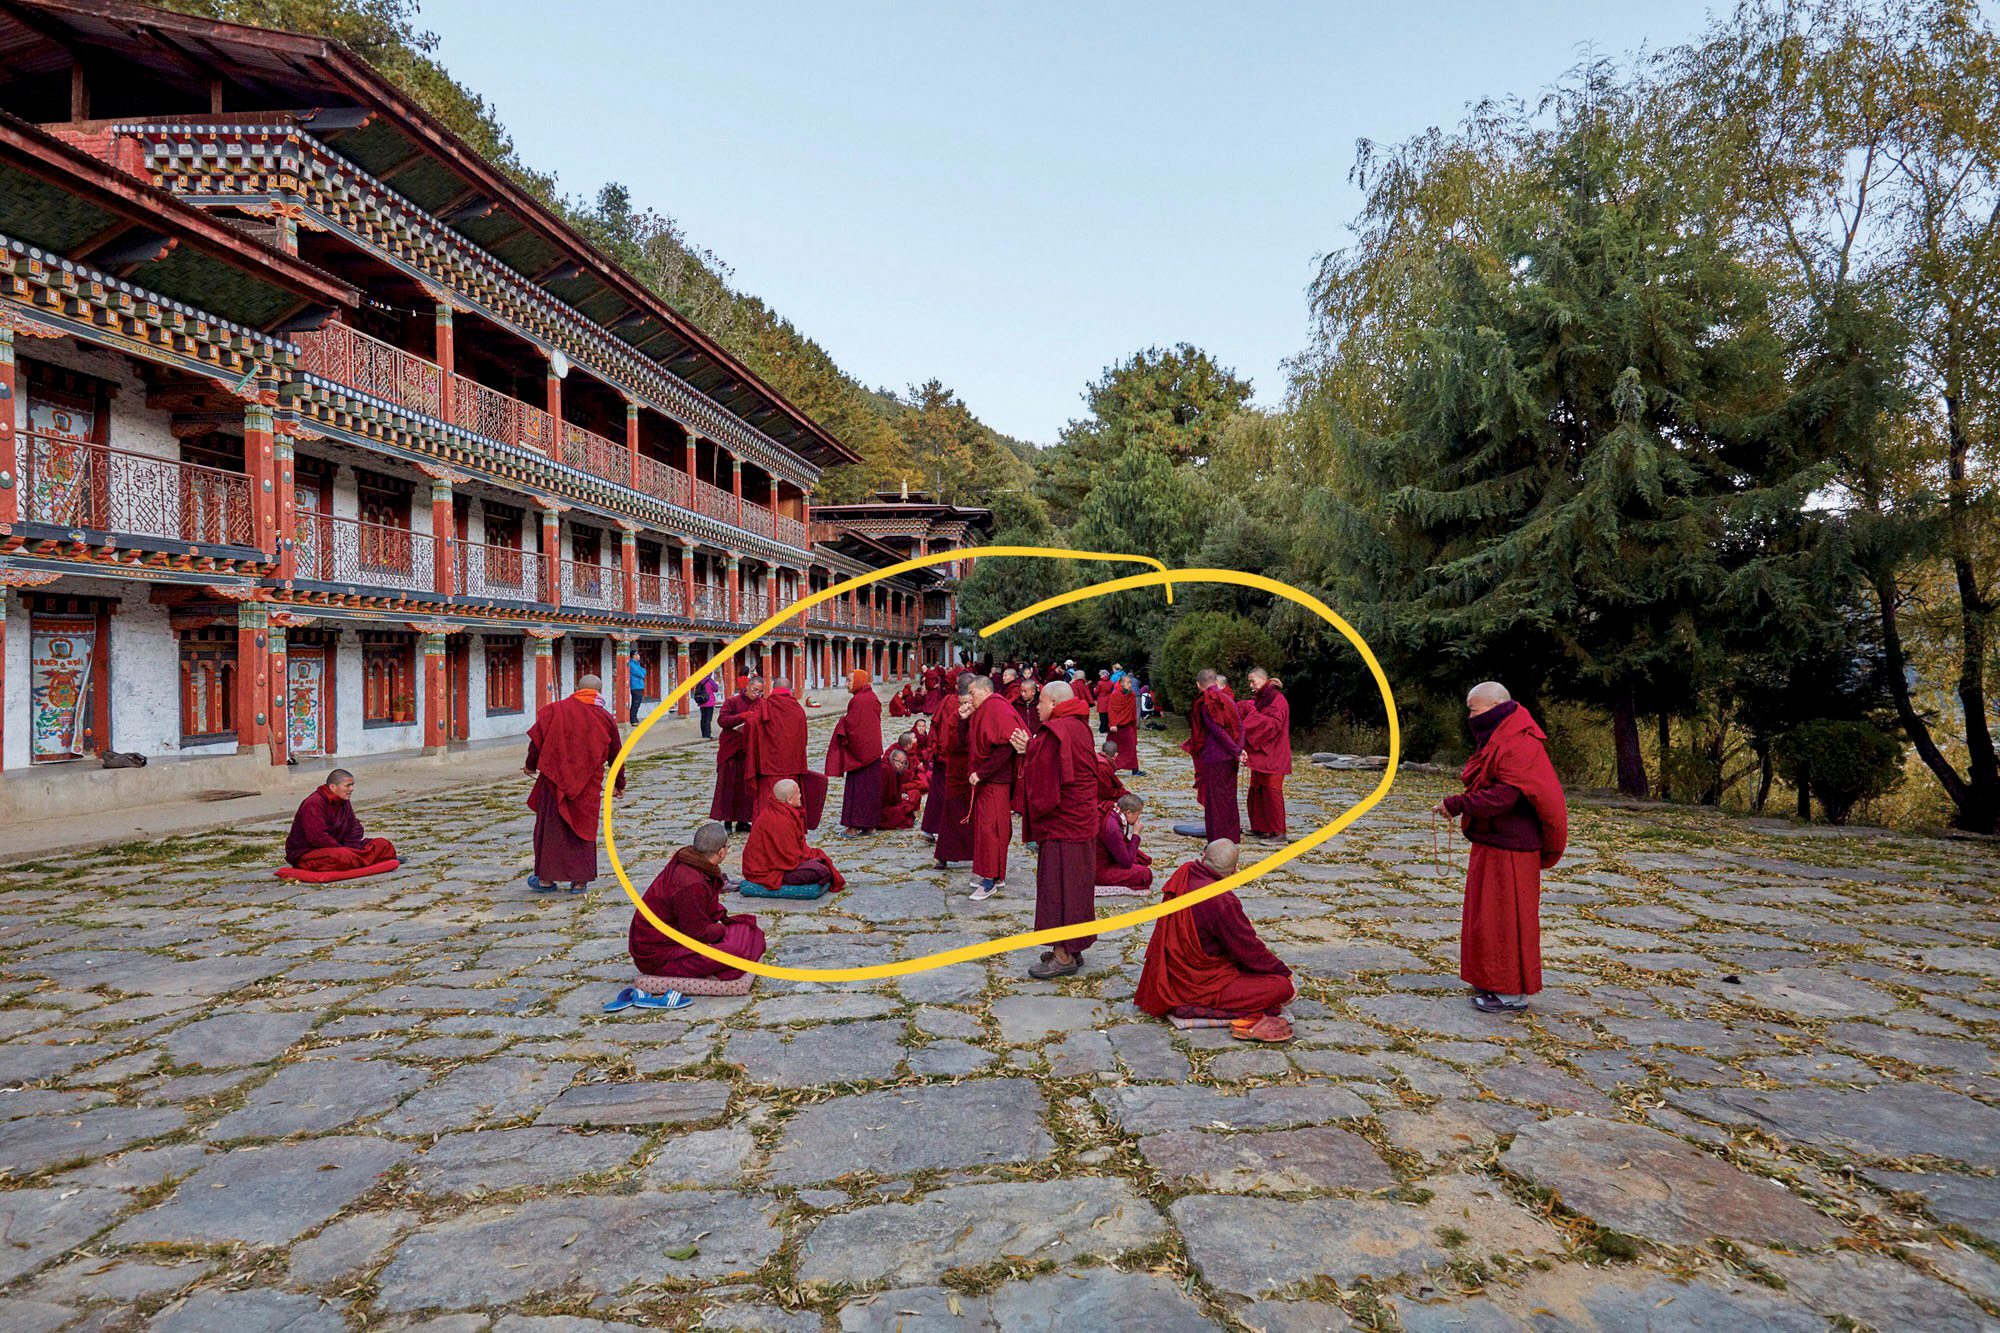
Perhaps the best place to start improving your photographs is with framing. Framing is not just about how close you are to your subject, but what you include and exclude in the photograph.
Before you trip the shutter, take a look around the viewfinder. Where is the subject? In the middle? Why? Probably because that’s where the autofocus gunsight is! Stop being lazy – anyone can take a photo with the subject in the middle, but how many take a look at what’s around the edges?
Some of the most common mistakes are portraits of a family member with a tree growing out of his head! By simply moving your standpoint, you could move the tree to one side of the head (or perhaps select an aperture to throw the background out of focus). Simple, but fundamental.
A new standpoint might solve the tree, but what else is in the photograph? A brightly colored chair, someone’s shoulder or an unsightly piece of rubbish? By simply reframing the photograph, you may be able to eliminate these. Walk in a bit closer or zoom in…
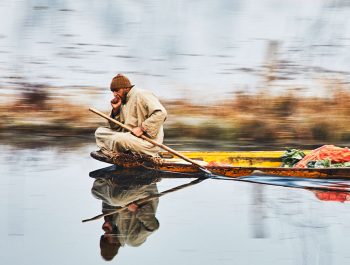
While you’re moving the camera around, see what effect positioning the subject on one side of the frame has. Think back to a lot of the really good portrait photographs you’ve seen in books and magazines. Where has the subject’s face been positioned in the frame? Chances are it’s not bang in the middle!
There’s lots more to composition, so turn the pages and have a read.
Don’t forget as a Silver or Gold member you can click on an image and see it larger.
Framing For Strong Composition
There are a lot of things that come into the simple act of framing your subject within the viewfinder. At the heart of it, you’re determining what you include in your photograph and, equally important, what you’re leaving out.
It’s amazing how easy it is to get the framing messed up in the heat of the moment. When action is happening in front of the camera, whether it’s the fleeting smile on a subject’s face or a burst of sunlight onto a spectacular landscape, we tend to forget about the camera and just look at the scene through the viewfinder. Click.
The problems are only revealed when we see our photographs afterward – the horizon isn’t straight, there’s a rubbish bin in the corner, and the subject that seems so close to us looks like it’s a million kilometers away in the photograph.
Thank heavens for digital cameras because we can view our framing on the LCD monitor immediately afterward. While this isn’t always a good technique, it is certainly very useful when you’re learning how to frame your subject and practicing.
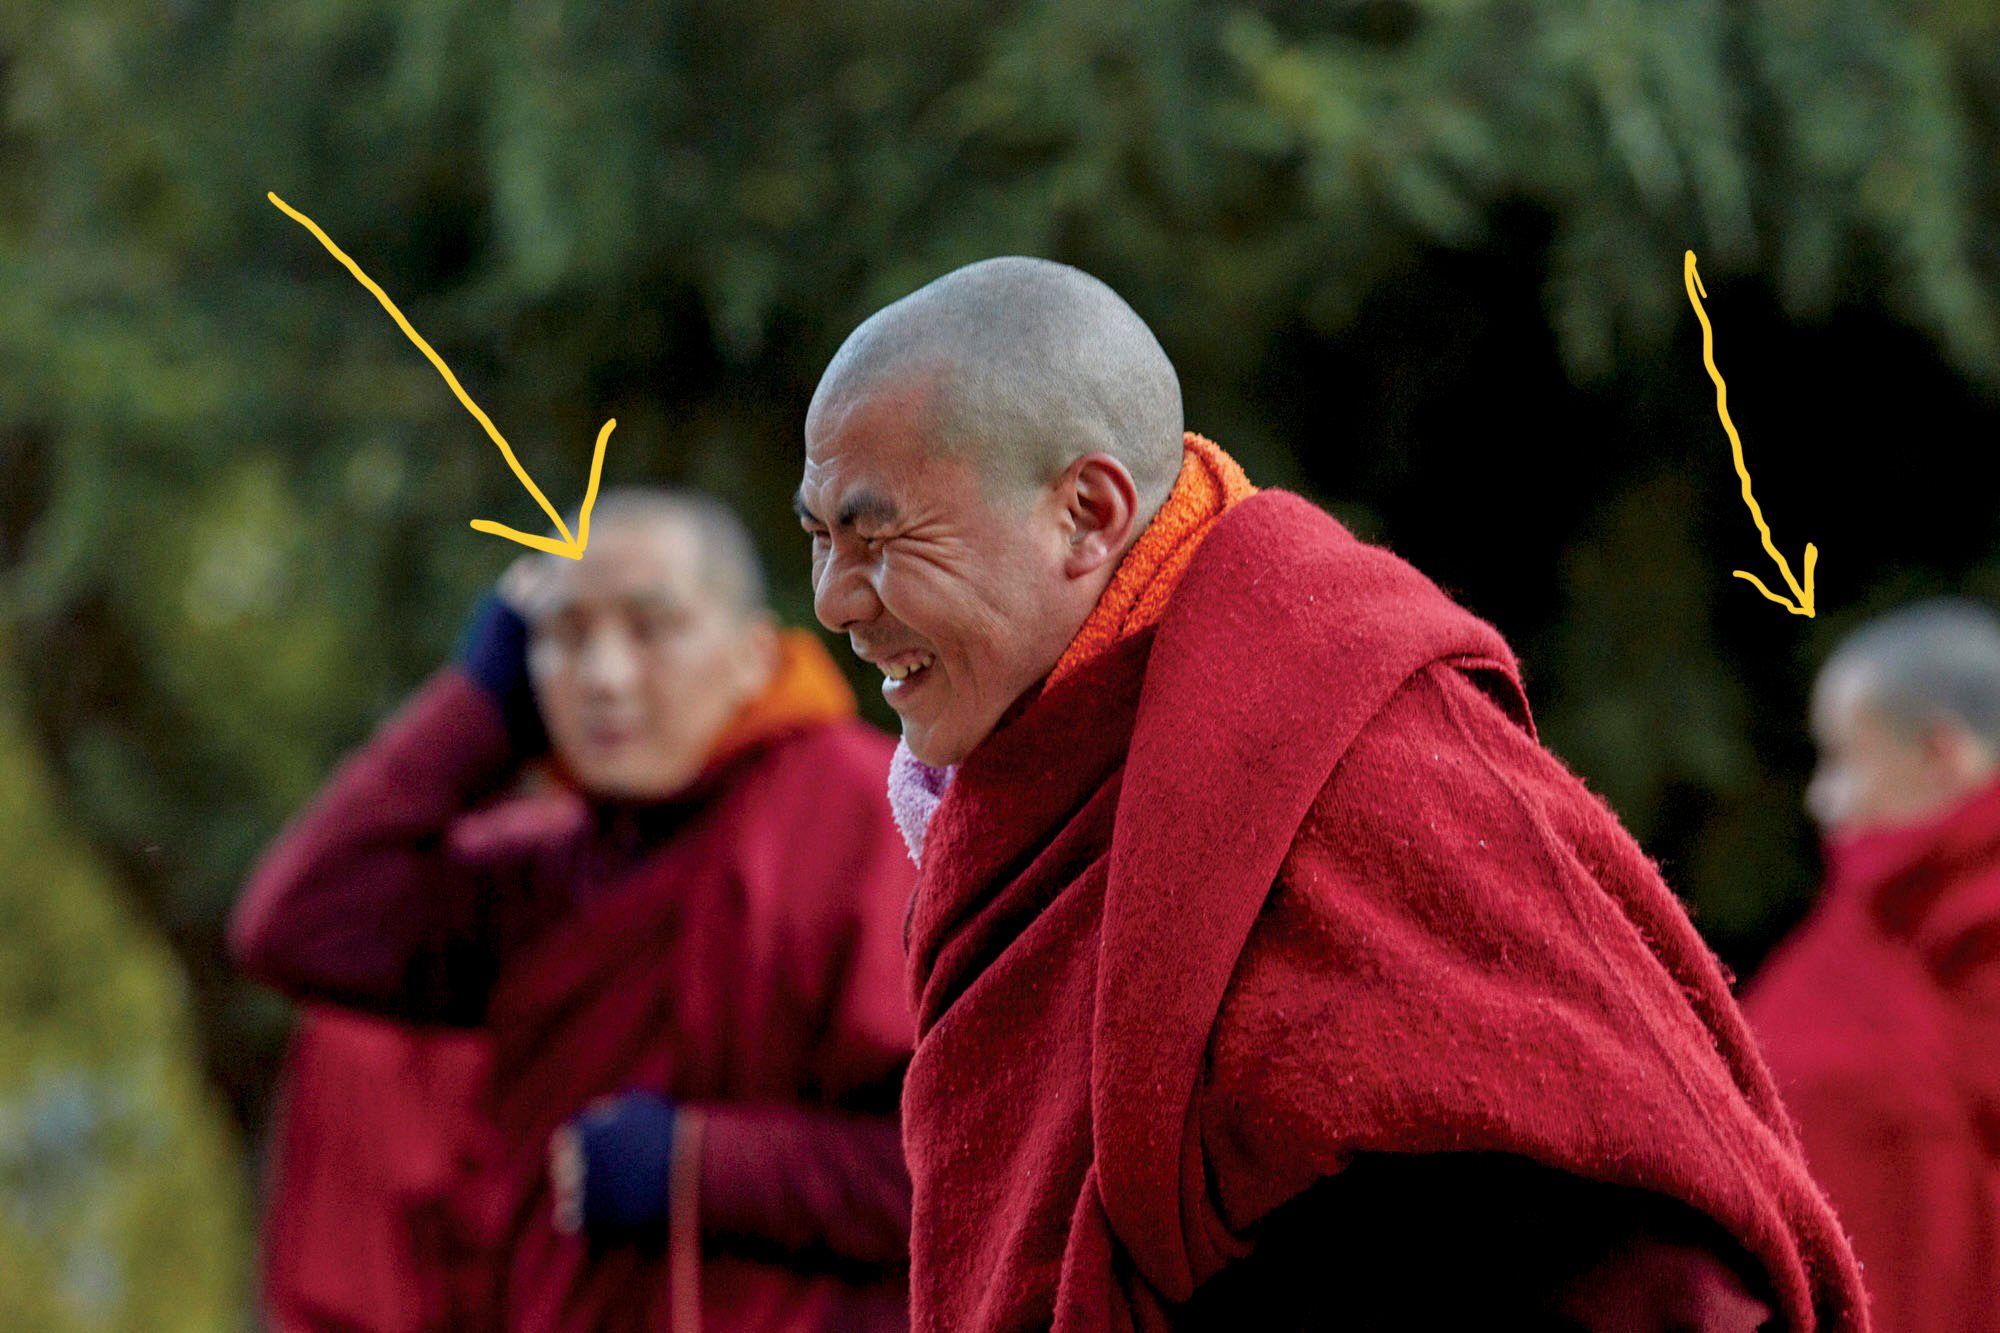
The size of your subject within the frame is important. If it is too small, there could be too many other elements in the frame that are distracting. If the subject is too large within the frame, you mightn’t get a sense of place or location.
With a portrait, you need to decide how big the person’s head should be in the frame, or whether to shoot a full-length portrait?
In landscape photography, there are often lots of different points of interest that make up a great scene, so it can be tempting to simply put on a wide-angle lens in order to fit it all in. But will this framing make an interesting composition?
Sometimes a wide-angle lens is the right decision, but don’t be scared to shoot photographs with a telephoto where you pick out a single element of interest and make that your subject.
When you come across a subject with great potential, shoot lots of different images – some with your wide-angle and others with your telephoto. By experimenting you’ll soon discover what you like – and you’ll probably be surprised from time to time what works the best. This is all a part of the learning process.
Zoom lenses are certainly helpful for framing but don’t just set the zoom at its minimum or maximum focal length, use the mid-range settings to carefully frame your subject.
And if you don’t have a zoom lens, use your legs!
As a suggestion, follow this process when you have the time to carefully compose your image.
1 What is the purpose of taking the photo? What is it designed to show?
2 What is surrounding the subject? Does it help the story or hinder it? Does including the surroundings make the story too complicated, or would excluding the surroundings mean your subject was out of context?
3 If your subject will work best with a minimum of surroundings, use a telephoto lens or move in close with a wide-angle lens so the subject fills the frame.
4 If your subject needs to be seen within its surroundings, how much do you need? Use a wider lens or step back to include the surroundings.
5 Now, look around the edges of the viewfinder frame. Is your subject contained within the frame, or if it is cropped off, is it done in a pleasing way?
6 When you look at the subject’s surroundings, are there bright distracting areas or intrusive objects that could be cropped out, or perhaps hidden by moving the camera position?
Lenses For Imaginative Composition
Perspective is what gives a photograph its three- dimensional characteristics, even though we all know that a photo is only two-dimensional.
The lens we choose can have an effect on the perspective we see in our photographs.
Wide-angle lenses generally enhance perspective while telephoto lenses compress it.
Wide-Angles
Wide-angle lenses have a focal length wider (smaller number) than 50mm on a full-frame DSLR, 35mm on an APS-C size camera, and 25mm on a Four Thirds sensor camera. These are approximate focal lengths, but the point is when it comes to creating perspectives with incredible depth, the wider the lens the better.
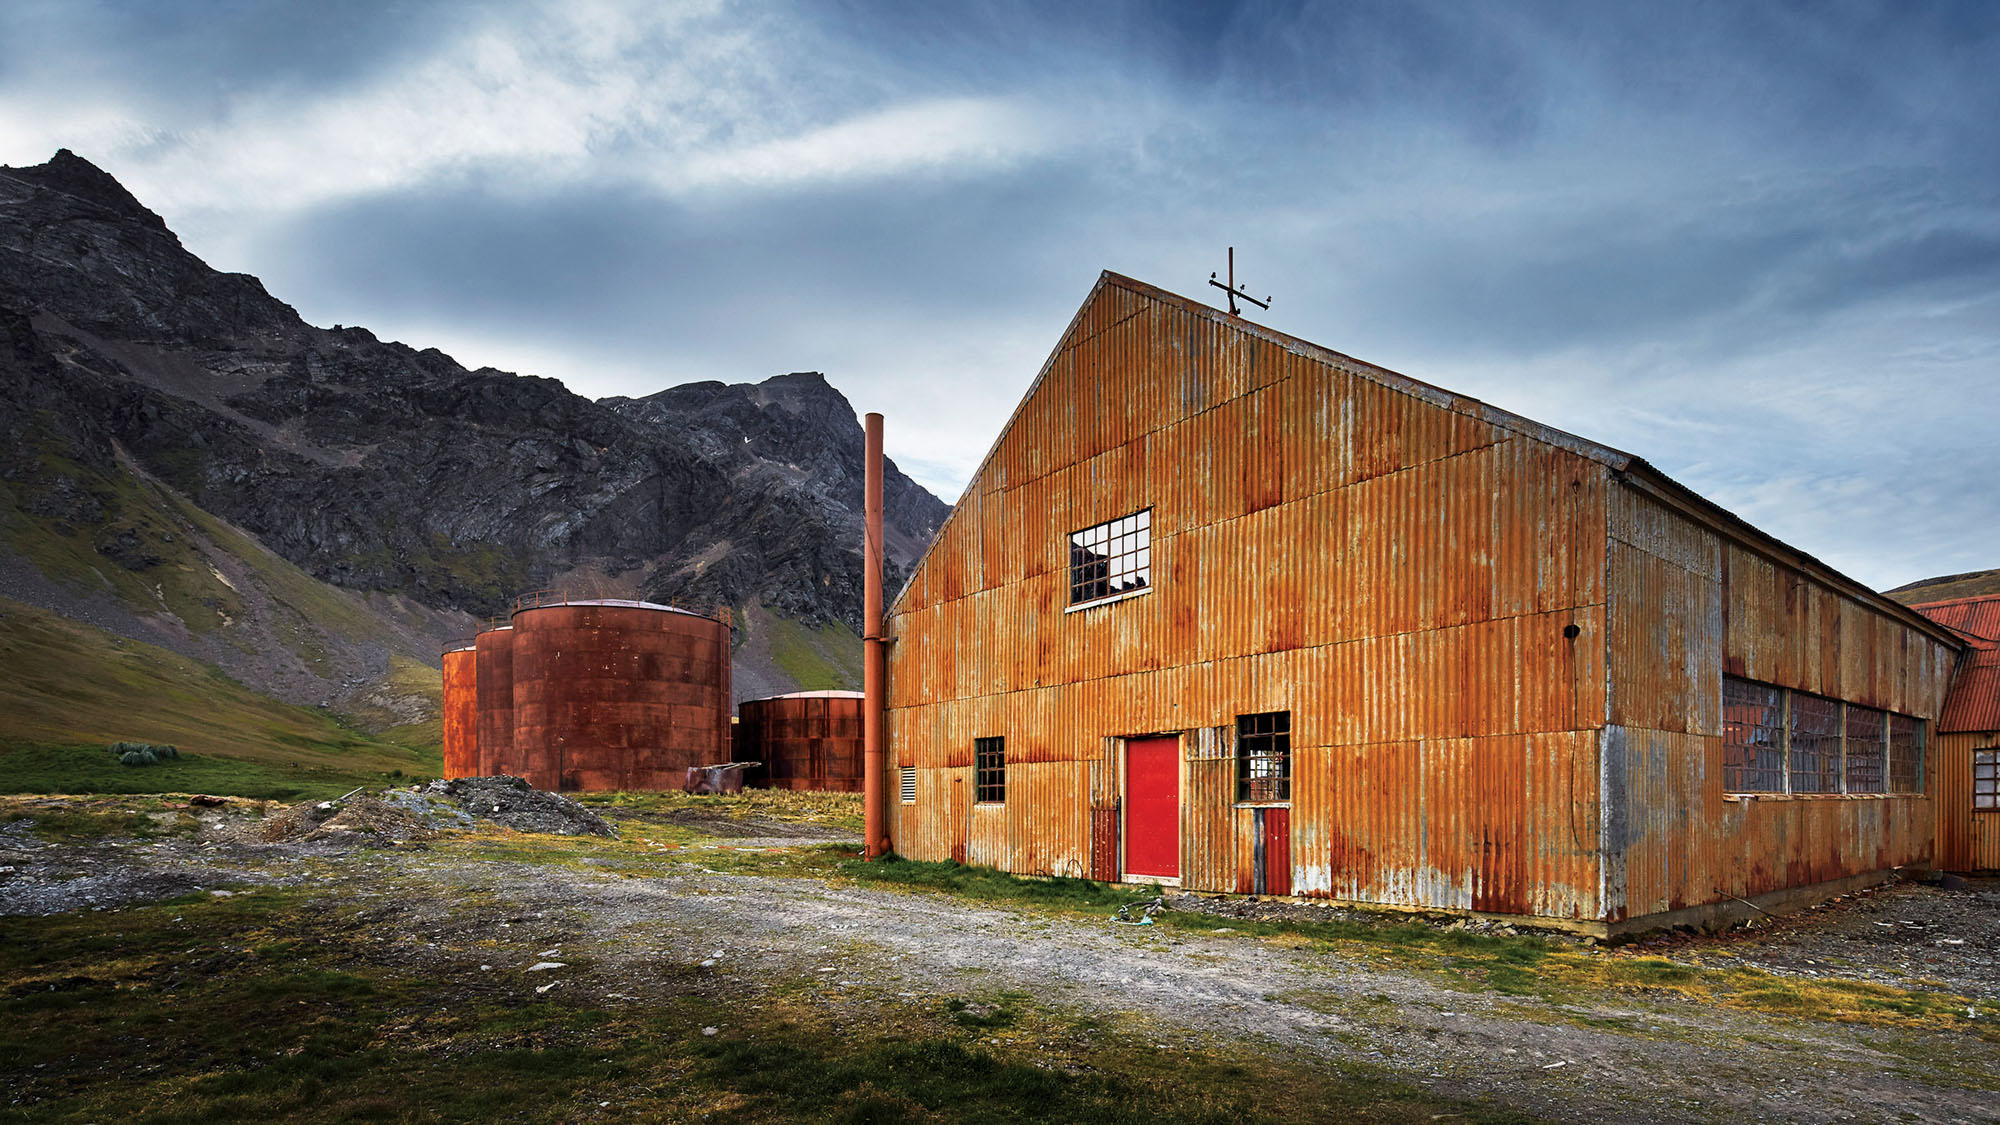
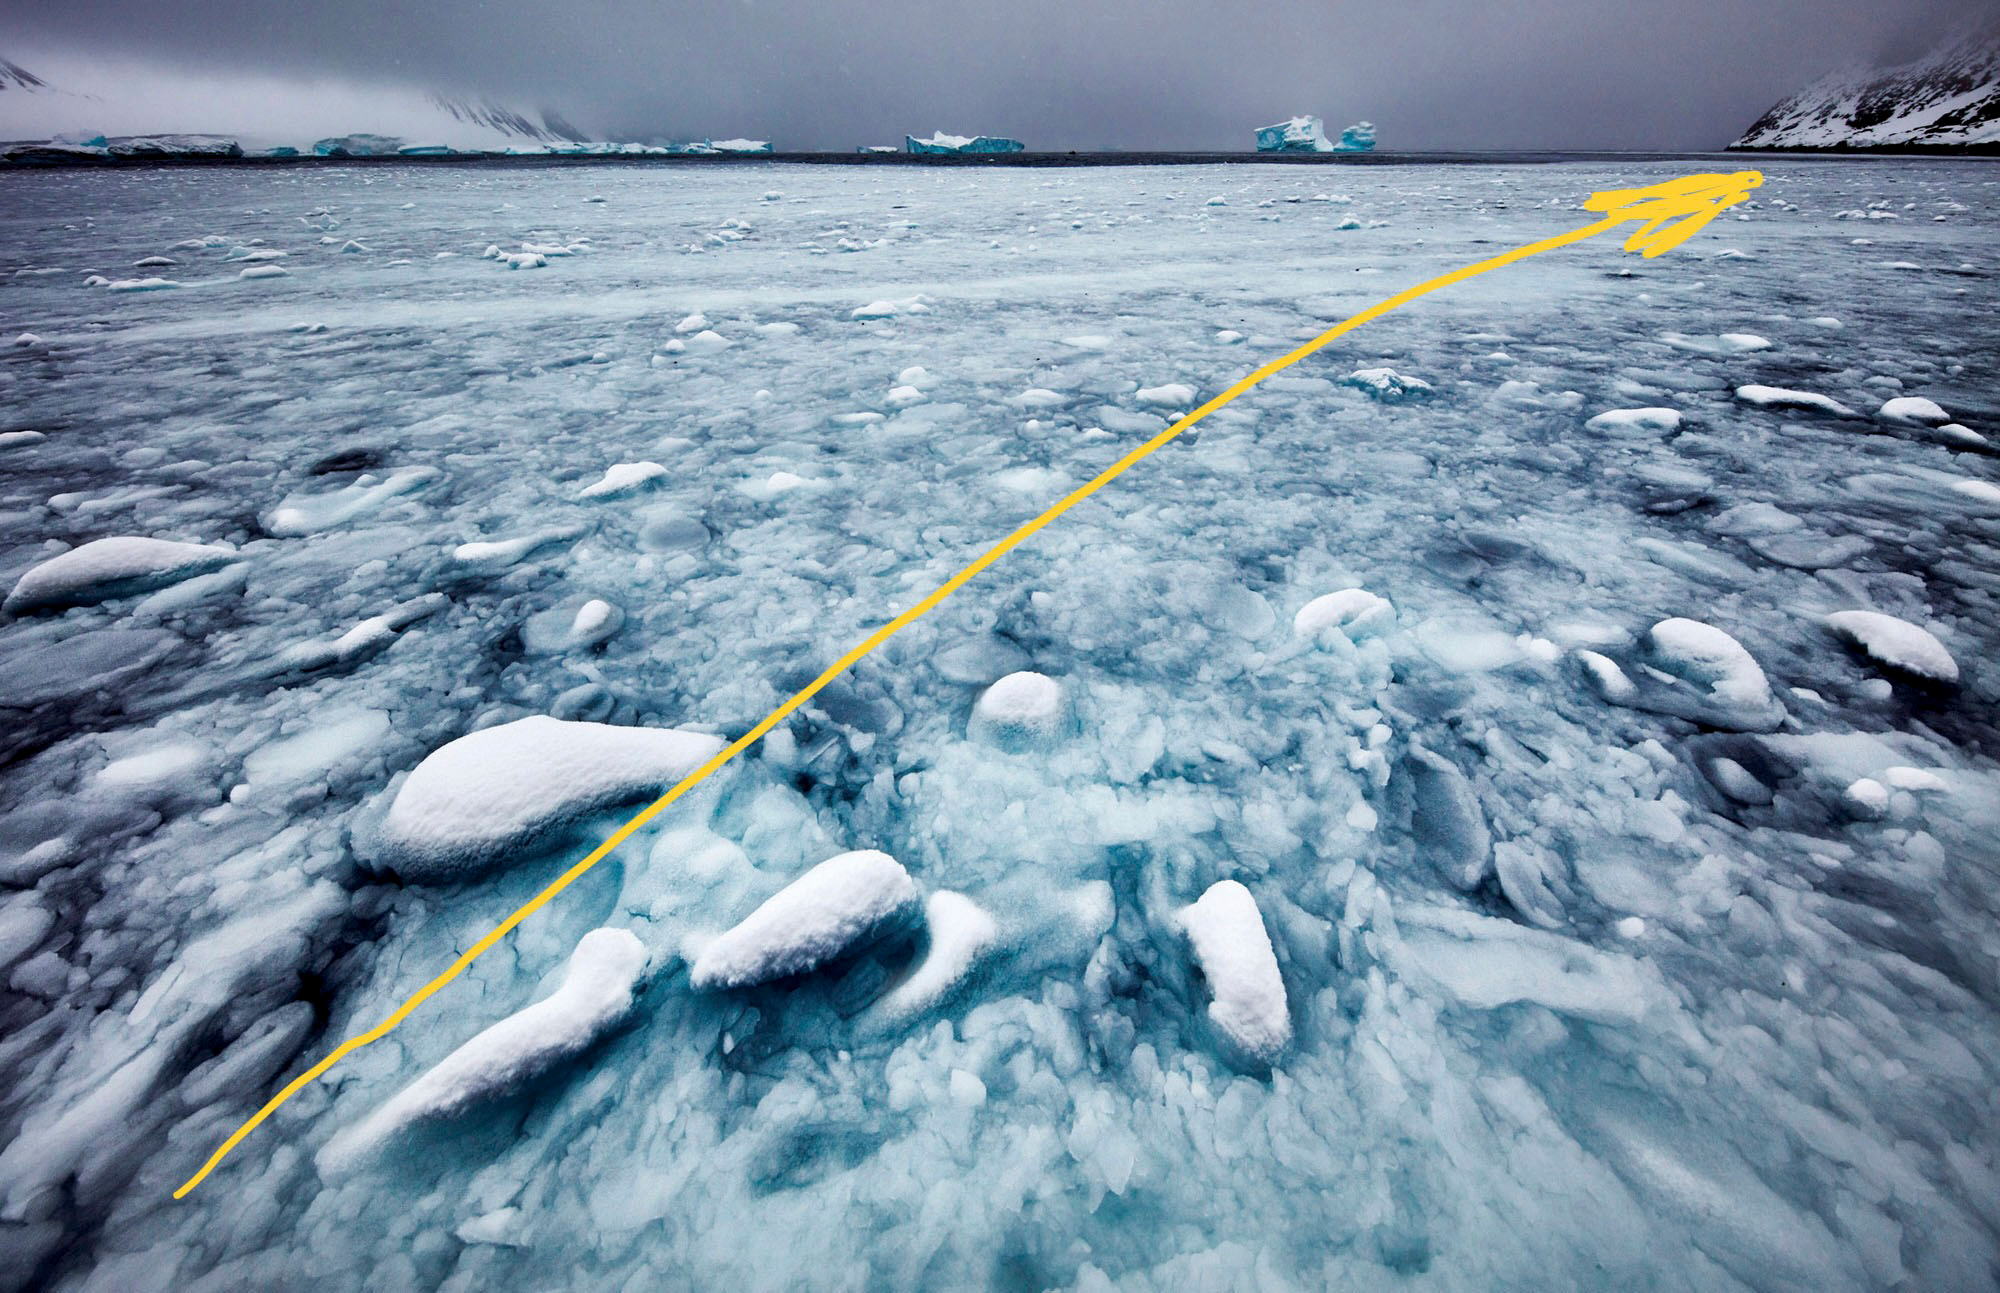
A wide-angle lens reduces size in order to encompass more. As a part of this process, there is an exaggeration of size for nearby objects compared to more distant ones. In addition, there is some image distortion – the objects in the photograph are stretched towards the sides of the frame. The net result is an image which can have an incredible ‘depth’ to it.
You almost feel like you can walk into a landscape captured with a wide-angle lens.
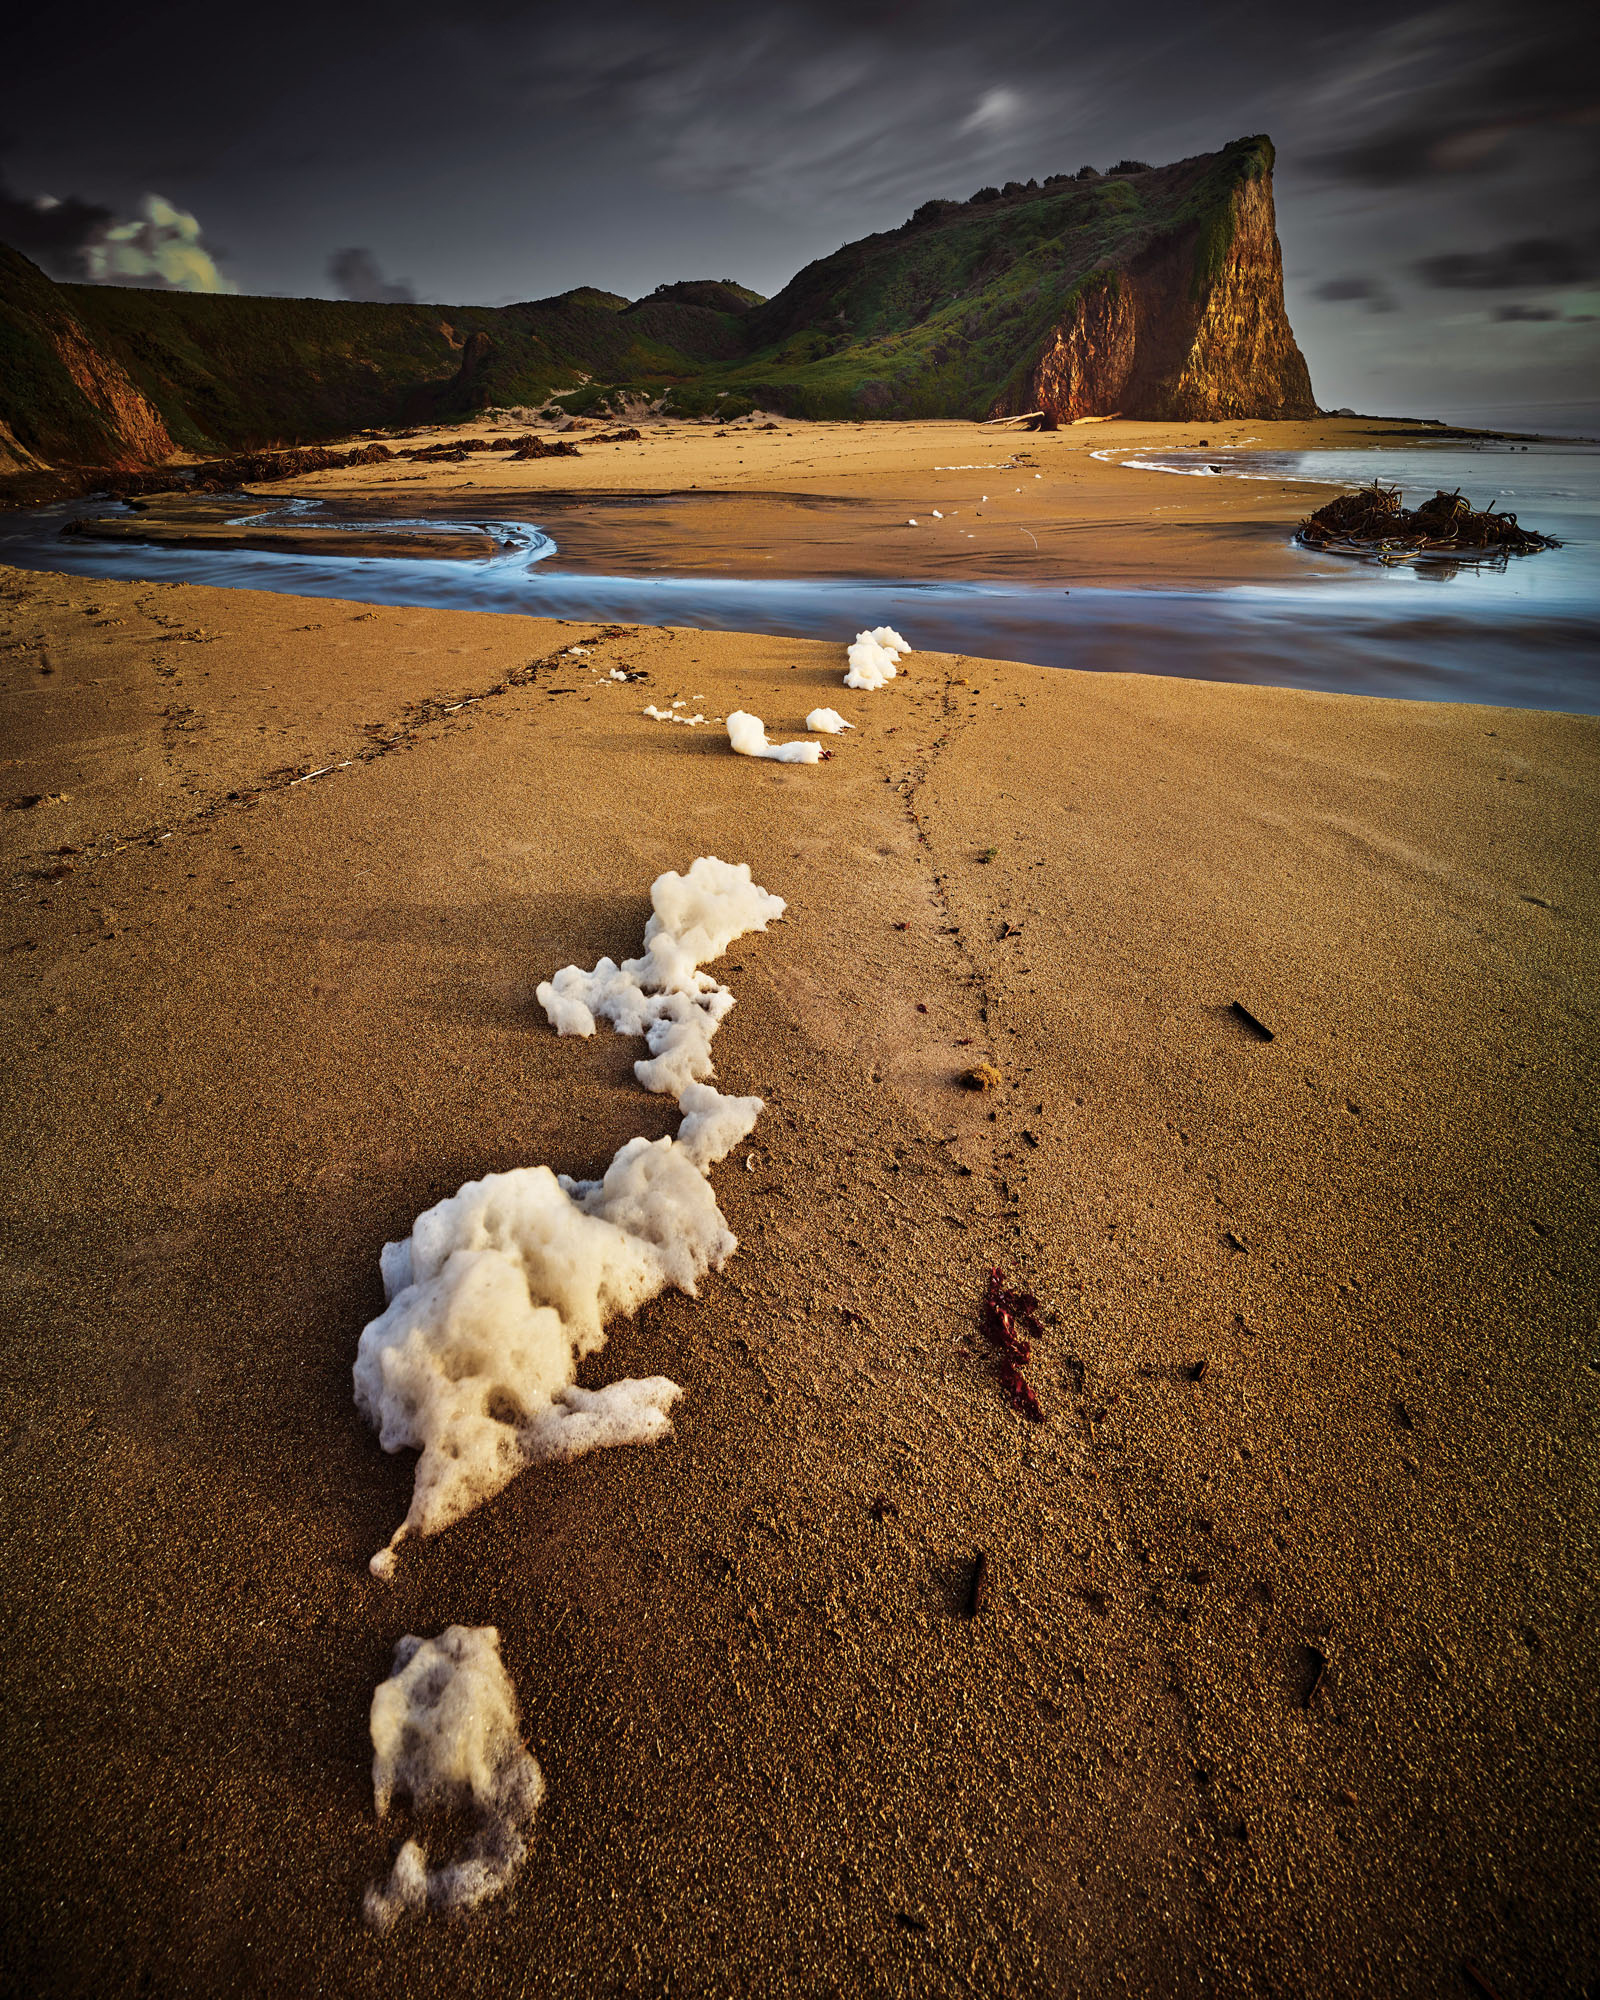
To enhance this feeling of depth, you can include a foreground object (such as a rock or a tree) so that it is large within the frame. Its relative size is exaggerated when compared with the rest of the landscape behind. The result is very powerful.
A 28mm lens (for a full-frame DSLR) will produce some feeling of depth, but the wider you go, the easier it is to create depth. A 20mm is great, an 11mm better still.
If you go even wider to a fish-eye lens, while you create a great feeling of depth, there are lots of curved lines to deal with which are not always appreciated.
Telephotos
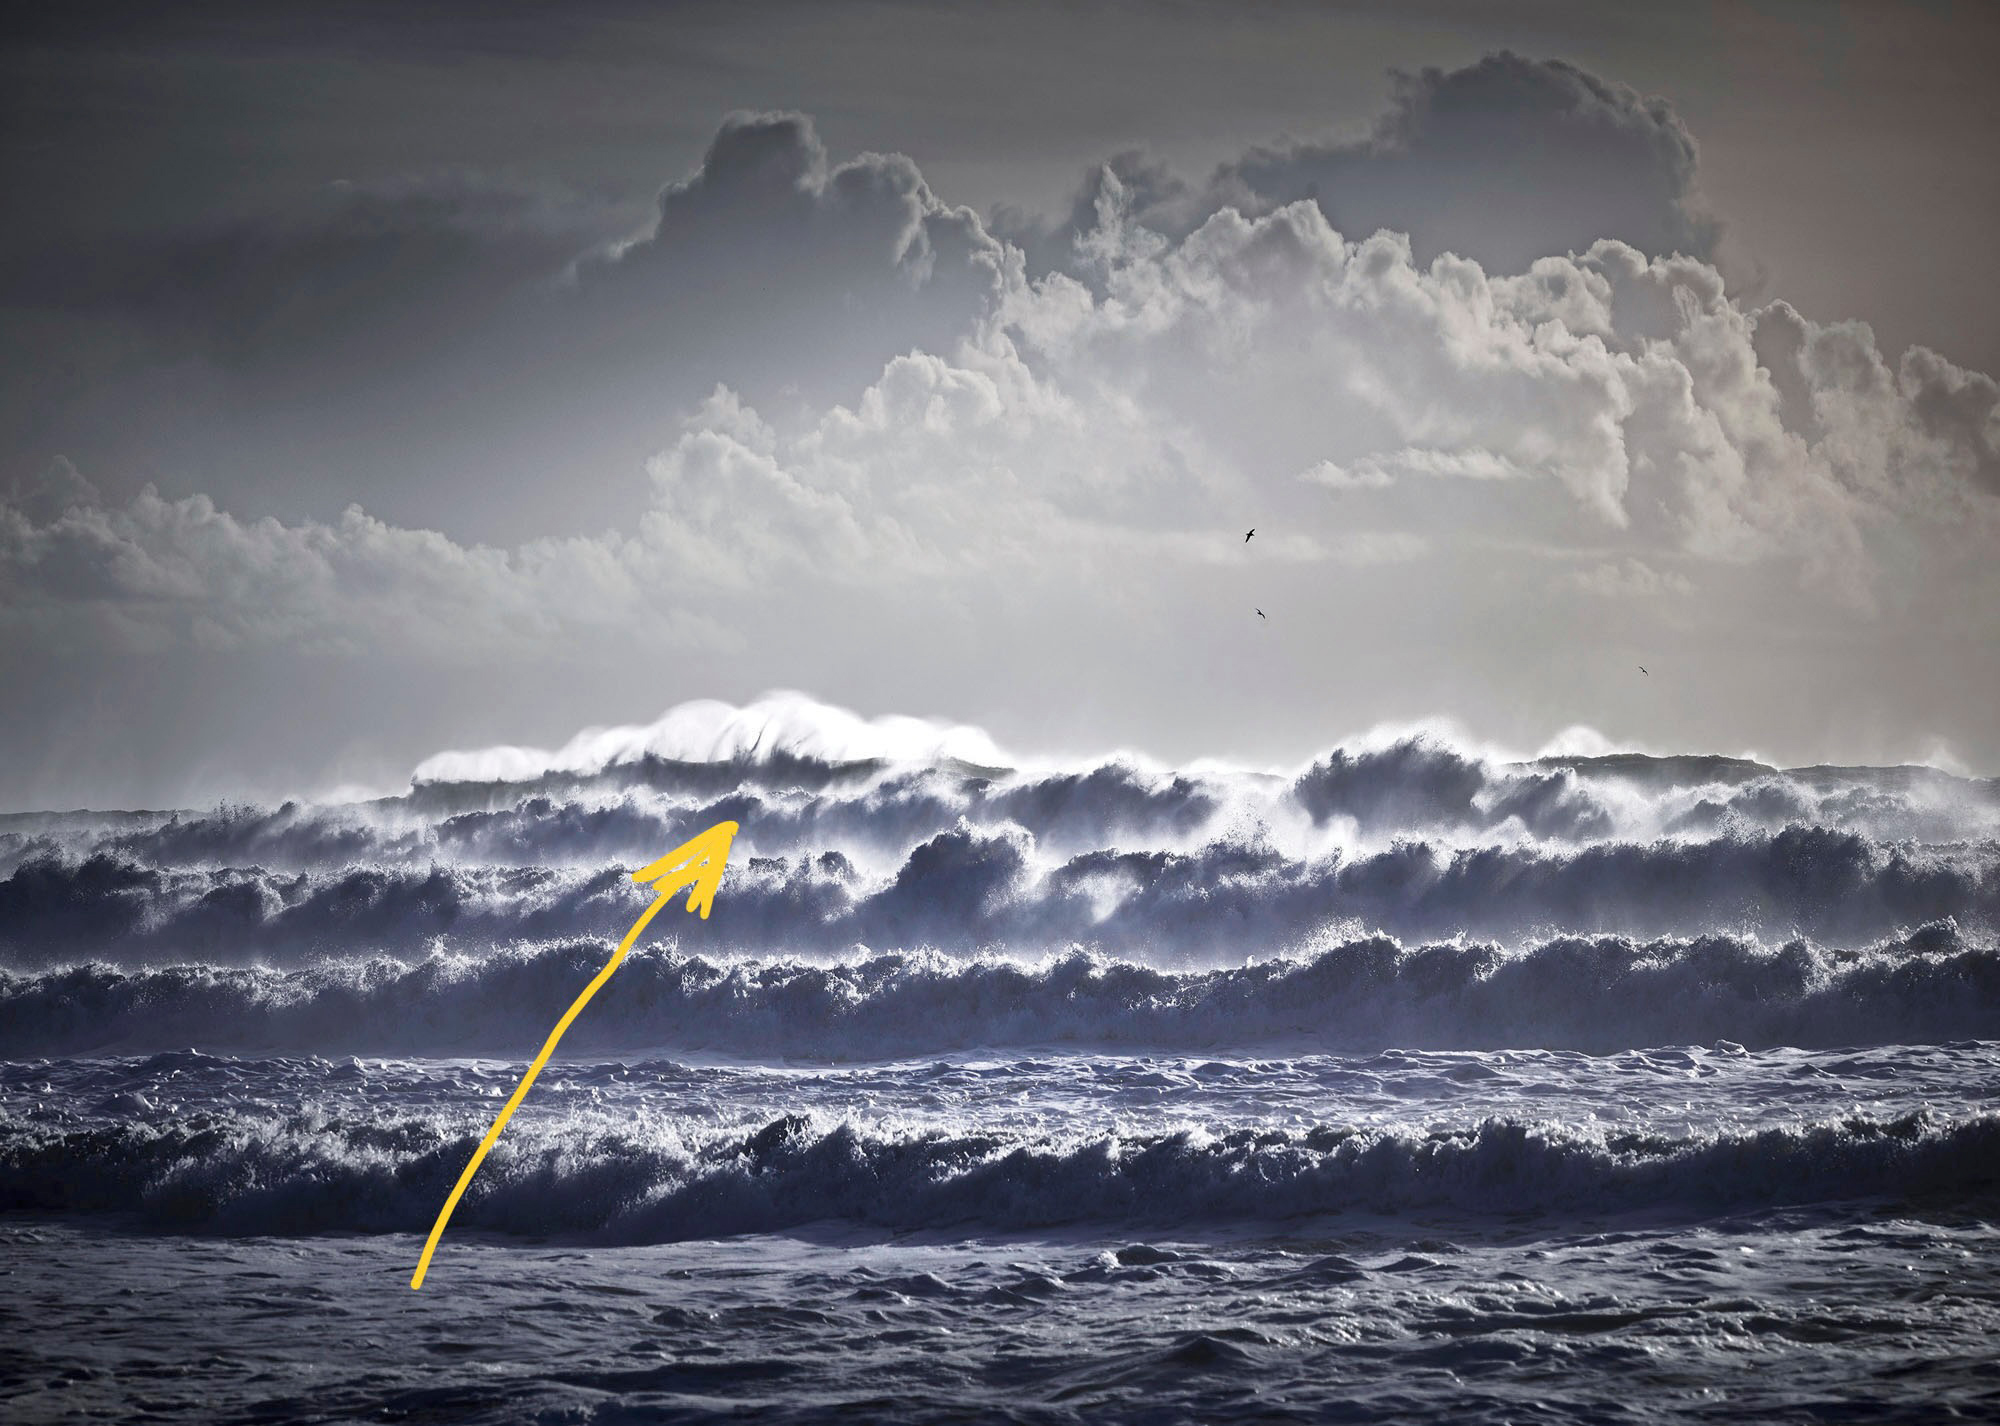
The opposite to depth is compression, where objects that in reality, are quite distant from each other appear to be stacked up on top of each other.
Telephoto lenses produce compression and once again, the longer the telephoto, the greater the effect. There is a very moderate amount of compression with a 100mm, while at 200mm and 300mm the effect is more obvious.
If you can go to a 400mm, 500mm or 600mm, compression is very obvious, especially in distant landscapes.
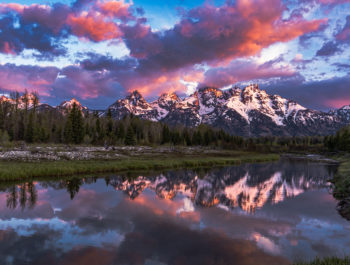
For compression to be obvious, you need to have two or more areas within the frame. A popular example is a series of mountain ranges, one behind the other. While the ranges may be ten or fifty kilometers apart, in the photograph, they look very close together.
Atmospheric haze also enhances the compression effect because the greater the distance, the more haze you are looking through. Haze has the effect of reducing contrast and often produces a blue coloration. If you can find a viewpoint where the line of sight is just skimming across a series of mountain ranges, the effect can be magnificent.
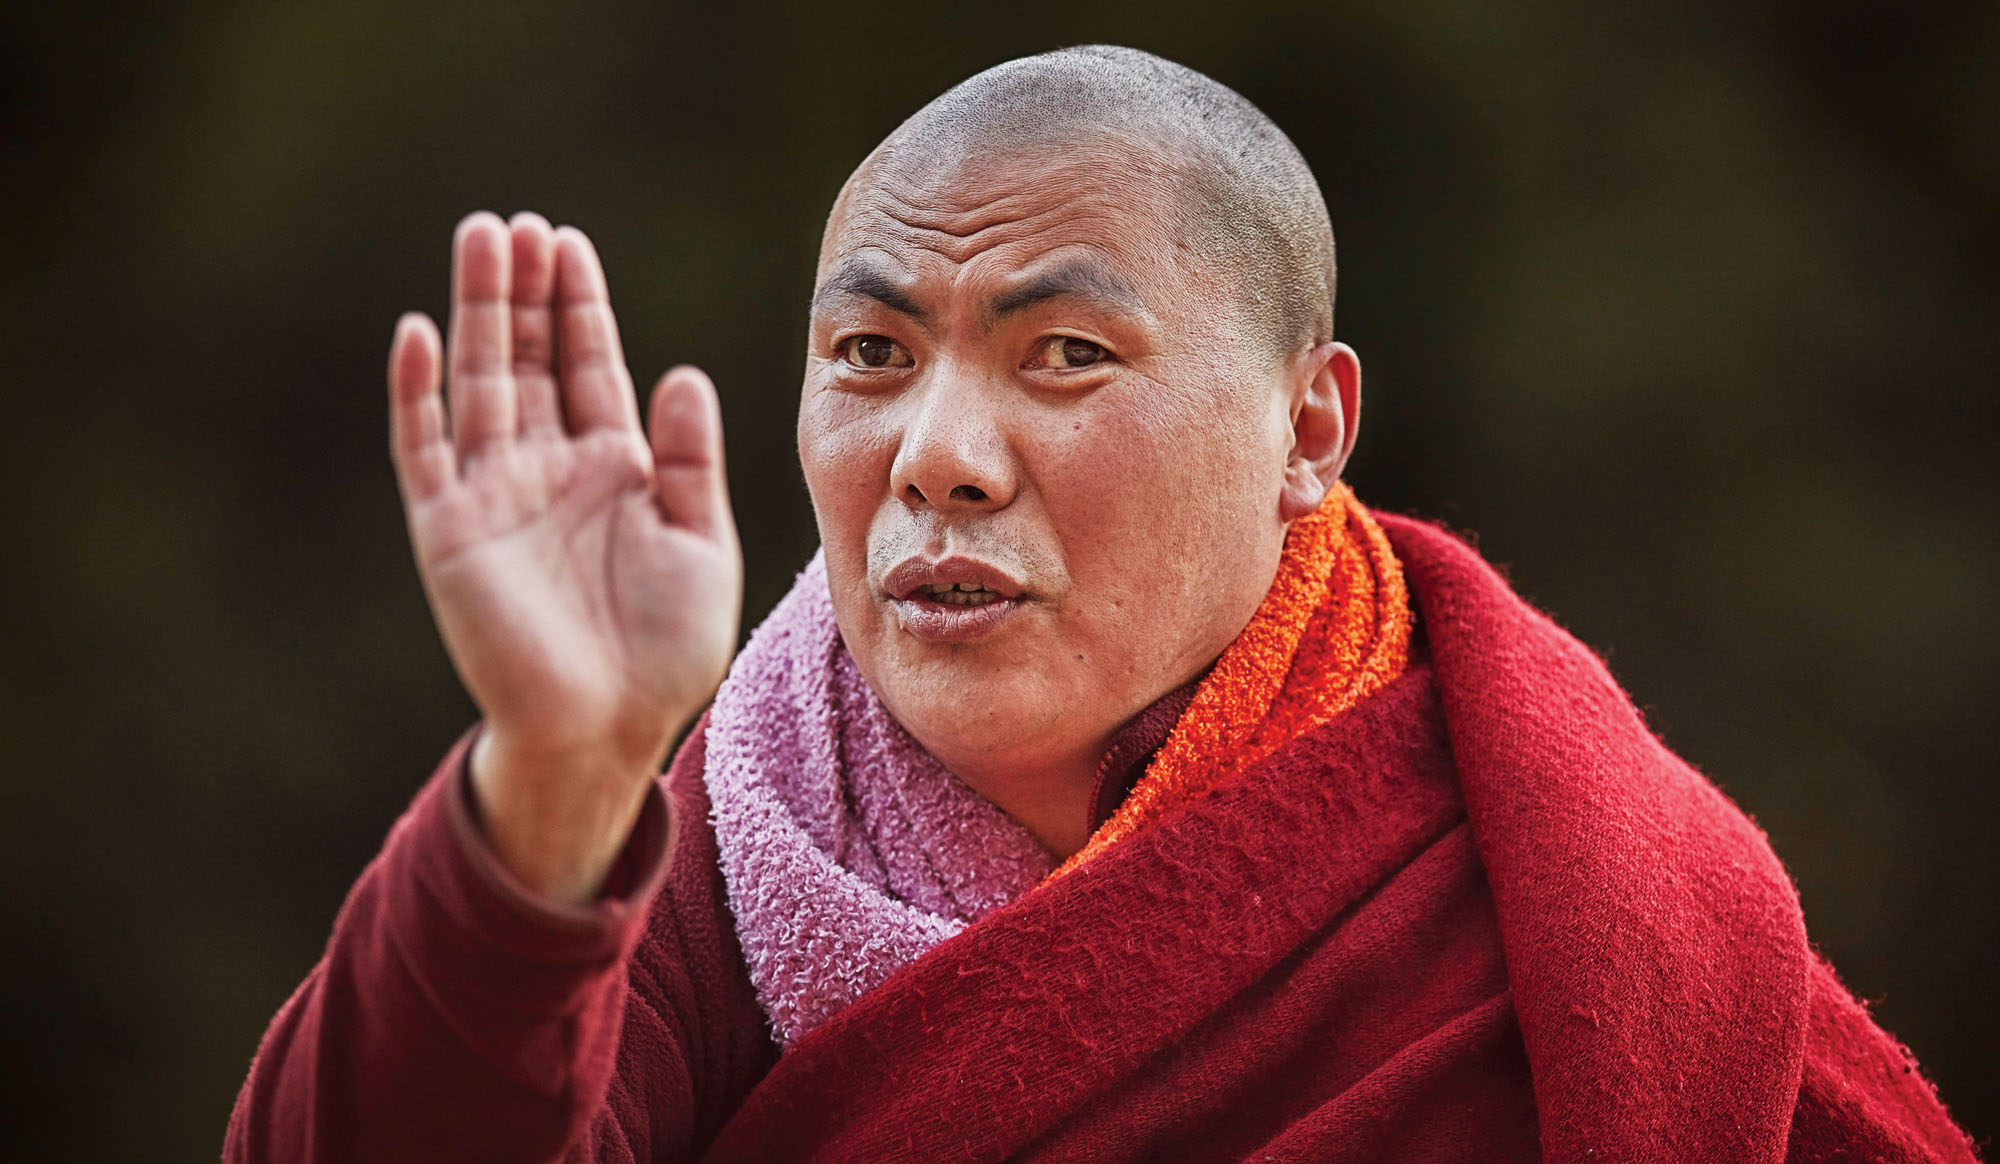
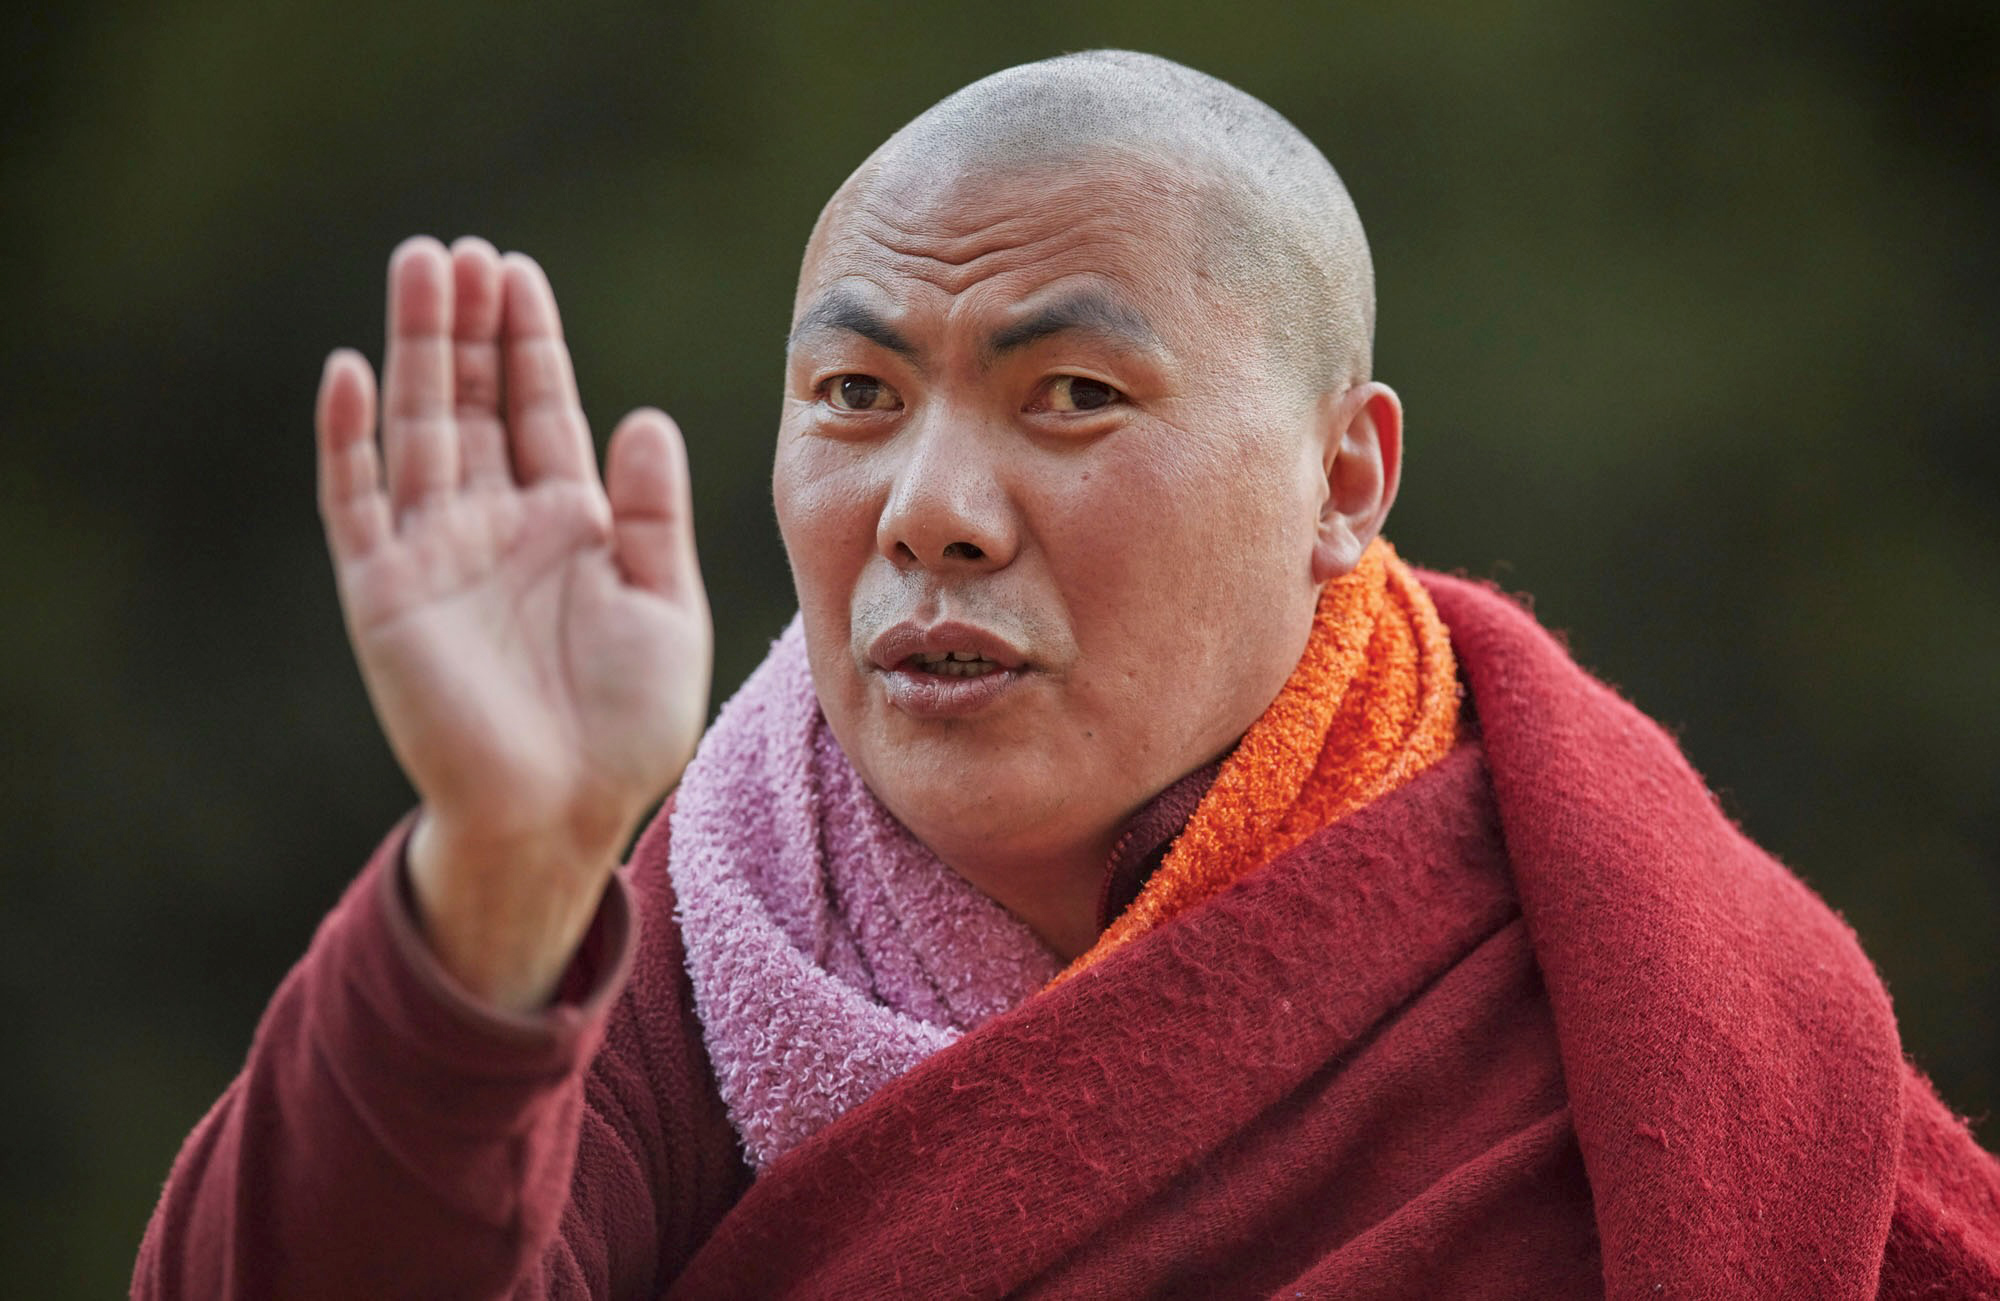
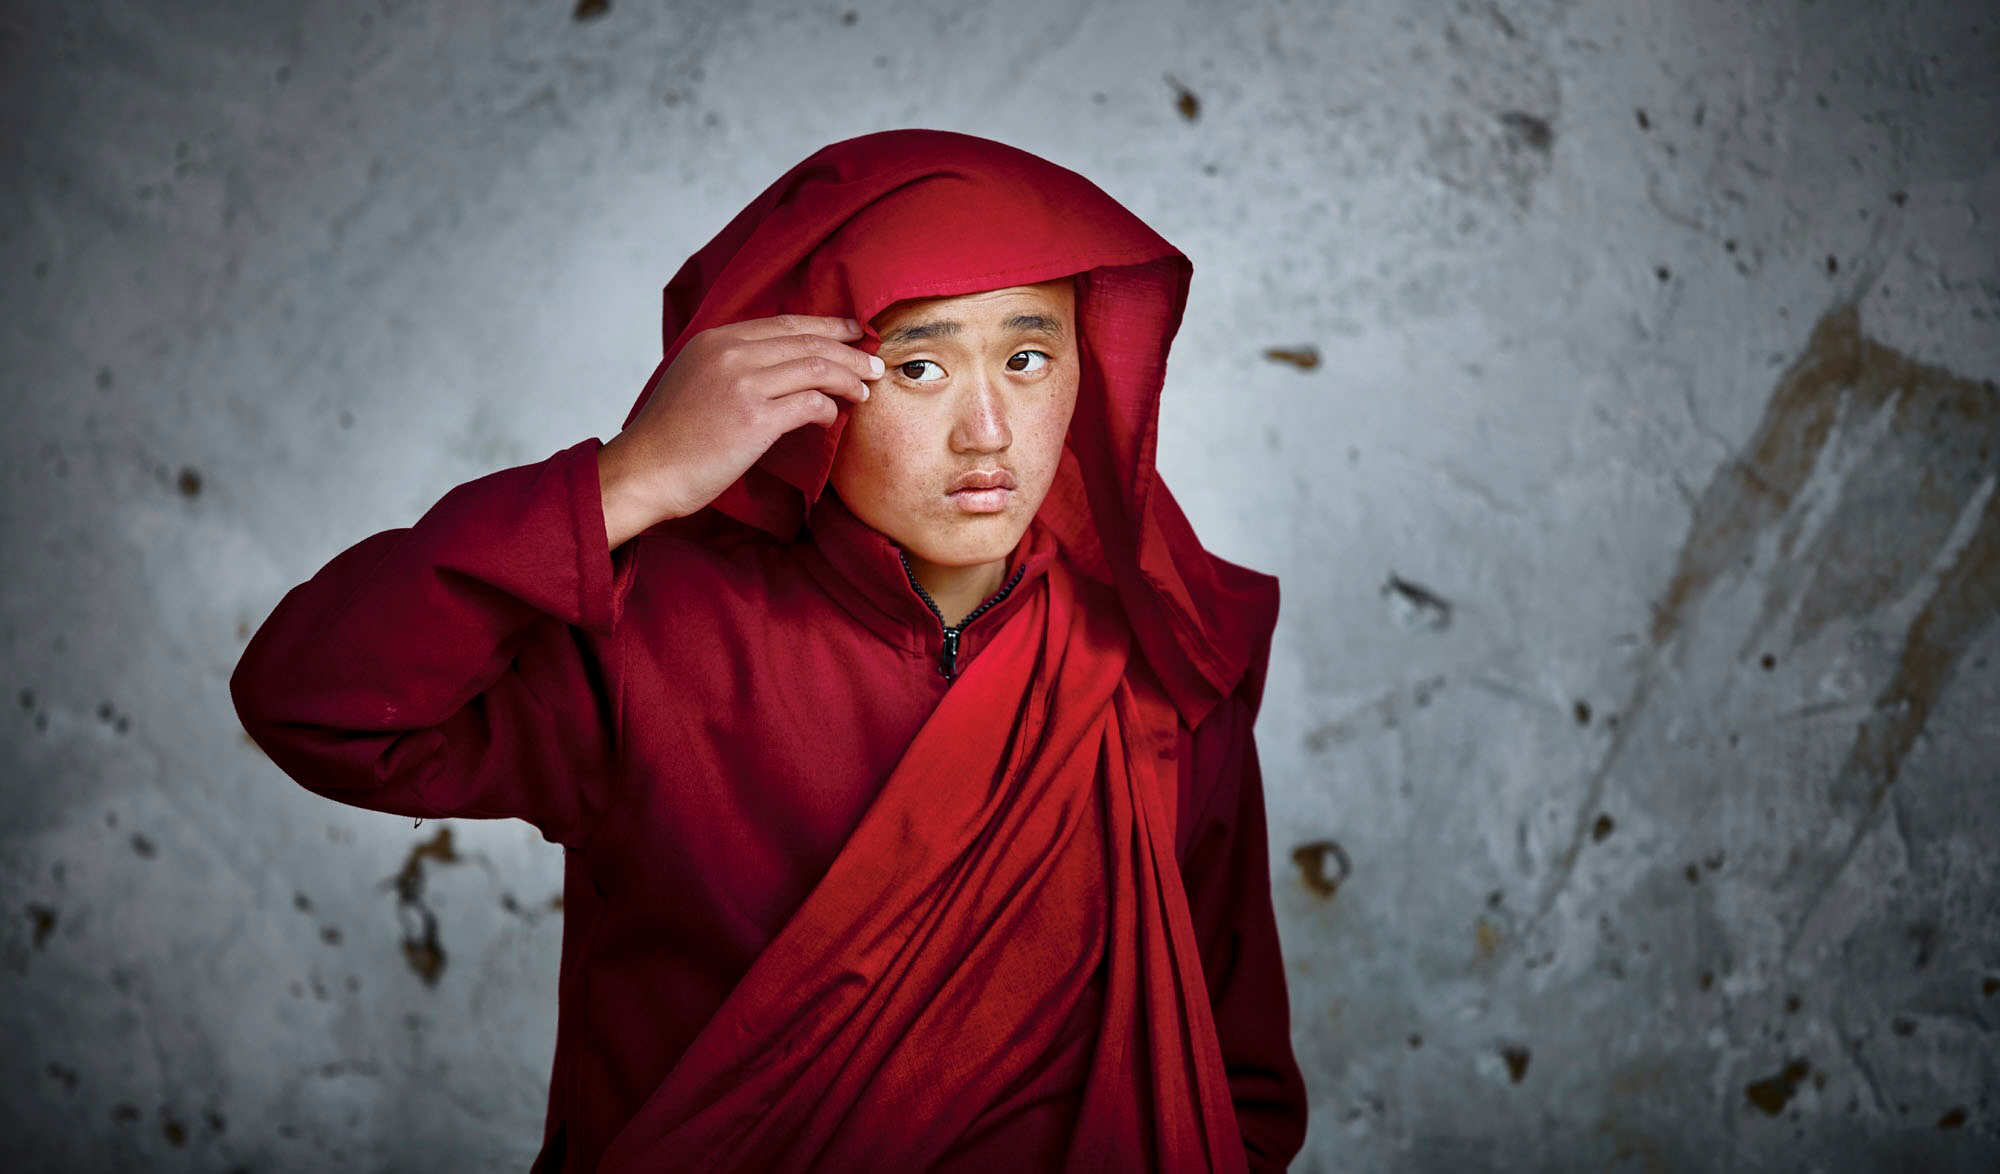
Compression doesn’t just work with landscapes. Many portrait photographers prefer a slight telephoto because it has a slight flattening (compression) effect on the face, and this flattening is flattering for many subjects.
If you’ve bought a camera with a standard zoom lens, and you’re wondering why other photographers are producing more interesting image, in some cases it could be their choice of the lens that gives them an unfair advantage.
Unfair? It’s only unfair if you don’t join them!
Peter Eastway
May 2022
Sydney, New South Wales
Peter Eastway is an Australian photographer known internationally for his landscape photography and creative use of post-production. He has been involved in photo magazine publishing for over 30 years, establishing his Australia's Better Photography Magazine, in 1995. As a result, Peter and his websites are a wealth of information on how to capture, edit and print, offering tutorials, videos and inspiration for amateur and professional photographers. Peter was the author of the Lonely Planet’s Guide to Landscape Photography. His photography has featured on the cover of the Lonely Planet’s guide to Australia, in articles in the Qantas inflight magazine, and in an international Apple television commercial. And he has worked with Phase One researching and promoting its high-end medium format cameras and Capture One raw processing software. He has also published The New Tradition, an anthology of 100 award winning images with accompanying techniques and discussions. He was one of the featured photographer in the first Tales By Light television series aired on the National Geographic Channel in Australia and produced in partnership with Canon Australia. It can currently be viewed on Netflix around the world. Peter Eastway is a Grand Master of Photography, a Fellow and an Honorary Fellow of the Australian Institute of Professional Photography, and a Master and Honorary Fellow of the New Zealand Institute of Professional Photography. He won the 1996 and 1998 AIPP Australian Professional Photographer of the Year Award. He is a WPPI Master of Photography. He was more recently the 2019 AIPP NSW Epson Professional Photographer of the Year (Australia). Peter is just over 60, rides a short surfboard, believes two skis are better than one, and in case you're buying him lunch, he is vegetarian.