Creating and Processing RAW Files On Your Mobile Device
Mobile photography has come a long way since its debut with the iPhone 3 in 2008. We’ve seen the introduction of additional lenses, larger sensors, and advances in computational photography that have led to incredible quality improvements.
One of those improvements is the ability to record and process RAW files on our mobile device, made possible by the Adobe Lightroom Photo Editor and Pro Camera app available for iPhone and Android. Although there are other apps that record RAW and a few that offer RAW processing, none can hold a candle to the robust power of Lightroom. Lightroom’s camera records images in RAW (DNG) format, and the photo editor is the most advanced RAW editor for mobile available today.
What’s the Big Deal About RAW?
When you set your camera to make RAW files, you are choosing a file format that keeps all of the image data that the camera’s sensor records. If you have your camera set to make JPEG files, data is lost when the files are compressed. With the RAW format, all the data that the camera’s sensor records remain in the file for us to work with, leading to higher quality and better image results.
The catch, if there is one, is that you must process the RAW file to make it look its best. Unlike Jpeg images that look ok right out of the camera, RAW images often look flat and dull before processing. But, a few quick adjustments in a simple workflow in Lightroom on the phone is all it takes to bring an image to life in ways that exceed what can be achieved by processing a jpeg file. The results are worth the effort! And, the Lightroom app is FREE, so you aren’t required to subscribe and pay a monthly fee if you choose not to.
Here’s how it works.
Anyone can download the FREE Adobe Lightroom Photo Editor and Pro Camera app.
If you are an android photographer, you’ll find it in the Play Store
If you are an iPhone photographer, it’s in the App Store
The free Lightroom version lacks three tools – Selective, Healing, and Geometry — none of which is needed for making and processing RAW files. So you can get the app for free and enjoy the higher image quality afforded by making and processing RAW without spending a dime!
If you already subscribe to the Adobe Creative Cloud, great; the complete version of Lightroom for your phone is included with your subscription.
There are two parts to the Adobe Lightroom Photo Editor and Pro Camera app:
- The Pro Camera for taking photos in the DNG format. (DNG is a type of RAW file devised by Adobe).
- The Photo Editor, with tools for processing these RAW/DNG files.
In addition to making RAW images, the Adobe Pro Camera also has settings for Long Exposure and HDR. The AUTO mode is tremendous, but, there is a PRO mode for those who want the control of setting shutter speed, ISO and F-stop manually.
Those who use Lightroom CC on the desktop will recognize most of the editing tools, which perform in much the same way as Lightroom’s desktop version.
My Lightroom Workflow
I follow these six-steps to edit RAW files in Lightroom on my iPhone. These same steps apply to android users as well.
- AUTO; This button makes auto-adjustments to light settings including exposure, contrast, highlights, shadows, whites, and blacks. By tapping AUTO, the app automatically makes adjustments to the image that are often all you need with respect to exposure.
- LIGHT; if you are not completely satisfied with the AUTO adjustments to the light settings, you can use the LIGHT tool to change the auto adjustments to your liking.
- COLOR; The color tool is one of the most powerful in the tool lineup. Not only can you make basic adjustments to white balance, color temperature, tint, vibrance and saturation, but you can also take advantage of advanced color features that allow you to make an adjustment to specific colors in the image. Want the blue in a sky to be bluer without saturating other parts of the image? Or would you like to transform a color image to B&W, but selectively leave the color in the red car in the image? All this is possible with the dynamic color tool.
- EFFECTS; to adjust for texture, clarity, dehaze, and adding a vignette.
- DETAIL; for sharpening and noise reduction.
- OPTICS; to remove chromatic aberration and enable lens corrections.
That’s it!
Once satisfied with the adjustments, save the image to your phone’s camera role as a JPEG or TIFF file. The RAW file has served its purpose, but remains in the Lightroom library, as this entire process is non-destructive.
Webinar
For more information on recording and editing RAW files on your mobile device, register for my April 4 webinar: Create and Process RAW files on Your Phone! during which I’ll share my camera settings and processing steps for using Lightroom on the mobile phone.
Publisher Note: I plan to be at this webinar. Rad’s courses are always good. Heck, I have nowhere to go. See you there
Email me at [email protected] with questions or comments.
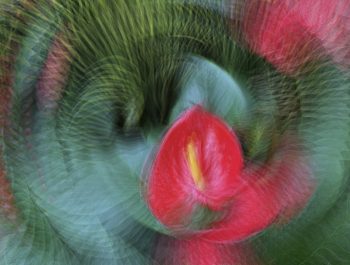
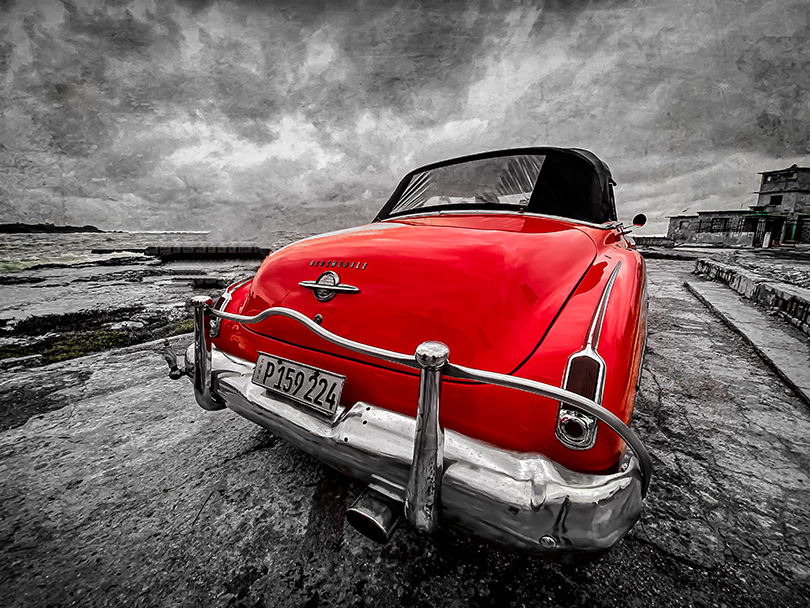
Image Before and after examples


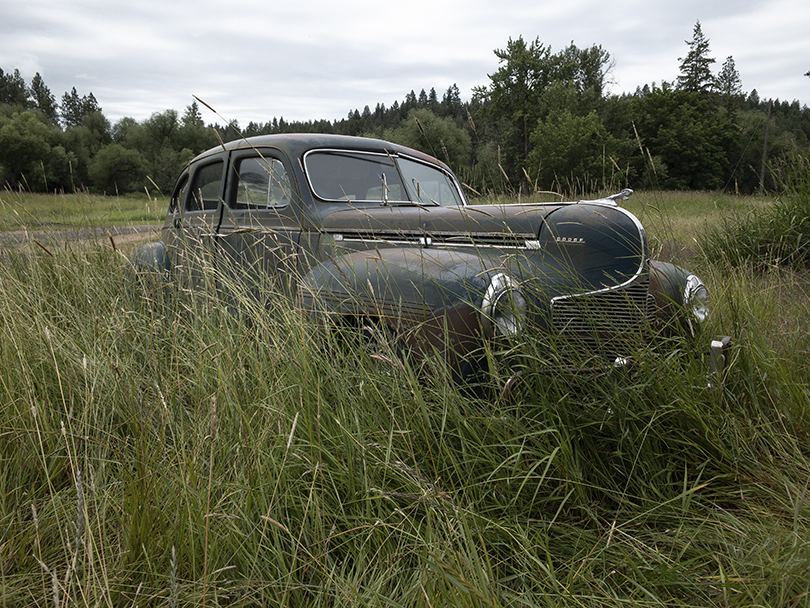
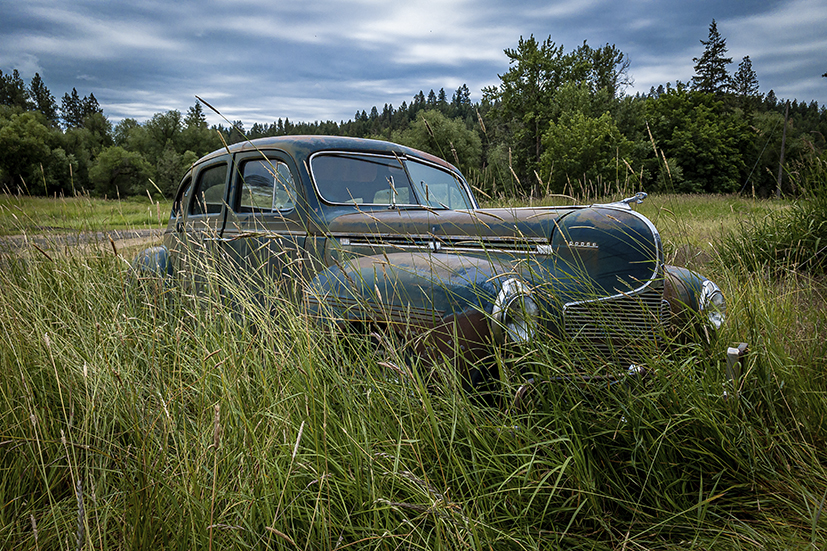


In the two images below, I used Lightroom’s Color adjustment tool to turn each image to B&W, while retaining the color in each car.

Rad Drew
April 2020
INDIANAPOLIS, IN
Photography has always been synonymous with fun and magic. As a kid, it was fun to compose, fun to capture, magic to develop and process, and fun to share. It was fun to seek out photos and to engage people, and magic to travel to new lands or find the unusual in familiar places. It was magic to convey an emotion or make a point and touch others through visual imagery that I created. As an adult, photography continues to be more fun and magical than I ever dreamed! Despite changes in technology that have occurred during my lifetime, the esthetic of photography remains much the same. The creative mind of the photographer is still the most important element in a great photo. The camera doesn’t create a photograph any more than a hammer designs a building; it’s merely a tool that allows us to create our vision. Today, my camera bag holds two mirrorless cameras, an infrared camera, a point-and-shoot, and an iPhone. Of these tools, I credit my use of iPhones since 2010 with providing more opportunities to practice the esthetics of photography, making me a better photographer regardless of the camera I'm using. And photography has never been more fun and magical!