Visit To Death Valley
In early February of this year, I spent five days taking photographs in Death Valley National Park and areas nearby. It was a great time to visit – none of the intense heat for which the Park is notorious, nor were there crowds of people.
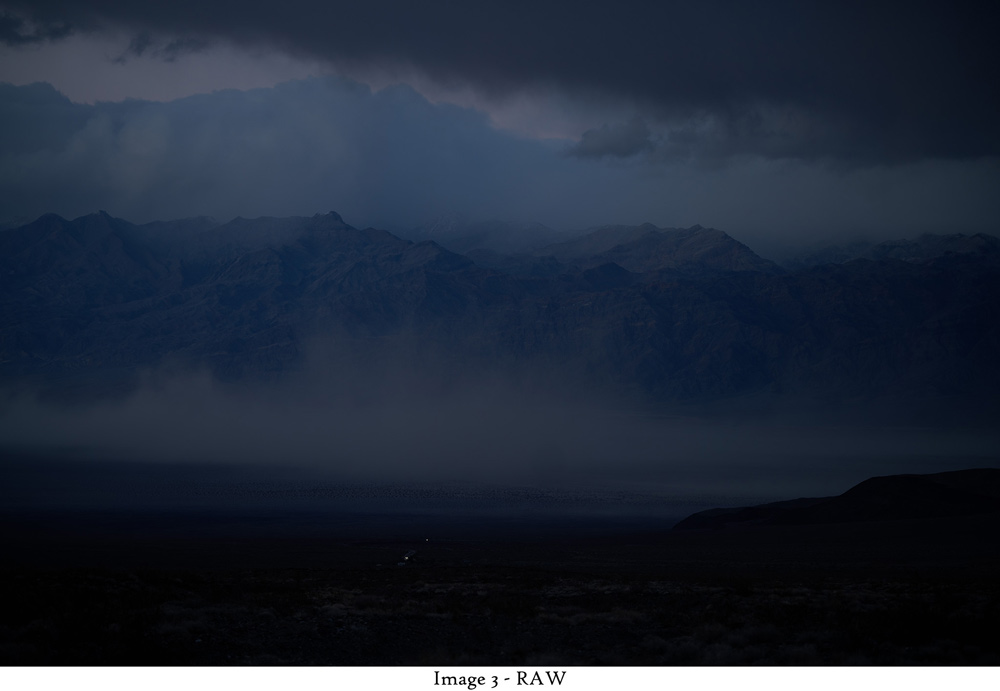
Here are a few images from the trip along with brief explanations of how I made them. I will show you the untouched RAW image, talk a little about post-processing, and then show the final finished image.
All photos were shot with a Sony A7R Mark 2 paired with one of five lenses:
– Samyang f/2.8, 14mm
– Sony Zeiss f/2.8, 35mm
– Sony Zeiss f/1.8, 55mm
– Sigma f/1.4, 85mm
– Samyang f/2.0, 135mm
In post-processing, I used DxO PhotoLab to make global edits to RAW files and convert them to .tif. I opened the .tif files in Photoshop where I made further adjustments to produce the final image.
Danté’s View
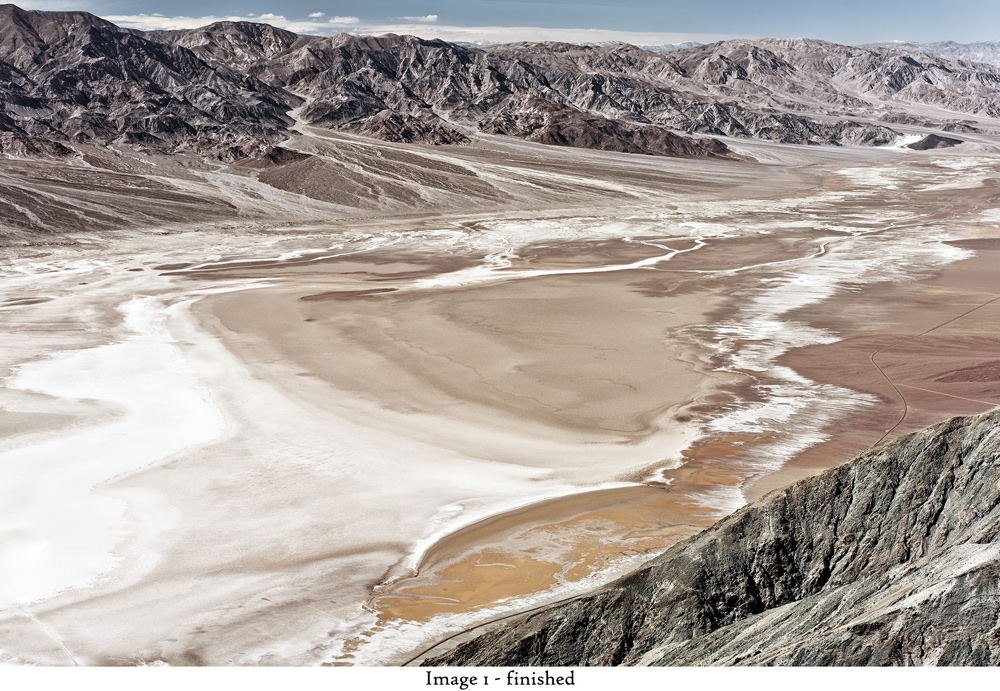

The panorama from Danté’s View is spectacular. In one glance you see the lowest spot in the Park (the Badwater Basin salt flat at 282 feet below sea level) and the highest (Telescope Peak at 11,300 feet above sea level). I shot the photo with the 55mm lens – wide enough to show the breadth and depth of the Basin, but not so wide as to flatten out the landscape.
The light was challenging. The extreme white of the salt flat shared the frame with the shadow detail of the mountains. And the overall light was dull and hazy. To address the extremes of light and shadow I did two separate treatments of the RAW image – one optimizing for highlights and the other for shadow. To overcome the dull, hazy light I did global tone-curve and fine-contrast adjustments on both RAW files. I adjusted white balance to warm up the image.
In Photoshop I blended the two files together and made further local tone-curve adjustments to isolate and fine-tune the tones and textures of the mountains, the intricate alluvial fans, and the salt flats. I cropped the empty space at the top of the frame. Here is the final product.
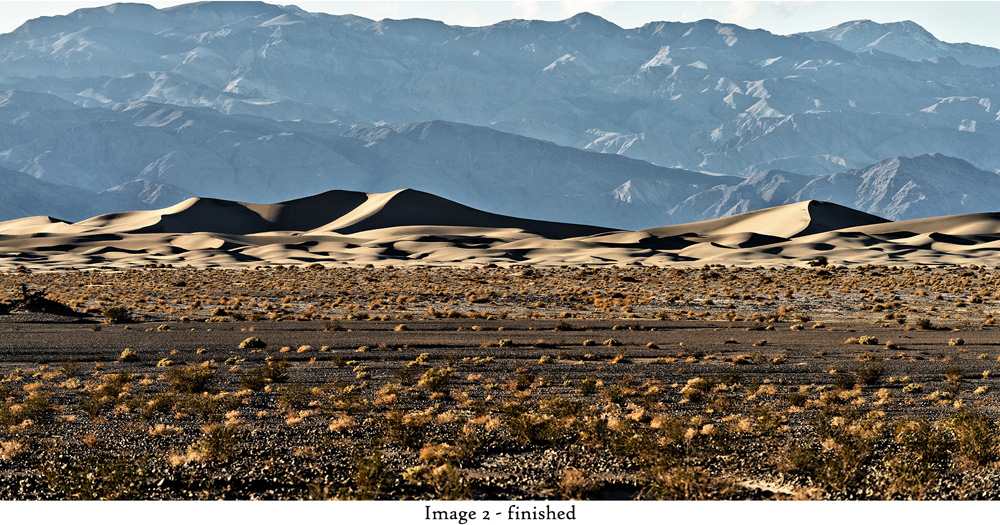
Mesquite Flats Dunes
 A visit to the sand dunes at Mesquite Flats was high on my list. I made sure to arrive in the late afternoon when shadows would be strong and the light mellow.
I walked the dunes looking for an interesting photograph but there were too many people! I didn’t want humans, or signs of them, in a photograph. Even when I framed an area without people, there were footprints everywhere. So I got back in my car, drove half-a-mile away to eliminate most signs of humanity and shot with a 135mm lens, which added impact by compressing the apparent distance between the dunes and the mountains. I set the aperture at f/2.0 for a narrow depth of field to blur the foreground.
Even in the late afternoon, the light still seemed flat – probably due to haze from dust in the air. In post-processing, I wanted to cut through the haze, make the dune shadows more dramatic, and bring out the angular detail in the mountains as a complement to the sinuous lines of the dunes. I did so with fine contrast and tone-curve adjustments to the RAW file. I also removed the vignetting (darkening at the edges of the frame) and warmed the image a little with a small white balance adjustment.
In Photoshop I isolated the dunes, mountains, and foreground, making separate tone-curve adjustments to each. I cloned out a few human figures and footprints (barely seen here, but visible in a full-sized print) and cropped the image to remove dead space at the top and accentuate horizontal lines. Here is the final product:
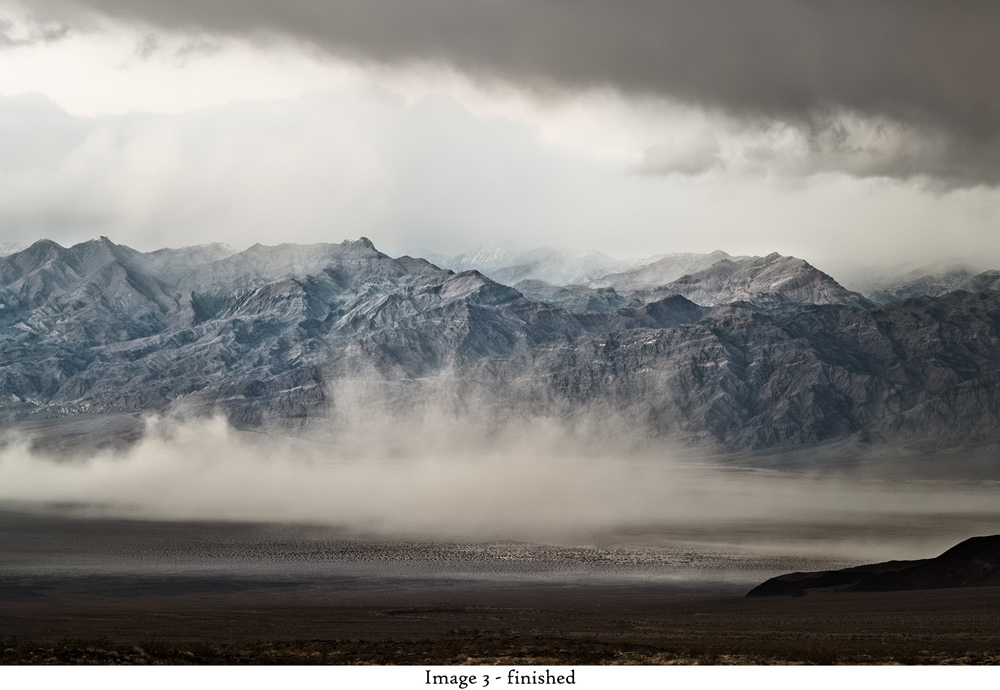
Sandstorm
Sometimes there is no option but to take photos under adverse conditions that result in poor exposures. But don’t immediately give up on an under- or over-exposed capture if you believe there’s a worthy final product waiting to be rescued. RAW files – unlike jpegs – are highly forgiving. Your RAW image editor can extract a surprising amount of data even from apparently useless captures.
This photo was shot at the end of a day of constant high wind that had kicked up sandstorms. As I descended into Death Valley on Highway 190 heading east from Stovepipe Wells I came over a rise and saw this dramatic scene: the sandstorm in the valley, the dark clouds above, and the mountains in the background. The light was almost gone, but I decided to give it a try.
The severe under-exposure was corrected with exposure and tone-curve adjustments to the RAW file. I adjusted the white balance to warm up the image. I then made a second copy of the RAW file. In one copy I increased fine-contrast and midtone contrast to bring out the textures of the mountains. In the other copy, I reduced fine-contrast to give a hazier look to the blowing sand and clouds. After converting the two RAW files to .tif, I blended them into one image in Photoshop, where I also made local tone-curve adjustments, cropped from the bottom of the frame to remove uninteresting space, and cloned out two sets of car headlights at the bottom of the frame. Here is the finished product.
The complete set of Death Valley photos can be seen in a six-minute YouTube video at https://youtu.be/k1vC_8Mwmu4
A broader selection of my work can be seen at https://luxetveritas.net
Mark Schacter
September 2019
Ottawa, ON
I am interested in subjects ranging from urban and industrial scenes to rural and small-town settings to landscapes. Three books of my work have been published - "Roads" (2010), "Sweet Seas. Portraits of the Great Lakes" (2012) and "Houses of Worship" (2013). My work can also be seen at www.luxetveritas.net