The Benefits of Regular Image Inventory Management (IIM)
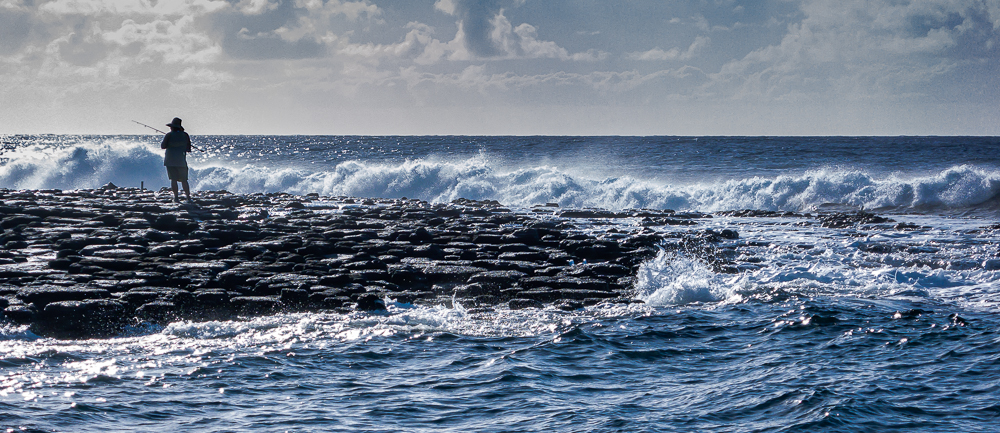
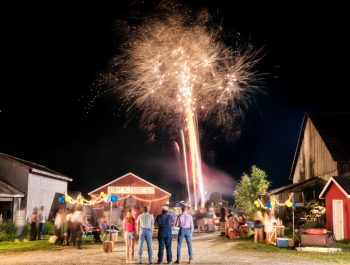
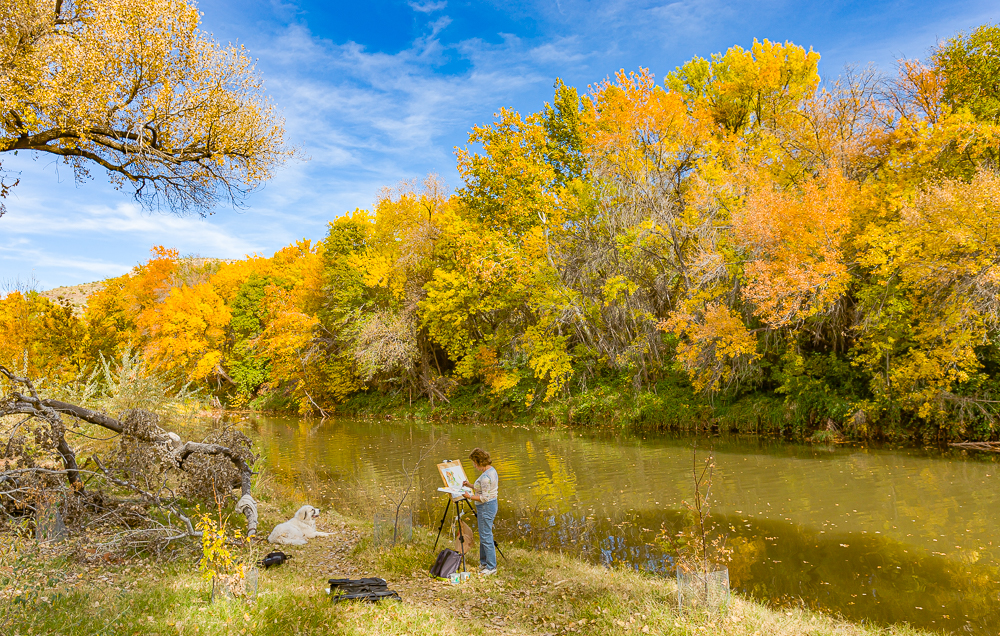
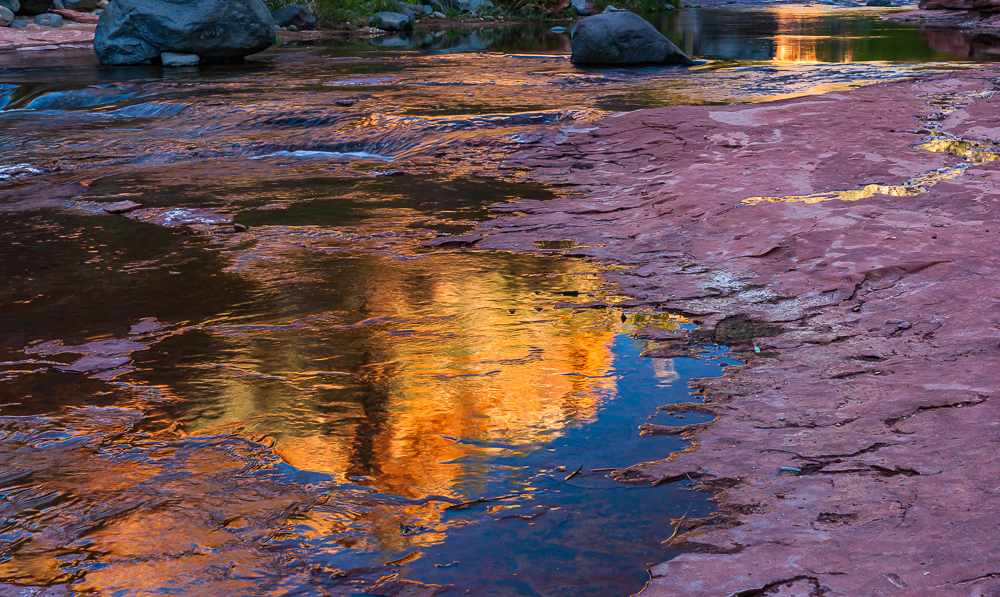
Though I suspect that we’re hardly unique, we nature photographers are a funny and driven breed. Like the lone fisherman in the opening image, we visit out of the way places, put up with cold, rough weather, loneliness and disappointment in an effort to capture something seldom seen and attention grabbing. Many of us take too many exposures, sometimes to break up long spells of boredom, then return home to briefly assess the results. We quickly spot what we think is the best example of what we envisioned, discard a few obvious failures, and consign the rest to deep storage, believing that one day, when we have more time, we will go through our files more thoroughly, and find hidden treasure. But, the sheer volume of images we accumulate increasingly discourages us from taking on such a task.
There are understandable reasons why we take unnecessary exposures. Little effort or cost is required. It makes us feel like we’re not just waiting around, and it provides comfort by covering all the bases and creating back-ups. We also maintain dubious bragging rights by being able to say “I have 30,000 images in my library”, or better yet 50,000. We forget that over 70 years ago, photographers carrying 5×7 and 8×10 view cameras produced great images, though a good day’s output was a dozen exposed negatives. Heck, Ansel Adams made his most famous image, “Moonrise Over Hernandez, NM” from one of only two exposures.
The fact that digital images surpass film both technically and in ease of capture doesn’t mean that discipline can be lax. Quite the opposite. We should be selective in what we capture, limit the number of duplicates we store, and also be discriminating in what we keep for future further evaluation. Without disciplined image inventory management valuable time is consumed in navigating the system, and editing time can lengthen considerably. We are also likely to overlook raw images with great potential if the volume of images to be reviewed discourages us from spending more evaluation time during the first review and editing session.
I know this, because I have been describing my experiences and those of many photographer friends who have followed a similar path. I first used Lightroom in 2002, when I moved to Sedona. In 2005 I ditched my manual file system and used Lightroom to track all of the digital files that I kept from earlier sessions and generated afterward, except for obvious “failures”.

Cumulative Stored Image Files on Lightroom – 2002 thru 2018 – H. Stearn
The above chart tracks the cumulative number of files that I stored on one hard drive. To avoid possible loss, this was duplicated on three other external drives. I knew that a housecleaning was advisable. But I kept postponing it as the scope of the task appeared ever more intimidating.
The increasing number of stored images was only part of the challenge. Almost every new camera I purchased offered increased resolution (ergo, total Megapixels), causing the volume of my data storage to mushroom even when my image production leveled off. In 2002, my Contax N produced 6 MP per image. I went from that to 11, 21, 35, 42 and 51MP, and next month to 61MP, approximately a 10-fold increase in data generation per image in 17 years. A 250 GB external drive used to be more than adequate for my needs. By 2018, I needed 6 TB per drive to handle past and near future storage volume.
Aside from just indiscriminately trashing every image not ranked five-star, I faced losing my ability to manage my stored files, particularly with multiple duplicated back-up drives. Every editing change had to be saved four times. So, my first 2019 New Year’s resolution was clean up the mess. It took almost 300 hours on the computer to do the job right which required much resolve and a very understanding wife.
By mid-June 2019, my 45,000 image library shrunk to 15,000. These are now stored on only two external hard drives. But, I store my best 700 images (at present) on five hard drives. Next year, I will further reduce total image storage to under 10,000. Review and editing time is now easy and efficient with fewer problems and less stress.
My newly streamlined systems and increased productivity was ample reward for all the hard work. There were also periodic bonuses when I discovered and re-edited old images that are now top notch. Seventy of these were prior editing failures that are now very successful, mainly because lighting conditions were difficult and I didn’t have the skill or the tools to realize my visions. Another 38 images, that were always solid, are better yet.
By the end of this project the folder containing my 592 best images expanded to 700 based on the rating system that I use which is similar to many others. Three quarters of these “rediscovered” images were taken between 2006 and 2011. This suggests that camera quality of that period was better than I appreciated, and all that was needed was to apply new editing tools and skills to bring out the full potential of those 108 images. The editing factors in converting previously underrated images to strong ones seem to group into the following five categories, although some images benefited from more than one type of correction.
Following are fifteen examples.
Setting correct color balances to eliminate color casts
It takes experience to recognize when and how a color balance is slightly off. The usual culprit is a slight yellow color cast because sunlight becomes more yellow in late afternoon. Some photographers don’t mind this. But, a small amount of yellow will quickly degrade other colors, and will reduce perceived sharpness as contrast is lowered. While many pro level camera sensors achieve accurate color balance, use of auto white balance settings often results in subtle shifts toward the yellow which often takes a lot of trial and error edits to find the right balance. Use of a color meter to determine ambient light color temperature and manually setting the camera to that is effective, and saves much editing time.
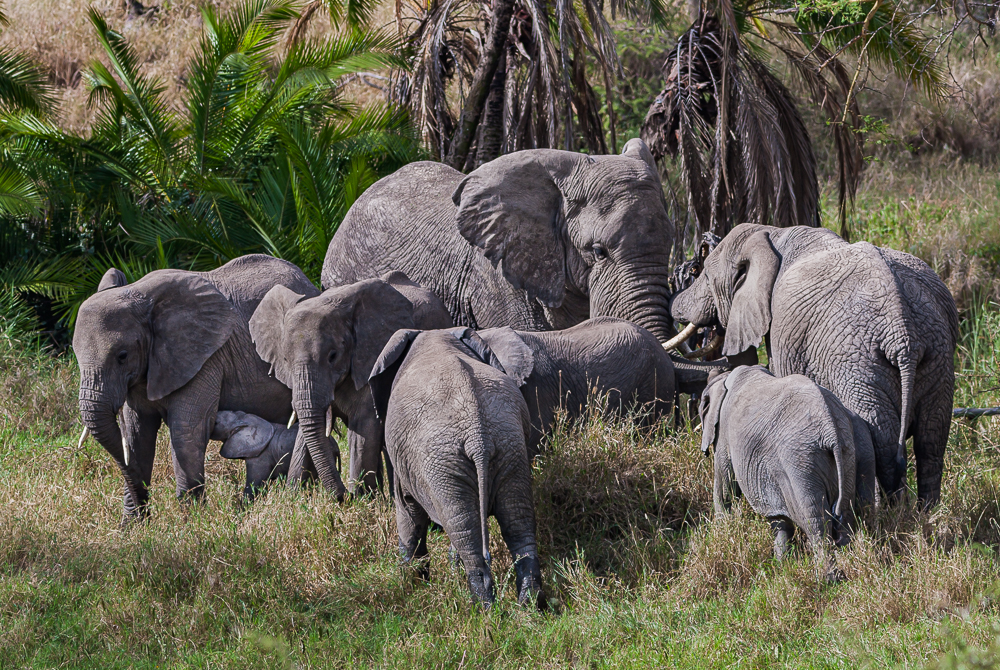
But, I didn’t think of that when I photographed Serengeti wildlife in Tanzania. The following image of a closely bonded elephant group lacked impact despite the lovely composition. After eliminating the tricky yellow bias from the abundant dry vegetation in the scene became more natural and appealing. The nursing baby on the left also shows more clearly.
The next image of my wife painting the Fall color along Oak Creek in Page Springs required adjusting for the dominant color influence of the afternoon sun and the yellow foliage without sacrificing the vibrance of the trees. The right balance was achieved when the sky went from a white featureless sky to a rich blue.
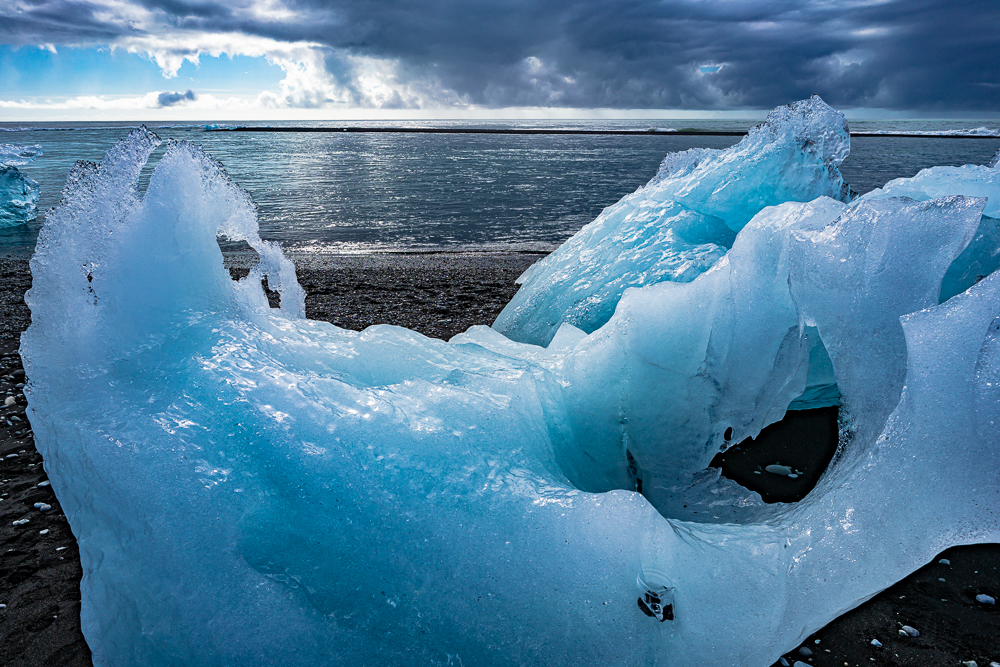
The following image is a composition of beached icebergs at Ice Beach in Iceland. Here the yellow/blue balance had to stay slightly toward the blue end to capture the cast of the translucent ice and the color of the ocean that reflected both the patch of blue sky and the dark clouds. More color shift in either direction would have misrepresented the mood of the scene.
De-hazing and controlling micro contrast in images taken with high contrast lighting.
Portraying the different types of contrast appearing in a brightly lit landscape is challenging. There is overall contrast or dynamic range which Ansel Adams’ Zone System addressed. But there is also edge contrast that creates a sense of sharpness, texture which addresses contrast in small structures, and also contrast within shadow, intermediate and highlight areas. The more effectively each of these types of contrast can be adjusted, the more realism and impact can be achieved in an image.
Adobe was slow in offering tools to address each type of contrast. Possibly motivated by improvements in competing editing programs, Adobe added two important new tools since 2016: a de-hazer slider which tones down and adds detail to white and highlight tones, and a texture slider which can increase the contrast between small structures that have different reflectance readings within a larger shape, such as the side of a brick as an example. These latest additions help make landscape images more effective and realistic.
The opening image (shown again below) had some of the most extreme contrast challenges that I have ever dealt with. The glary overcast sky was bad enough. But, this image appeared to be severely overexposed with blown-out highlights. Lowering the exposure too much risked losing the brilliance of the foamy highlights. Editing with only the contrast and clarity sliders and with the tone curve wasn’t sufficient to reproduce the impact of the actual scene. The de-hazing and texture tools made the difference. The sky went from pure white to an acceptably hazy sky with cloud structure and light blue color which fits this scene. Most important, the sparkle of the wave highlights and the blue ocean hue were preserved, as was the light to middle tones of the dark lava slabs.
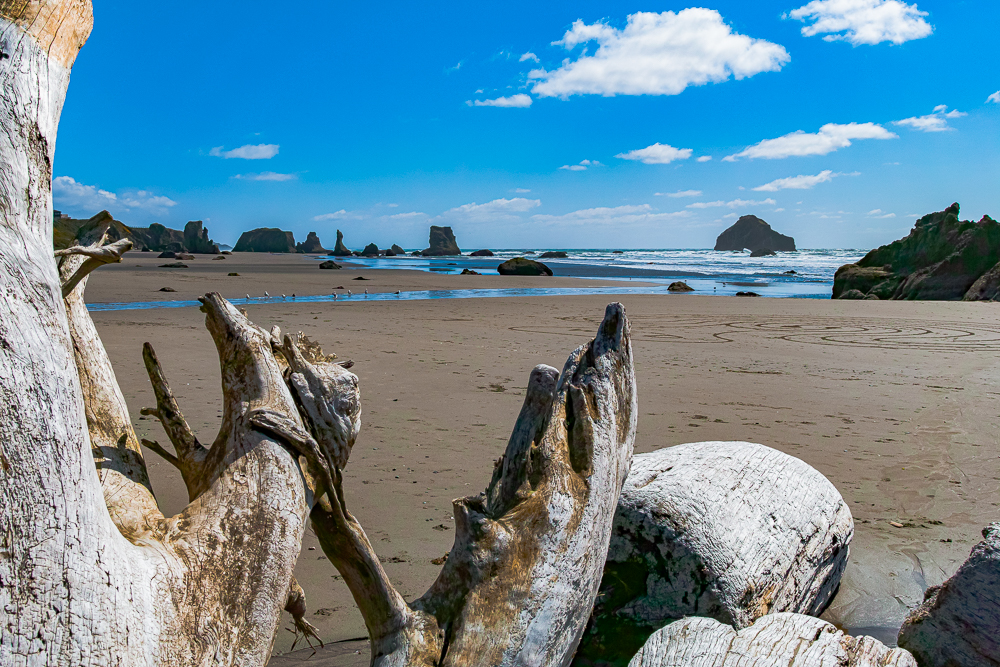
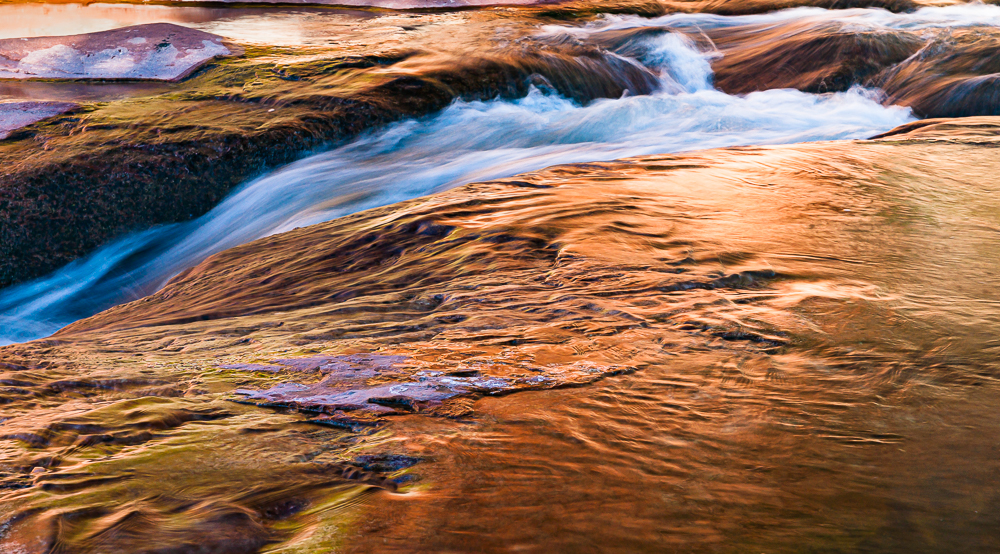
In another ocean front scene (shown below), there were similar contrast issues. But the highlights of concern were not the waves. Instead the smooth weathered tree trunk section in the foreground reflected a lot of light toward the camera. This could have been fixed by masking and selective editing, though my first choice is always to try to adjust the different types of contrast globally for a more natural looking image. Again, the de-haze and texture tools achieved the desired balance.
The next two images also involve extremely light and dark tones with the need to preserve detail in both. And again, the dehaze and texture tools proved adequate.
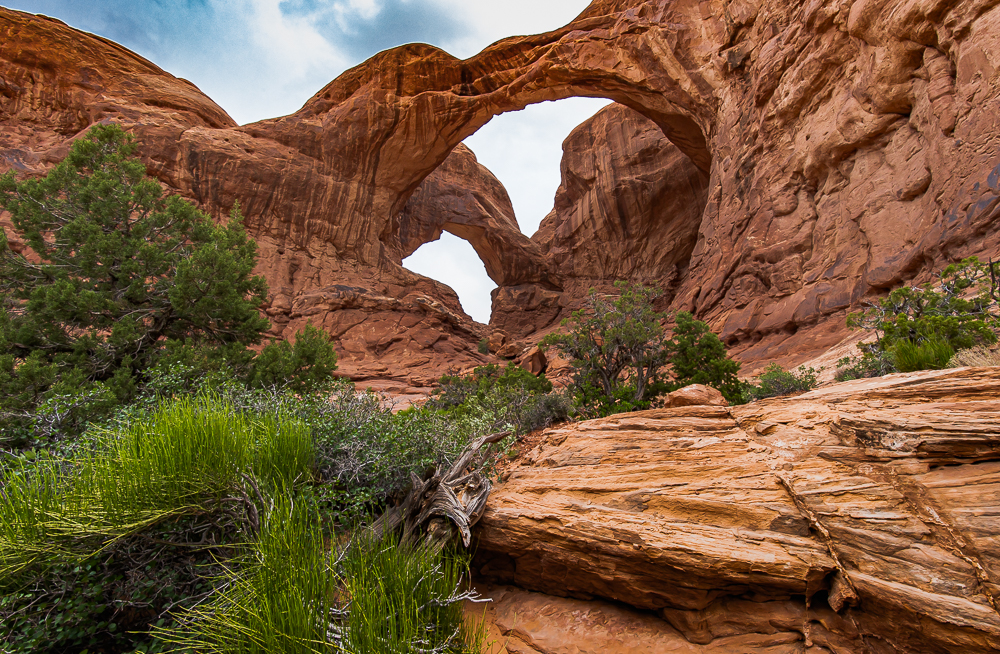
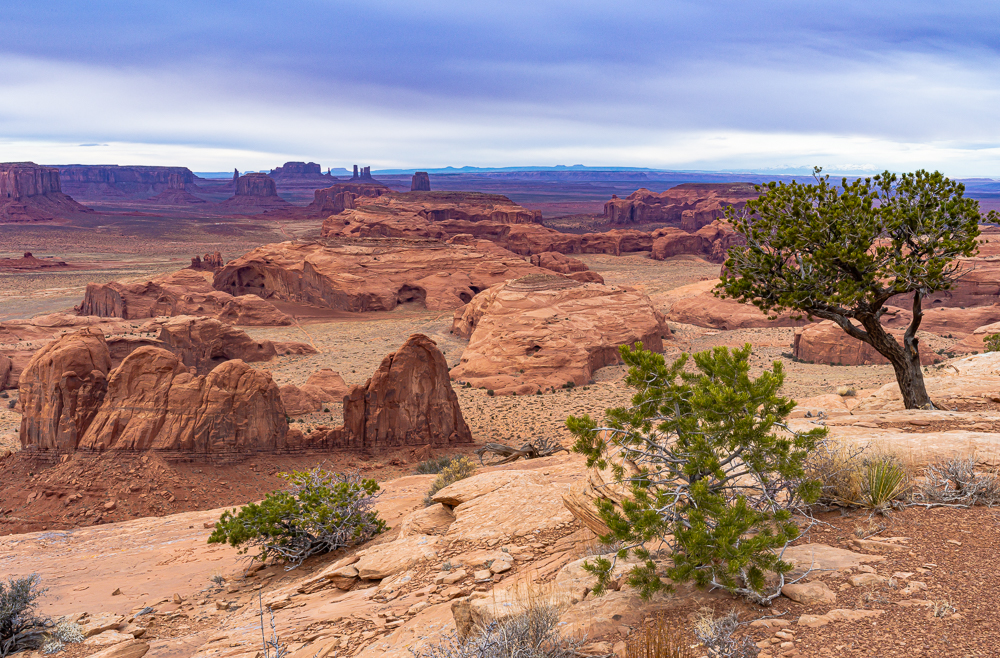
Re-capturing lost sky detail and color.
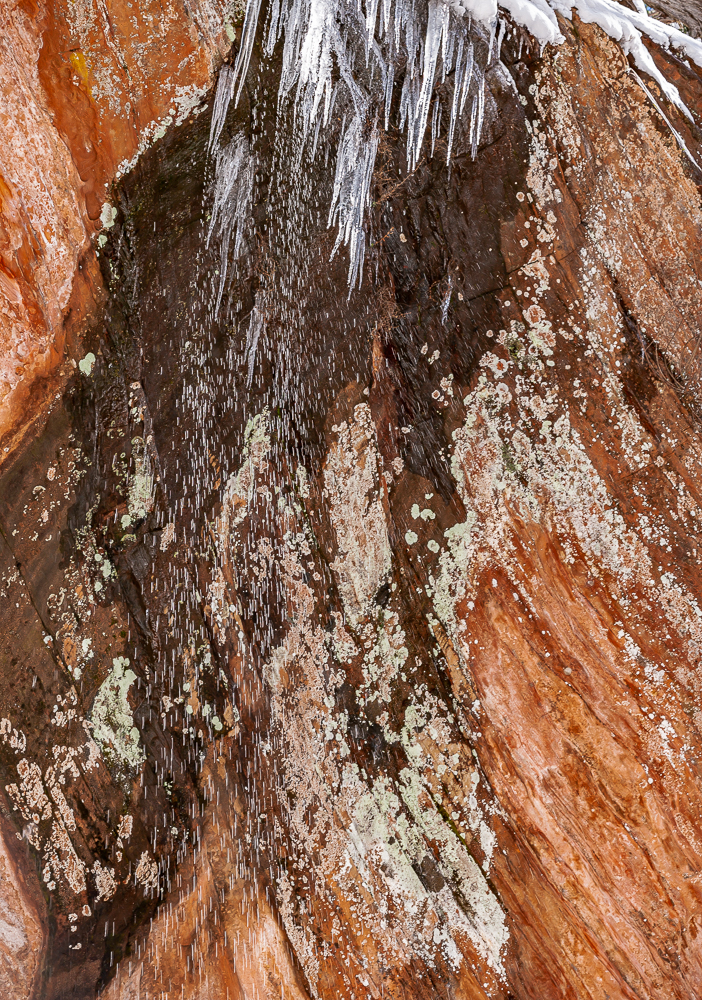
This category is also a matter of dealing with extreme contrast. However, the primary challenge in the following two images was to restore the skies (which started out pure white) without unduly darkening the red sandstone structures that were softly illuminated. Masking and using graduated neutral density filters helped, but only to a point short of looking natural. The de-haze tool did the rest.
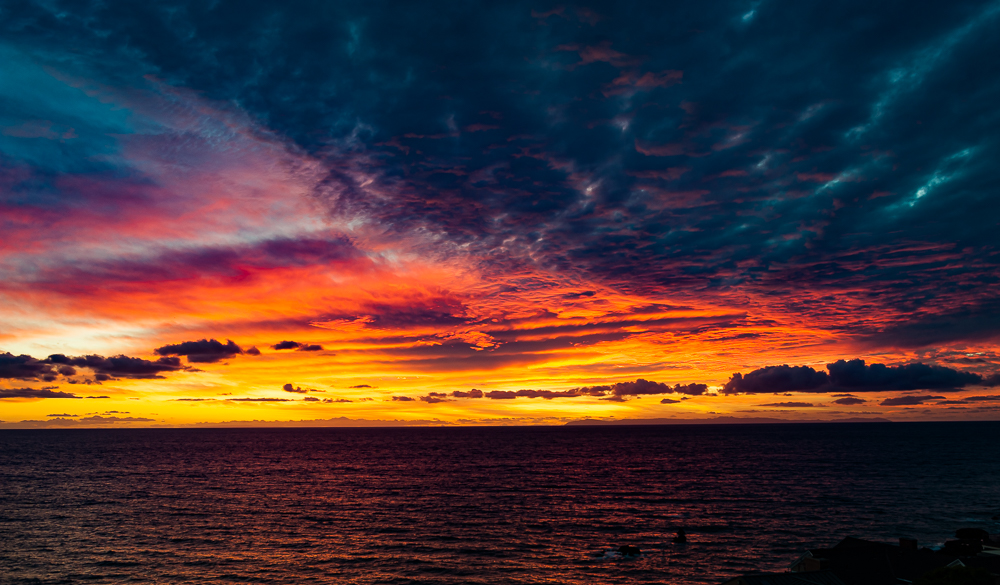
Producing purer and more vibrant colors.
I almost never add saturation to an image except in the rare event (fog or snow storm) that all of the colors are under-saturated. Instead, I use the vibrancy tool which acts selectively on colors that most need it. On rare occasion, I will add small amounts of saturation to a particular primary color, but only if that color was under-represented in some unusual circumstance. My two goals regarding color representation are to reproduce as closely as possible both the precise colors and the tones that I found in the scene. This is much easier today because the color accuracy of modern sensors (particularly Sony) is so high, as is their accuracy in reading reflected intensities. Images taken with older cameras can be another matter.
The following sunset was taken eleven years ago with a Nikon D700. For some reason, possibly because of the unusual juxtaposition of warm and cool hues, the sensor was thrown off and none of the colors in the image were close to what they should have been. I had to experiment to find the right color balance, and the de-hazing tool helped bring the various intensities into balance. I have seen this type of vibrant red-blue confluence only a few times and it is always vivid and spectacular. Eleven years ago I didn’t know how to edit this image. So, it sat for over ten years. The flat dark shape on the right horizon is not cloud layer. It is Catalina Island.
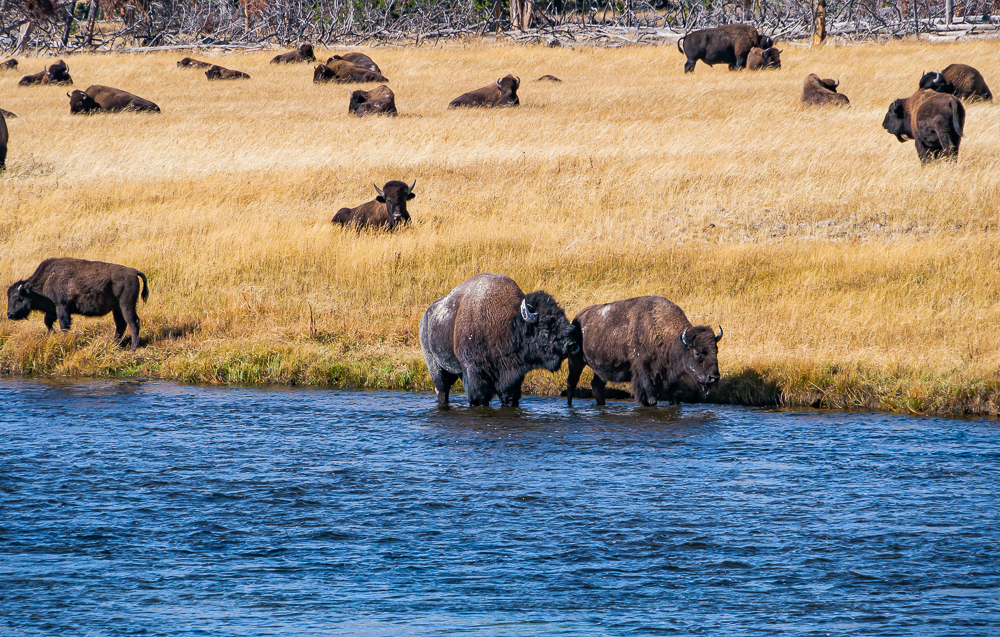
The next image was taken in Yellowstone NP. Once again, large swaths of yellow and blue fooled the auto color balance, and I was left with a washed out looking image. Eight years later I had the tools and knowledge to obtain clear accurate hues, and to also make the different textures more crisp.
Recognizing an opportunity for a different and more exciting perspective.
Of the 108 re-discovered images, not all just awaited better technology. Some became more appealing because my concepts broadened over time, and I saw opportunities to present those images differently. I think that the next two photographs reflect a more playful move toward finding abstracts in Nature, a very common trend among senior photographers. Through careful cropping and changes in contrast, these two images are more graphic, though still realistic after they are viewed more closely.
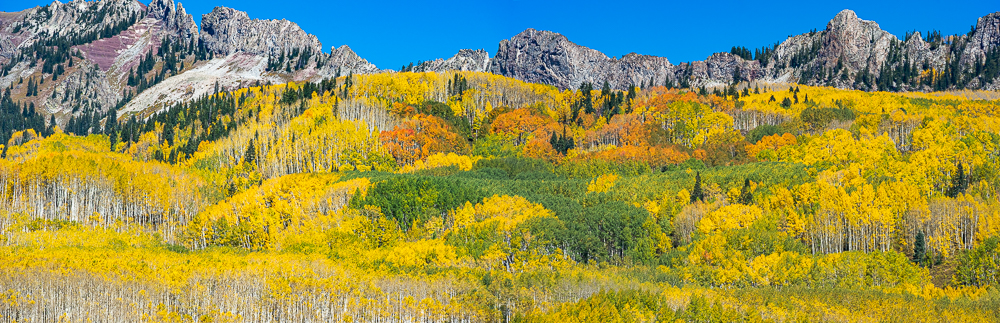
The next image required no fine tuning. I took a series of shots of the Kebler Pass Aspen Grove near Crested Butte CO in 2010 during the best color display that anyone could remember. Linked by a common root system, this grove is the largest single organism on Earth. It is ten miles wide. I produced many beautiful images the week that I was there. But, this year I noticed that one image started where another left off except for about a seven percent overlap. I didn’t think about shooting images to create a stitched panorama on that trip, though that should have been my first thought in capturing the essence of that grove. I got lucky. Despite minimal overlap and little margin on top and bottom, I got a really good panoramic image without losing much detail. Nine years later this alone is the image that captures the essence of that scene.
The last image awaited one simple change. A cluster of broken wooden pallets sprawled on the ground next to the fence. When I first reviewed this image it didn’t “speak to me”. I took little time to study it until this year. Only then did I realize that the pallets should be edited out. Adobe’s Content Aware Fill tool came out in 2010 which would have made this easy. Had I not rushed through all the images after that trip, I would have had this image eight years earlier.
Conclusions
- Setting specific goals for image capture and limiting exposures to what is relevant is an important discipline to maintain, especially when single image file sizes grow with increasing resolution.
- During the first editing session following a photography session or trip, take adequate time to complete basic edits, analyze the results and decide which files to edit in more detail, which to keep for justifiable reasons, and then discard what’s left. Don’t wait till later, because “later” often comes too late at the cost of additional time and effort.
- Take the time to periodically re-edit older images. With continual improvements in editing software, and as your own skill improves, it is likely that what you thought was good can be much better.
As a matter of additional interest, a forum on this website, photopxl.com, covered an issue raised by a member photographer in response to Sony’s introduction of the 61 MP 7ArM4
Camera. The initial commentary in the chain questioned whether it makes sense for photographers to buy this camera or even higher resolution ones when we’re already struggling to manage ever increasing data storage. What wasn’t discussed was the advisability of tackling the root of the problem which is to use more discipline in taking pictures and in reviewing them regularly to identify and save keepers while discarding the rest.
There is a wonderful axiom that goes: “With great power comes great responsibility!” Higher technology is that power. With its use comes many advantages, but also responsibility to use it wisely. As higher resolution cameras become available we should not shrink from using them if we can afford them, and if we see substantial utilizable benefit. But, we also need to develop the discipline to not produce unneeded data that new technology can so effortlessly generate.
Harvey Stearn
September 2019
Sedona, AZ
To see the scope and essence of Harvey Stearn's photographic art please visit www.CameraStops.com. Mr. Stearn began photographing Western landscapes and wildlife at the age of 13, spent 50 years pursuing his passion in the field and in the darkroom before fully converting to digital photography in 2002. He developed color prints as well as monochrome, but switched over to digital capture and editing in 2002. Though he was a top executive for two large scale land development and home building corporations, he always found time for his fine art photography which won many awards. His work was exhibited in art museums in Southern California and Arizona, and was also featured in billboard advertisements and published in magazines. Mr. Stearn served on the California Arts Council for nine years, including two years as Chairman and another two as Vice Chairman. In addition, he was the founding Chairman of the John Wayne Airport Arts Commission in Orange County, California. Mr. Stearn’s work was sold through Arizona galleries for 15 years. In recent years he wrote 33 illustrated articles for PhotoPXL.com and 14 articles for Luminous-Landscape.com. In 2013 he published a book entitled “In Search of the Old West” which has been widely acclaimed. He was a guest lecturer on photography on a cruise ship visiting Chile, Argentina, Uruguay and the Falkland Islands. His work was among the top 100 images printed in NANPA's Showcase publications in 2019 and 2020. Images have been edited and selected for two new books on Landscape photography which will be published in late 2024 and early 2025.