Seeing Light Differently – The Magic of Light Painting
For centuries, paint artists have been able to manipulate shadow and light in their work simply by paint selection and placement. As photographers, our choices are more limited; we can wait for the right light, change the camera position to a more favorable lighting direction, subtract unwanted light with gobos or shades, or add light, typically with reflectors, electronic flash or continuous light sources.


Light painting provides the photographer with an additional option of being able to add light to individual and often very specific areas of a scene to create a look not possible by any other method of photographic image creation.
I’ve been fascinated by this process for decades, from the late 19th century stroboscopic effects of Marey and Demeny to Man Ray’s experiments with flashlights to Gjon Mili and Andreas Feininger’s essays in Life Magazine. In the ‘80s I was a fan of the works of Aaron Jones and his Hosemaster lighting tool.

Of course, all of these works had to be done on a single piece of film. Each exposure was built upon the previous one, and careful planning and much experimentation was required during the photography session to ensure the desired result.
The advent of digital photography opened up new opportunities for light painting artists. Individual images could now be made, evaluated and later blended into a single photograph with precision not available to film photographers.
I was first introduced to digital light painting in 2013 when Kevin Raber published an article by Pennsylvania photographer Harold Ross. Harold’s still life work has a beautiful, ethereal quality to it that is both timeless and technically excellent. I studied with him, and also found influences in the large scale projects of Eric Curry, the architectural work of Mike Kelley and Jeffery Jacobs, and the beautiful landscapes of Dave Black and Reuben Wu. Each of these artists has been instrumental in developing my personal style of painting with light.
A quick Google Image search on the words light painting will return a wide range of image possibilities made with continuous, stroboscopic and electronic flash. My preference in using continuous light is that it provides the option of moving a small light over a larger surface during a long exposure. The added dimension of extended exposure time can create the look of a very large and soft light from a much smaller one. This provides new lighting opportunities that don’t exist in the fast shutter speed world.
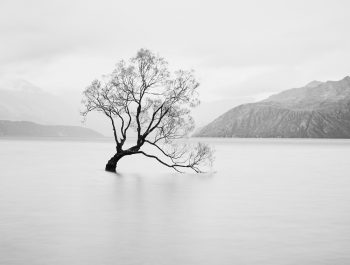
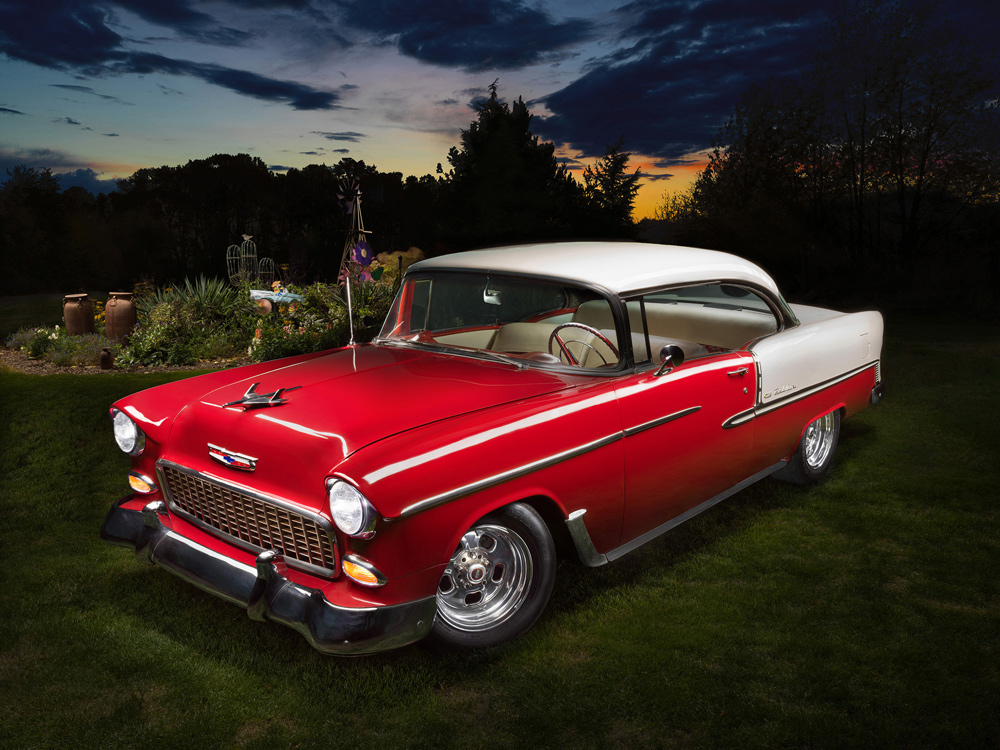
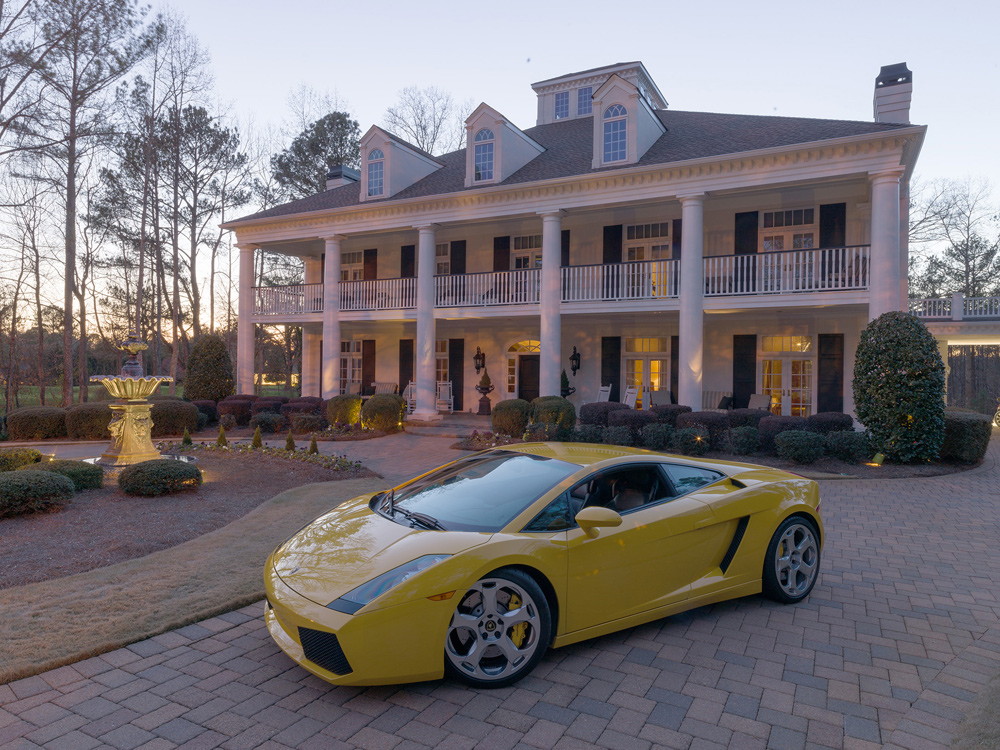
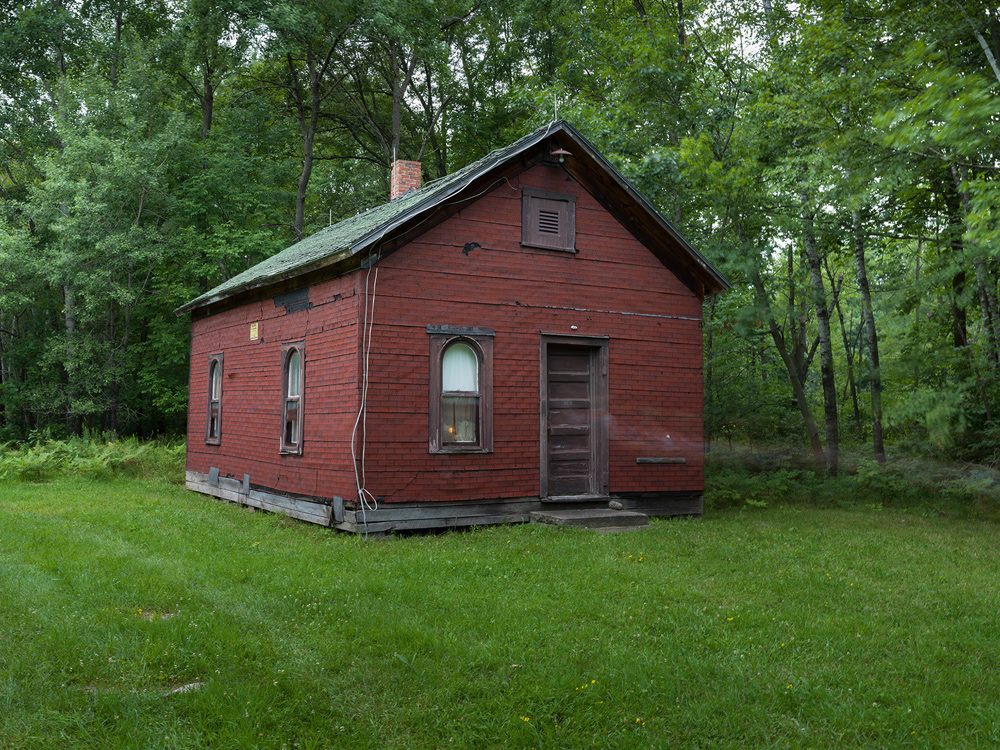
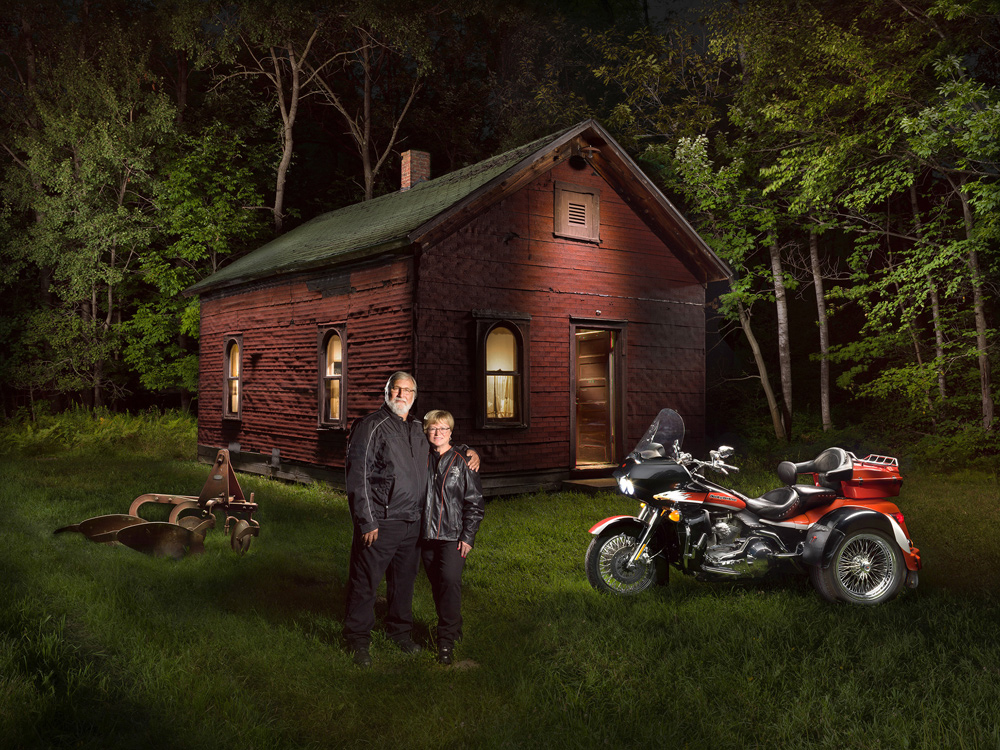
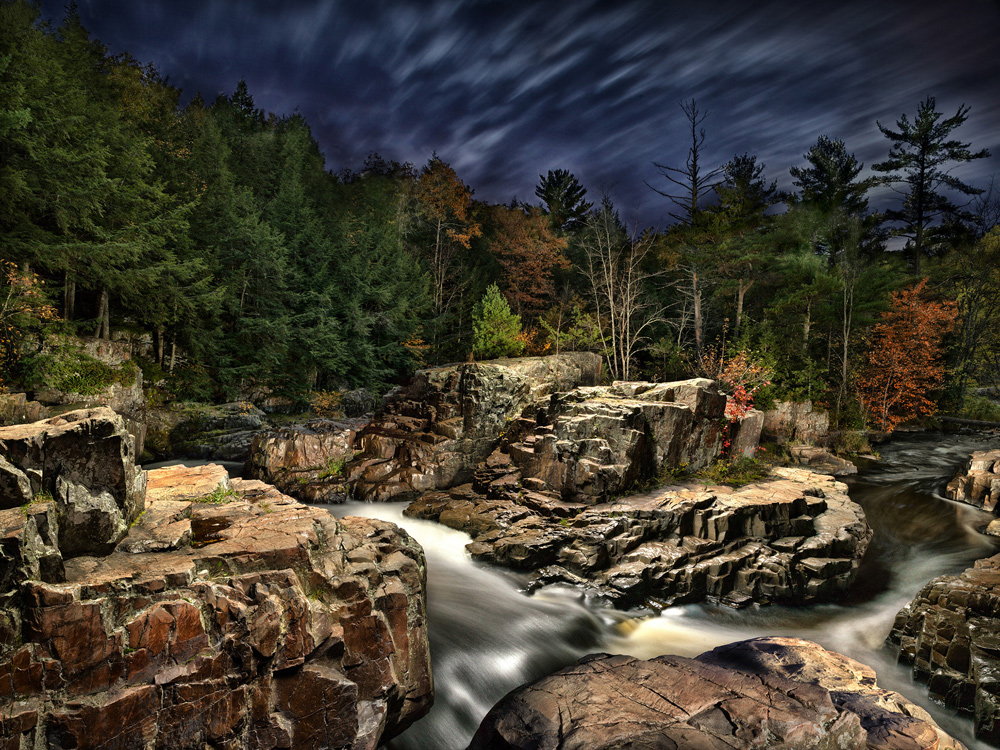
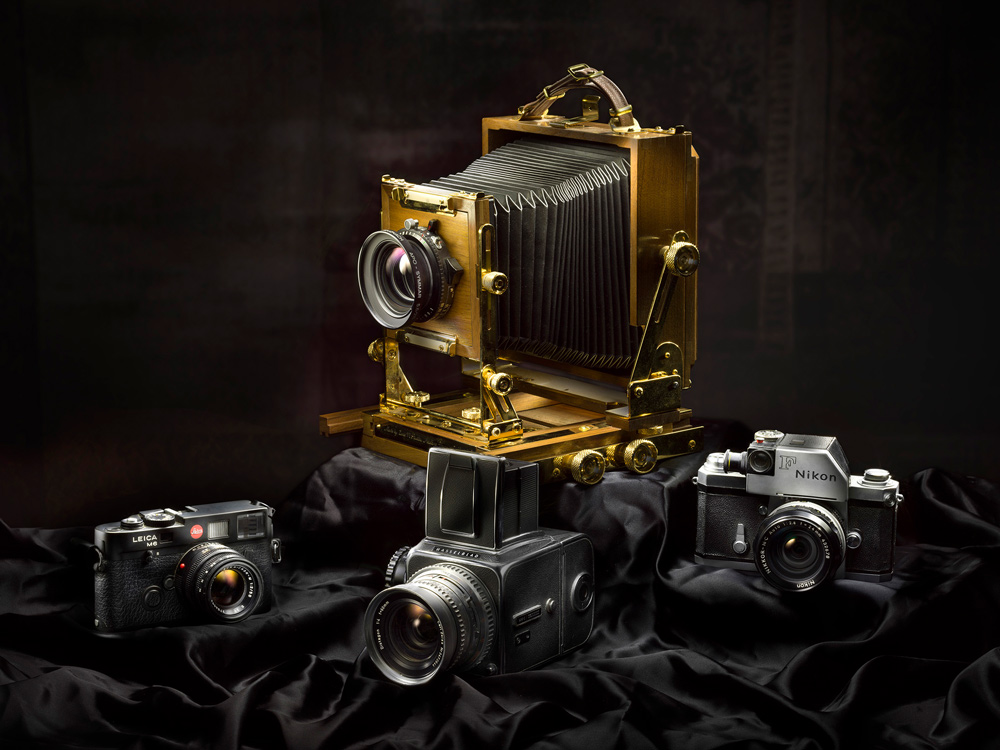
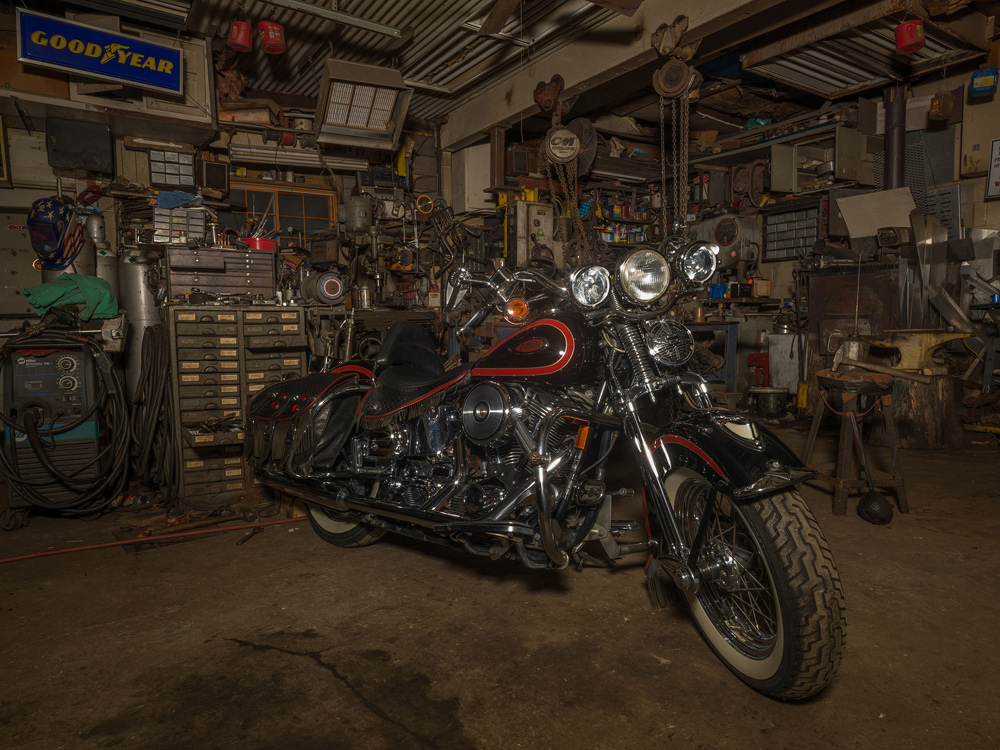
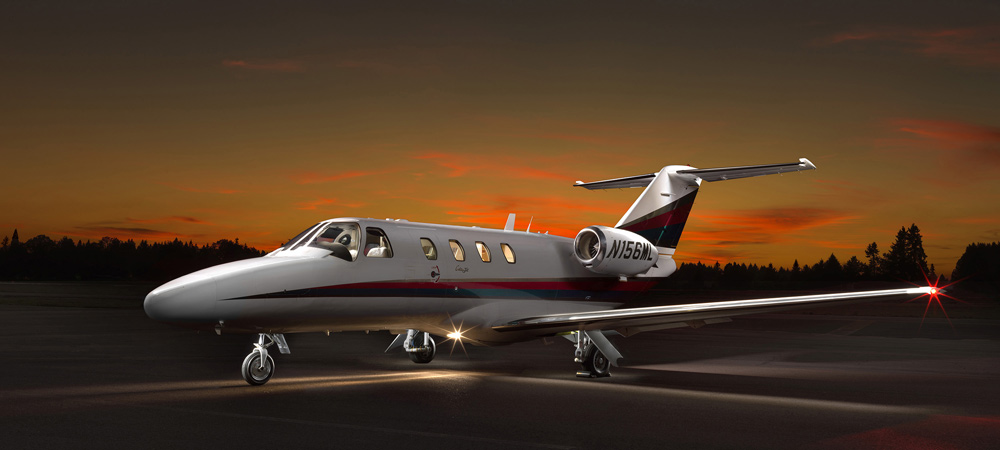
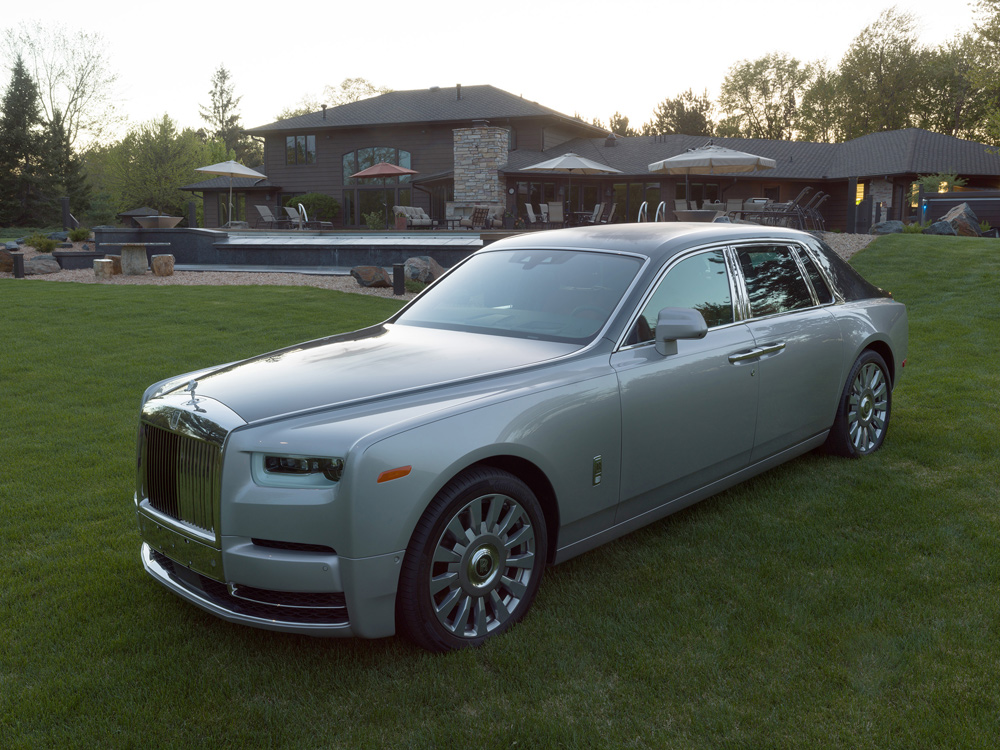
The majority of my light painting works are commissioned projects that include automobiles, aircraft, motorcycles, homes and buildings, farm machinery, commercial products, musical instruments, and jewelry. In addition to this paid work, I do self projects such as landscapes, still lifes and experimental portraiture. Most of my light paintings are comprised of dozens, if not hundreds of individual images, composited in Photoshop.

After forty-five years as a professional photographer, I’ve discovered painting with light to be one of the most challenging and rewarding styles of photography I’ve ever done.
General requirements

1) The environment must be dark enough to allow for long exposures without ambient light pollution. That means the lights used must be 6–7 stops brighter than the ambient light.
2) The camera must remain motionless at all times. That means the shutter must be triggered remotely, either through a wi-fi app on a tablet or smartphone, a wired cable release or a device such as a CamRanger.
3) Because the camera cannot be touched, a remote viewing system is required to monitor the images as they are being made. The images can be transferred wirelessly to a device such as a tablet or smartphone, or the camera can be tethered to a computer, importing images to a RAW processing program such as Lightroom or CaptureOne.
Lighting Direction

When creating a light painted image it is important to consider in advance the general direction of light, just as you would when making any other photograph. Accent or kicker lights from behind or from the side help to add texture and depth to the image, but there should still be a sense of lighting direction in order for the finished photograph to make sense to the viewer’s eyes.
Camera Settings


A base ISO of 100 and a small aperture (f/22) are used to provide adequate exposure times and a large depth of field. The focus must be set to manual to avoid the lens hunting in autofocus in the almost completely dark environment of the photoshoot. Because most of my finished projects end up as large images printed on aluminum between 40” and 120”, I use a 100 MP medium format camera.
Lighting Equipment
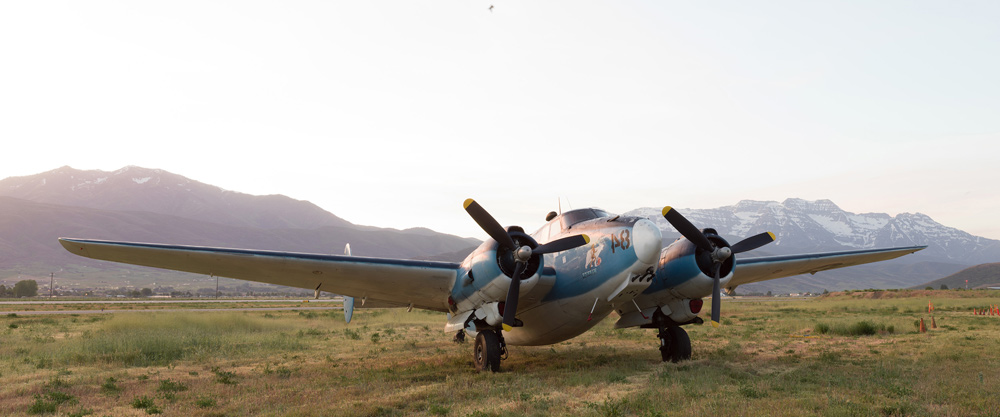
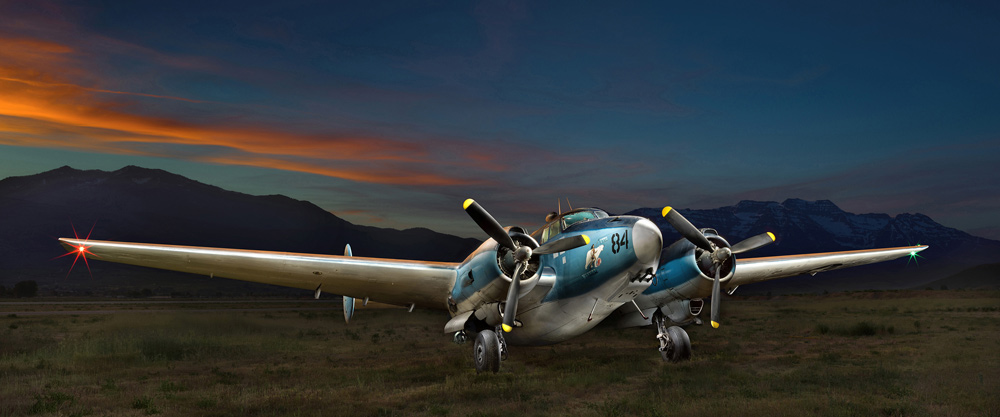
The lights used should reflect the scale and scope of the project. For tabletop still life work, a small flashlight might be all that is necessary. For larger projects such as autos or motorcycles, a more powerful tool such as a light wand may be needed. And for the biggest subjects like aircraft, buildings, and landscapes, larger LED light panels, spotlights or even lights mounted to a drone may be useful. I have a selection of about eight different lights that are used according to the subject and ambient light that may need to be overcome. My entire toolset can be found here.
White Balance

LED lights must be properly white balanced, especially if multiple light sources are used. Custom presets that adjust the white balance for each light can be made and saved in the RAW processor and then applied either at capture or sometime prior to processing. This assures a uniform color balance for all exposures in the series.
Editing

The lighted portion of each image is selected, copied and pasted into the master file. A layer mask is applied and then brushed in. These steps are repeated for each exposure, gradually building up to the desired image.
Like every other style of photography, a light painted image is not ‘real’. Even natural light photographers distort reality with their choice of lens, aperture, and shutter speed in the capture, as well as the color, tonality and contrast in the post-production process. Painting with light, just like painting with other media, is just another method of manipulating a scene to correspond with the artist’s vision. The process is relatively technical, but the success of the final result will ultimately result from an understanding of light and shadow, and how each will affect the subject in the finished image.
Biography
John Hartman has owned and operated a professional photography studio since 1974 and has been an industry educator for 36 years. He has authored several books on portraiture and studio management, and for seventeen years produced and presented a business workshop for professional photographers called the John Hartman Marketing Boot Camp, held in Chicago and Las Vegas. He has created several software products including QuickMats, a digital matting solution that is used by photographers worldwide. John continues to stay relevant with commissioned and personal photography projects in portraiture, commercial, travel, and light painting work. He also teaches small-class, hands-on light painting workshops throughout the U.S.
Please visit John’s websites for more information. johnhartmanlightpainting.com , jhartman.com and johnhartmanseniors.com
John Hartman
November 2019
Stevens Point, Wisconsin
Full-time professional photographer since 1974, industry teacher, software developer and (of course) drummer.