Seeing in Black & White
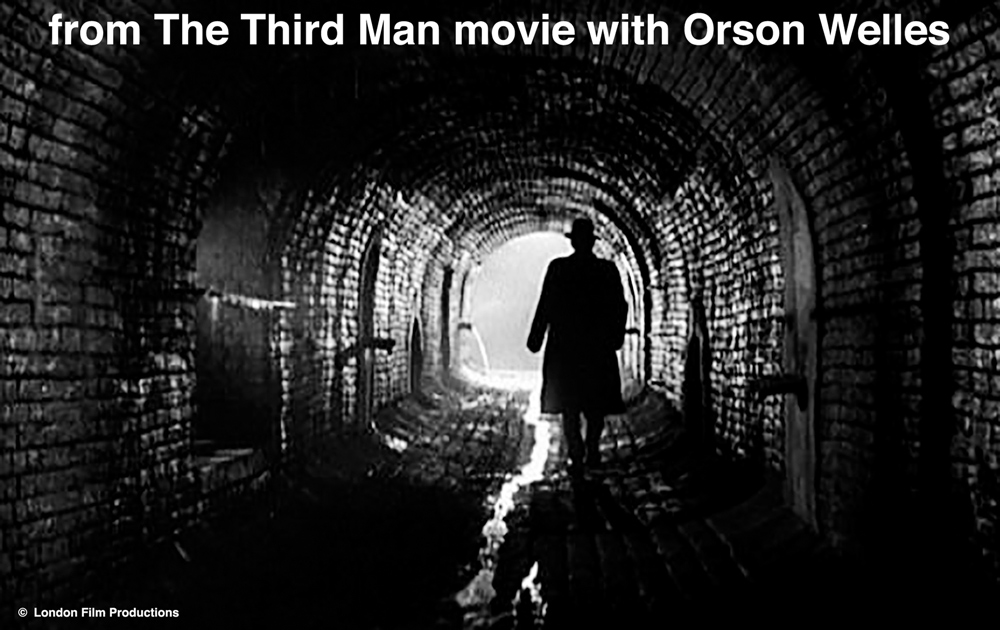
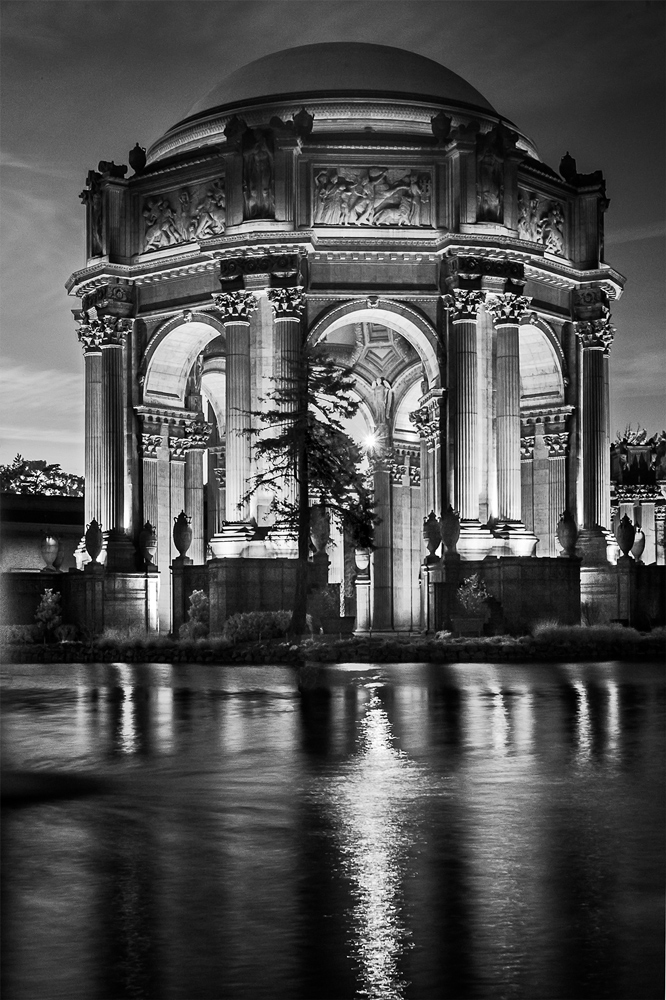
“Why black and white?” That is the question we are most often asked about our photography. Not a question with an easy answer – or answers. Our love goes back to early black and white films (think early Alfred Hitchcock or Orson Welles films). Certainly, early mysteries and adventure films were packed with high-contrast black & white images, especially when the high drama was sought.
Of course, influence came from our admiration of early black and white photographers – Ansel Adams, Edward Weston, Alfred Stieglitz, and many more of this period helped train our eyes to see and capture beautiful and unique images.

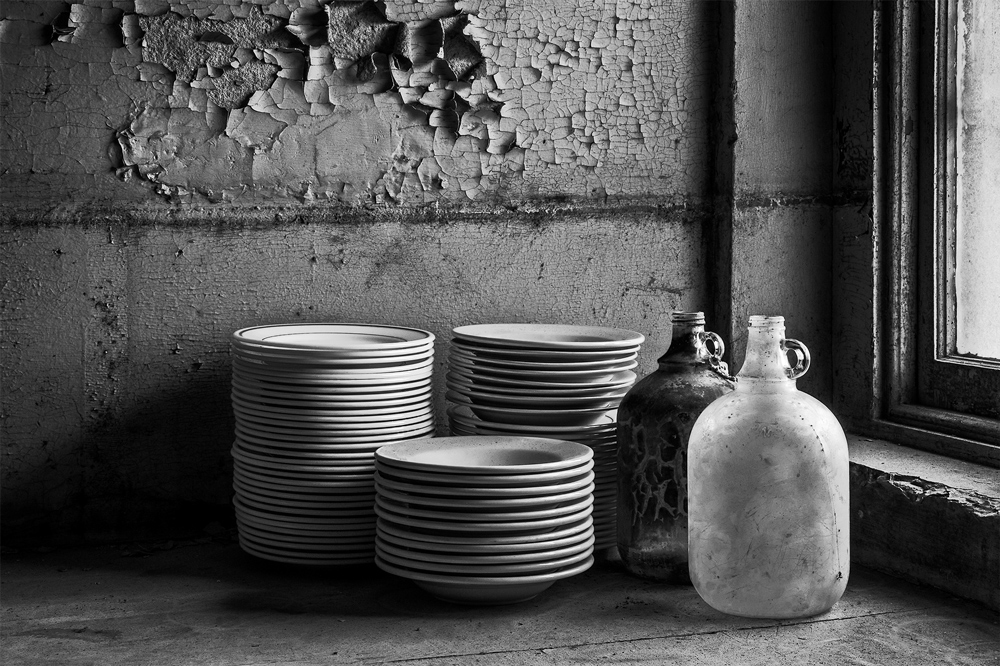
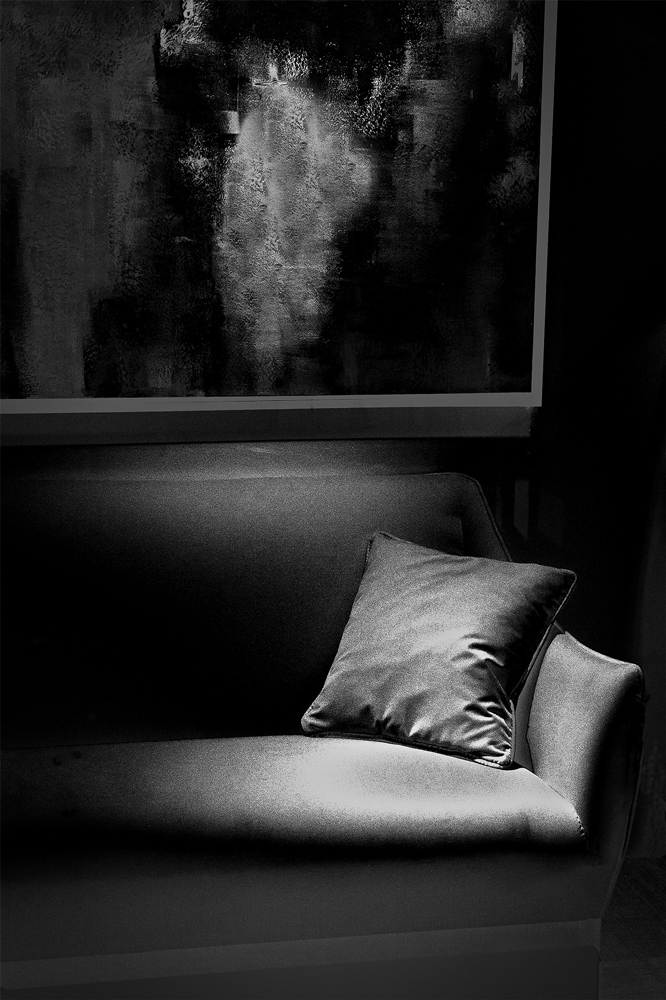
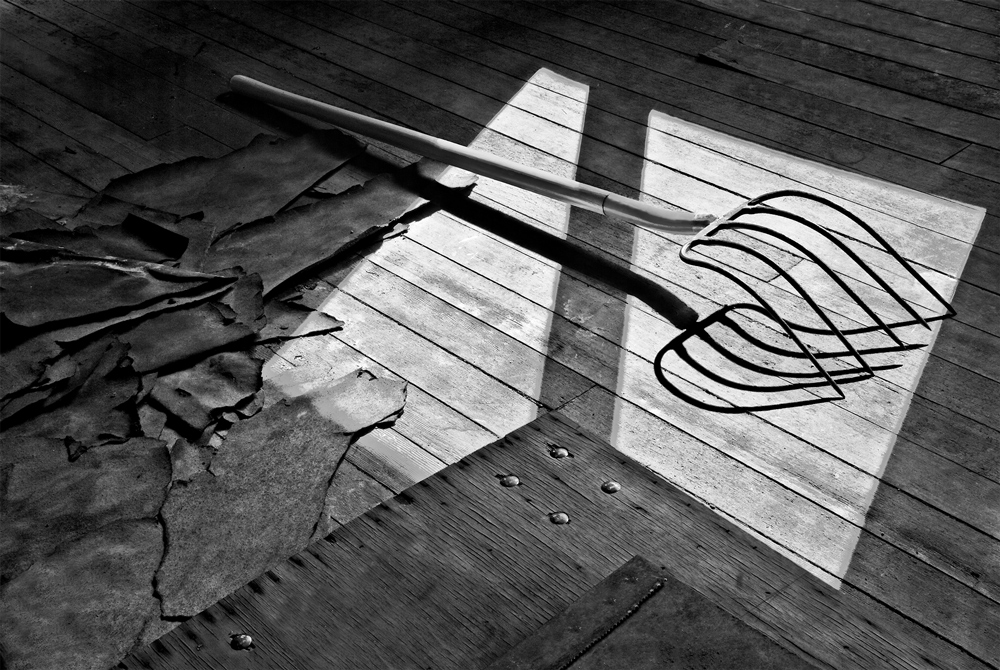
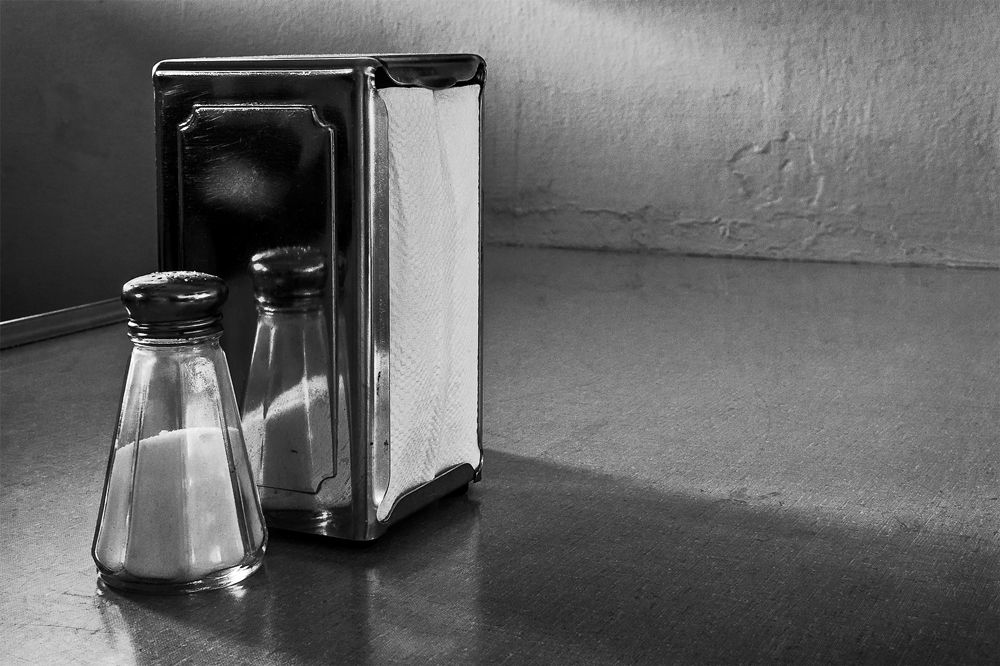
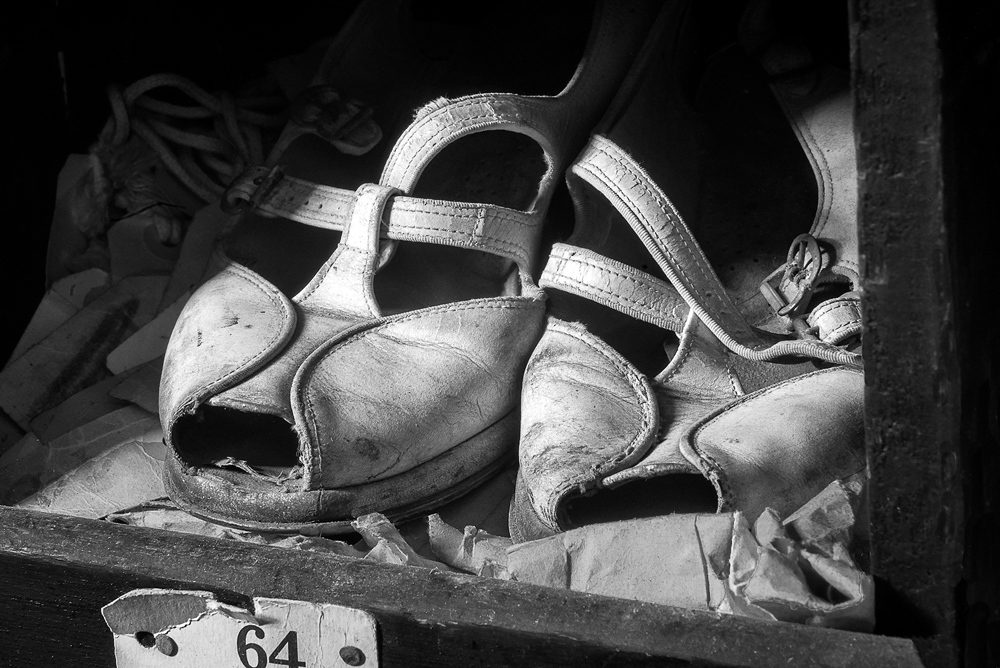
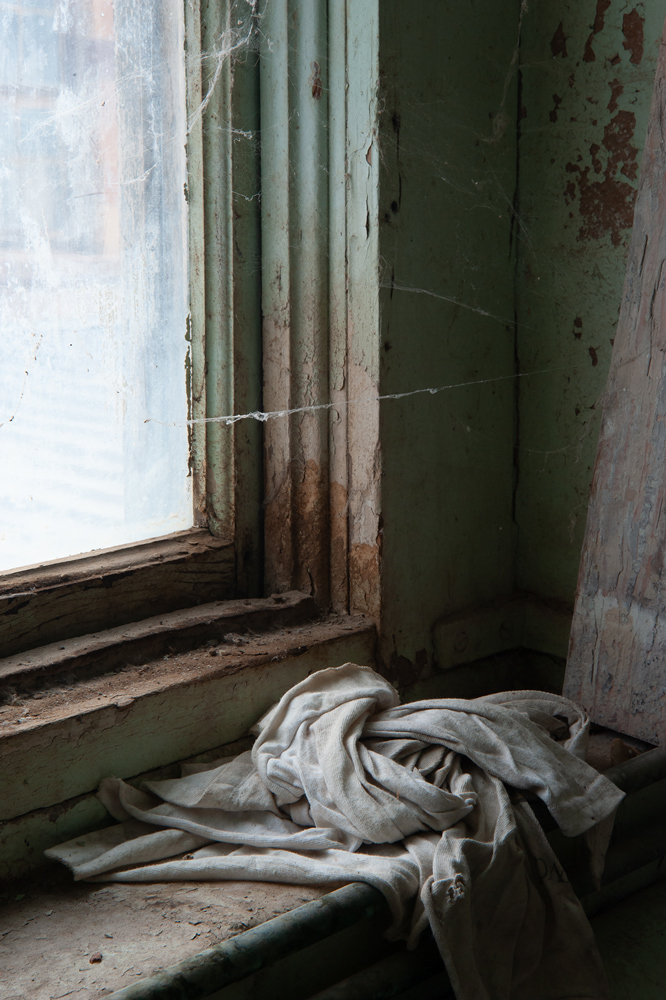
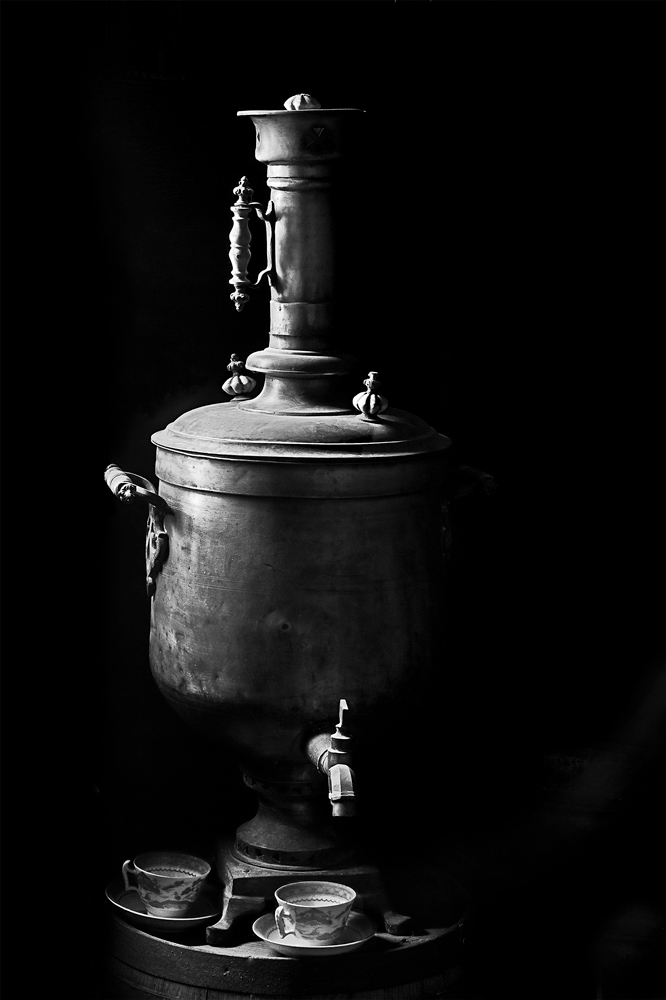
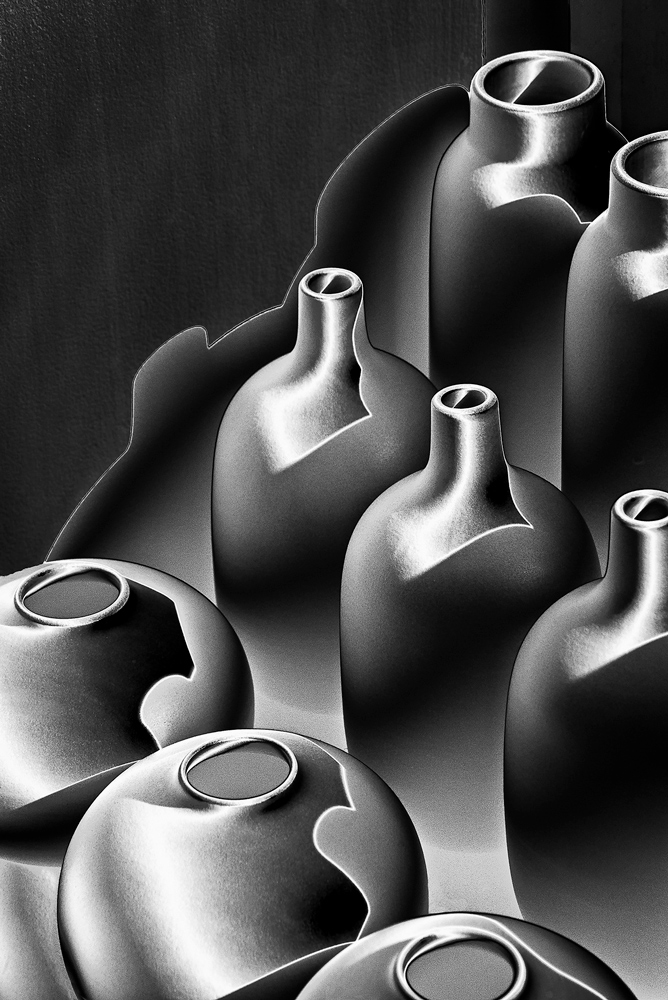
In training our eyes to see in black & white, we find beauty that others might miss – morning shadows on a lonely street, discarded toys in a play yard, an array of plates and bottles in an old gold rush kitchen. The list in endless. Before we trained our eyes to look at EVERYTHING, we would have just walked by or ignore these scenes. We love to rise early and search city streets for unique scenes with long black shadows.
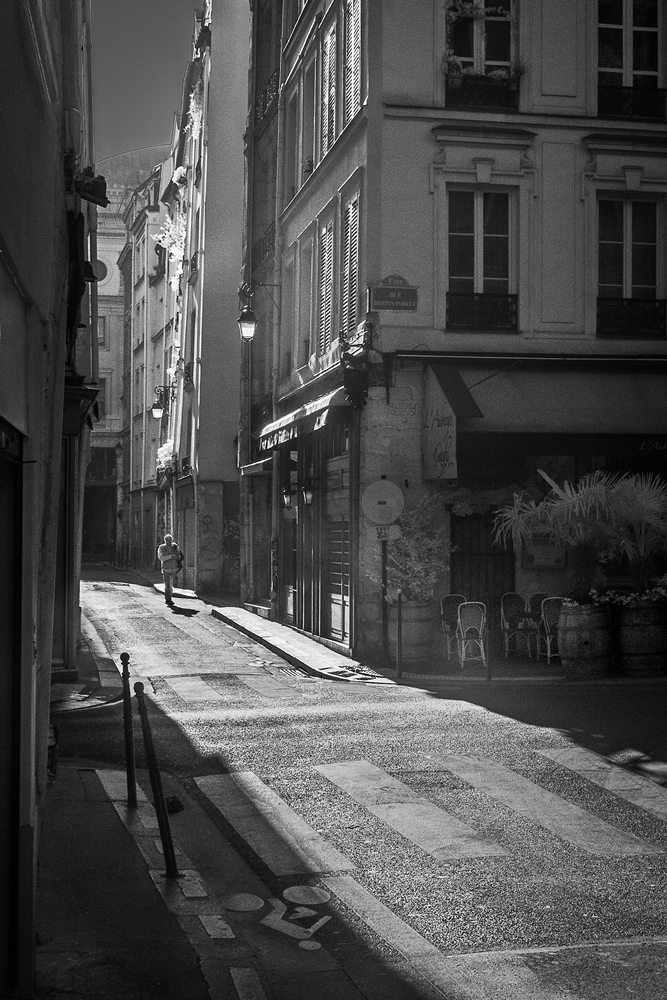
Another technique that helped in training our eyes was to lock ourselves (figuratively) into an area or just one city block; then search and search for images, walking back and forth to see the scene in different ways. Very often we would find good/interesting scenes that we missed on our first pass.
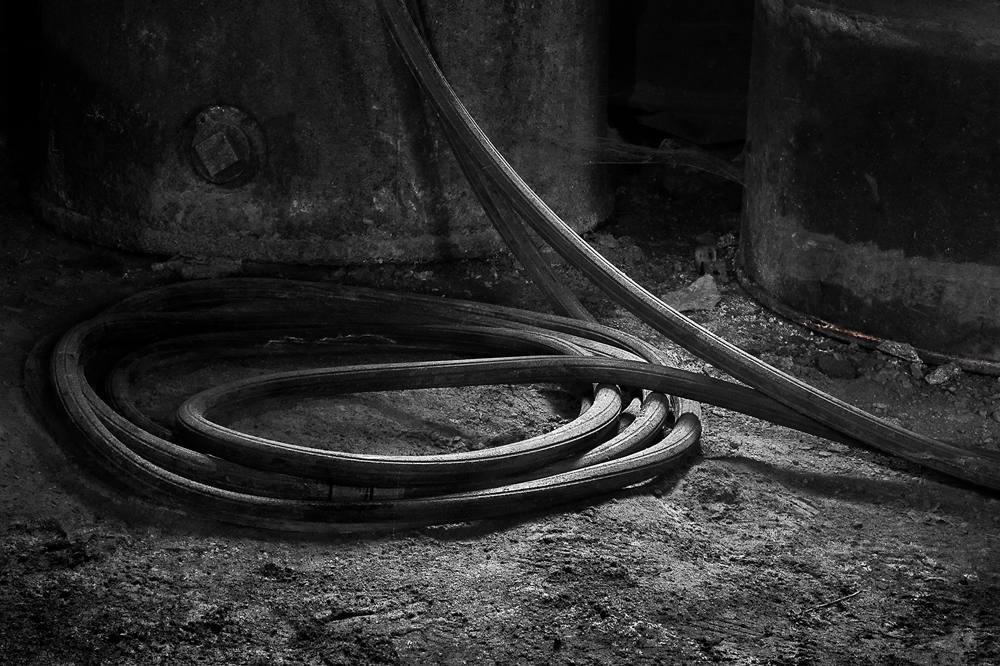
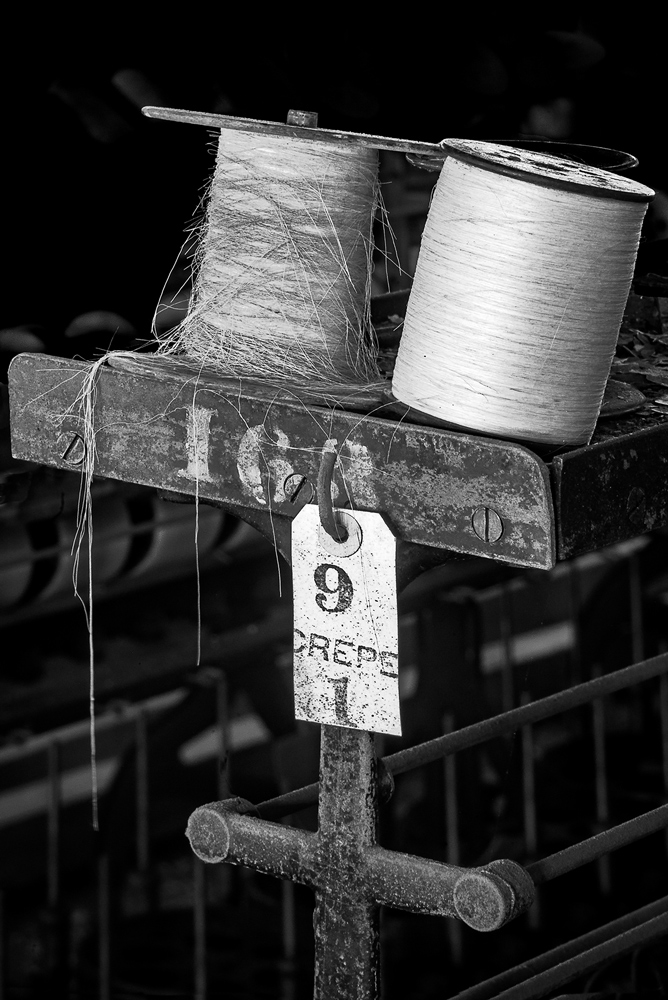
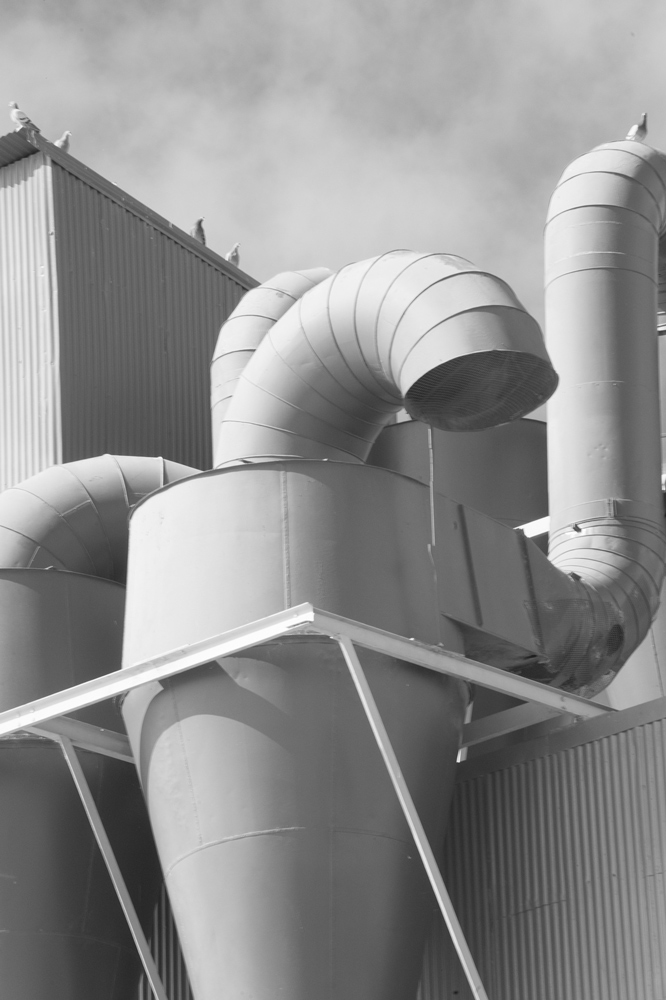
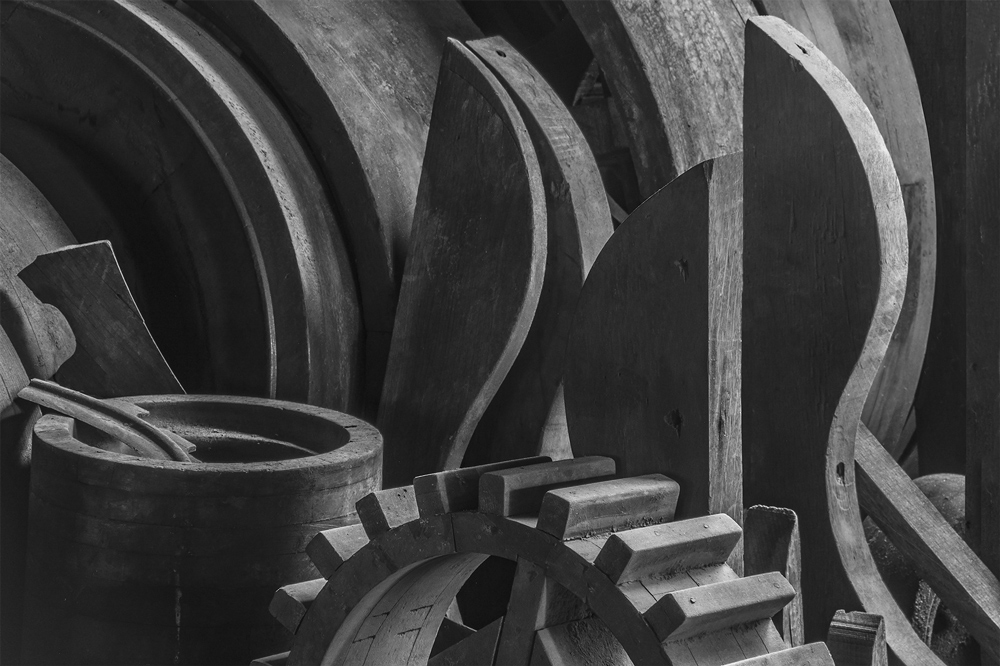
We shoot the world built by people. It can be a historic home, an abandoned factory, an old steam train, a lumber mill, a street corner, the list is endless. Many of our images isolate elements within the scene.
We do not shoot portraits; people appear only rarely in our images.
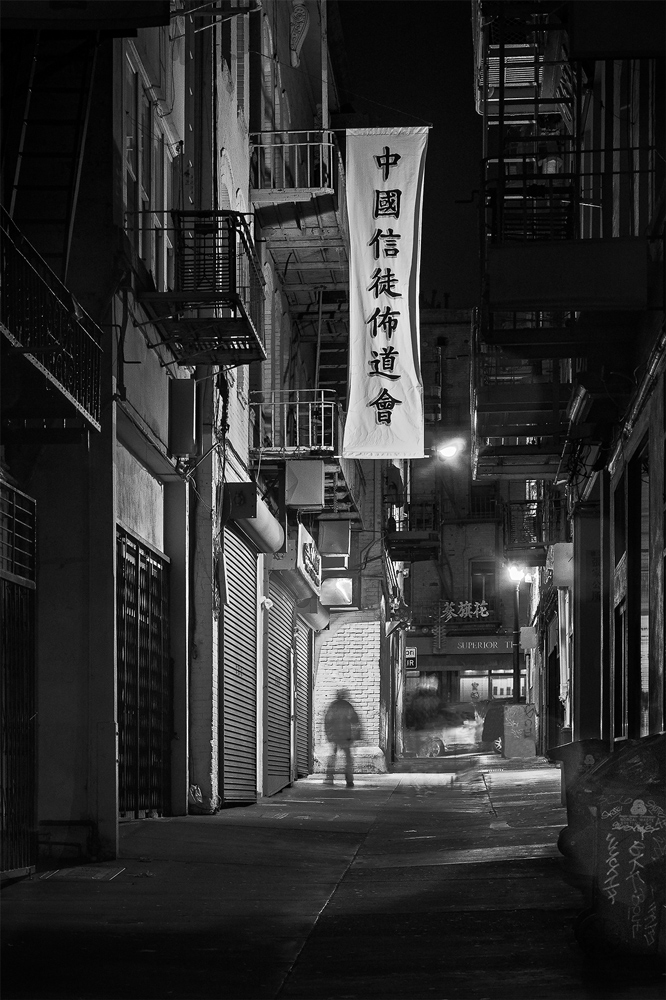

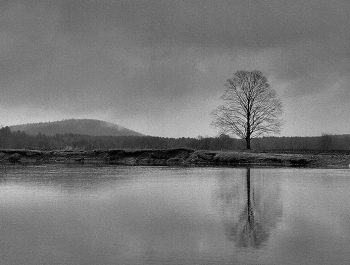
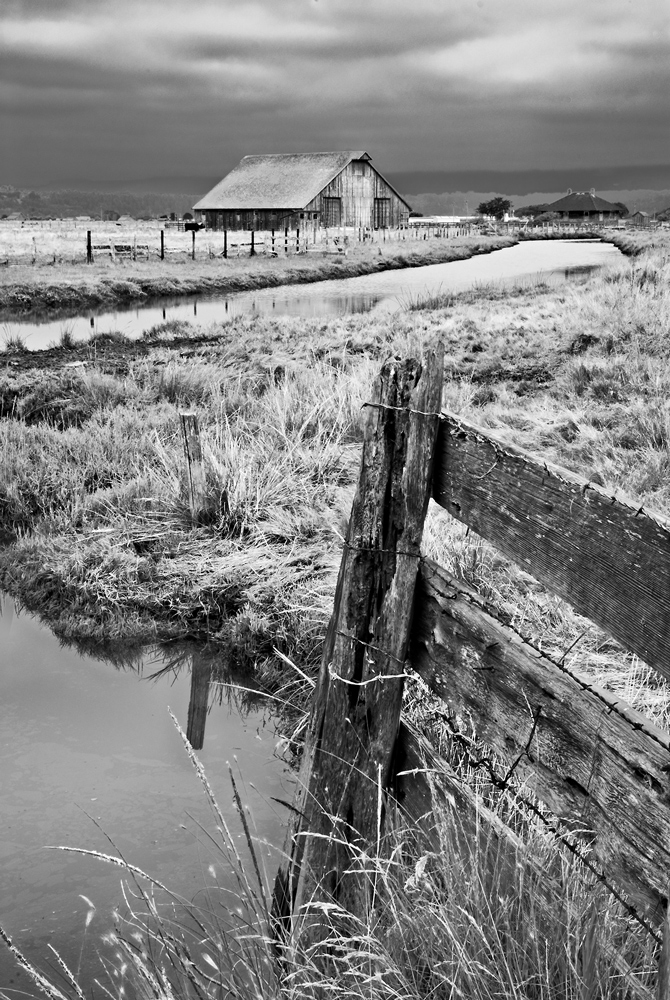
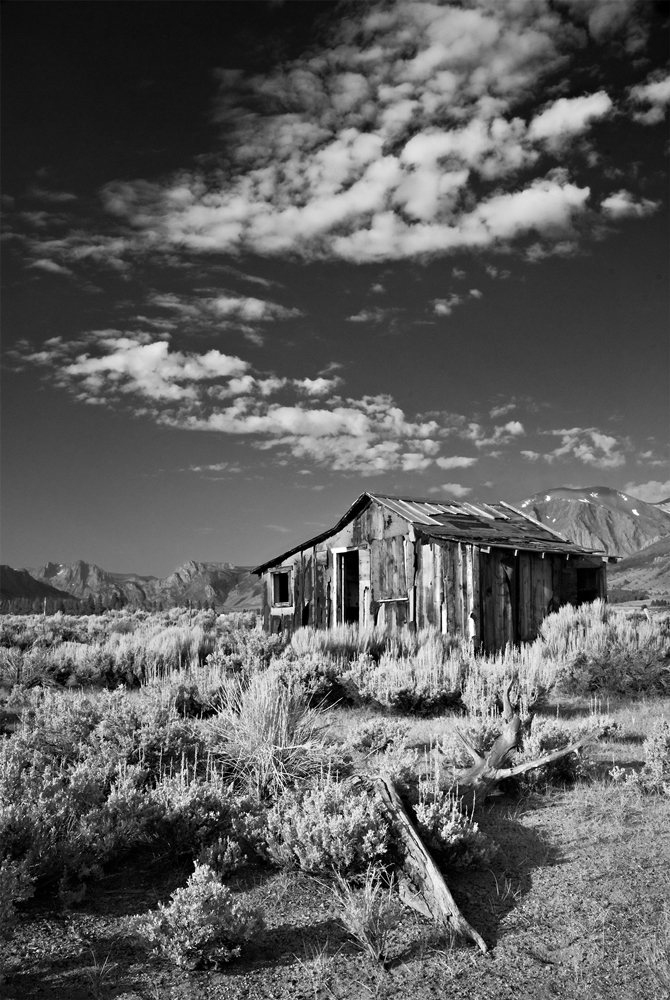
And we rarely shoot landscapes although they may appear as backdrops for a city scene, an old cabin, a fence, or an abandoned car.
It’s been said that our images capture scenes that others might walk right by – seeing the extraordinary in the ordinary.
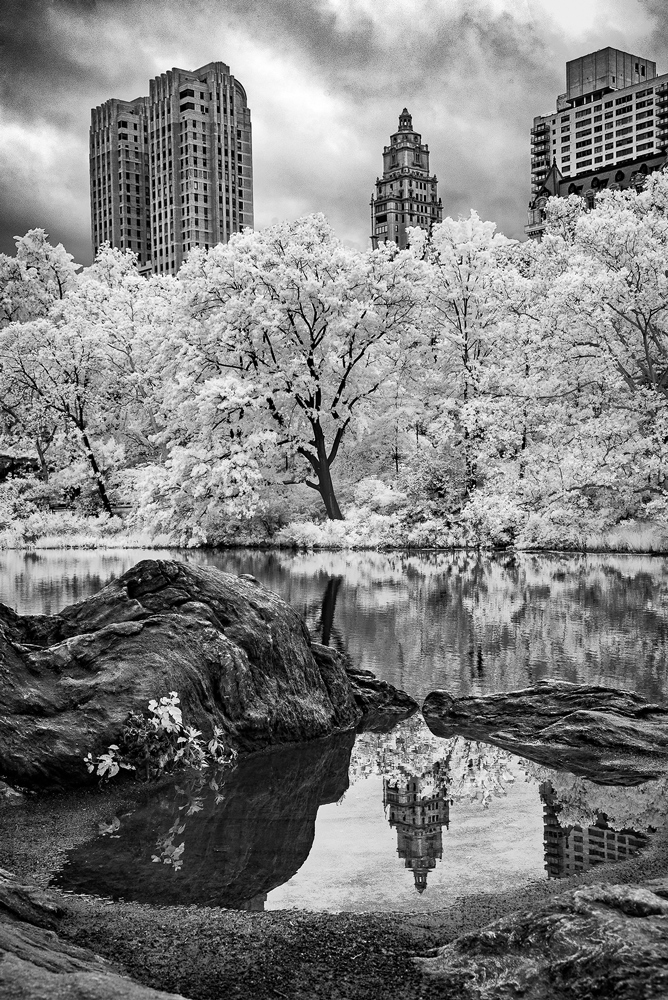
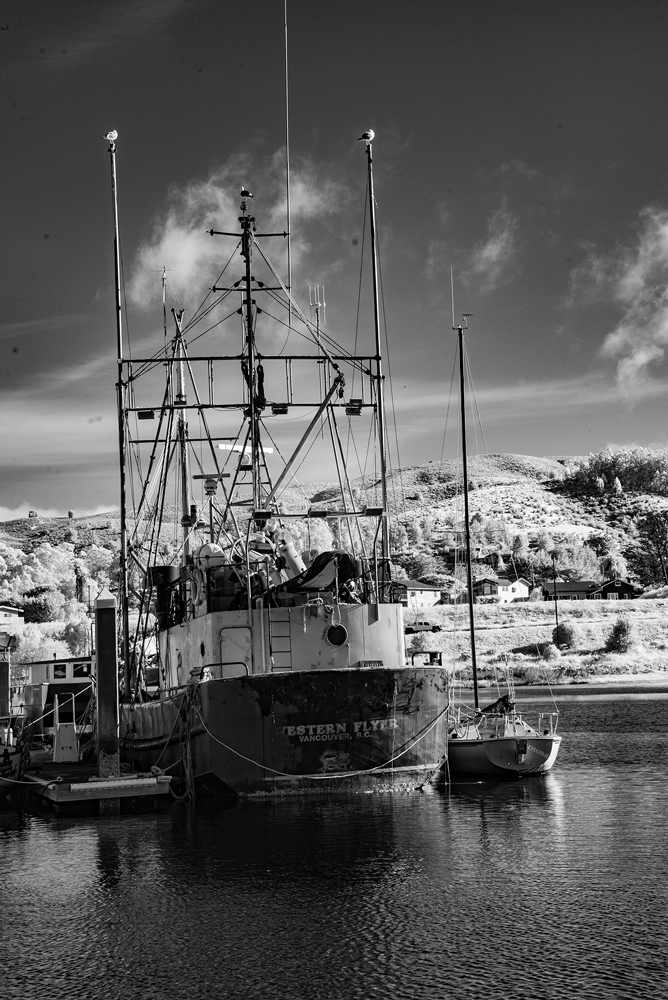
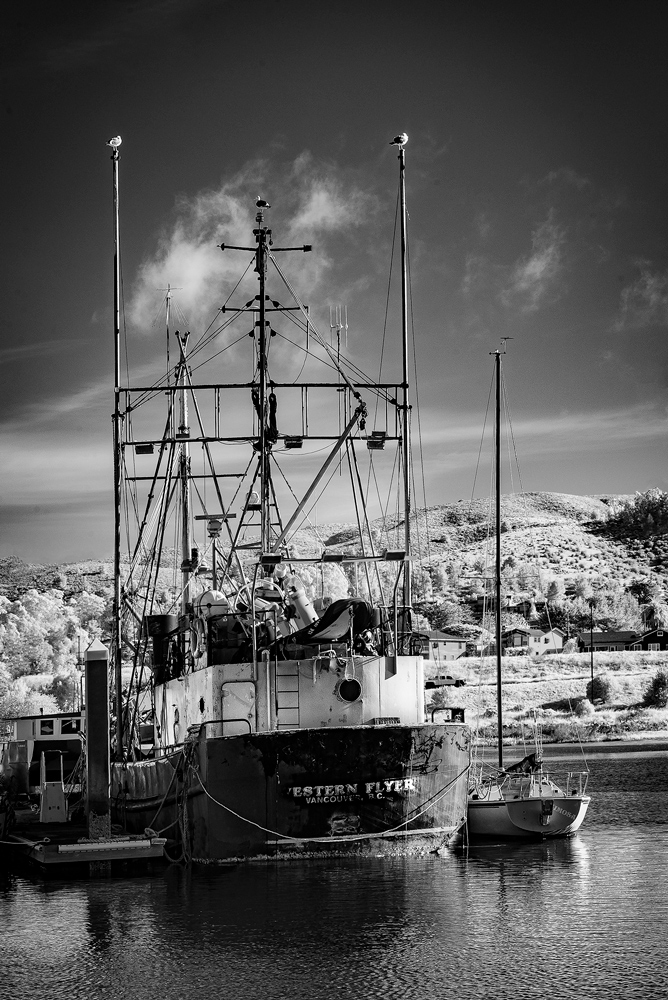
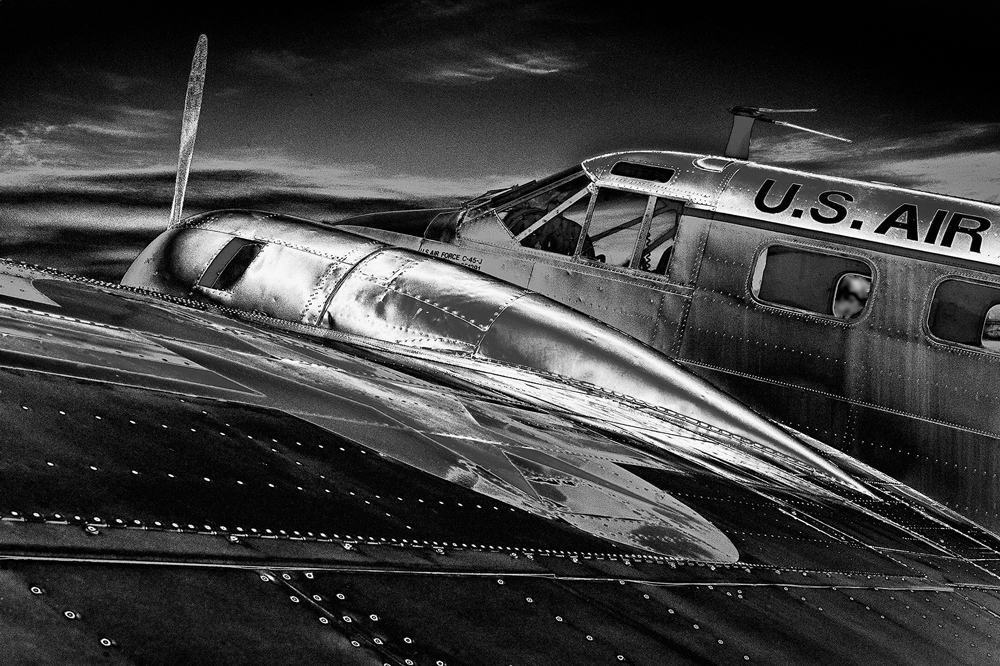
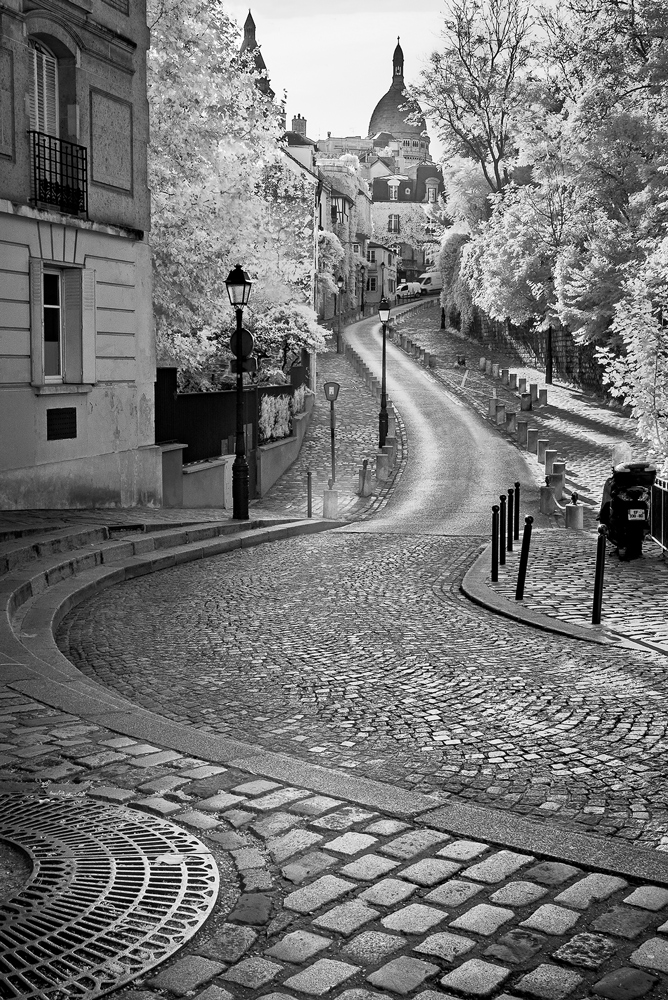
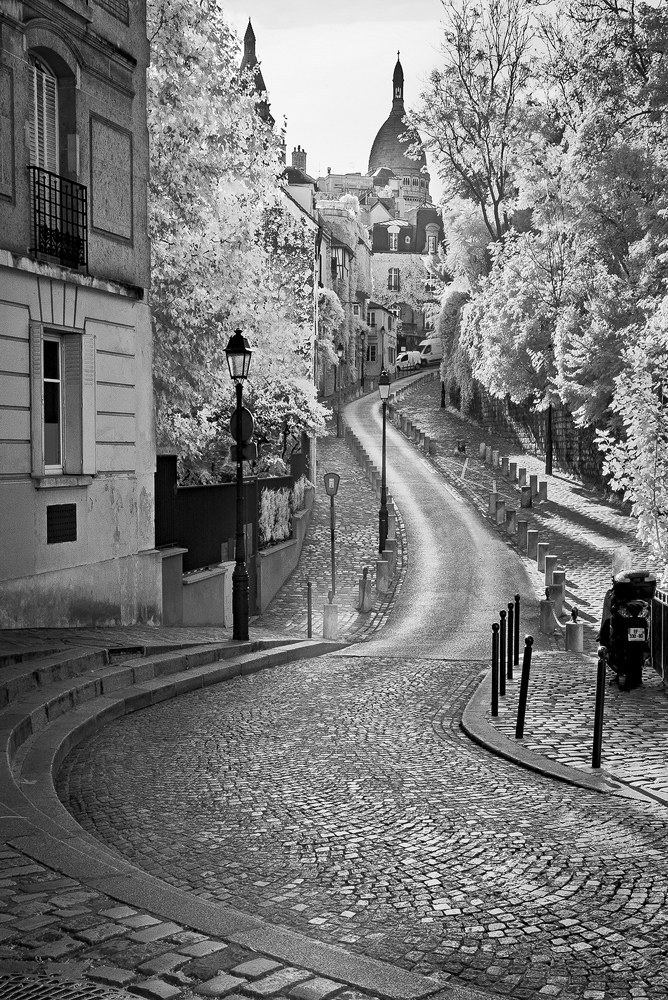
Tom: My digital cameras has been converted to black and white infrared by LifePixel www.lifepixel.com . Infrared is on a different portion of the light spectrum than what we humans see. Many of the colors are converted in infrared to different tones. Often greens and yellows, and sometimes reds, will convert to white, which is fine for black and white images. The blue sky is turned into very dark tones. The infrared effect is more pronounced if the sunlight is strong. In deep shade it may be much softer or not apparent at all. Until I shoot the scene, I do not know exactly what the image will look like. The in-camera image review is always a surprise! Sometimes good, and other times bad. Just another joy of photography!

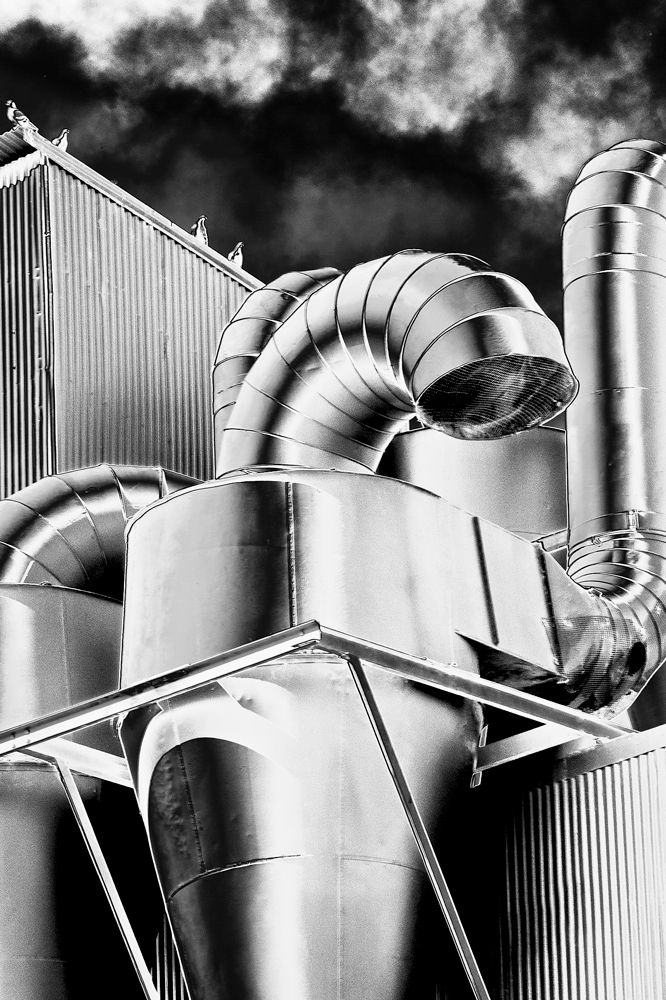
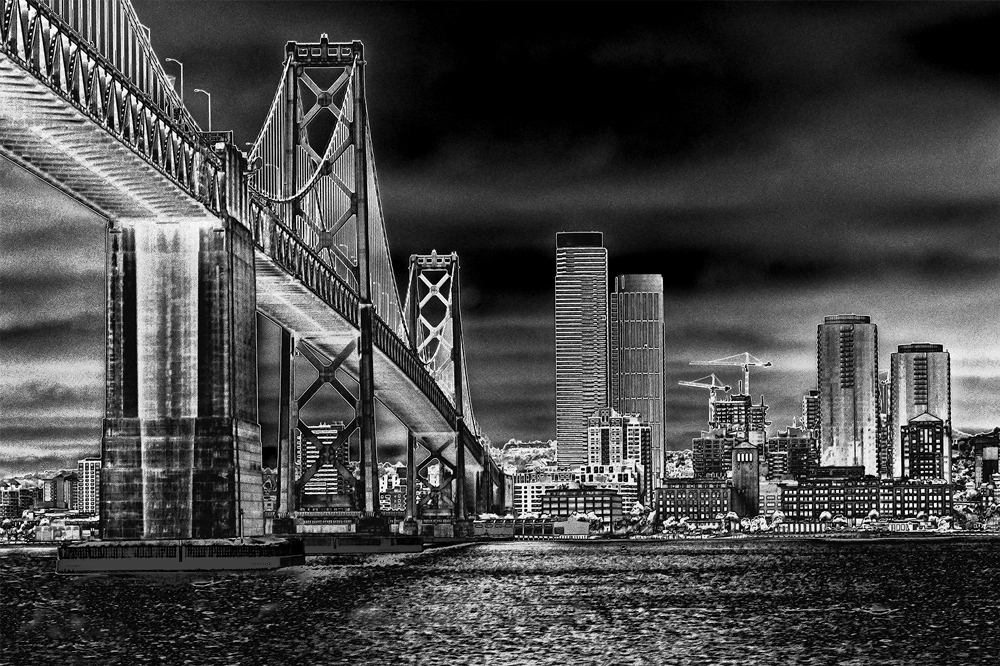
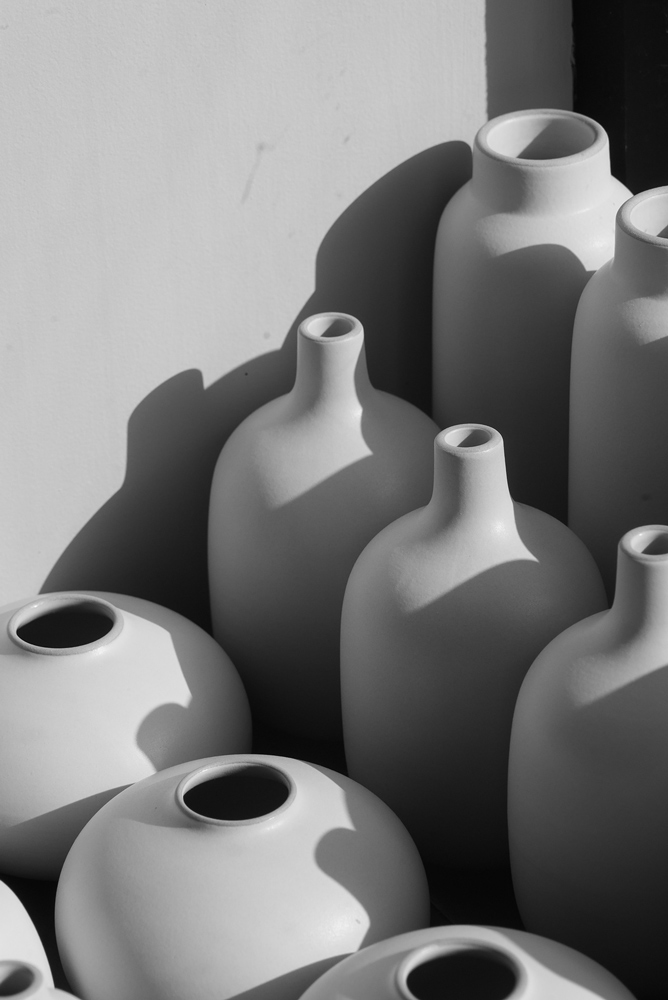
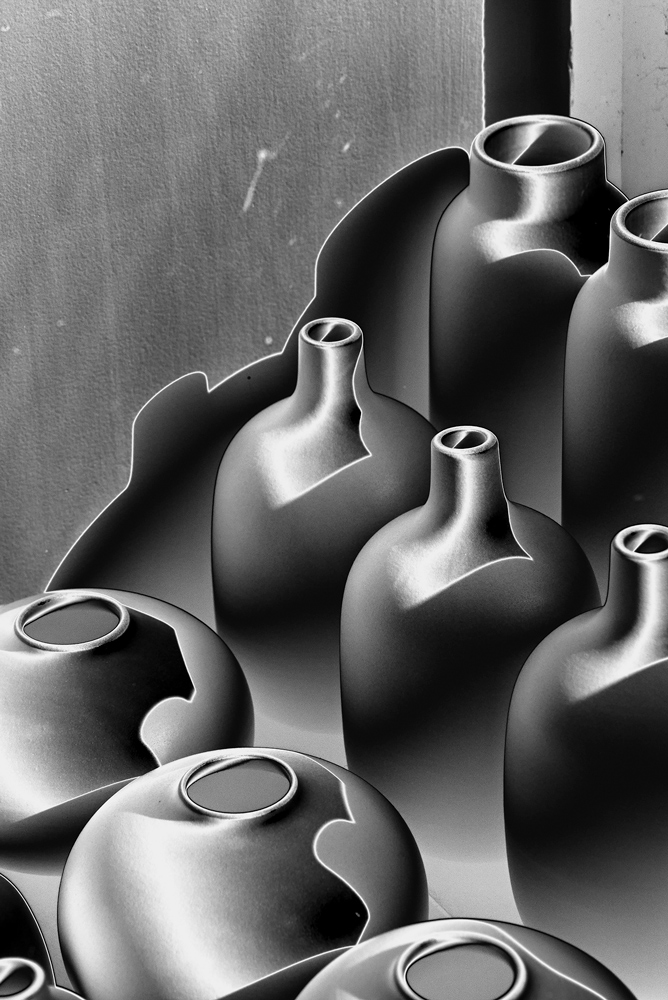
Tom: I also look for scenes where I can apply a digital solarization effect in the computer.
Man Ray and Lee Miller used this technique in the 1930s and 1940s by exposing the negative or print to light in the chemical darkroom. I developed a technique in both Lightroom and Photoshop that produces a similar look. Generally, it has the effect of reversing the lights and darks. Then the sliders in the Basic panel in Lightroom or the curve layers in Photoshop are employed to further enhance the effect, searching for the high contrast that I seek. (We’ll go into more detail on solar conversions later.)

Shooting the image is only the first step. Now we ‘develop’ it in Lightroom and Photoshop to create our style of black & white.
Lightroom – what we do in Lightroom and what we leave for Photoshop.
Tom: My infrared camera captures images in reddish and white tones, not in color. I import them into Lightroom in the Black & White mode.
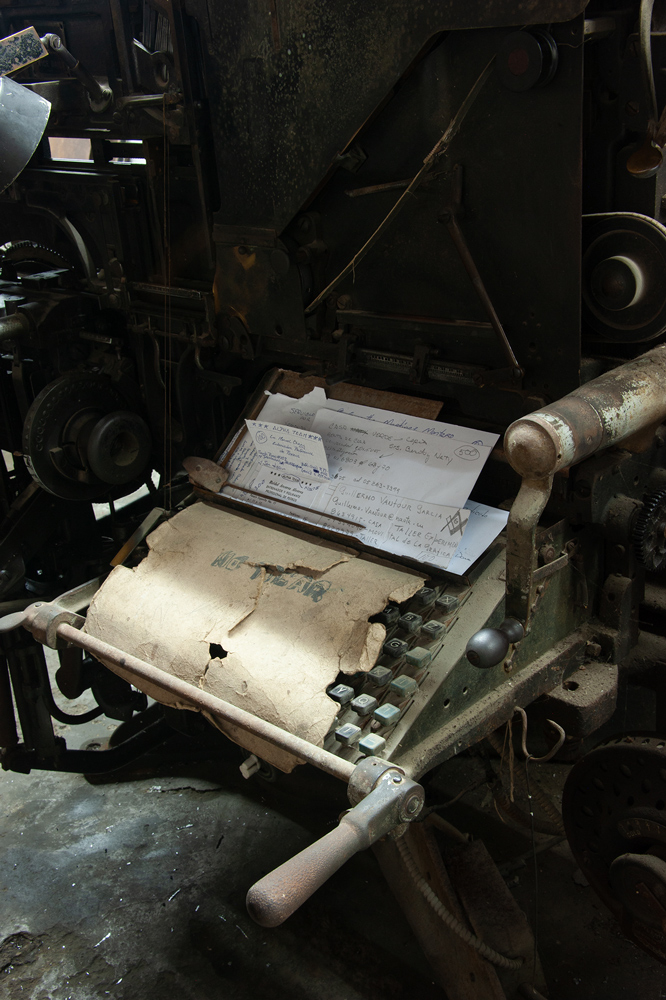
Marj: Since I’m shooting with a ‘regular’ color camera, I import the images in the Color mode. But I set the Saturation to -100 (100% desaturated) so that I can see how the shades of gray are separated in the exposure. As I make adjustments, I regularly switch the saturation between the RGB colors in the camera capture and this 100% desaturated view.
After we import into Lightroom, we analyze the image to get a ‘picture’ in our mind of what we want to accomplish as the end result. What was it that caught our eye, that made us stop and shoot? If there is a story to tell or a mood to capture, how do we use the computer software to accomplish this.
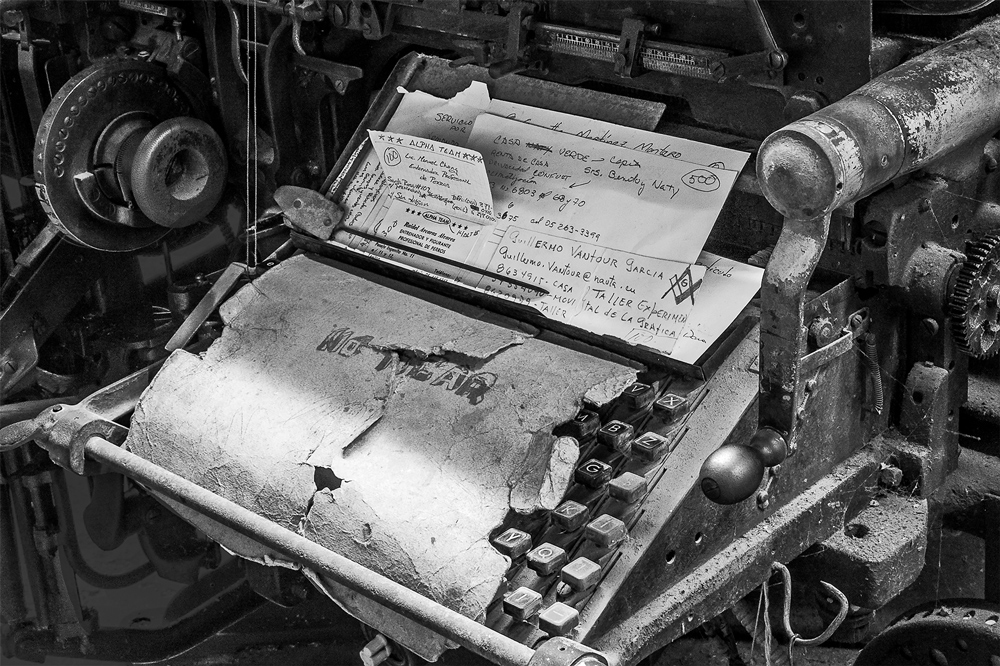
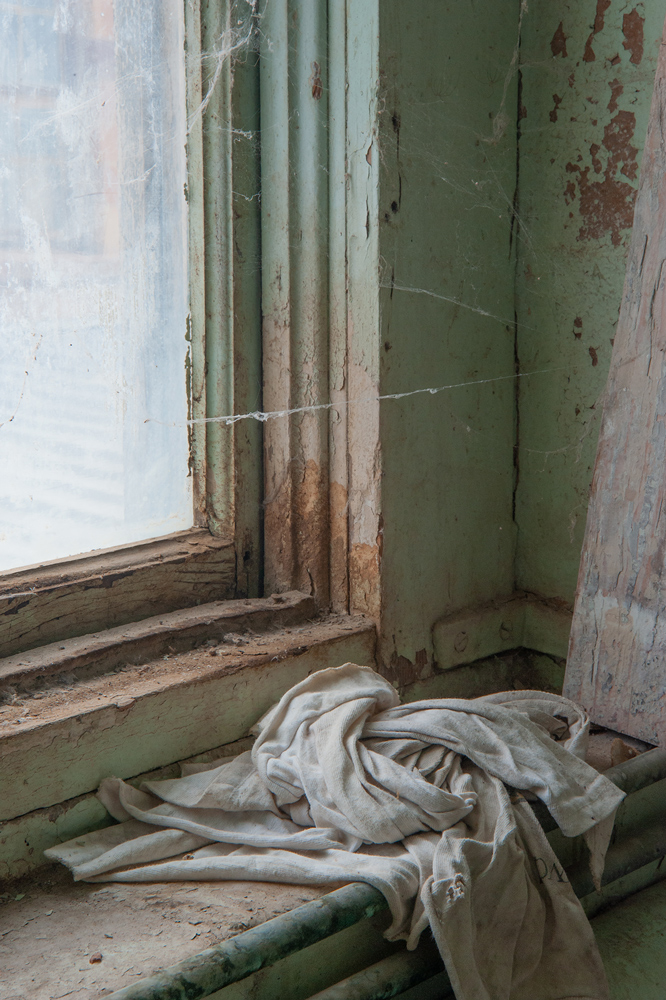
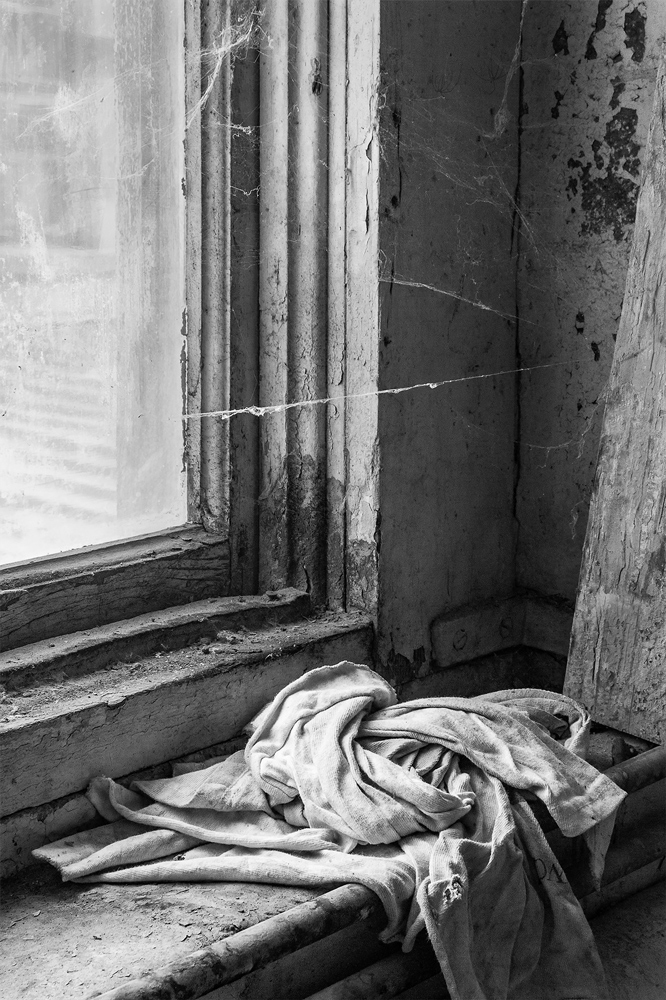
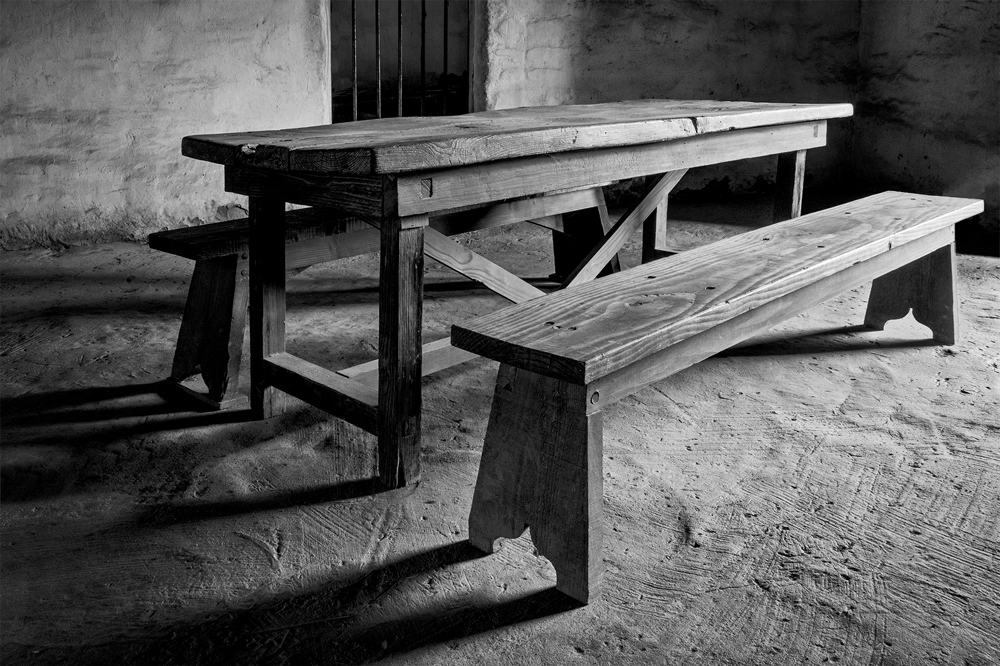
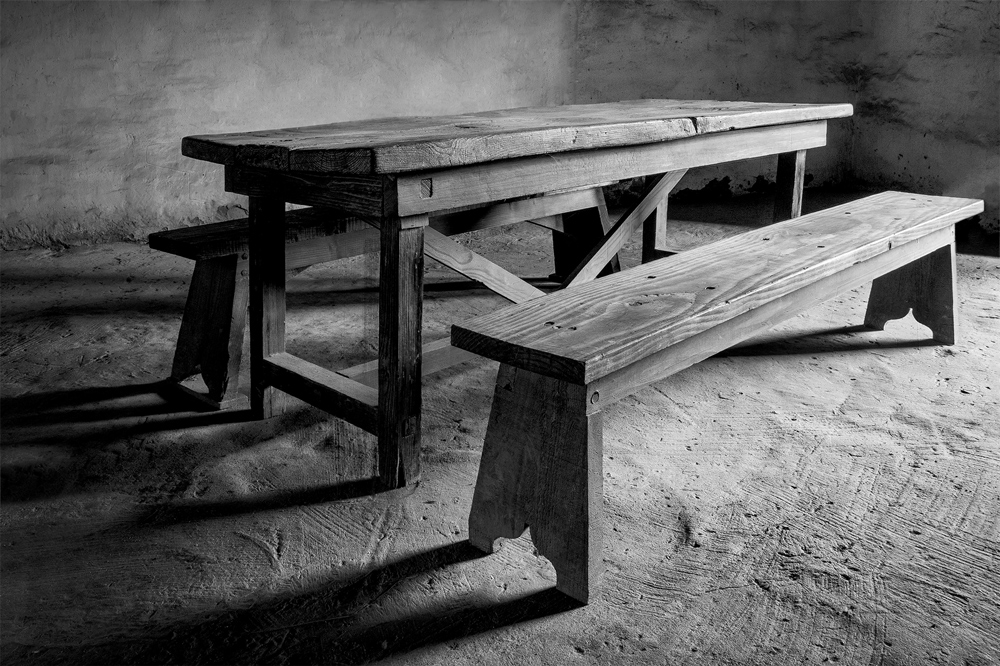
We start by concentrating on the Lightroom Basic Adjustment panel for global adjustments. We pay particular attention to the Shadows and Highlights sliders to separate the darker and lighter tones. If the image has bright areas with little detail, we’ll darken the Highlights to separate those tones. Similarly, if the dark tones prevent us seeing into areas of importance (we shoot a lot in abandoned buildings with the only light coming from broken windows), lightening the Shadows will open them up and add detail. Mastering shadow detail is critical for our black and white images.
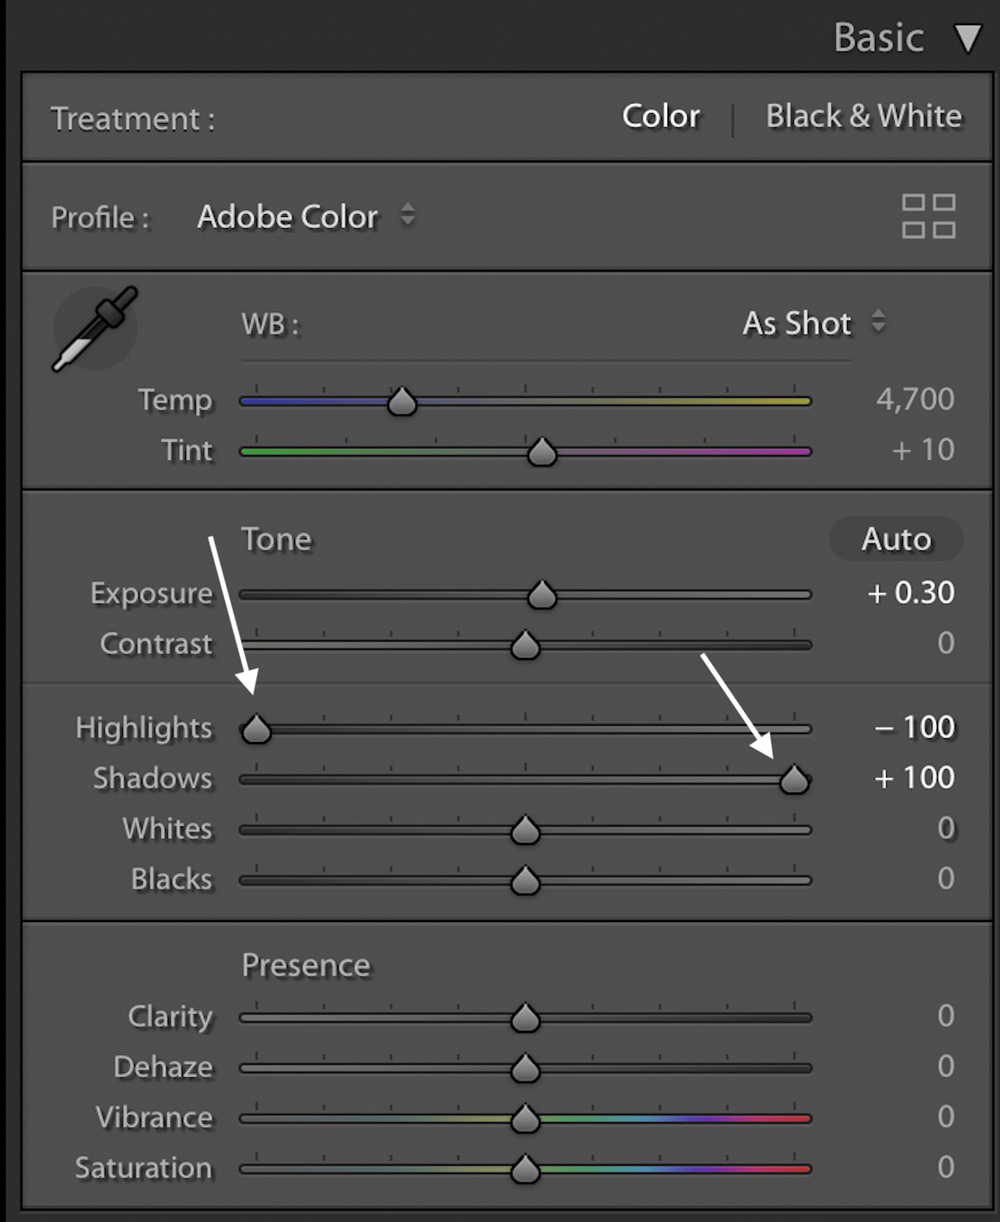
While each exposure is different, it is usually only after dealing with the Highlights and Shadows that we’ll adjust Whites, Blacks, and Exposure as needed.
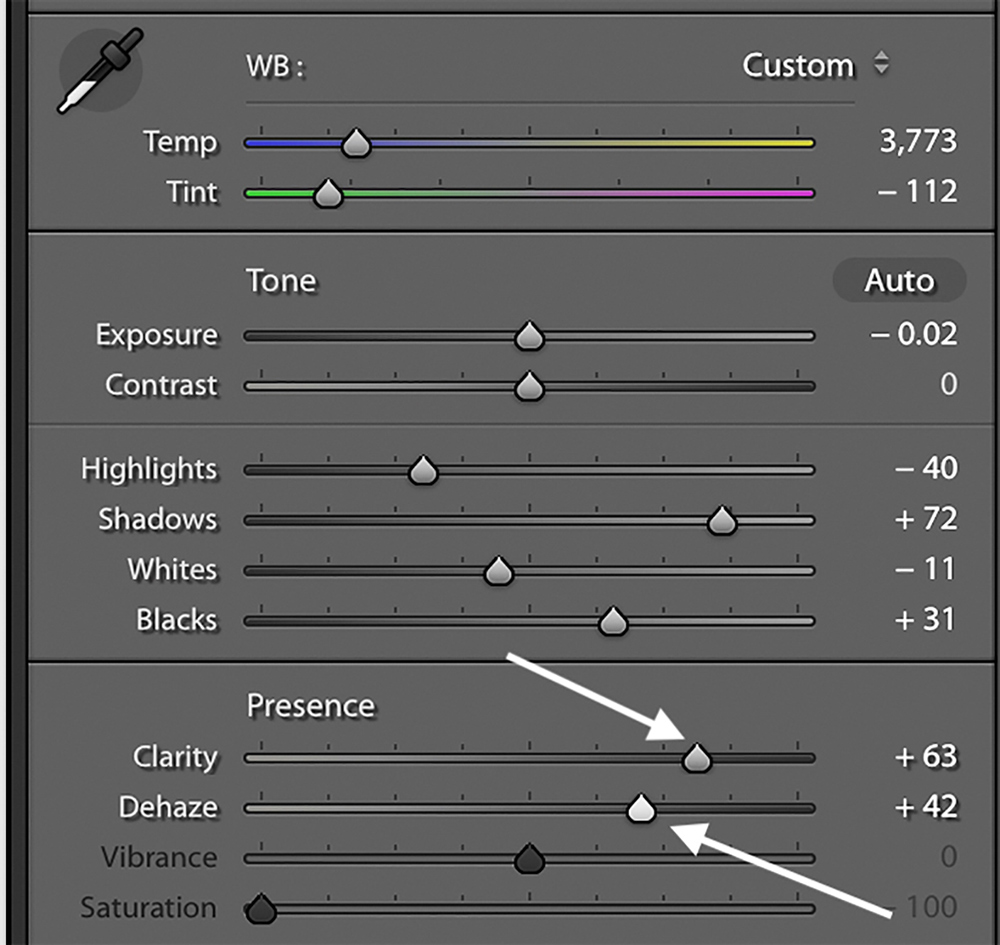
Next, the most important sliders are Clarity and Dehaze. We almost never use the Contrast slider as it tends to compress the white and black tones. Instead, we increase the Clarity slider. It boosts the contrast in ALL tones — whites, blacks, and mid tones. The only problem with Clarity is that it can sometimes create halos in the image if the slider is pushed too far.
Dehaze was created by Adobe to deal with the haze in images (think long shots of distant landscapes). We find adding a little amount of dehaze can be extremely useful to darken and add detail to the image.

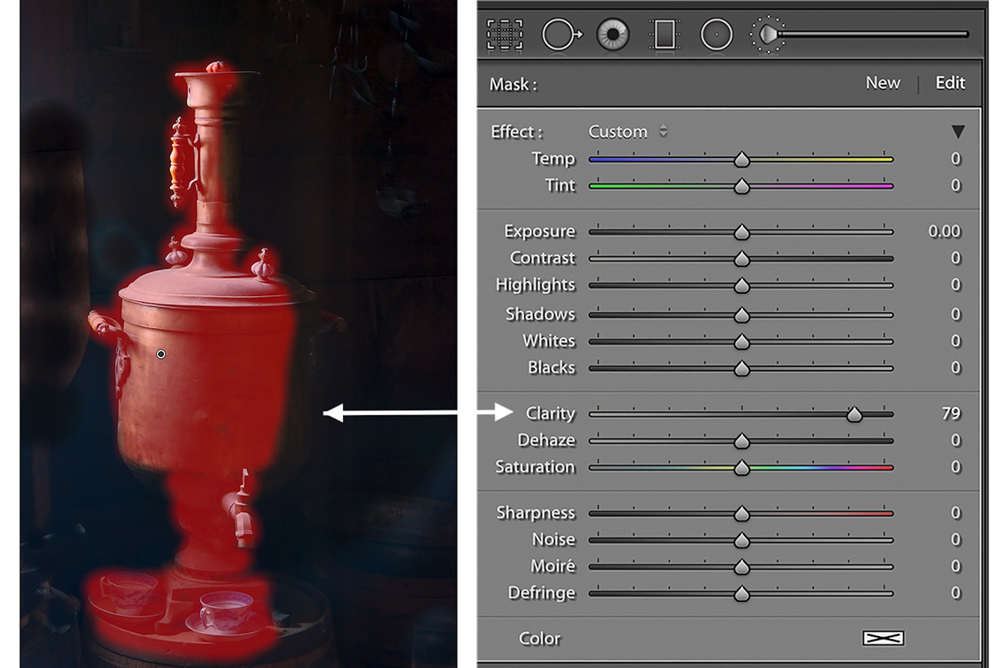
All the above Lightroom changes have been global adjustments to the entire image. We wait until the image is exported into Photoshop for precise local area adjustments. However, occasionally, we want to make changes to areas that can be defined with loose masks. This is particularly true if we want to add Clarity or Dehaze only to specific areas. Neither adjustment is available in Photoshop. In these cases, we’ll use the Local Adjustment Brush. The Brush allows us to make all the same Basic panel adjustments but has them change only the areas we define.
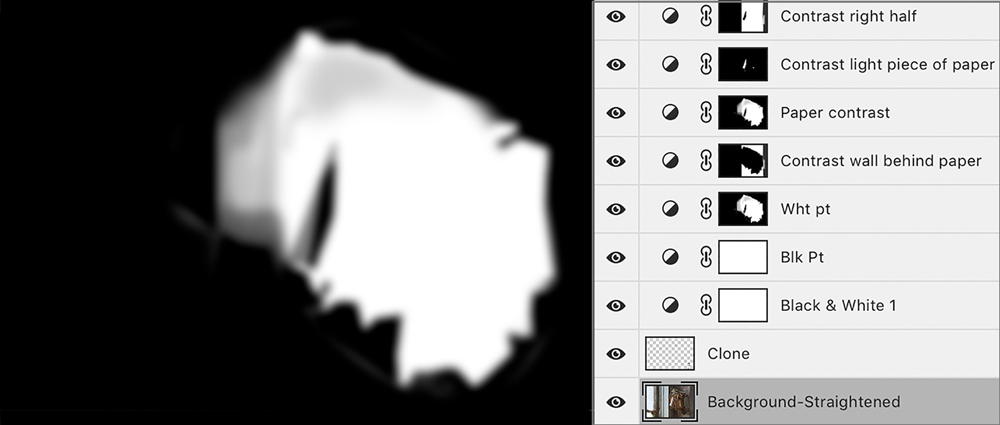
The Transform panel function in Lightroom has been greatly improved. With a simple click of the Vertical or the Levels button, images can be straightened. However, Photoshop’s transformation ability is greatly superior, so we only do simple Transform adjustments in Lightroom. Similarly, we generally leave any cropping until the image is in Photoshop.
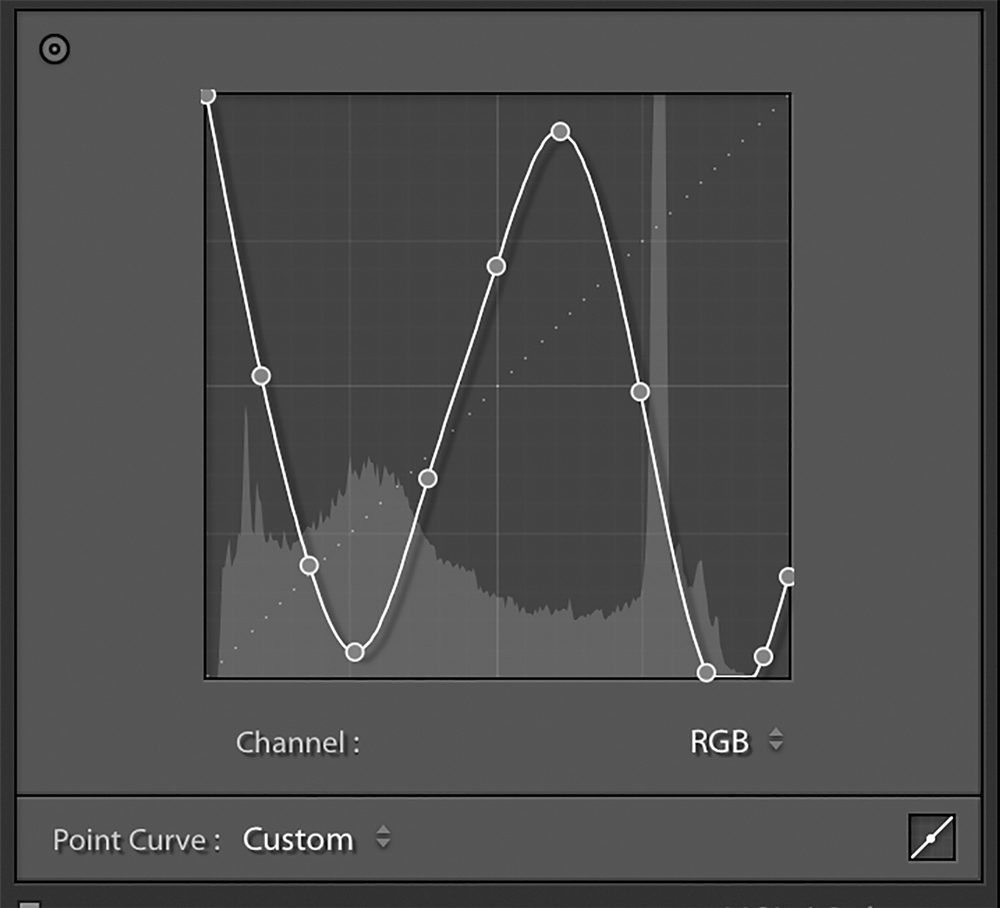
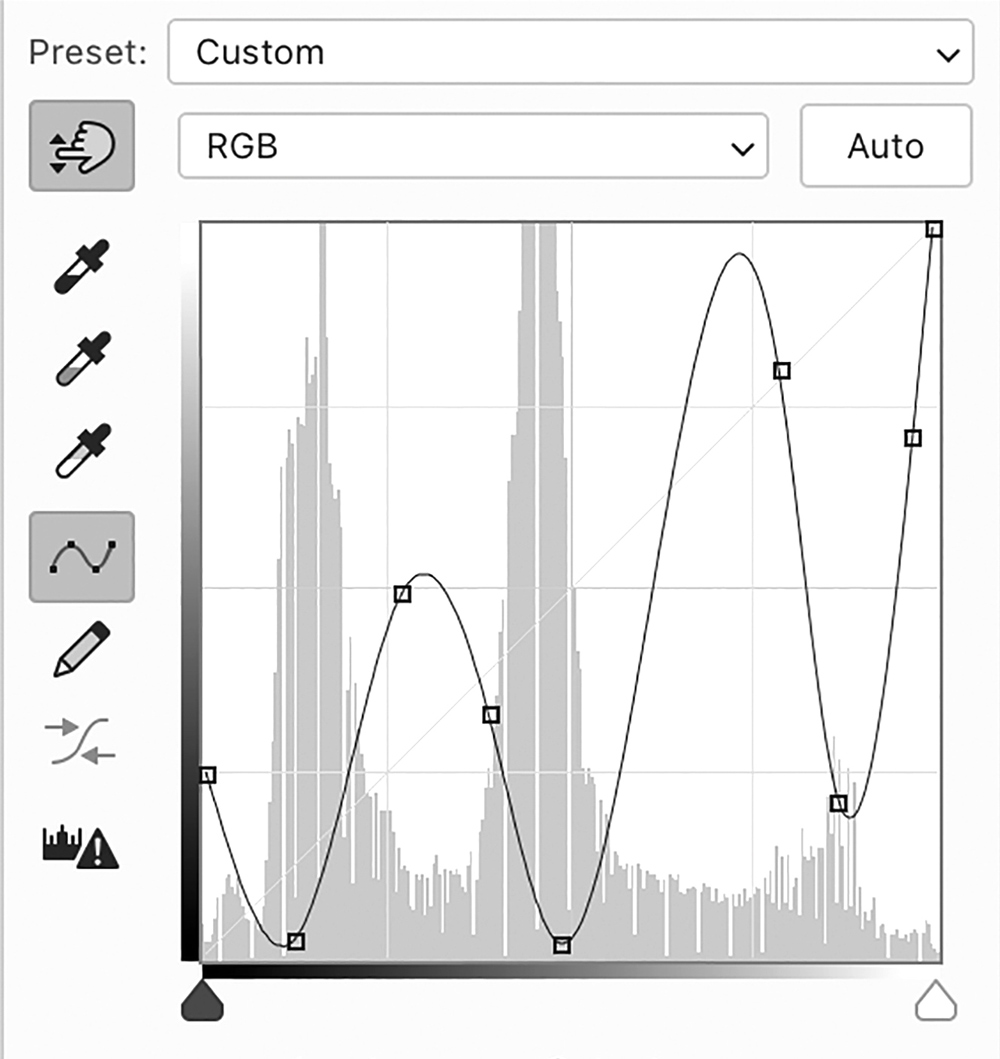
Tom: As mentioned earlier in this article, I also look for images where I can apply a digital solarization effect. To create this, I’ve set up 3 Develop Presets that use the Tone Curve panel in Lightroom. After deciding which preset is best, I can play with the curve or go back to the Basic panel to change any of the settings to emphasize the high contrast look I seek. Sometimes I’ll wait to solarize the image in Photoshop.
Marj: Before exporting the image to Photoshop, I set the Saturation slider back to zero so that the image is exported in RGB color. I may also increase the Vibrance slider before export to add saturation to the less saturated colors that will help the image when I convert it to black & white.
We export our Images to Photoshop in the psd format set to 16-bit with the Pro Photo color profile.
Photoshop – how we use Photoshop to accomplish the style and look of our black & white images.
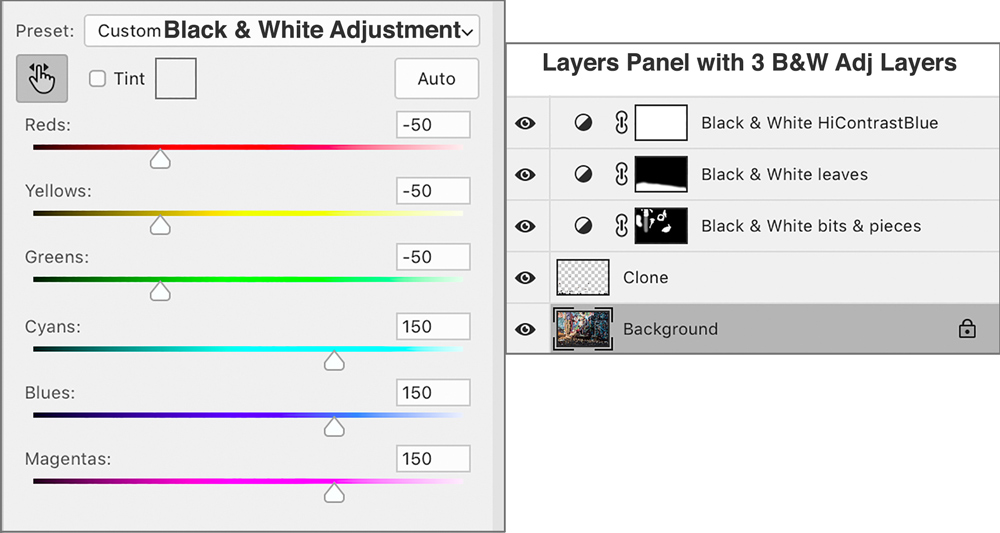
Photoshop allows us to isolate specific parts of the image through the use of layer masks. A mask is simply a selection of part of the image to be used with an adjustment layer. The selected part (the white area of the mask) will ‘see’ the changes made by the adjustment; the unselected part (the black area) will not. Our selections are usually made using either the quick selection tool or the lasso tools. Feathering the selection creates areas of gray which will be partially changed by the adjustment to seamlessly blend it into the entire image.
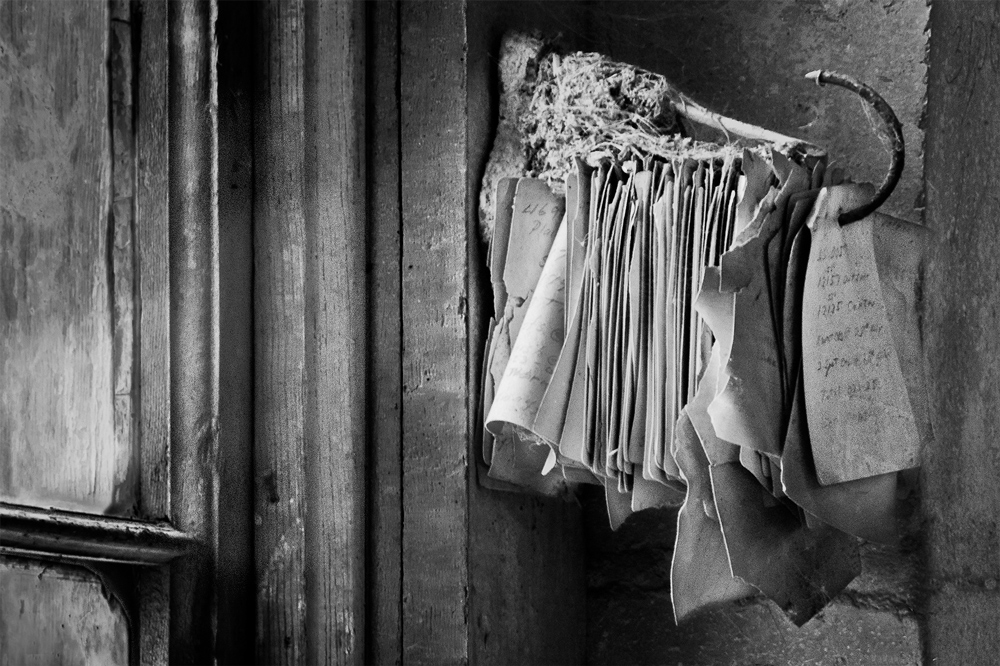
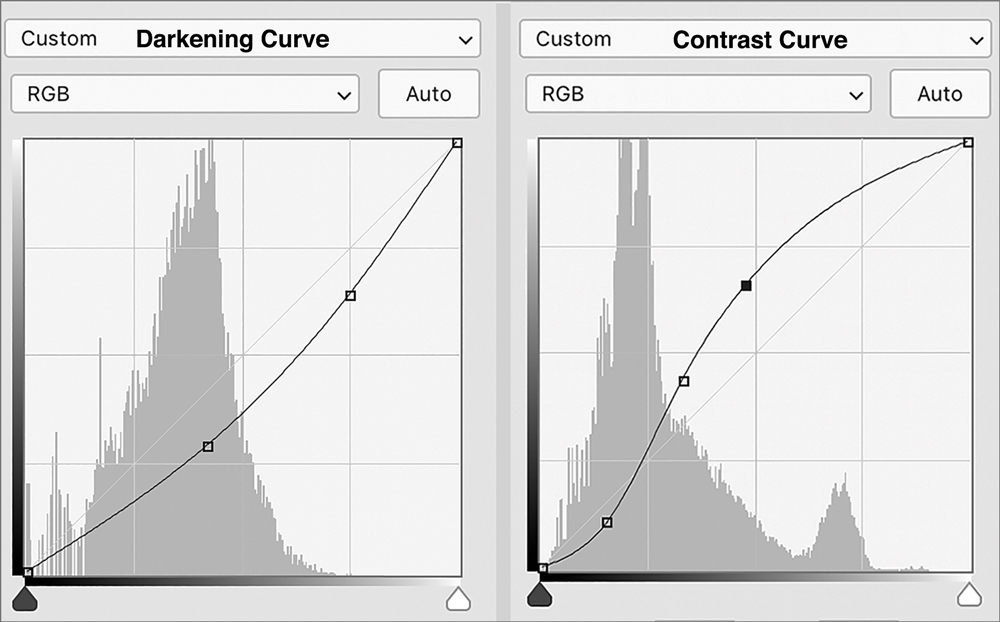
We use Photoshop’s powerful curve adjustment layers to create the contrast, shape, texture, tone and details of the final image. We decide which areas should be brought out and which should recede into the background. We also decide if we need to move the light around to ‘create’ light that wasn’t present in the original exposure. A curve adjustment can lighten, darken, add contrast, or all three.
Marj: I turn my color image into black and white using a B&W Adjustment layer. I wait to do this In Photoshop and not Lightroom because I can use multiple B&W layers with layer masks to apply different settings to specific areas. I look at the default, high contrast red, and high contrast blue presets to decide which is the best starting point and then play with the sliders to get the best effect.
Tom: For my solarization routine, I’ll sometimes wait until I’m in Photoshop to solarize the image
All of the work in Photoshop is non-destructive. The changes are isolated on separate layers leaving the original pixels of the background image unchanged. If we need to transform (straighten/scale/distort) an image, we’ll create a duplicate of the background layer. Because the adjustments are on separate layers, we can always go back and make changes (or even delete layers) as we work toward the final image.
A word about our cloning – we consider our images art and not photojournalism. If we want to get rid of a cigarette butt, remove a doorway, or add foliage, we do it. Combining shots to create a better sky or add an object to an image that wasn’t originally there are also possible. It all depends on the final image we’re creating. Cloning/healing brush/replacing objects, etc are done on separate layers immediately above the background layer. Cloning and compositing take a lot of time, but they can really improve an image.
We then create a duplicate image that is flattened, sized and sharpened for our first proof print. The wonderful thing about both of us being photographers is we can critique each other’s work. While we sometimes ‘nail’ it on the first print, the vast majority of the time we’ll go through several drafts to get to the final version.
Lightroom and Photoshop are great tools. Now that we have learned the effects we can create; this gives us a wider world to choose from when we are out shooting. And, as the software improves, it is a never-ending learning cycle from deciding what to capture through deciding how to get to the result we visualized. We see scenes not as they are, but as they can be. It is called creating, and we love it.
One final note: over the years, we’ve had some wonderful teachers who have increased our knowledge of shooting and optimizing images. If you ever get a chance to take a workshop from Charlie Cramer Tim Grey or Mac Holbert, it’s an experience not to be missed. For many years, our friend, Jim Millett, has been our mentor in critiquing our images. If you’d like to see some exceptional black and white film images. For more of our work, our website is: www.tomandmarj.com .
Tom and Marj Green
August 2019
Los Altos Hills, CA
We are fine art black & white photographers from Los Altos Hills, California. Our photographs reflect urban, industrial, and rural works of man. We find beauty and design in common objects and capture how they work with light and shadow to evoke a mood or story--—seeing the extraordinary in the ordinary. Subjects and scenes range from present day to a decayed world of 50 or 100 years ago. These scenes can be abandoned factories, ghost towns, a lumber mill, or a street corner. Our website is www.tomandmarj.com