Photo Editing Tips to Make Your Photos Look More Professional

Taking a photo is only half of the photo-making process in today’s digital photography world. The other part involves using a photo editing program to digitally enhance the image.
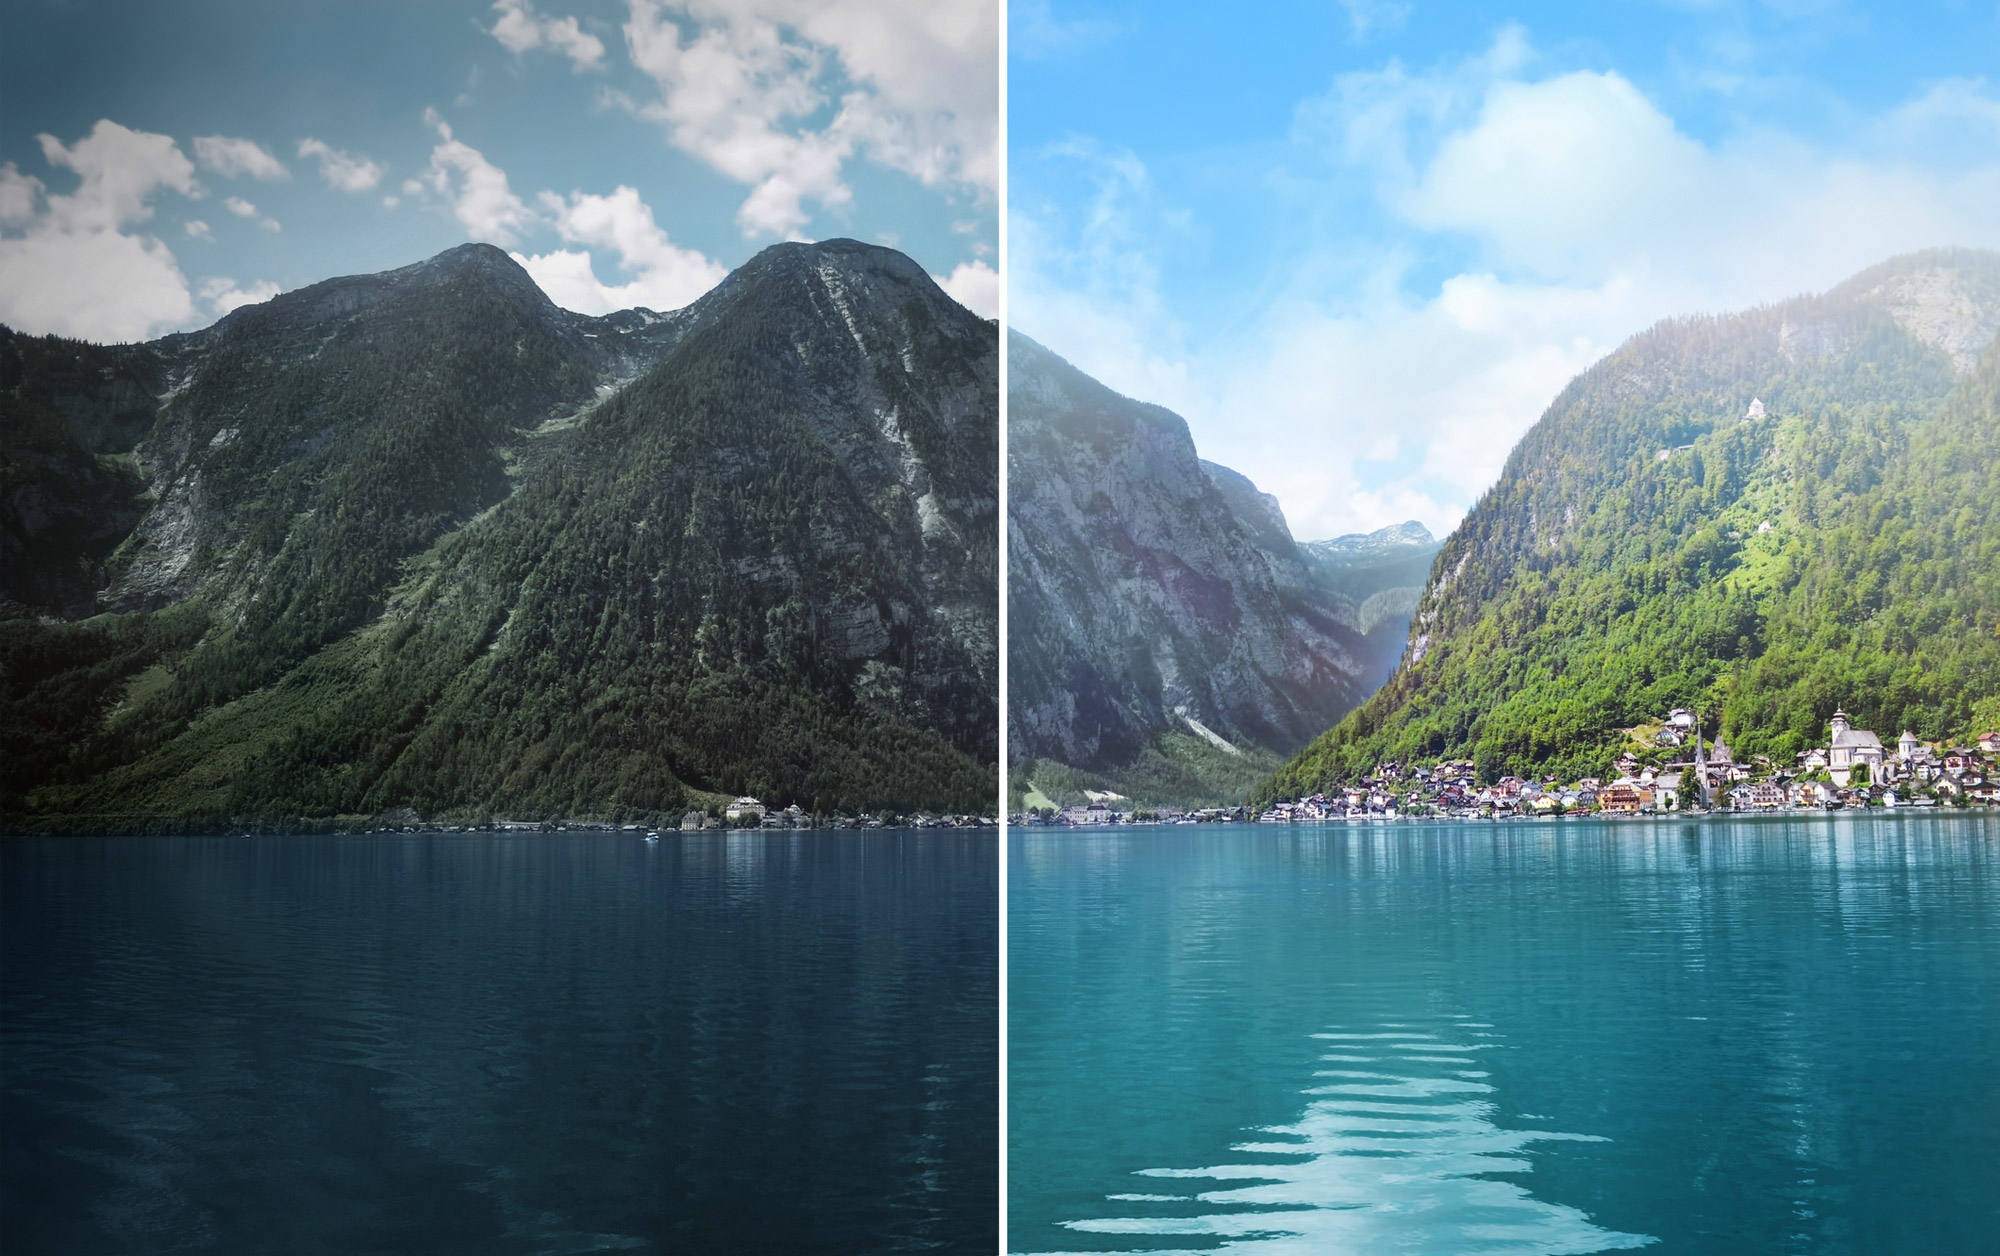
Almost every professional photograph you see on the internet has been manipulated digitally in some way. To create a unique atmosphere, the photographs are sometimes completely altered. However, the majority of the photographs are edited to correct flaws or make them more visually appealing.
Photography editing, on the other hand, does not have to be a difficult effort. It might be a procedure that you anticipate as much as shooting. It can also be the deciding factor in whether a photograph succeeds, fails, or is saved.
Let’s look at how to edit images like a professional using the tips and techniques listed below, which make the process straightforward, creative, and gratifying.
1. Create A Distinct Personal Style

There is no one-size-fits-all approach to professional photo editing. Professional photographers edit their photographs in a variety of ways. There are photographers who want to play with color and vibration, others prefer photography with Black and White. Some people prefer high key images (with lots of light and whites), while others prefer low key photos (dark and moody).
Look through social media and other photographic portfolios to discover what catches your eye to start defining your style. Try to figure out what it is about the photos that appeal to you. Is it because of the composition or because of the photo’s appearance? If the latter is the case, this style was produced in post-production.
You might not know exactly how to get the desired look if you’re new to post-production. However, the first step is to figure out what you enjoy.
When altering a photo, consider what you want to achieve. For example, you might wish that the photo was a little brighter, that it wasn’t skewed, that it had more color, and so on.
Find a means to make it happen to utilize a picture editing program once you’ve identified what you want or what’s missing to make this shot great.
2. Low-Resolution Images
Are you wondering what is the best option for a resolution? Well, it depends on how the shot is to be used. The higher the resolution, the better the photograph will seem in print projects like photo albums.
Images on the internet are an exception. They usually have a PPI (pixels per inch) of 72, which prevents slow loading times while still looking good on a display. However, because online photographs appear grainy in print, it’s best to shoot high and scale down.
Upscaling resolution is an option in most editing tools. The Resample Image tool in Photoshop boosts an image’s PPI. However, consider it as a Band-Aid solution because the photographs are not as clean as if they were shot at the required quality initially.

3. Photo Resizing
Resizing a photograph is now easier than ever thanks to modern software. The Image Size option is located under the Image tab in Photoshop and allows you to change the image’s pixel measurements, document size, and resolution.
When resizing, don’t be scared to play about with the frame. You might want to relocate some of the shots out of frame and re-center the subject if you’re downsizing the image. You might also slide the subject across to add some dynamic negative space when making an image larger.
4. Straighten and Crop Your Image
The first step in editing an image after it has been imported into your chosen photo editing software is to crop and straighten it.
Cropping an image can aid in the correction of any compositional flaws. If you snapped the photo a little too wide, slanted, or with a Dutch angle, you’ll want to fix it first. Cropping can also aid in the creation of more symmetrical or exact frame compositions.
When cropping an image, it’s critical to know the resolution of the original. Avoid overcropping because it usually results in a loss of image quality.
5. Remove Distracting Elements
The next step is to remove any distracting elements from your photograph. A cloud or a bystander are examples of huge elements. In portrait photography, it could be details like blemishes or stray hairs.
Depending on your photo demands, this step is a little more complicated (and optional). If you are trying to learn how to edit images like a professional, understanding this stage is vital.
Using Adobe Lightroom’s “Spot Removal” tool to enhance a photo and remove characteristics such as blemishes is simple.
If you want to remove larger objects from a more detailed image, such as a person, cloud, or plane, you’ll need to open it in Photoshop. The clone stamp, healing brush tool, and other Photoshop tools can be used to remove anything from a shot.
After you’ve removed any undesired visual features from the image, you can begin modifying the image’s various attributes.
6. Adjust The White Balance

The balancing of color temperature from light in a photograph is what white balance is all about. The white balance of a photograph can be either too warm or too cool when taken.
Locate the color temperature and tint adjustments to make the necessary changes. Temperature is a change in the blue and orange color spectrum. A tint is a color modification that affects the green and magenta color spectra. You can adjust the white balance of your photo here.
By selecting which quality of light you shot in, you can employ a few automatic white balance correcting tools. While this is convenient, it isn’t always correct. Practice manually altering the temperature and color of an image to hone your photo editing skills.
7. Exposure Fix

Nothing is more frustrating than taking a stunning photo only to discover the exposure is incorrect. How can you correct overexposed or underexposed photos? Fortunately, you can correct this with some editing wizardry.
There are some tools available to assist with exposure correction. “Exposure” or “Brightness” is an outright exposure adjustment found in most programs and software.
Adjusting this will assist you in achieving the desired exposure level. It’s possible that by editing the exposure triangle settings, you’ll be able to correct the majority of your photograph. However, certain areas may become overexposed or underexposed.
Adjust the shadow and highlight settings to fix these issues. The brightness of these places will be adjusted as a result of this.
When you change an image’s exposure, you’re also changing the image’s shadows and highlights. This automatically adjusts the contrast of the photographs. However, there are additional tools that may be used exclusively to change the contrast of an image to your liking.
8. Make Adjustments To The Contrast

Changing the contrast can have a variety of results. A photo’s contrast can be increased to make it appear crisper or more dramatic. A faded effect to photos could provide similar quality as to film stocks by lowering contrast.
Any effect you want to seek can be achieved by adjusting the contrast setting. Adjust the contrast slider to determine which image type you prefer.
Tone curves are an advanced technique for carefully increasing or decreasing contrast in your image. Tonal curves are a tool for adjusting the brightness of certain sections of your image, such as shadows, mid-tones, and highlights. It also selectively modifies the contrast of an image by doing so.
9. Color Adjustment
After you’ve dealt with exposure and contrast, it’s time to move on to color. Adjusting the strength of color in your photo is what we mean by dealing with color.
The brightness and saturation adjustments both change the strength of color in a photo. However, they differ in terms of which hues they amplify. A rudimentary understanding of color theory will also aid you in deciding how color will be used to tell the story.
The intensity of all colors in an image is increased by increasing saturation. Vibrancy, on the other hand, tries to protect skin tones by increasing the intensity of muted tones and colors.
You can use HSL changes (hue, saturation, and brightness) and selective color adjustments to manipulate the actual color of an image and try to use color theory in your photo.
When editing the colors of your image, it’s important to make sure you’re working on a high-resolution display.
10. Refine Your Picture
It’s time to start on the last touches of sharpening your image once you’re happy with the overall composition, brightness, contrast, and color of your image.
One of the greatest ways to edit photos that appear a touch soft or images that will be printed is to use this technique. Sharpening your image usually involves using the adjustment sliders labeled “Sharpness,” “Structure,” “Detail,” or “Clarity” in Lightroom.
Adjusting any of these will sharpen an image’s textures. This element of the editing process is entirely optional, and you should use it based on your judgment.
If you do use it, keep it to a minimum because too much of it can make an image appear excessively sharp and detailed.
Learning how to edit images like a pro may be a surprisingly enjoyable and gratifying aspect of the photography process. While all of these processes and advice are important, the most important aspect of the process is honing your eye and developing your style, which will result in amazing photographs. Practice is the best method to improve both.
Author Bio: Isabella Foreman has been an avid blogger for 5 years, with particular interests in photography and related technologies. She has consistently contributed articles to top blogs and websites such as dribble and strikingly. Beyond writing and blogging, her hobbies include reading, movies, and photography. She is now associated with SmartPHOTOeditors, a professional bulk image editing and retouching services company.
Isabella Foreman
October 2021
, New Jersey
Isabella Foreman has been an avid blogger for 5 years, with particular interests in photography and related technologies. She has consistently contributed articles to top blogs and websites such as dribble and strikingly. Beyond writing and blogging, her hobbies include reading, movies, and photography. She is now associated with SmartPHOTOeditors, a professional bulk image editing and retouching services company.