Creating A Blurb Photo Book
Dusting Off The Hard Drives Part 3
During these difficult times we all know what is involved in keeping safe and for the most part it has meant staying home and not getting out capturing images which is what we all enjoy.
In order to break up the months of boredom I have written a few articles for Photopxl.com called Dusting off the Hard Drives, parts 1 and 2. While searching my hard drives for old images to process with new and updated RAW conversion engines, I finally decided to create a photo book since in the past I never made enough time to make one. I mainly use Capture One and a little Photoshop. This article takes one through the good and bad steps I have experienced while creating a Blurb photo book and is written for someone who has little or no experience in creating a Blurb Photo book. I realize there are other options for making photo books, but I have only tried Blurb so far.
Initially I decided to use images which were already printed to get me into the ballpark for a photo book since as we all know what you see on the monitor if printed without adjustment will print too dark. For paper consistency I now concentrate on using Epson Exhibition Fiber Paper in17x22”and 13×19” for both color and B&W and Ilford Smooth Pearl roll paper for prints from 17×24 to 17×34”. I print only B&W on this paper and have dialed in my Medium Format files to my satisfaction with this approach. It is amazing what those extra few inches can do for a nice, large file in landscape mode at 360dpi. I keep a notebook where I record the details of each print made with camera used, file number, how the image was processed in color or B&W or both, paper choice, Epson printer name and settings where Photoshop runs the printer and not the other way around. Then after 24 hours of degassing, I rate the print for all the qualities important to me which are usually brightness, contrast and if B&W also the full tonal range with deep blacks and whitest of whites. For color prints I want to have some snap to the image with highlight and shadow detail as desired. I have worked up a body of work mainly using the Phase IQ4150 Achromatic of old Ghost towns and those images are fantastic when printed on Ilford paper out to
17×34”. I also assembled a body of work presented here in Photopxl.com on Shooting Steam Engines in the Cold of Winter (August 2019) where I used the Fuji 50R and 3 lenses. Almost all images were converted to B&W via C1 although I must say if using color Fuji colors are fantastic right out of the camera.
The main concern is how much brighter to make the image so that it reproduces well on Blurb paper of choice. I found this is the most crucial item to fine tuning a Blurb image not unlike soft proofing in PS. The problem with using Blurb is that there are no paper profiles I know of in order to soft proof to a Blurb paper. This makes the process a bit of a trial and error. One can order a sample pack of Blurb papers, but that is one 4×6” page of each paper type. It would be most helpful if one could purchase say 25-50 of 8×10” sheets of your paper of choice for fine tuning images before spending over $100+ on a complete book. This factor alone could drive away some discerning photographers.
Be that as it is, a method that has worked for me is to take a finalized, previously printed PSD or TIFF file into PS and add a Curves Adjustment Layer at the top. After placing the curser in the very center of the curve window, irregardless of the histogram, I use the up arrow key 15-25 clicks while watching the histogram for clipping. Once it starts to look nearly too bright on my calibrated monitor it often ends up looking just fine on the Blurb #140 paper. Then I enter File/Export/Export As/Save at 100% up to and including my Fuji 50R files/Name the jpeg file while adding the number of up clicks used on the file (i.e., +20) and send it to a folder named for the new book so as to have all jpeg images ready in one place. Large Phase 150MP files have to be saved as jpegs at either 50% or sometimes 75% if extensive cropping has been used since the maximum Blurb image size allowed is 75MP.
BLURB
INTRODUCTION AND COMMENTS
Book creation with Blurb is accomplished by using their proprietary software called BookWright which is free, but must be downloaded into your computers Applications. Before beginning a Blurb photo book I first create a Pages document which contains all text for the proposed book. The “Introduction” is always my first page and the “Artist Statement” my last page. See more on this subject under “Blurb BookWright Software Basics”.
PAPER AND COVER CHOICES
Getting the most out of a Blurb book for me is paper choice. I tried lesser papers, but in the end decided on their 140# (190 gsm) paper. For me it produces rich Black and Whites and also vibrant color images even though my books are mainly B&W except for my last book which was entirely in color about The People of Havana. My rationale for this paper choice is why go through the effort of making a book which could be lacking in high quality and a good tactile feel due to your paper choice.
TYPE OF BOOK
Layout and size are important considerations. I always select the largest book available in the type of book I am using. The Blurb input sequence is explained below:
1. “CREATE” Click on the blue button to start.
2. Select “Books and Magazines”/“Next”
3. “Photo Books”/“Select Size”/“Next” Read below before selecting this parameter.
If most of your images are in portrait mode then a vertical book layout obviously make sense and conversely if most of your images are landscape then a horizontally oriented book size is important even if some images are portrait. Another main contributor to book size is if one wants to insert words under or above photo images. I generally select 12×12” books for street and 11×13” sized books for landscapes with words at the bottom of both sizes. A 12” square book lends itself to 11Wx9”H landscape images or up to 11Wx9”H or lesser sized vertical images with 1-2” of text under each photo. A 13Wx11”H book lends itself to 12Wx9”H landscape images with room for 1-2” of text below the image or one can position two 6Wx9”H images side by side with enough room beneath for 1-2” of text.
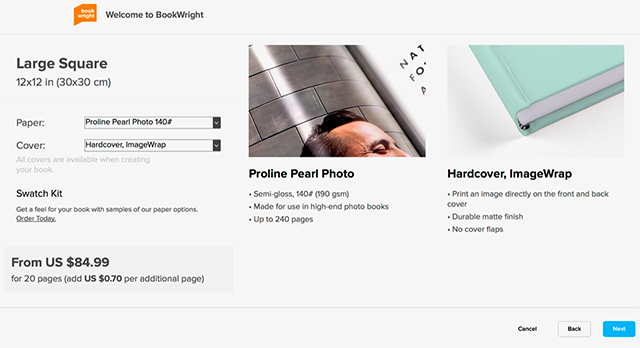
4. “Choose Your Paper”and “Choose your Cover”/“Next”

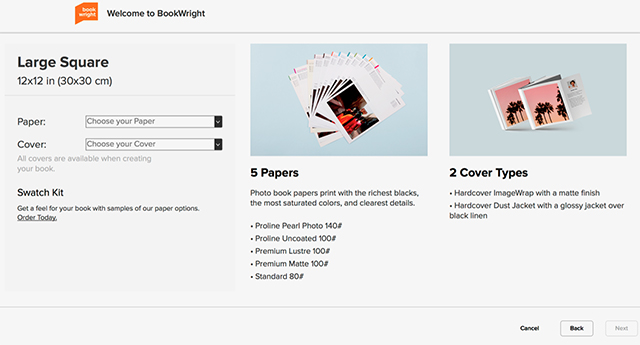
The top image above shows the Paper and Cover Selection page before entering selections. The bottom image above shows the Paper and Cover Selection page after both the Paper and Cover Selections have been made.
5. “Project Title, “File Name” and “File Location”/Input
![]()
Above is the Project entry page.
6. BookWright Software now Opens.
BLURB BOOKWRIGHT SOFTWARE BASICS
BookWright takes some getting used to with my main complaint has been how slow it is to respond to my input on a fast Mac Pro with 2TB SSD, 64GB of RAM and fast video cards. My internet connection is 236Mbps download speed and 12Mbps of upload speed so that might be the issue here where my ping rate is 12 ms.
The top left corner of the BookWright software shows “Covers” and next to “Covers” it shows a double spread of two “Pages” . At the beginning and end of the book there are gray pages indicating the actual inside covers of the book which do not accept data. Align your containers anyway you want. I use “Align Centered”.
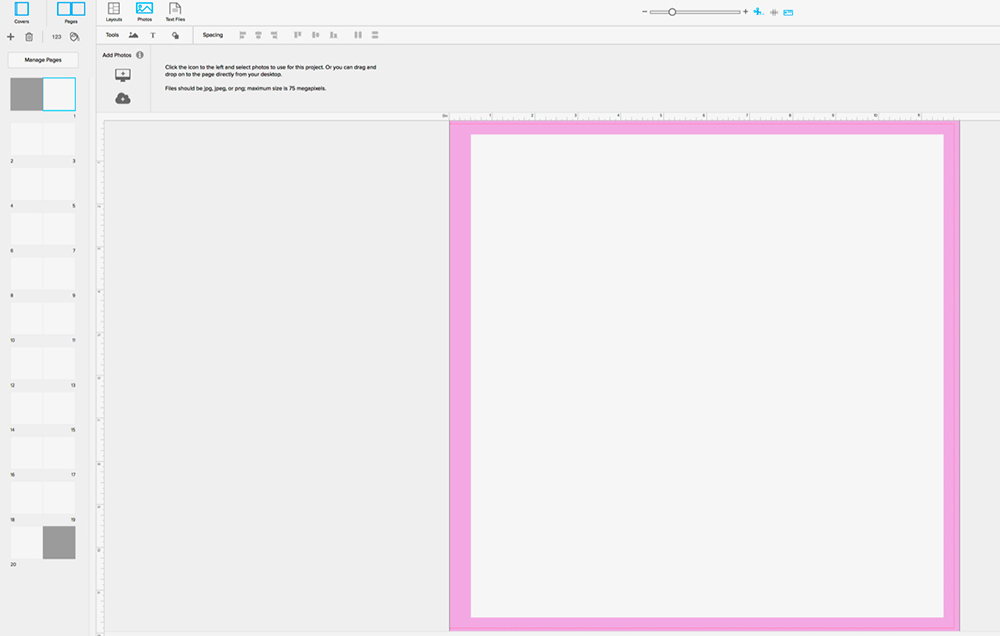
Above is the initial BookWright screen view.
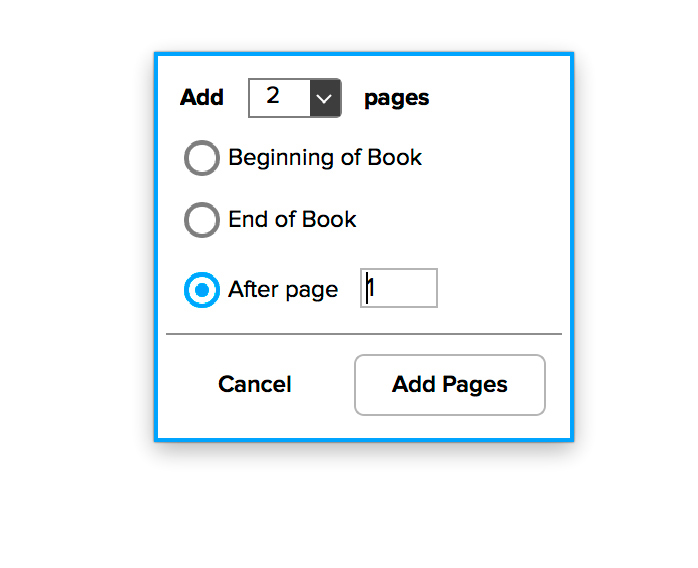
Above on the top Menu Line one can select “Add/Add Pages” and then decide how many in pairs of pages and where to input them, such as before or after a specific page number. Remember to hit File/Save often through the entire book creation process.
One mistake I made when first using Blurb was to create an RTF file of my entire document. I would then input that RTF into the header of the BookWright main page with Text Files in highlighted in blue, click on the monitor icon with a plus in the center and lastly use the “Input RTF” command to find the specific file in my Documents for the input.
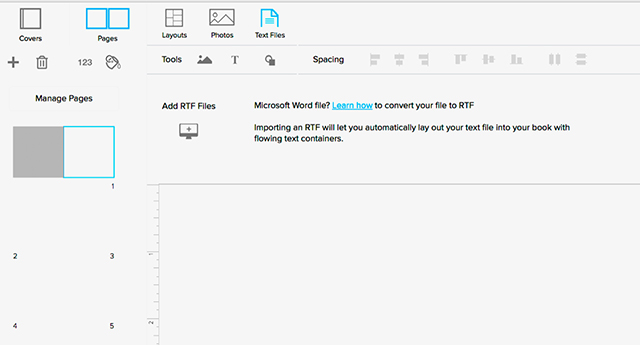
Above is the screen preview showing where one adds an RTF file.
The problem with this RTF approach was that if I only wanted a portion of that RTF input in a text container it still had the rest of the file in that text container which required deleting the rest of the RTF manually. In using this method I was getting error messages about my text containers overflowing. So now I create an “Introduction: RTF and “Artist Statement” RTF and place them in separate text containers. Problems solved.
I use the preconfigured layouts available with text (page icon) and photo (mountain icon) containers. The layout selection dropdown list is helpful where one can select the number of photos wanted for each page or text.
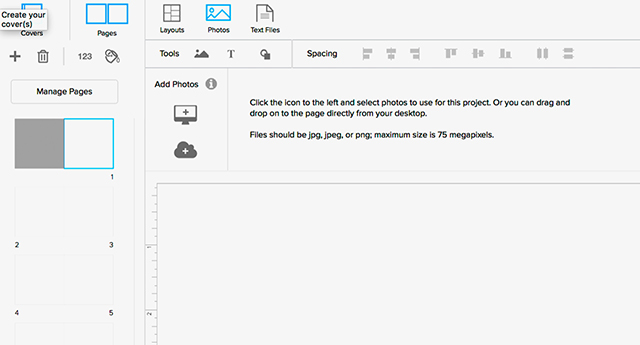
Below is the initial Layout screen before selecting Photo or Text.

Below is a screen example of how one adds a photo.
Below is a Photo Layout with side window to the right.

Below is a Text Layout with side window to the right.

I use the “T” Tool for placing a text container manually which is about 4”x4” by default. I then click the 4-arrow icon to open a side window to manually adjust the container size by finding the width and height settings to manually change them to your liking. Remember to hit X in the top right corner of this side window to close it before trying to use the black 4-arrow mouse icon to move the container around the page. Like with PS the hand inside the image lets you reposition any photo image with a photo container. For photo containers click the 4-arrow icon to open a window where you find the two Frame Options near the top of the photo image side window: “Fit to Frame” and “Fill to Frame”. I find them both worth experimenting with in order to see what Blurb does with your image in the container you’ve created.
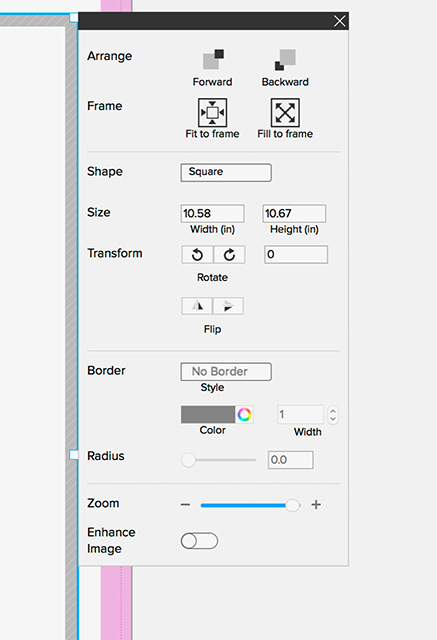
Above is an enlarged Photo Container side window used for changing container size and deciding how the photo will be initially input into the container, such as with “Fit to Frame” or “Fill to Frame”, etc.
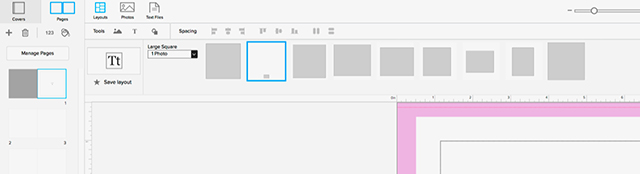
Above indicates how one selects a 1 Photo Layout in a Large Square.
RULERS, GUIDES AND ERROR WARNINGS
Around your selected book size Blurb puts a pink ”Safety Guide” on each page. You can activate the “Trim Guides” in the top menu and Blurb then adds a faint and I mean faint dotted line where they might trim your pages so do not put anything beyond that Trim area or better yet keep your containers inside the pink Safety Guides.
You might get error warnings which look like a yellow triangles. Sometimes you get warnings for ebook use which I was not using so I ignore them by clicking on the warning and then in the detail of the warning and click “Ignore/OK” in the warning box list.
FINALIZING YOUR BLURB BOOK
At this point before doing anything else I add an ISBN number for my book. Make sure on the Main Menu you click “Distribution/Add Free ISBN Number”. Then, if finished with your book, at the top left of the Main Menu click, File/Save and then File/Upload to begin the final process. Blurb checks spelling for you and alerts you to misspells and lets you Preview your book and get a draft PDF if wanted. Blurb will also give you yellow warnings where you might have data inside the pink “Safety Guides” or other problems under “Review Errors”. When I add text over the cover image I get a warning that the text will not show up on ebooks which I don’t use. It is a lengthy process to get to where you can click “Next” where Blurb begins Render, Upload and Processing Project. It takes many minutes for a 200+MB size book to finish its download. Go get a cup of coffee.
Once you are finished, Blurb takes you out of BookWright and places you in their ordering software where you confirm the type of book and if wanted add a PDF of your final book for $4.99. I always select for the Blurb logo to be added on the back page of my book which saves you around $10.00. If no ebook is wanted, uncheck its box because if you forget to do this Blurb will add another $9.99 to your book order. The next page has two main windows, “Order your Book” or “Sell your Book”. To date I have no knowledge of Selling on Blurb, but I see they do interface with Amazon.
I click “Order your Book” and then the next page indicates the final price of the book for one copy without shipping costs where on another page you have 4 shipping options from fast to slow. Volume discounts are offered, but Blurb rightly cautions against volume orders until you have purchased a proof book. I call it a proof book since no matter how careful I have been, once I receive my first book I invariably find errors of some sort which are mostly punctuations in the wrong place and certain images that come out too dark for my liking.
Blurb prints books in Seattle so to get a book sent via the least expensive option takes about 7 business days to the East Coast once it has been printed. I must say the quality of their 140# paper has me wanting for more and I am now on my fifth book using older images dusted off from my hard drives. Just a note—I am not affiliated with Blurb as I am just a dedicated user during this pandemic and wanted to highlight positives and pitfalls using Blurb for photo books.
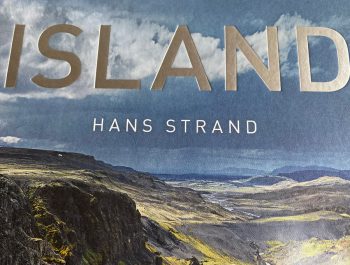
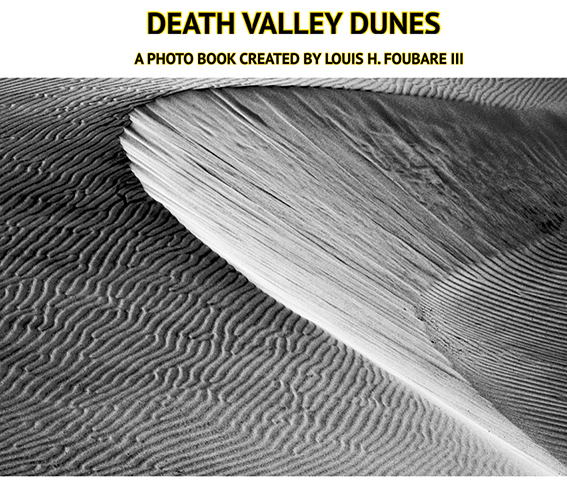
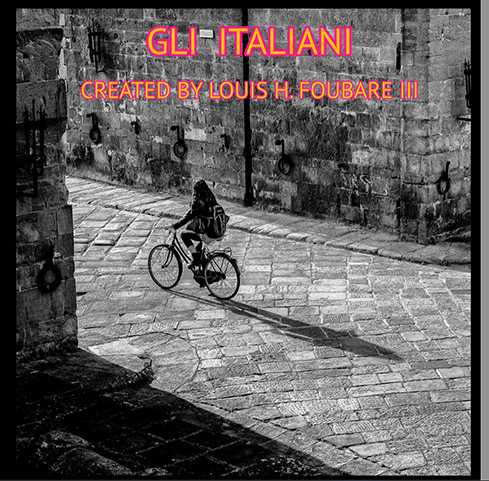
Take a look below at my Blurb books for sale on Photopxl.com
Les Parisiens, Gli Italiani, Death Valley Dunes, Los Habaneros and soon The New Yorkers. More to come later.
Louis Foubare September 2020

Stuart, FL
After nearly loosing my eye sight, the decision in 2011 to buy a digital camera in order to leave something on earth if blindness were to set in has given me the energy and drive to capture images of all sorts. In one word it is Life that I capture in all its shapes and forms. Life has various meanings to each of us, but it is Life that is crucial to me no matter where it is found. I very much like to see Life and live Life. On one hand, I am a photographer who captures earthy, gritty, emotional and moving street scenes with a worldly emphasis. And on the other hand, I am also a photographer who loves the openess and solitude of the beautiful and moving landscape environment where ones artistic juices are allowed the freedom to flow to their maximum. Sometimes that means dramtic colors and other times it means capturing the scene in stong and intense black & white images. In January 2016 I was again fortunate enough to receive the coveted Jay Colson Portfolio Award at FOTOfusion where 50 professional photographers and photo editors voted my portfolio the best. Winning this Award once is an honor, but now that I have won it three years in a row, it is an overwhelming achievement. Below are links to various articles written about my photography and what moves me to capture my images. Cuba Article-Leica User Forum My Street Photography-Leica User Forum My Landscape Photography-Leica User Forum