Palouse Falls – Behind The Shot
As many of you know, the Palouse in South East Washington State is one of my favorite landscape photography locations. I have been going there every year since 2004. The early summer blesses the photographer with rich green rolling hills of this year’s main crop wheat. In August, the green has turned to gold as that crop is harvested.
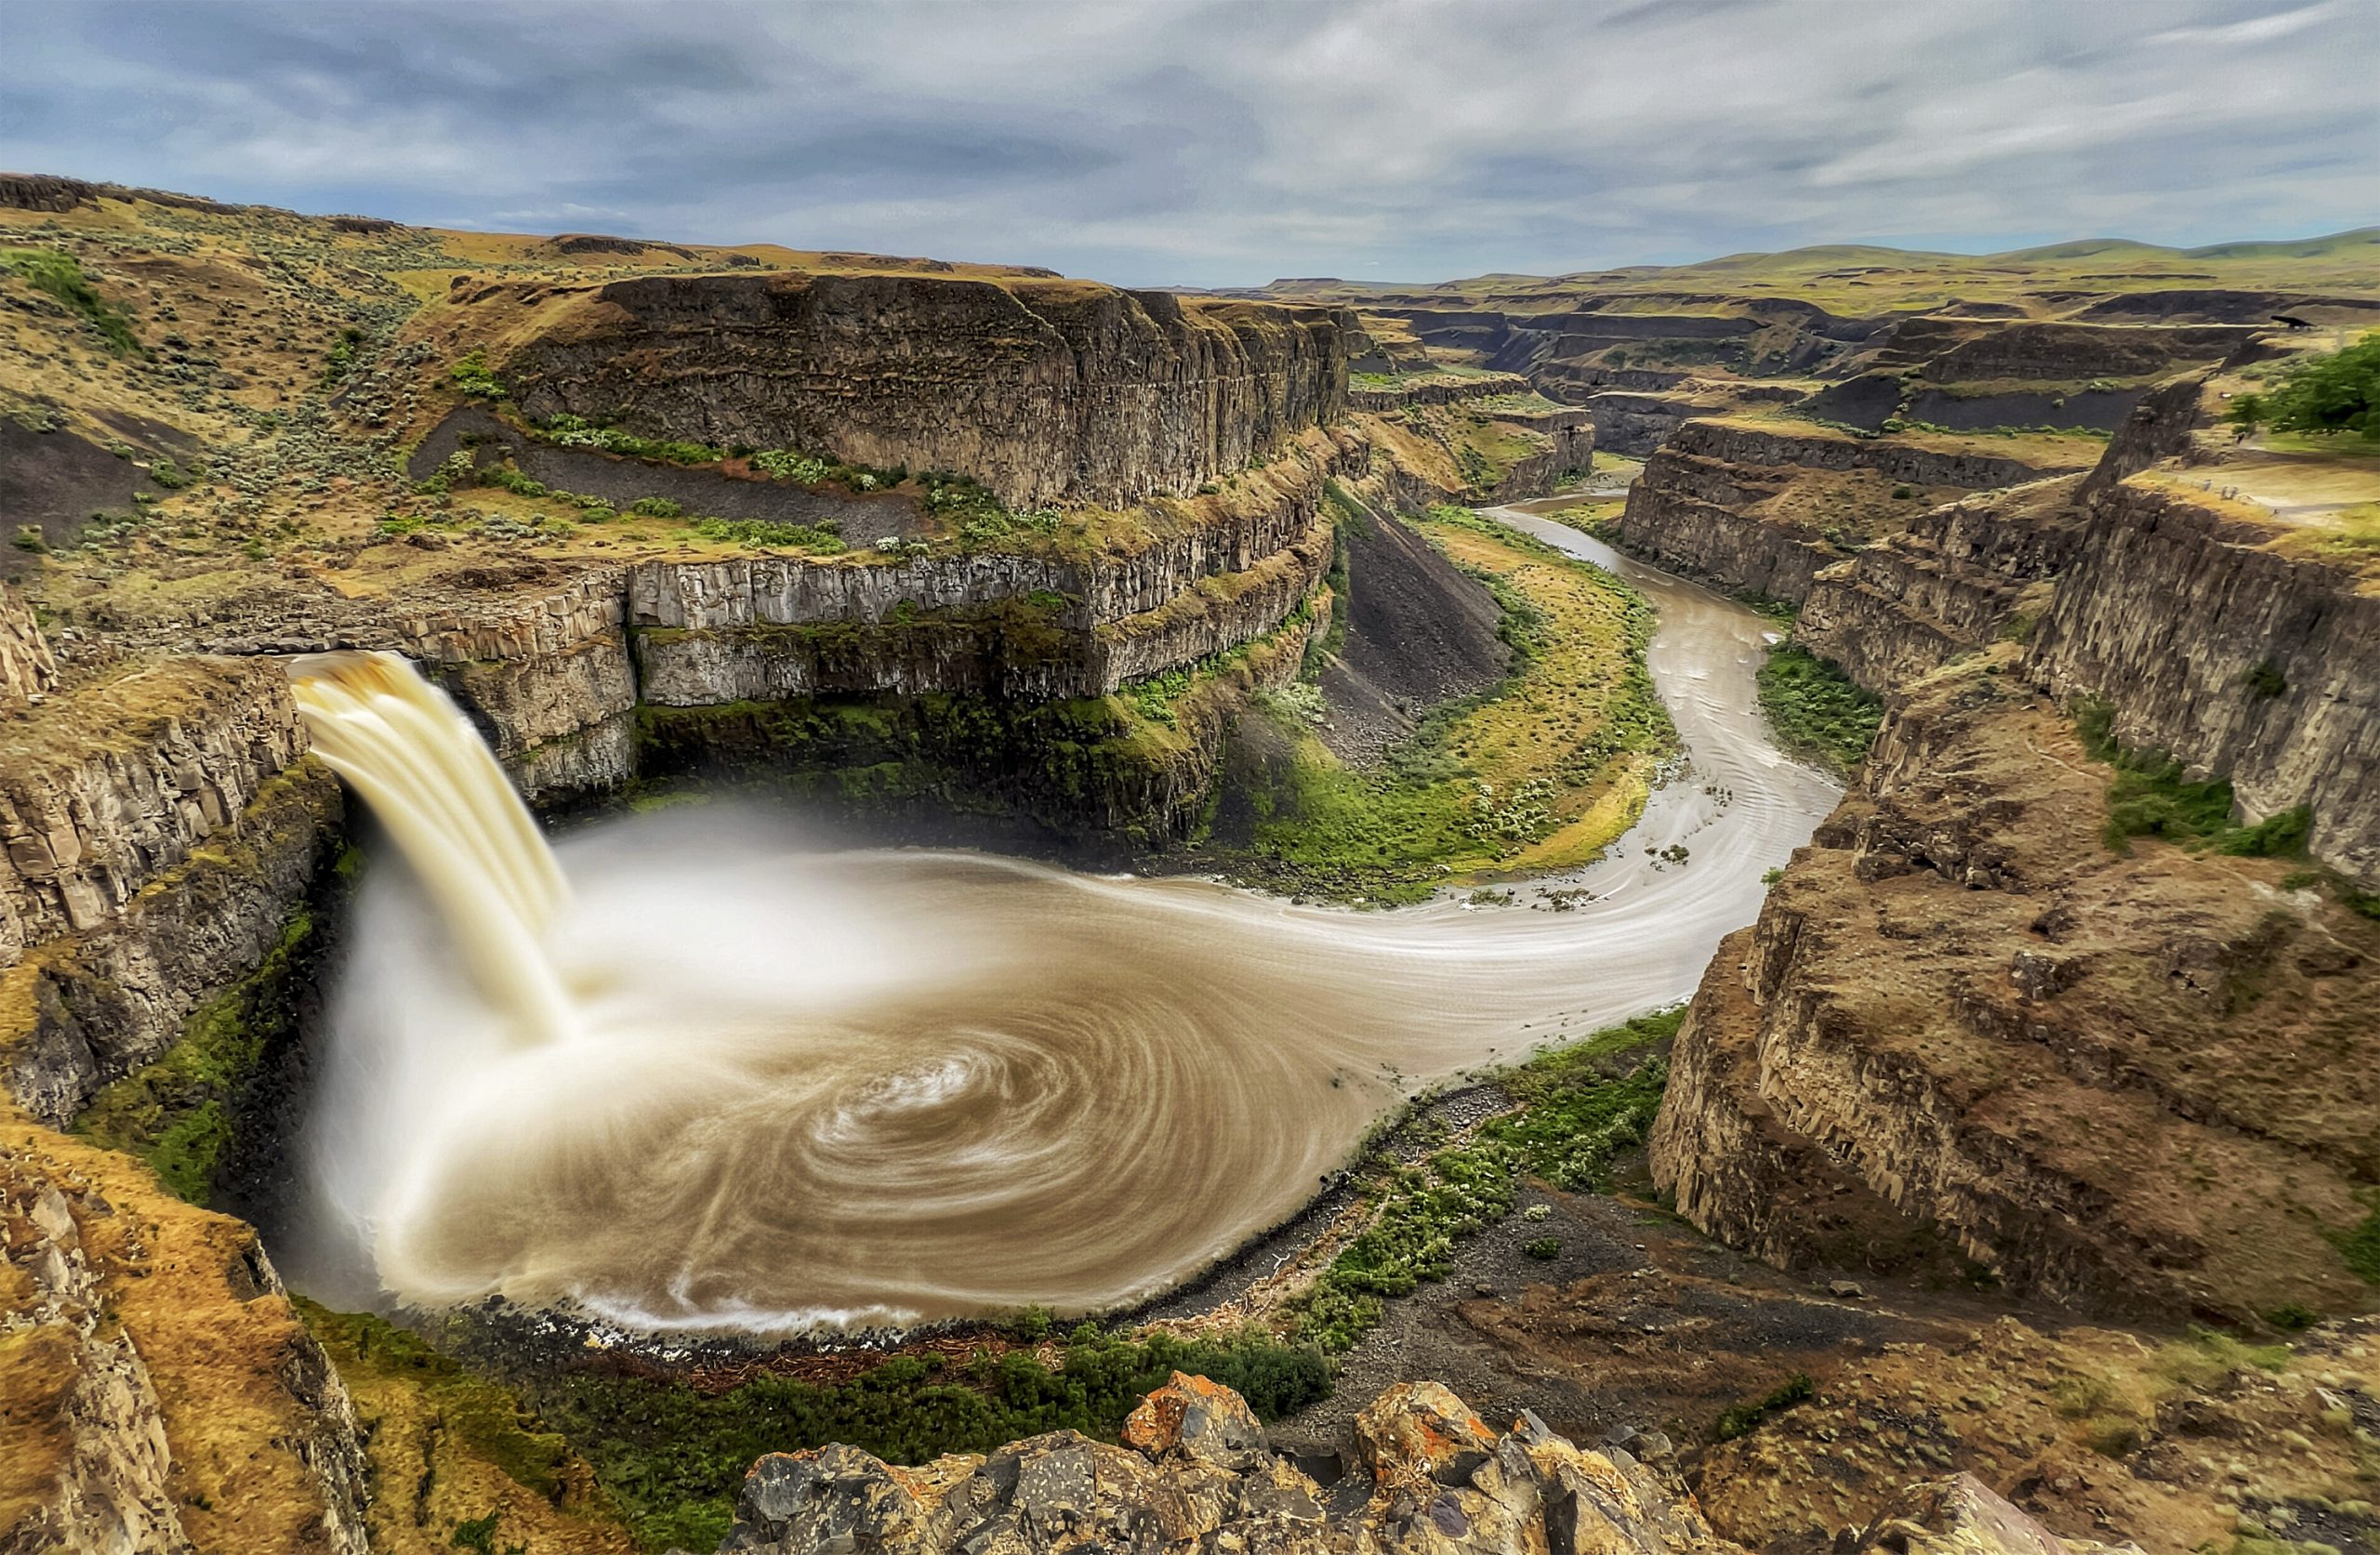
The Palouse has many attractions and one of those is Palouse Falls. This a spectacular location where water rushes over a high falls and then winds it way down a canyon. For the last twelve years I have been working on getting a great falls picture. Some years, the falls were not running as it was a dry season. Some years I spent hours on the special outcrop over the falls messing around with long exposures and neutral density filters while fighting wind conditions or poor light.
This year (2022) I once again returned to Palouse Falls and in 15 minutes got the perfect picture I have been waiting for and I did it on my iPhone, no less. I did it without filters or complicated calculations.
For the last few months, I have been playing with and testing an app called Reeflex Pro Camera. This is an app designed to be a supplemental camera to your native iPhone camera. With an in app payment of a few dollars, you can add a module to the app that allows for long exposures to several minutes and longer with no ND filters. It works in the same way as Frame Averaging does on the Phase One camera backs.

To get this shot, my friend Rad Drew joined me and I took my Peak Design Tripod, the ULANZI ST-14 tripod mount for iPhone. The Palouse had just had one of its wettest weeks in many years and there was flooding all over the place and the falls were running like I never have seen them before. Perfect conditions for a great shot.
I set the tripod up, mounted my phone in the iPhone holder and composed the image. Luckily, the sky cooperated with beautiful clouds mixed with blue sky. With a simple tap, I brought up the long exposure module and was ready to take the shot.

The challenge was to find the right exposure (exposure time length), A lot of times we have been taught that 1/2 a second or around there will capture a nice smooth feeling in waterfalls. I wanted more, though. I wanted to catch that swirl in the pool under the falls. So I started with a one minute, two minutes and three-minute exposure time. This is easy to set on the reeflex app. In addition, you can actually see the results in real time as I made the exposure.
In the end, I used the two-minute exposure. What’s nice is I had no burnout to overblown highlights like you get many times in doing traditional long exposures with filters and such. I took the image into Snapseed and did a few minor adjustments, such as burning in the foreground and removing a blue color cast in the sky. I am amazed that I could shoot this with an iPhone. I liked the fact that even at this long exposure time I had no blown out highlights.
I’ll be using this image as part of a separate article about how big a print you can make from an iPhone. I have made prints so far to 17×22 with great success. I intend to push it to 30×40 if possible and doing so with Topaz Giapixel app on my MacBook Pro.
Short Video of Kevin Raber making the long exposure (video by Rad Drew)
I’ll be doing a companion article on this app showing more images I have made. The creator of this app has now made a newer app that records these images in RAW ReeXpose. That app I am also trying out and being able to capture an image in RAW format and taking it into Lightroom for editing is a big game changer.
The bottom line is it was a no brainer to make long exposures with superb image quality. And so far I have made a 17×22 print that I am quite happy with. I’ll know soon if I can even take print sizes larger.
Kevin Raber
August 2022
Indianapolis, IN
Photography is my passion and has been for 50 plus years. My career in photography has allowed me to travel the world, meet some of the most interesting people on the planet and see things I could never have dreamed of. My goal is to share the passion of picture taking through photographs and teaching with as many people as I can, hoping it brings them as much joy and happiness as it has me. I do this through photoPXL.com, this site, as well as Rockhopper Workshops, and other projects, as well as teaching as Artist In Residence at the Indianapolis Art Center.