My Adventures With 3D Virtual Tours – Take Your Photography A Step Further
Getting Into Matterport
3d viral tours are not new. For many, it was hard to explore and make because the gear used t make these virtual tours cost an arm and a leg and needed a fair amount of training to use. That has changed and you can now use your iPhone or Android devices to make virtual tours.
I decided that I would try it. My son Kevin has been doing this kind of work for quite some time and has made a big business out of it using drones to map cell towers, buildings, and just about anything you can think of. There are big differences between doing these models inside vs. outside. As you will see below.
Outside, you are walking around or, in his case, with drones flying around. Using the system I use, I walked around inside a room. I’ll do an article in the future showing the work that Kevin does. Today I want to show you my first attempts.
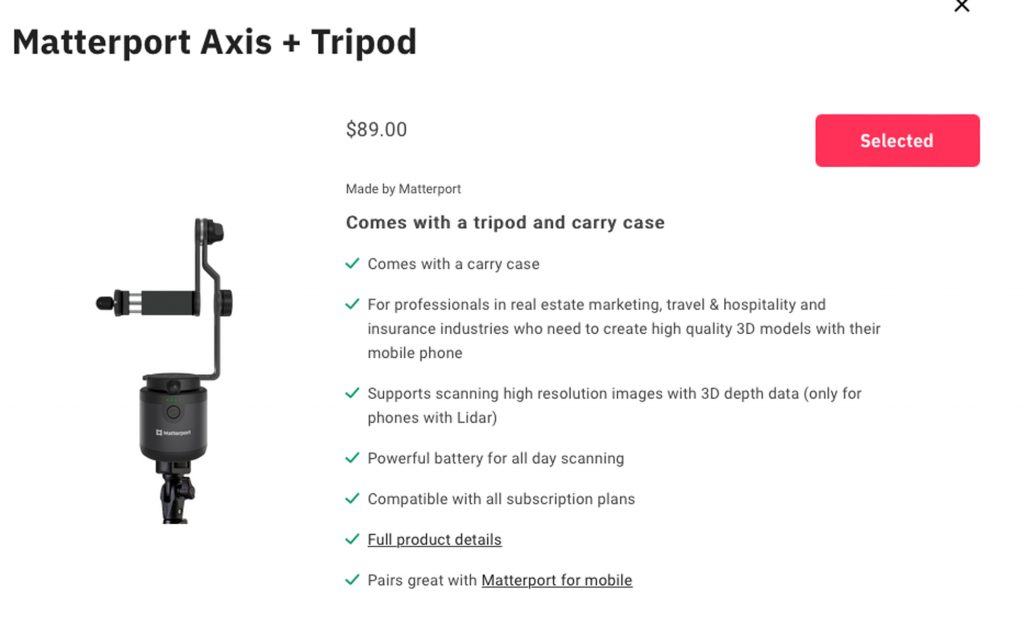 . I purchased the Matterport Axis Starter Bundle, This included a mounting system for my iPhone 14 ProMax and a tripod. I also downloaded the Matterport software for my IOS devices (iPhone and iPad).
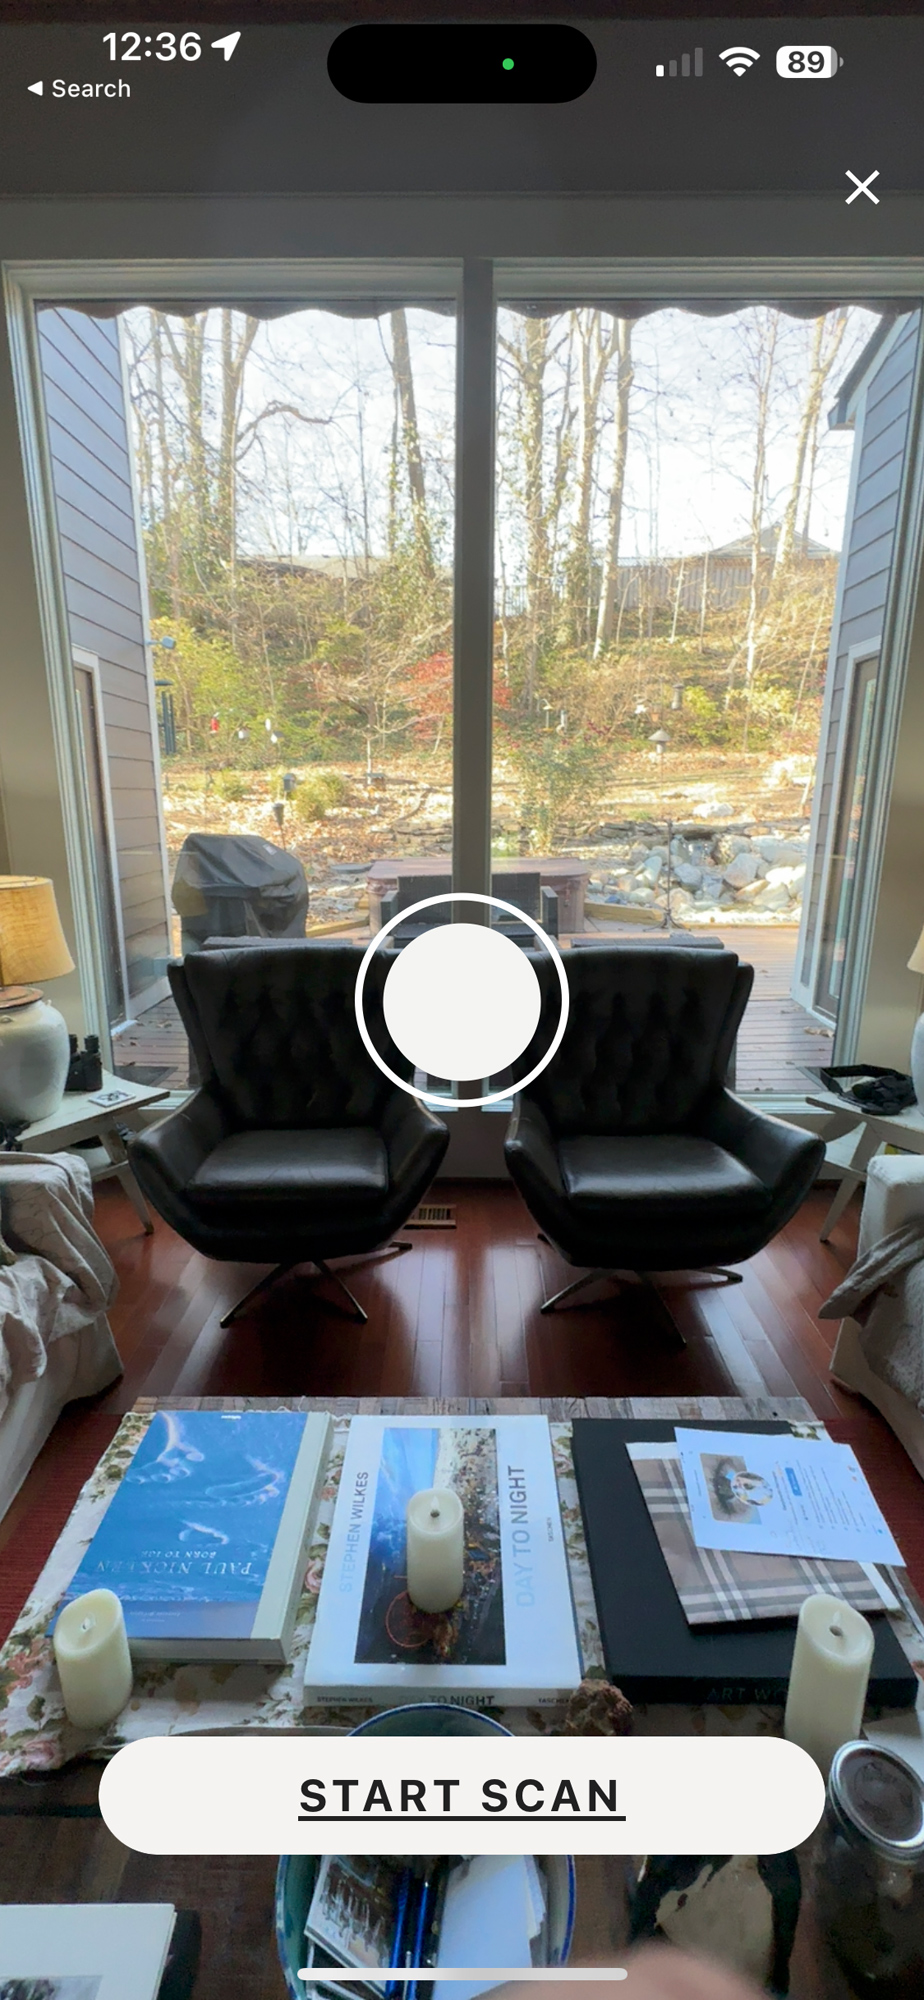
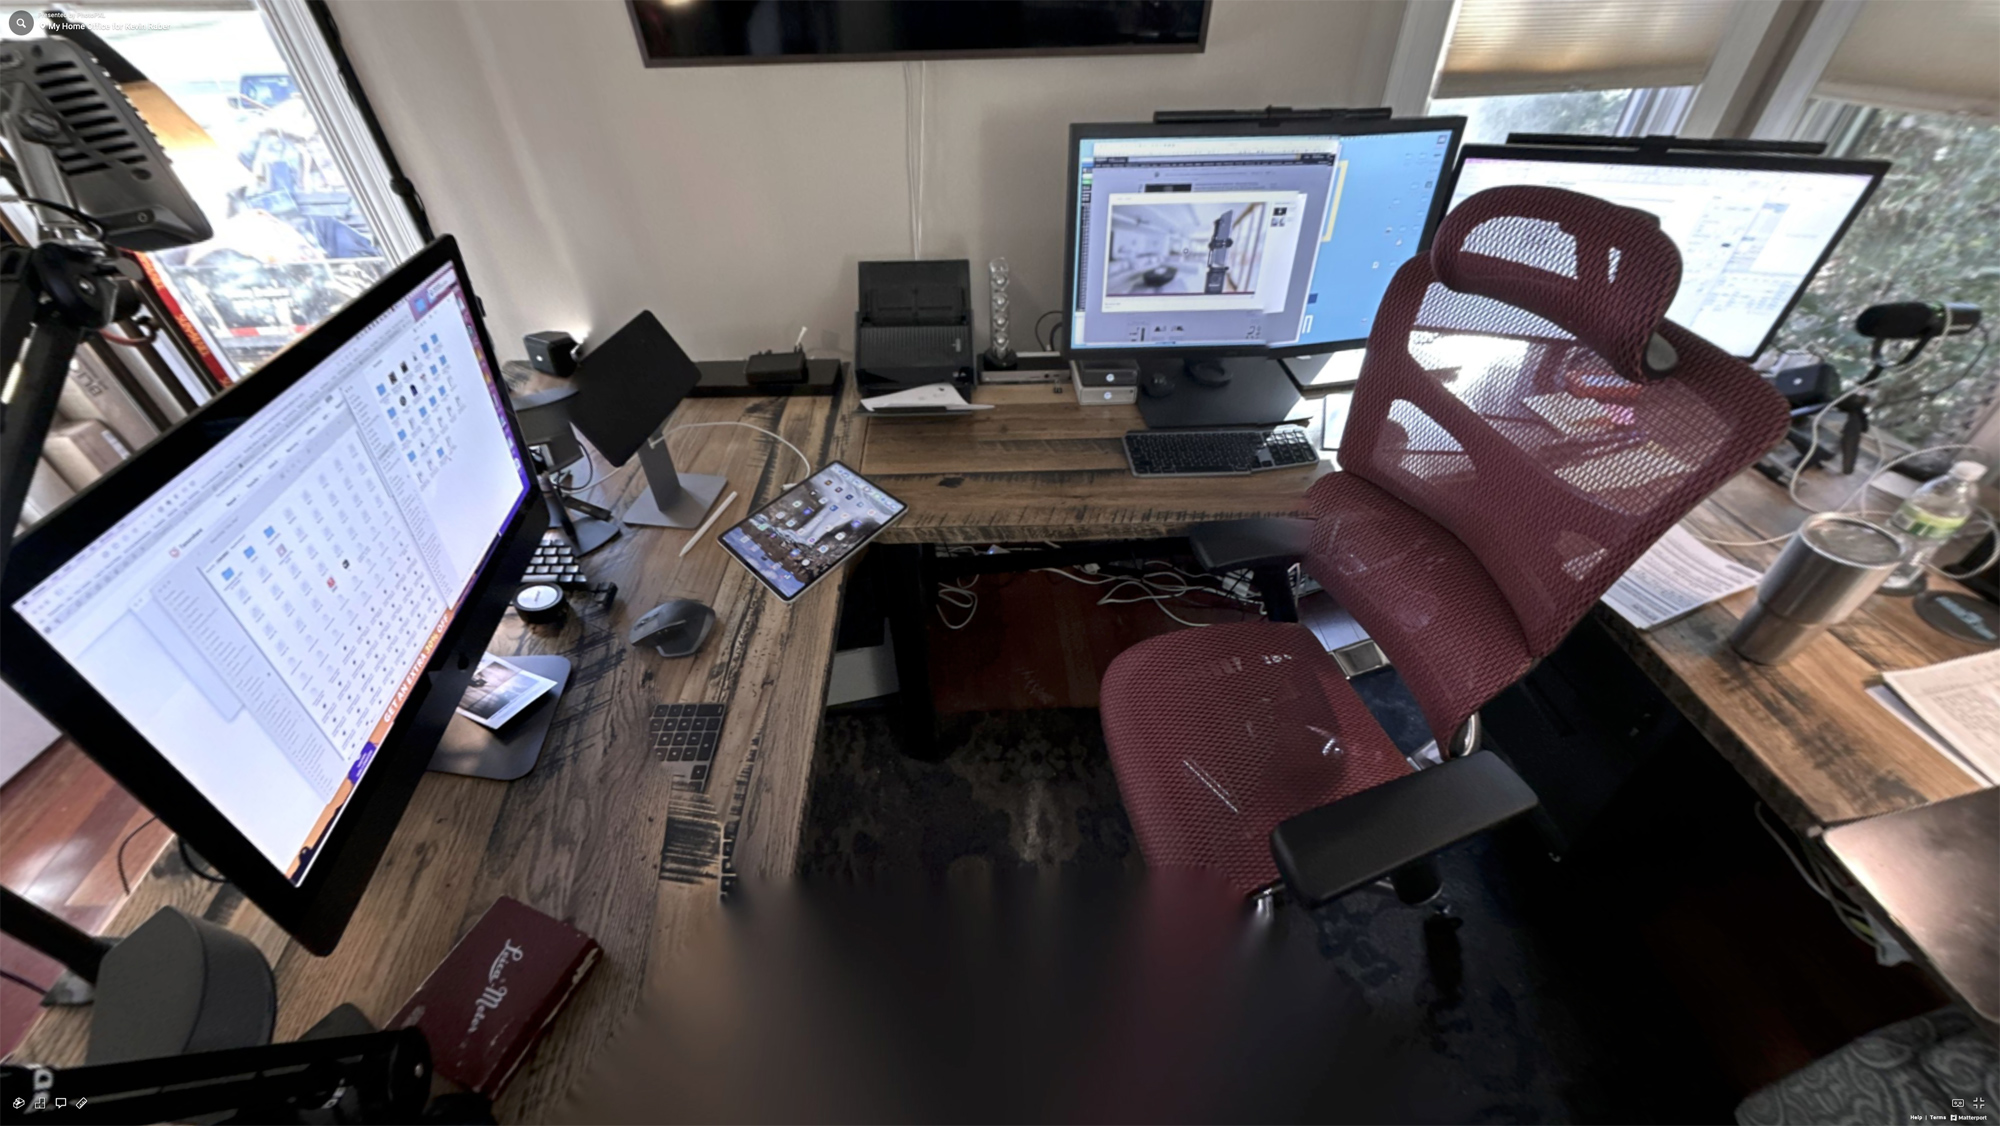
My first attempt was at my office, doing it handheld. Using their software, you hold your phone vertically and start the app. After exposure, the app says to rotate to the right until two circles meet then it exposes and you do it again until you have 360-degree coverage.
When complete, you follow the directions to upload it to the Matterport website where the image is processed and then when ready, they email you a link to your page to view it. I started out with the free account but since have now moved up to the next level.
You must use the Matterport site for processing and depending on the complexity of the file it may take a few hours to get the image processed. Once again they notify you when it is ready. Someone can find HERE the pricing for Matterport Services and Cloud plans.
I uploaded my handheld office images, which Matterport refers to as spaces, and then got a link back to see the spaces all stitched together. You can view it HERE.
Please note: to see the final images and spaces in this article you will need to click on the captions. These will then open to the Matterport site gallery.
Now I Take It To The Next Level
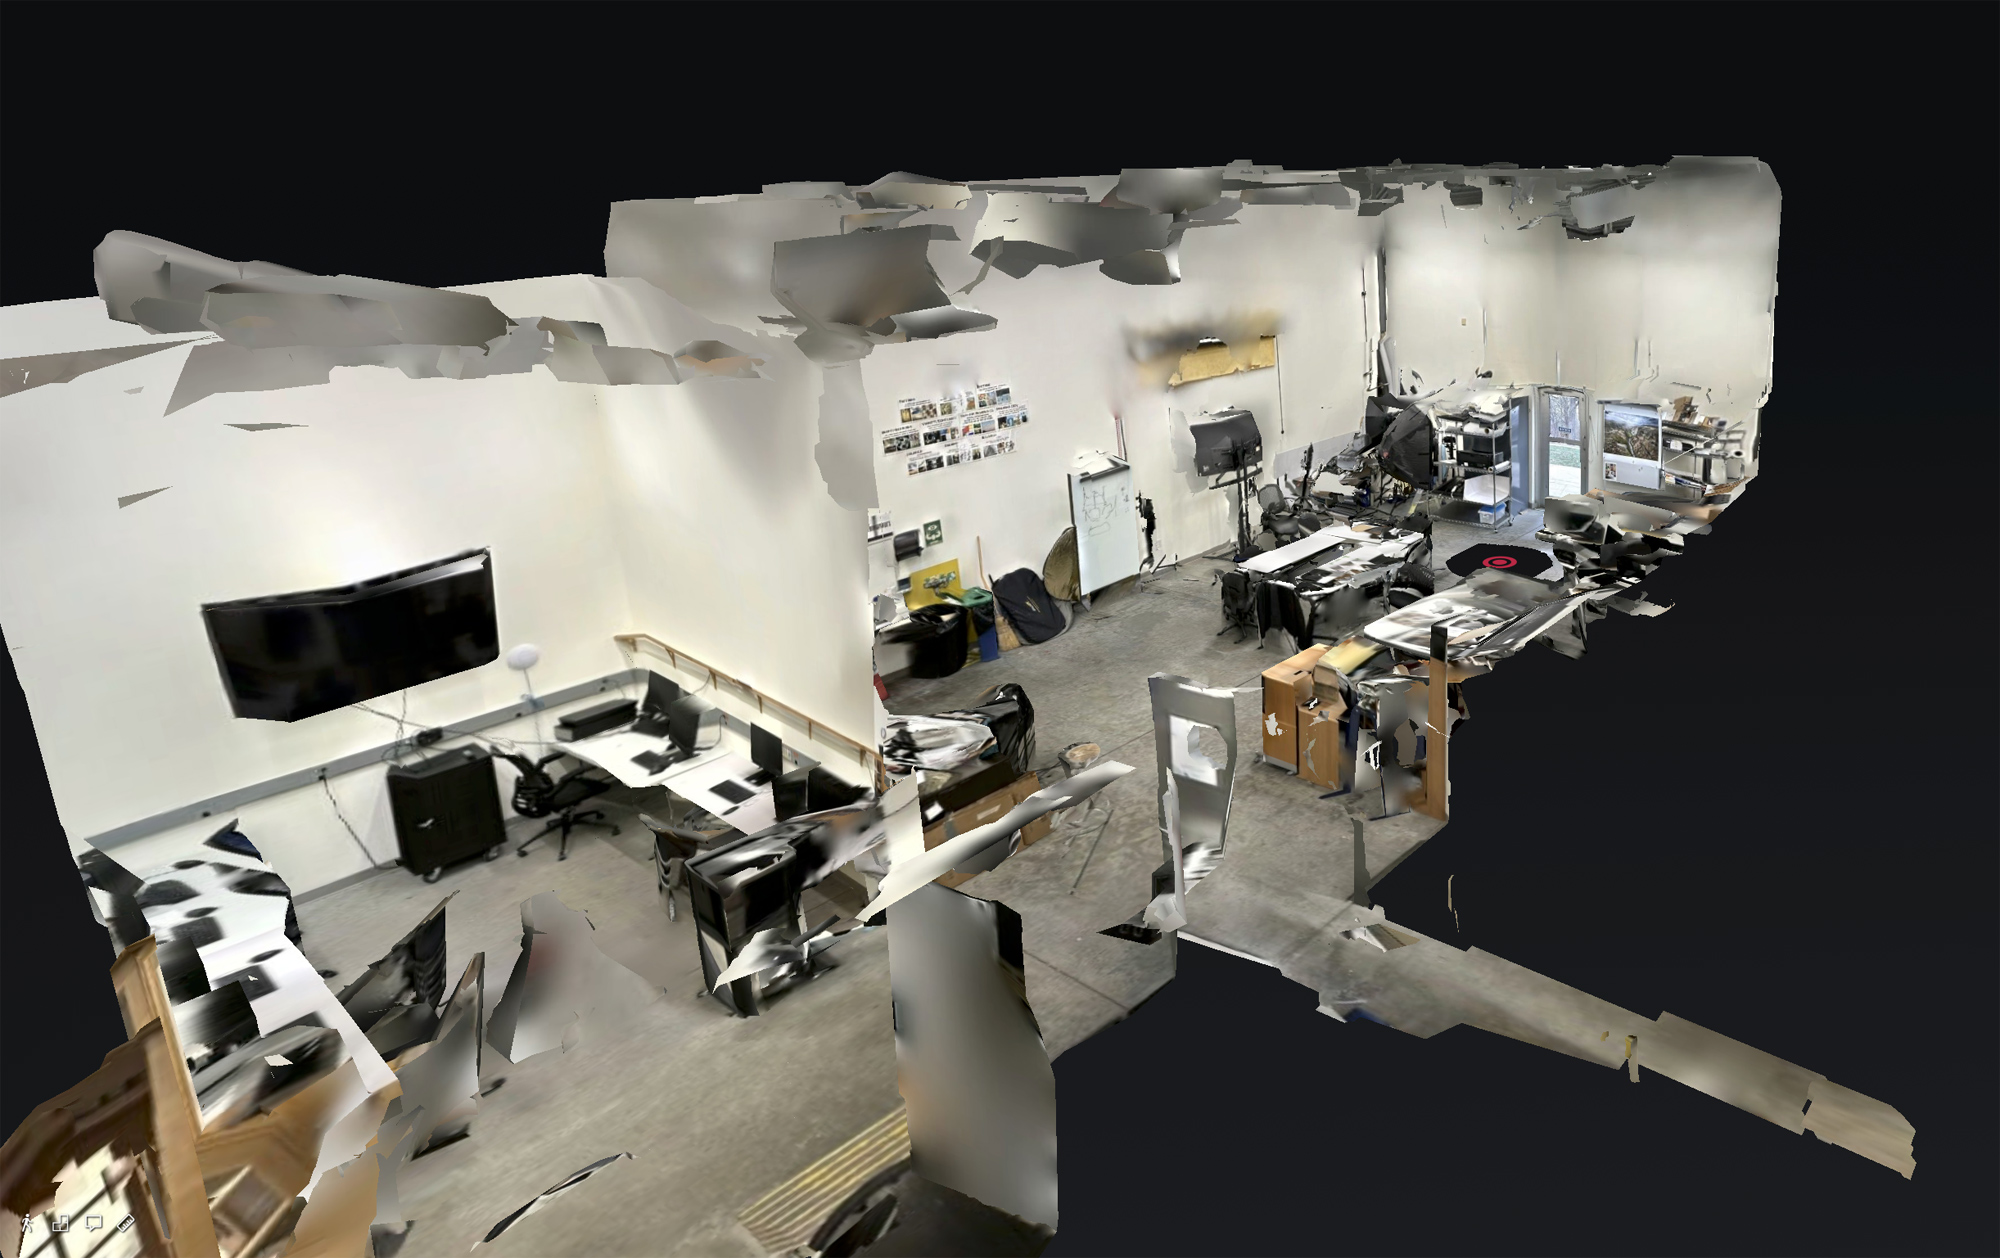
I saw how cool this was and decided to take it down to the Indianapolis Art Center where I now have studio space. I decided when I got to the art center that I would take a 3-D model of my new studio as well as one of the galleries at the art center.
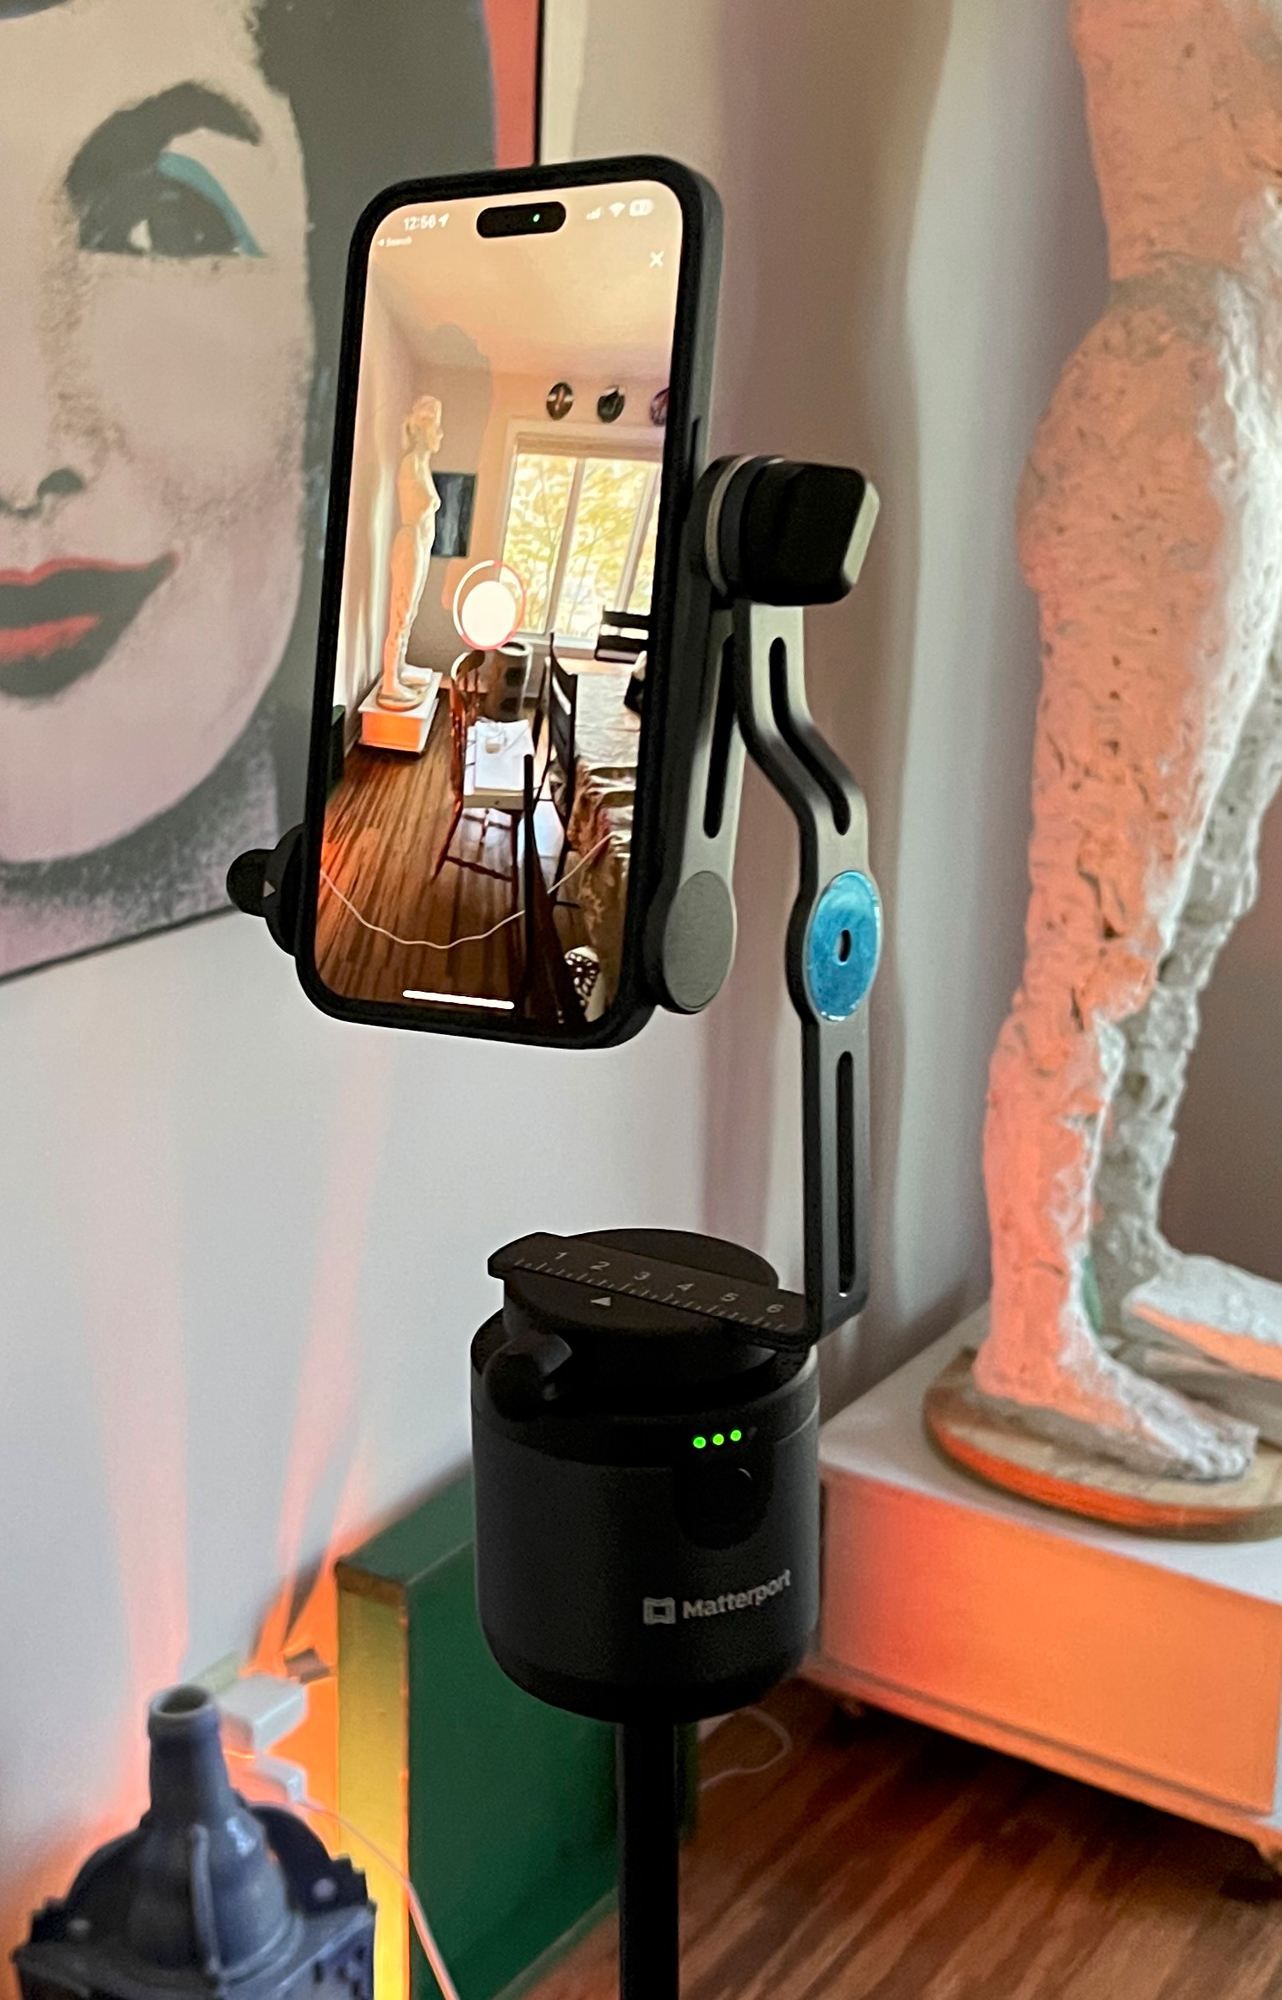
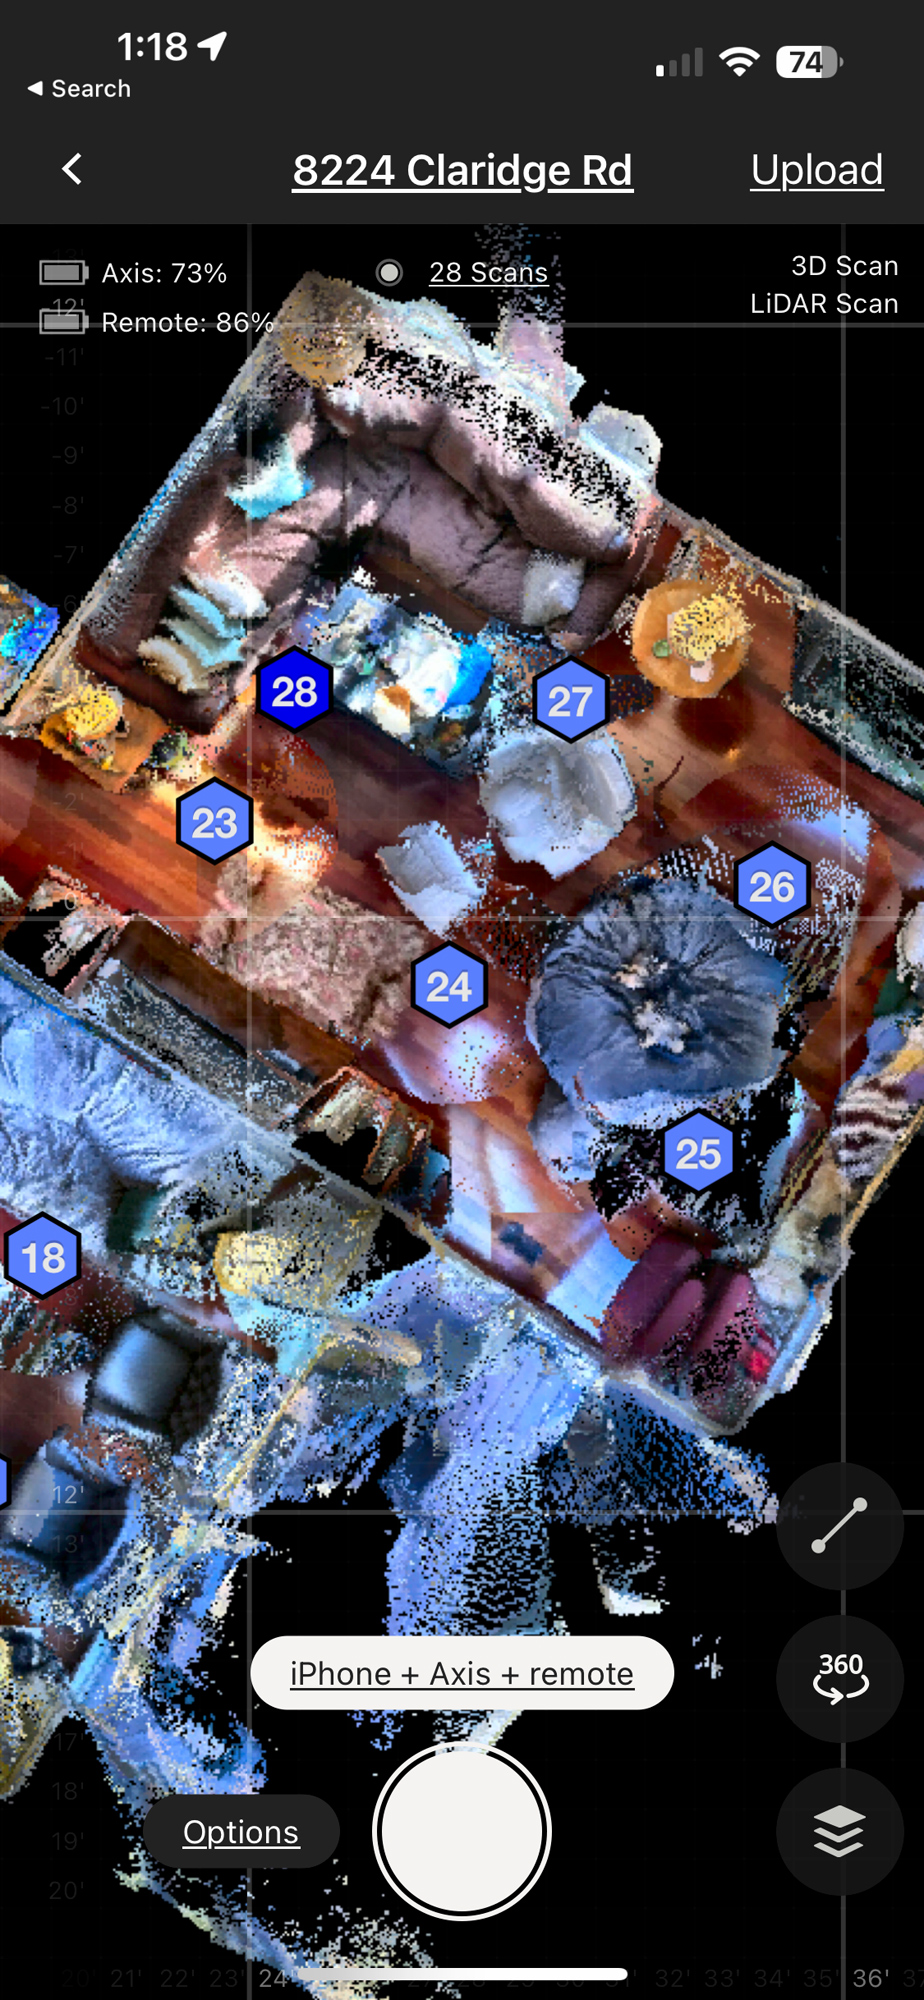
I started by setting up the matter, port access product on a tripod, making sure my lenses were centered, and that the angles reset properly. There are prompts along the way to make this easy. They also supply remote control, which is a little tiny button and you just pair it with the camera and you’re ready to go. I shot my first picture and the camera automatically rotated to the next position with the push of a button. I took the next picture. And this continued into all the exposures that were made.
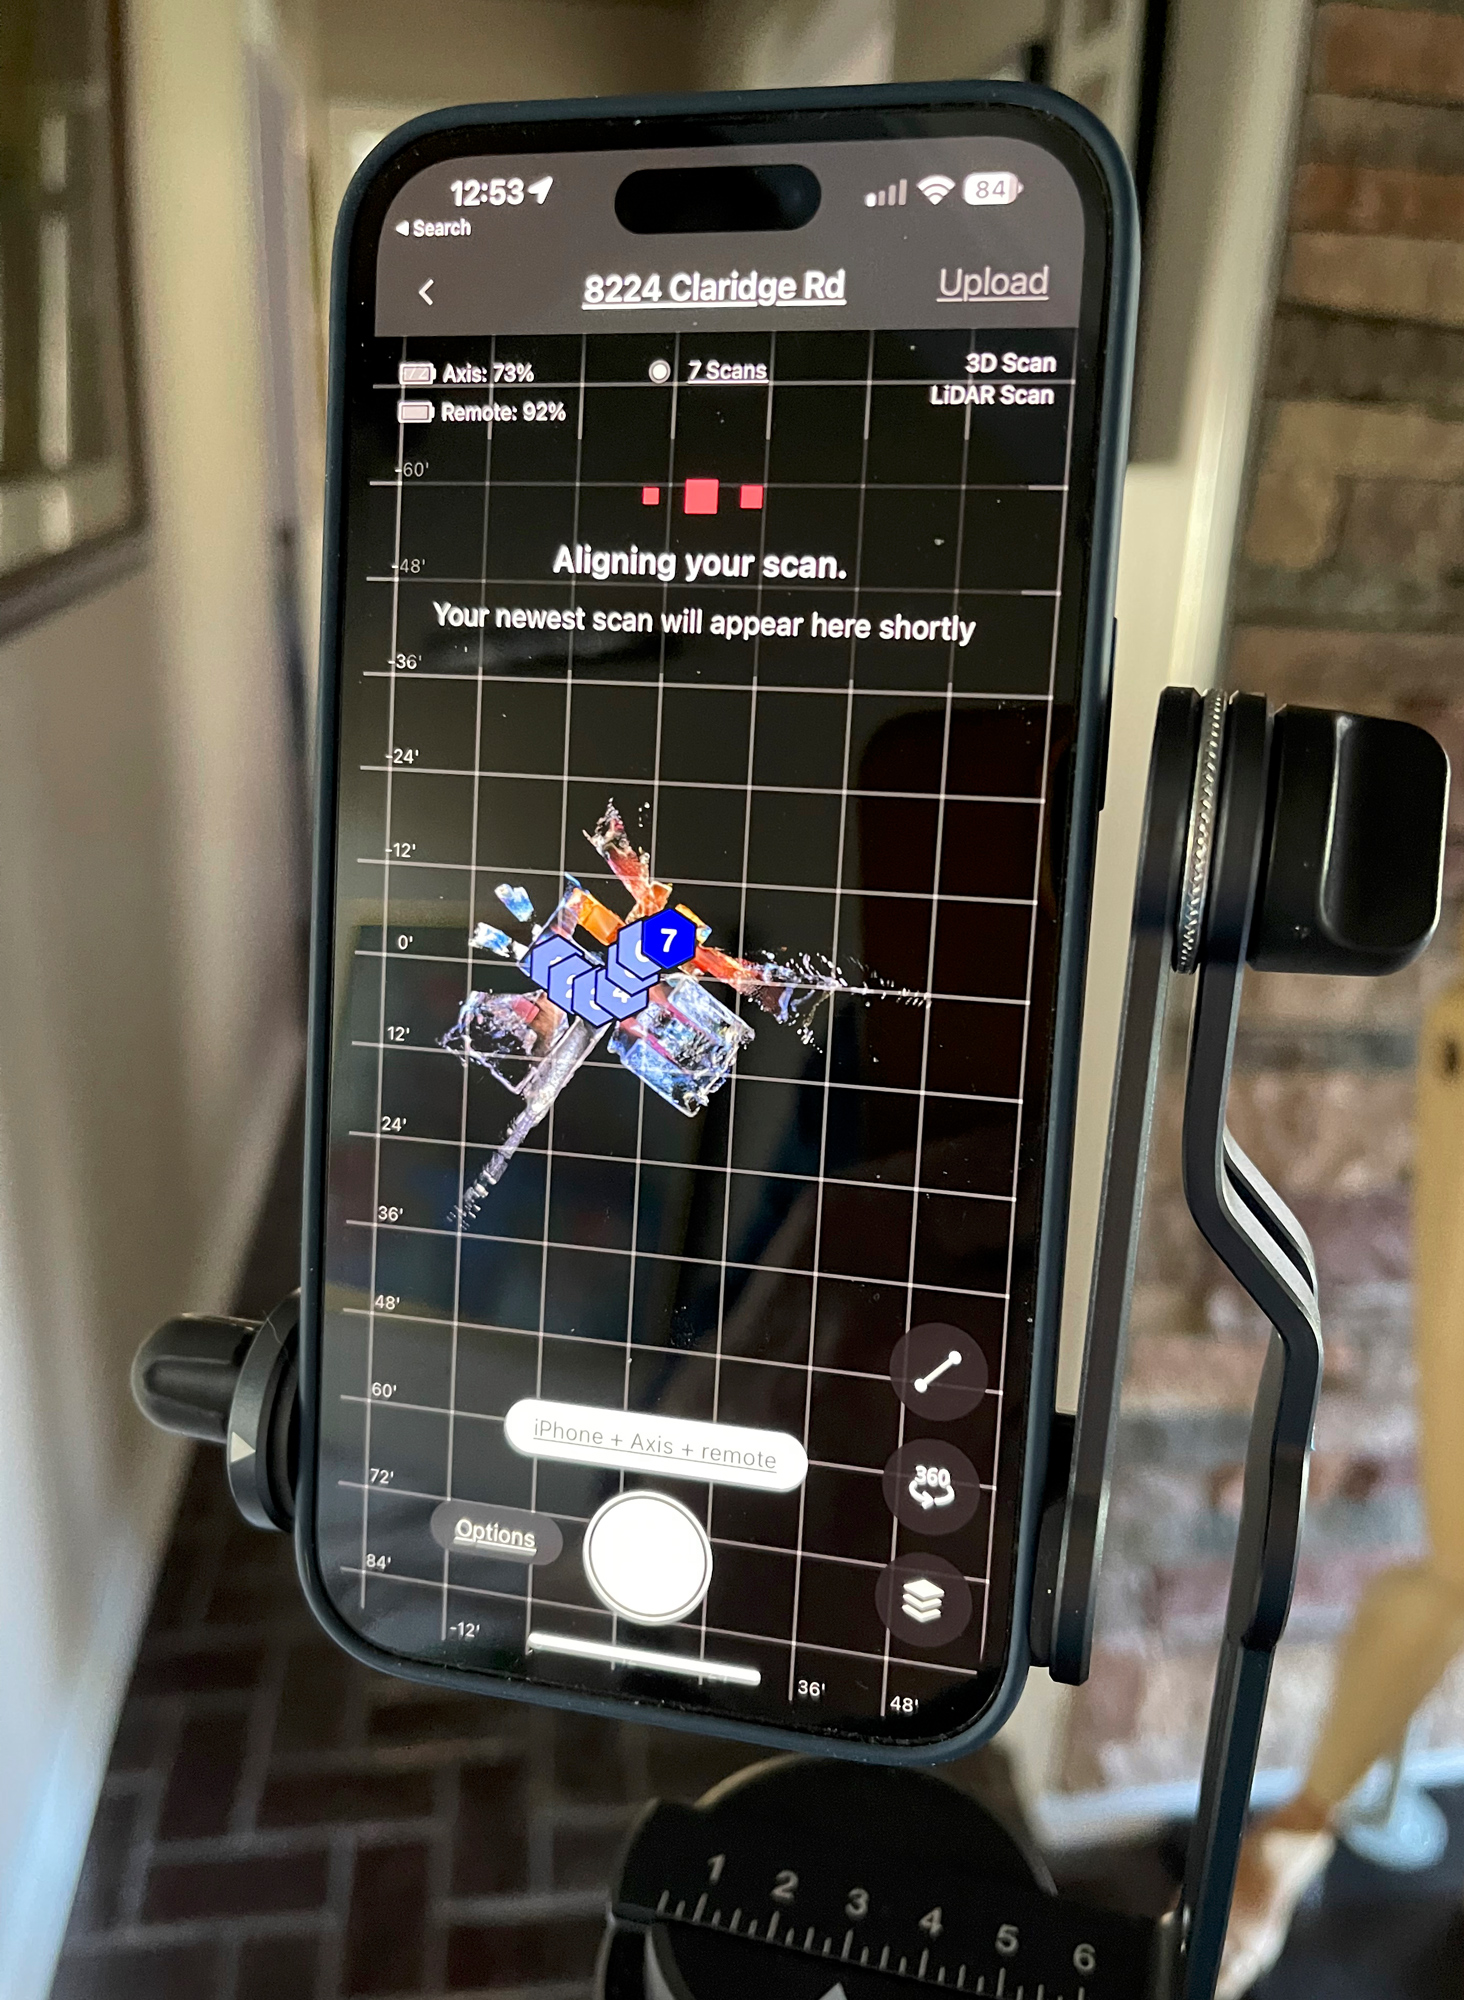
I then picked up the tripod and moved about 10 feet and repeated the process. And I continually do this in multiple spots. It seems the more spots you do the better the model is putting together itself when uploaded to the matter port site. If I’m going to repeat, this, which I will once the studio is finally complete is due a lot more locations for a lot more detailed 3-D model.
I’ve uploaded what is called the space which is what it is called and saved it on the iPhone to the Matterport site where it would start doing the math and generating the 3-D walk-through model. This can take several hours and when it is finished being generated you get an email notification.
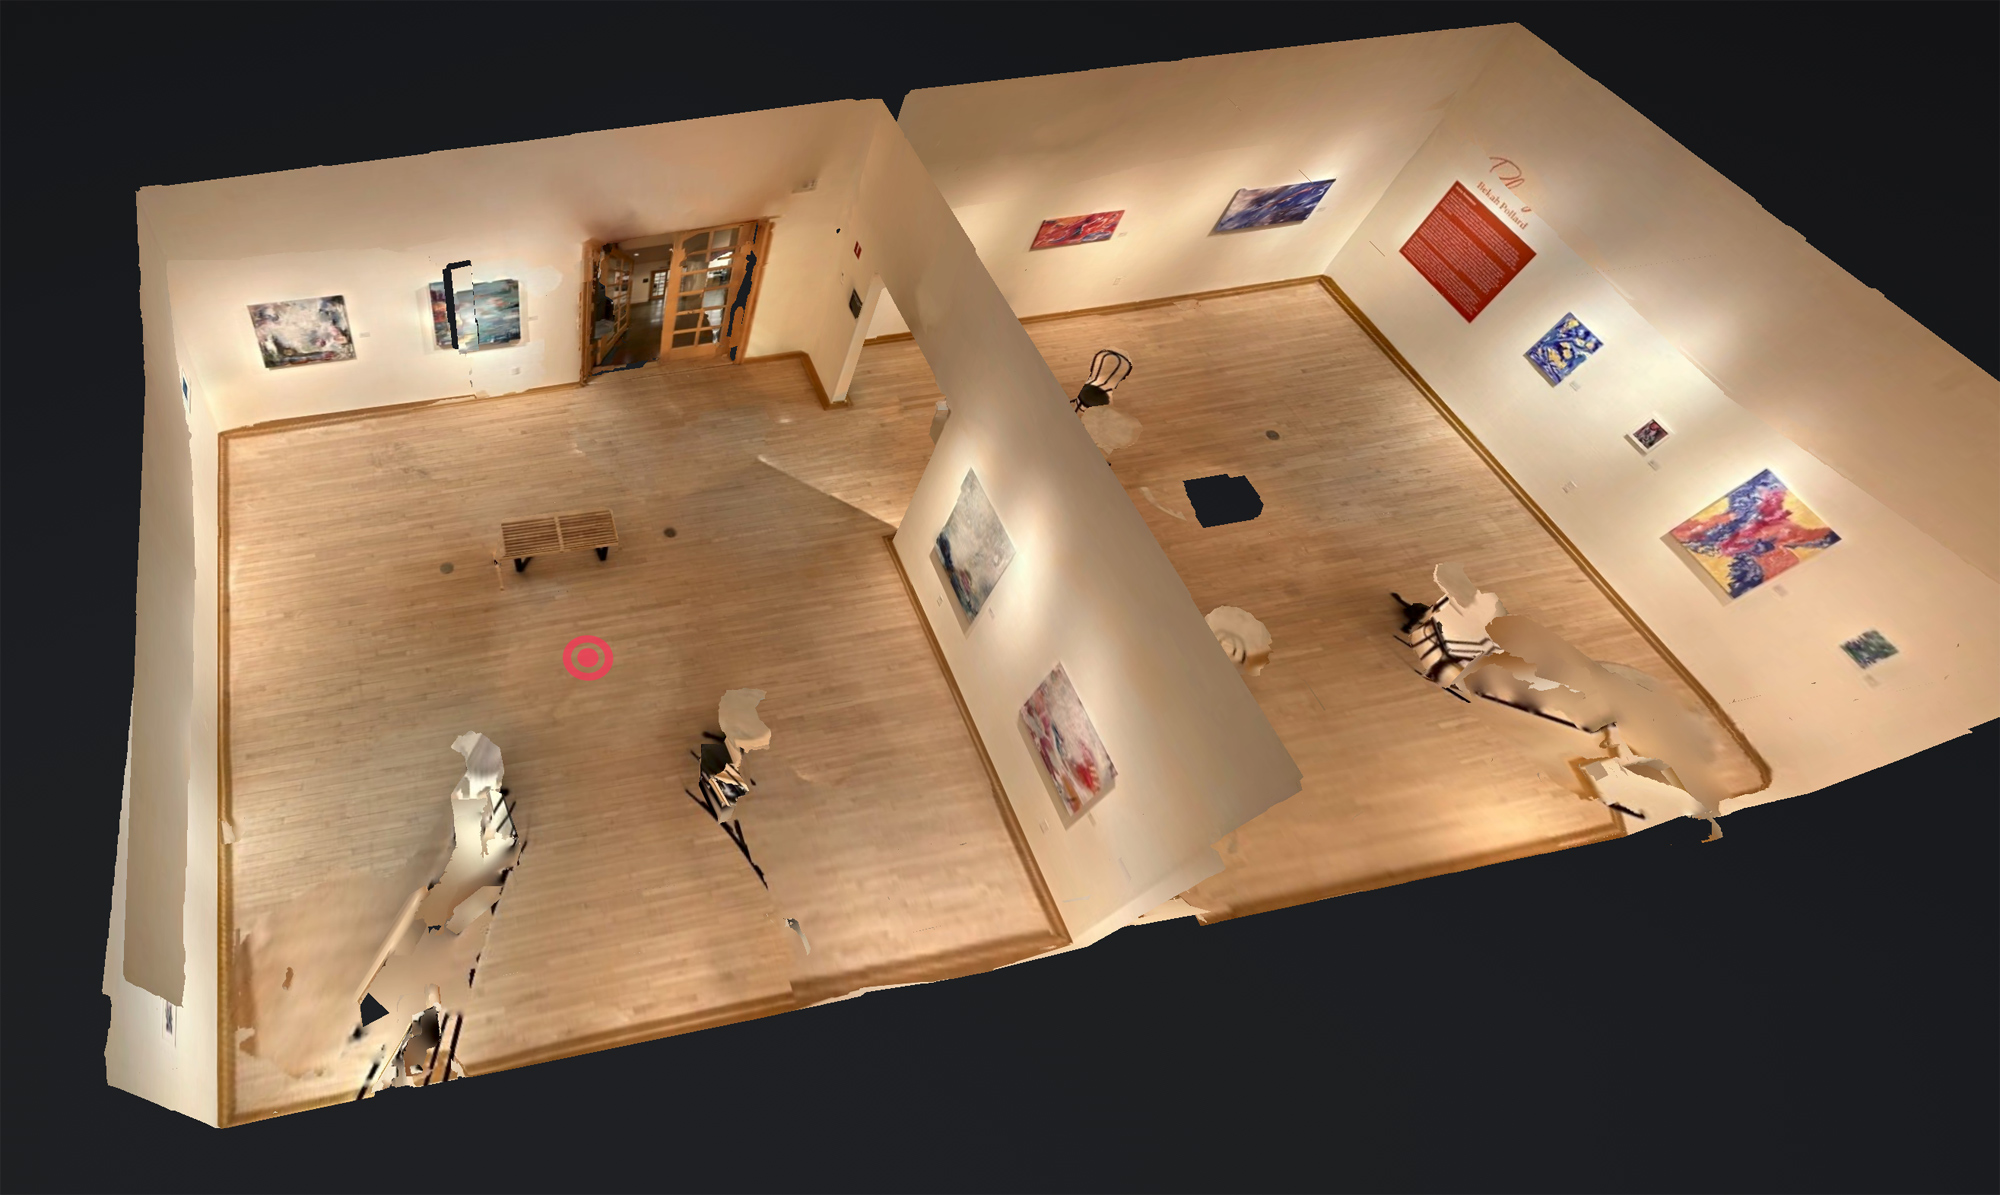
The Indianapolis Art Center Gallery
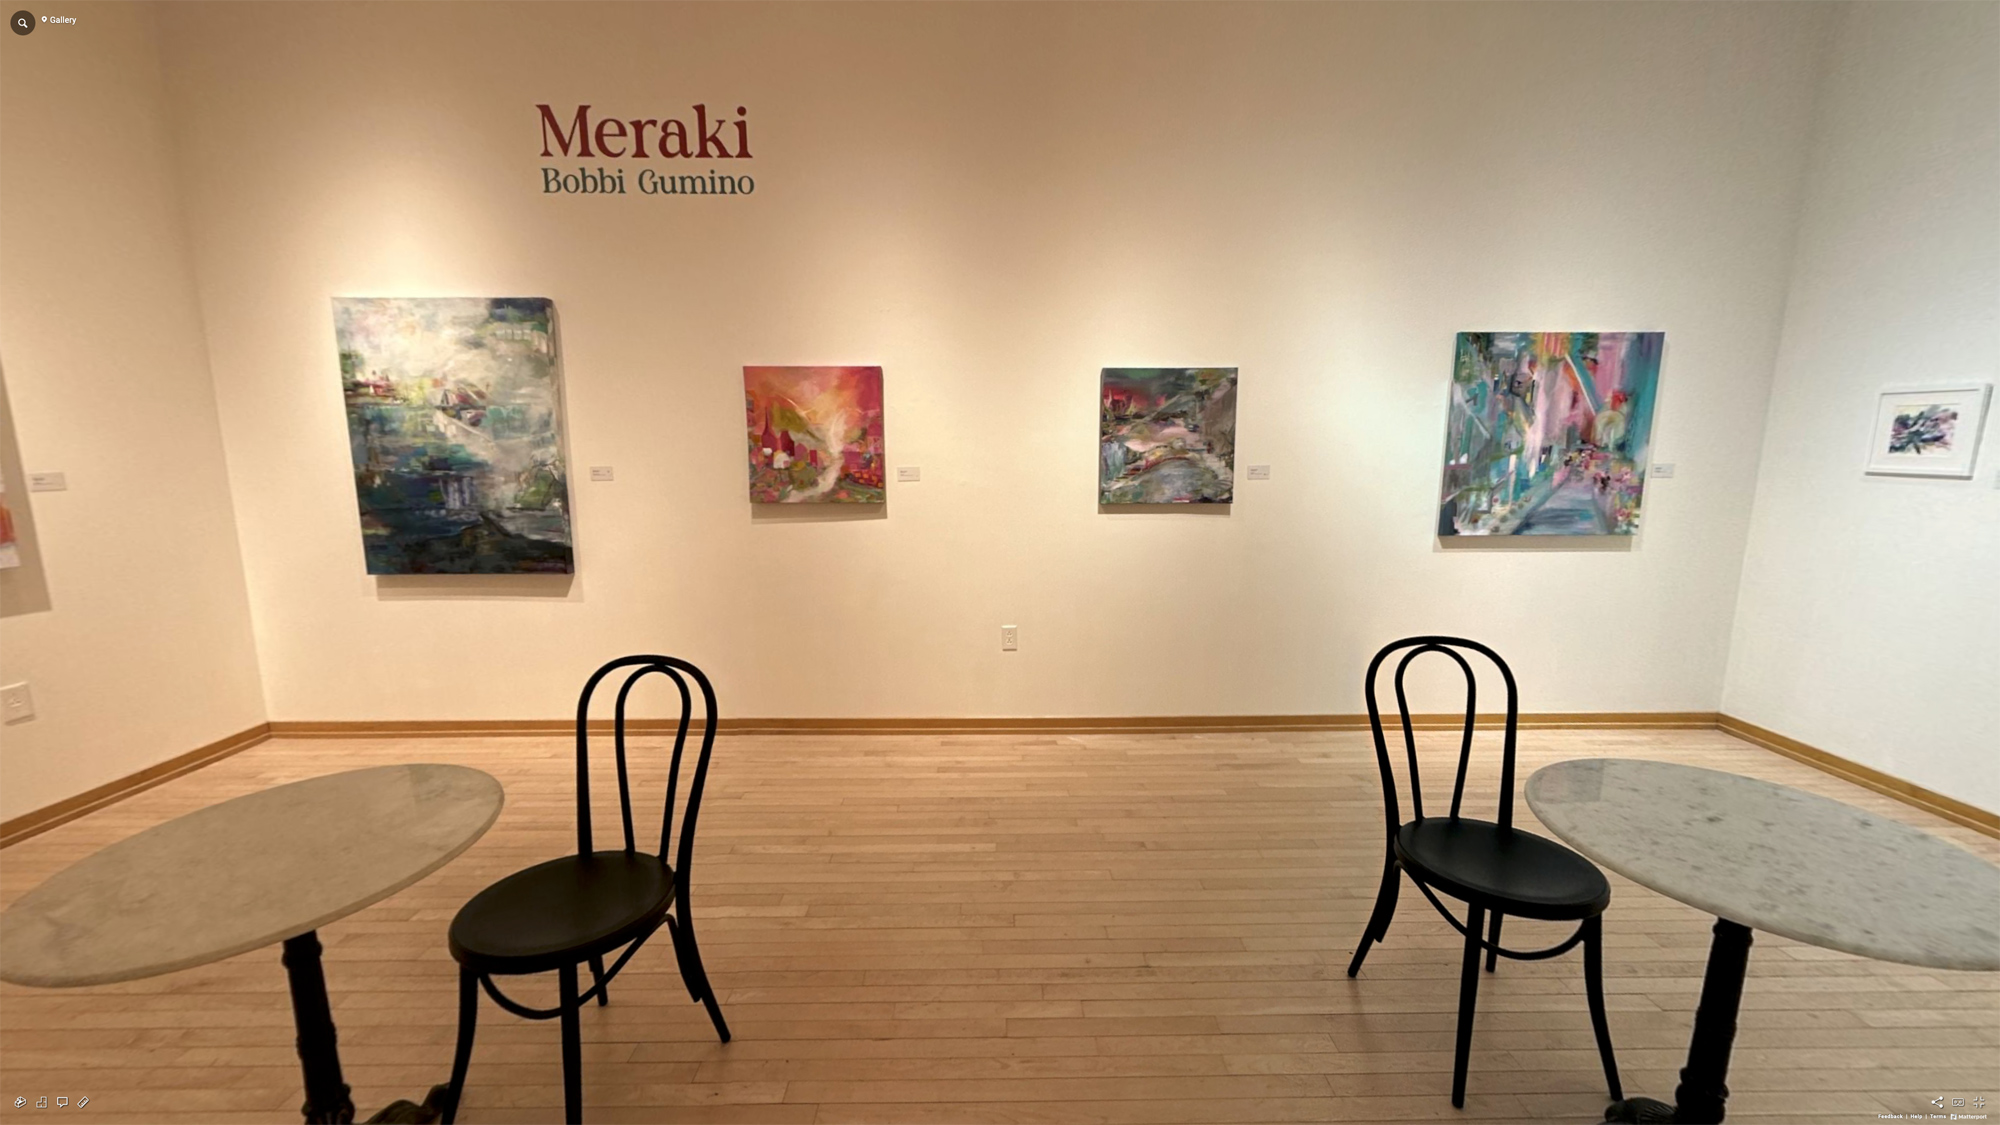
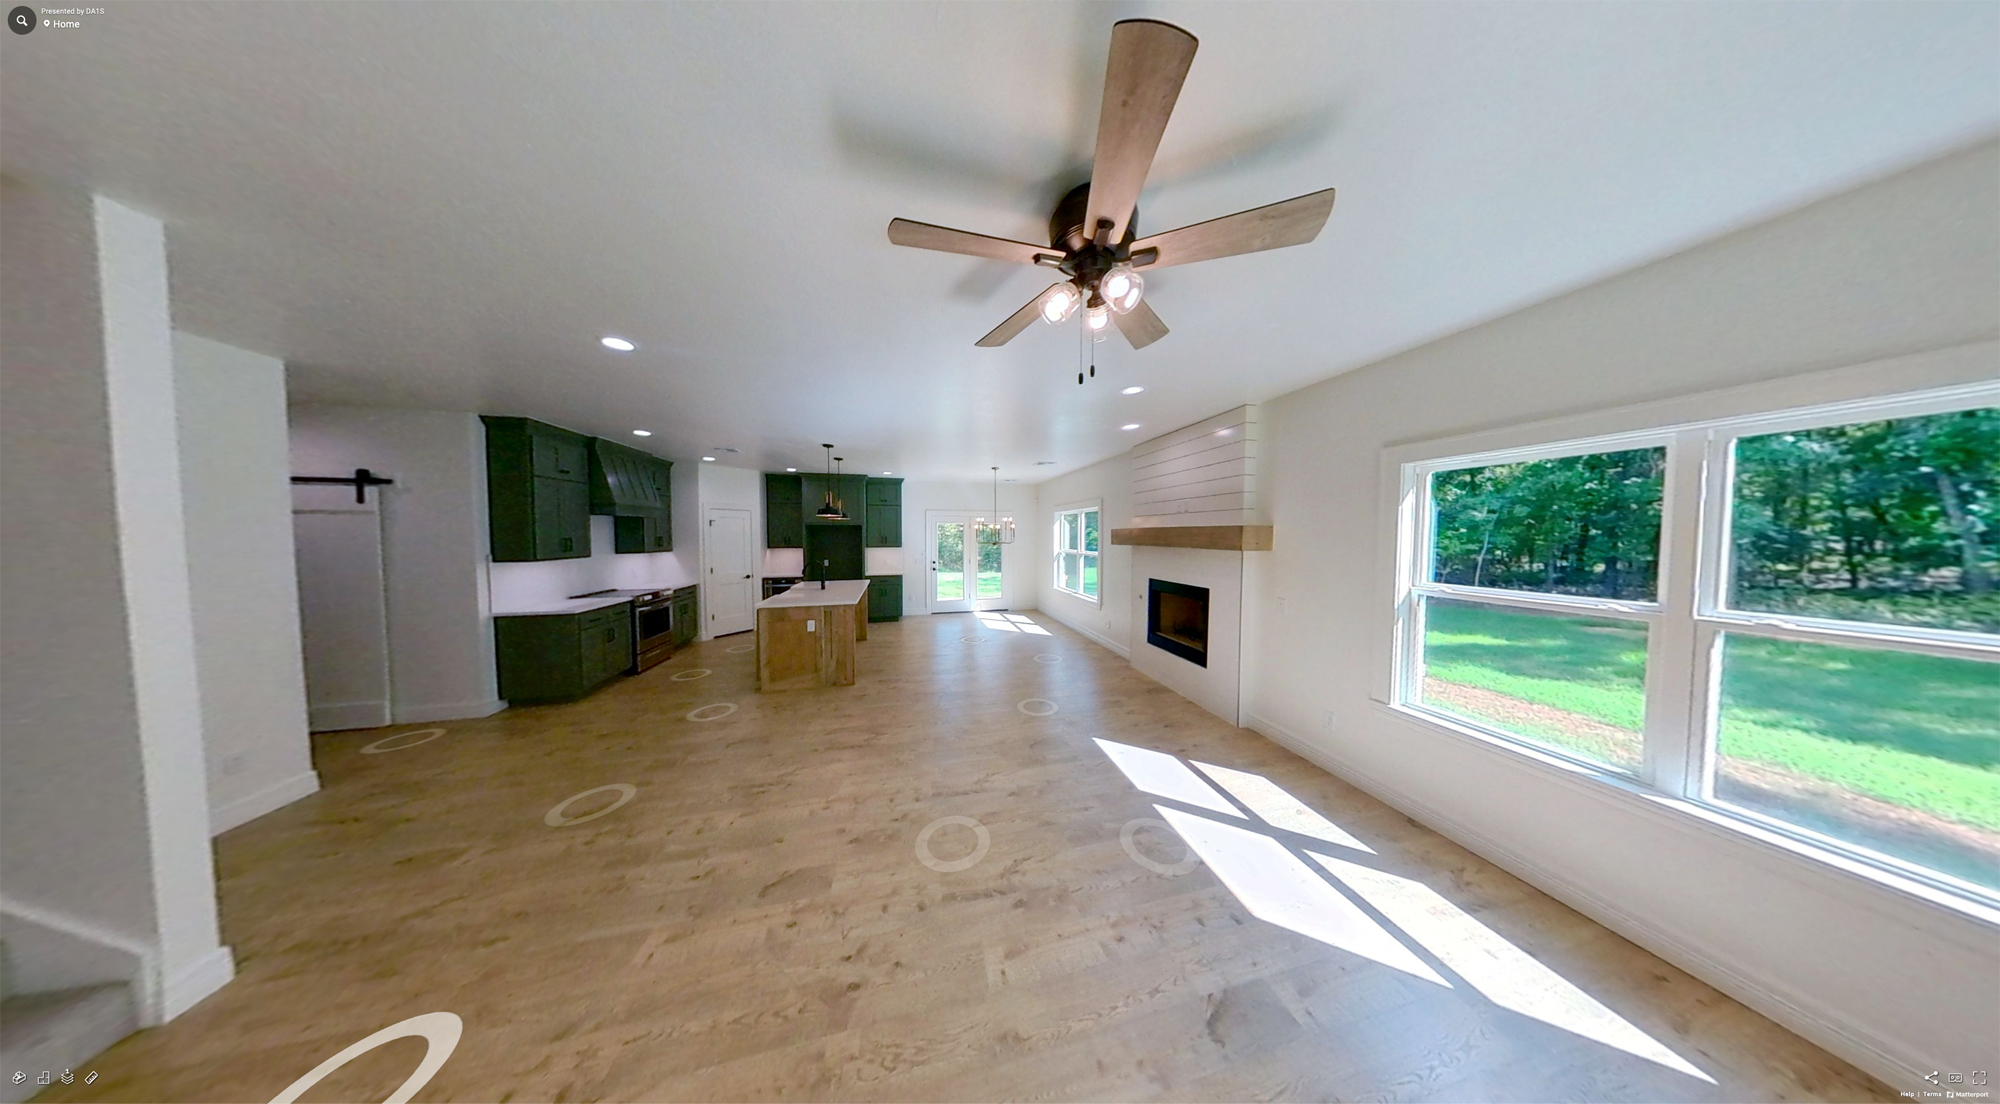
Across from my studio is the art center gallery. It’s a beautiful space, brightly lit, and exhibits continually change in the gallery. There’s a big step up from where I was before as the gallery attracts a lot of people and it’s quite a nice place just to sit and be quiet and enjoy a coffee. Did I mention that in the art center? There’s a coffee spot.
In any case, I set my tripod up in the middle of the gallery and created a new gallery or space that I could shoot into. Once again, this is pretty intuitive in the Matterport app on my iPhone. I then continually walked around the gallery, placing the tripod at new locations, pushing the remote button, and watching the camera do its 360 capture.
Of course, I had to make sure that the camera rotated using the access system that I rotated with it so that I was not in any of the pictures. And I did this several times for the gallery until I was satisfied I had enough images at which time I uploaded them back to the matter port site. If I would do this again, I’d take a lot more exposures and make them closer to the works of art so we could see them in more detail.
The Studio
Now that I actually created three spaces and I have shared with you the links that allow you to explore the spaces I plan on based upon what I learn take things even further. I’d love to do a full tour where I can do multiple rooms that connect together. You may have noticed that if you’re looking at one of the models above, you’ll see a circle and each circle represents where the camera was placed. So you can just click on the circle and go right to where that camera did its 360 views.
Once you click into the view above you can move your mouse and click to travel through the space. Once again, I should have shot from many more locations. I’ll do another image of this space once the studio is completely set up.
It seems from what I’m learning the more places. I set the camera and take pictures the more detailed the model becomes. So I will experiment continually and learn more as I go using this camera system. I do want to get my hands on one of the larger pro systems and give that a try as I hear it’s quite amazing.
Kevin Raber Jr’s House
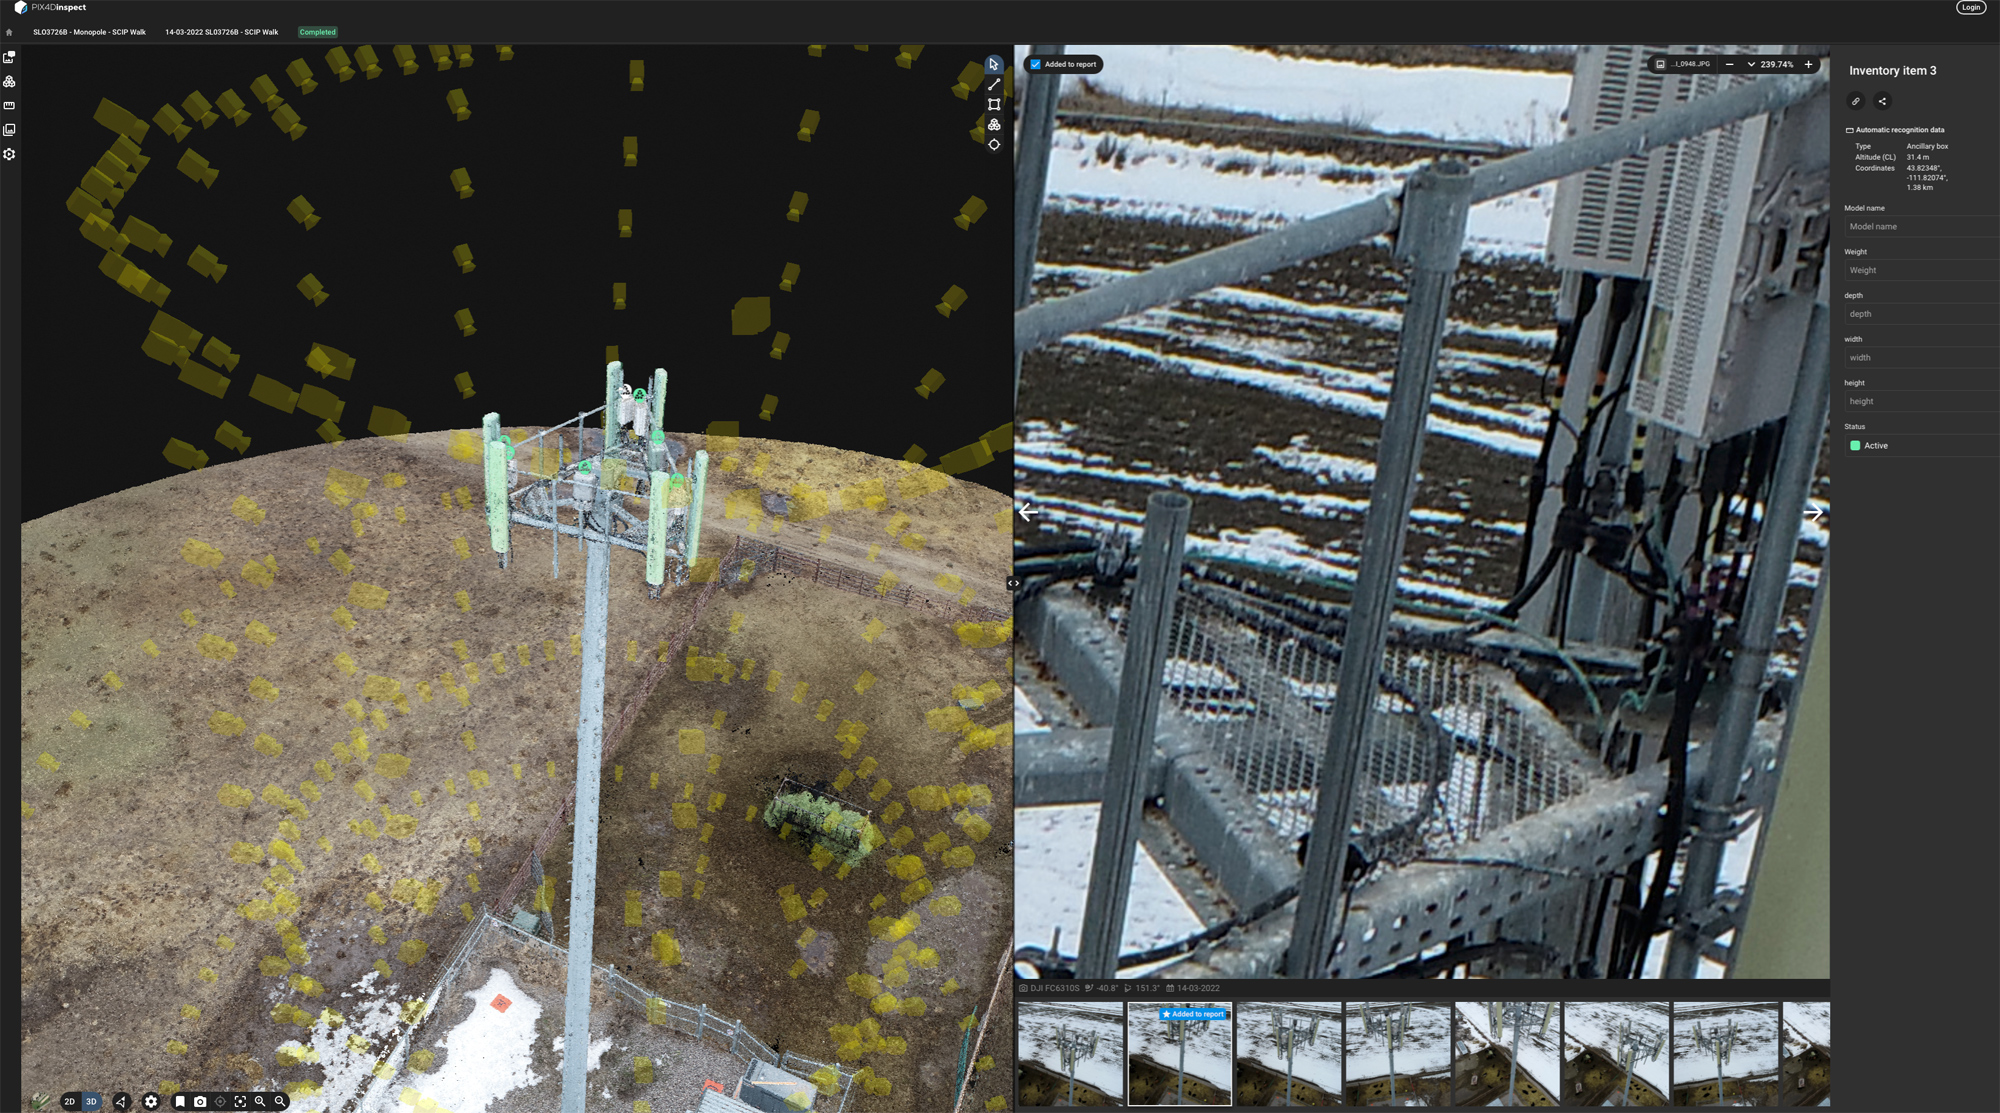
My son is a master with all of this stuff. He does LIDAR, 3D mapping with his drone for commercial purposes, as I show below. He just purchased a new house and did an excellent Matterport tour of his new home. Click on the picture or link and take a tour. Move your mouse pointer in the direction you want to go or click on the circles. The circles designate where each capture was made. You can even climb stairs in the above space.
Some of Kevin’s Other Work
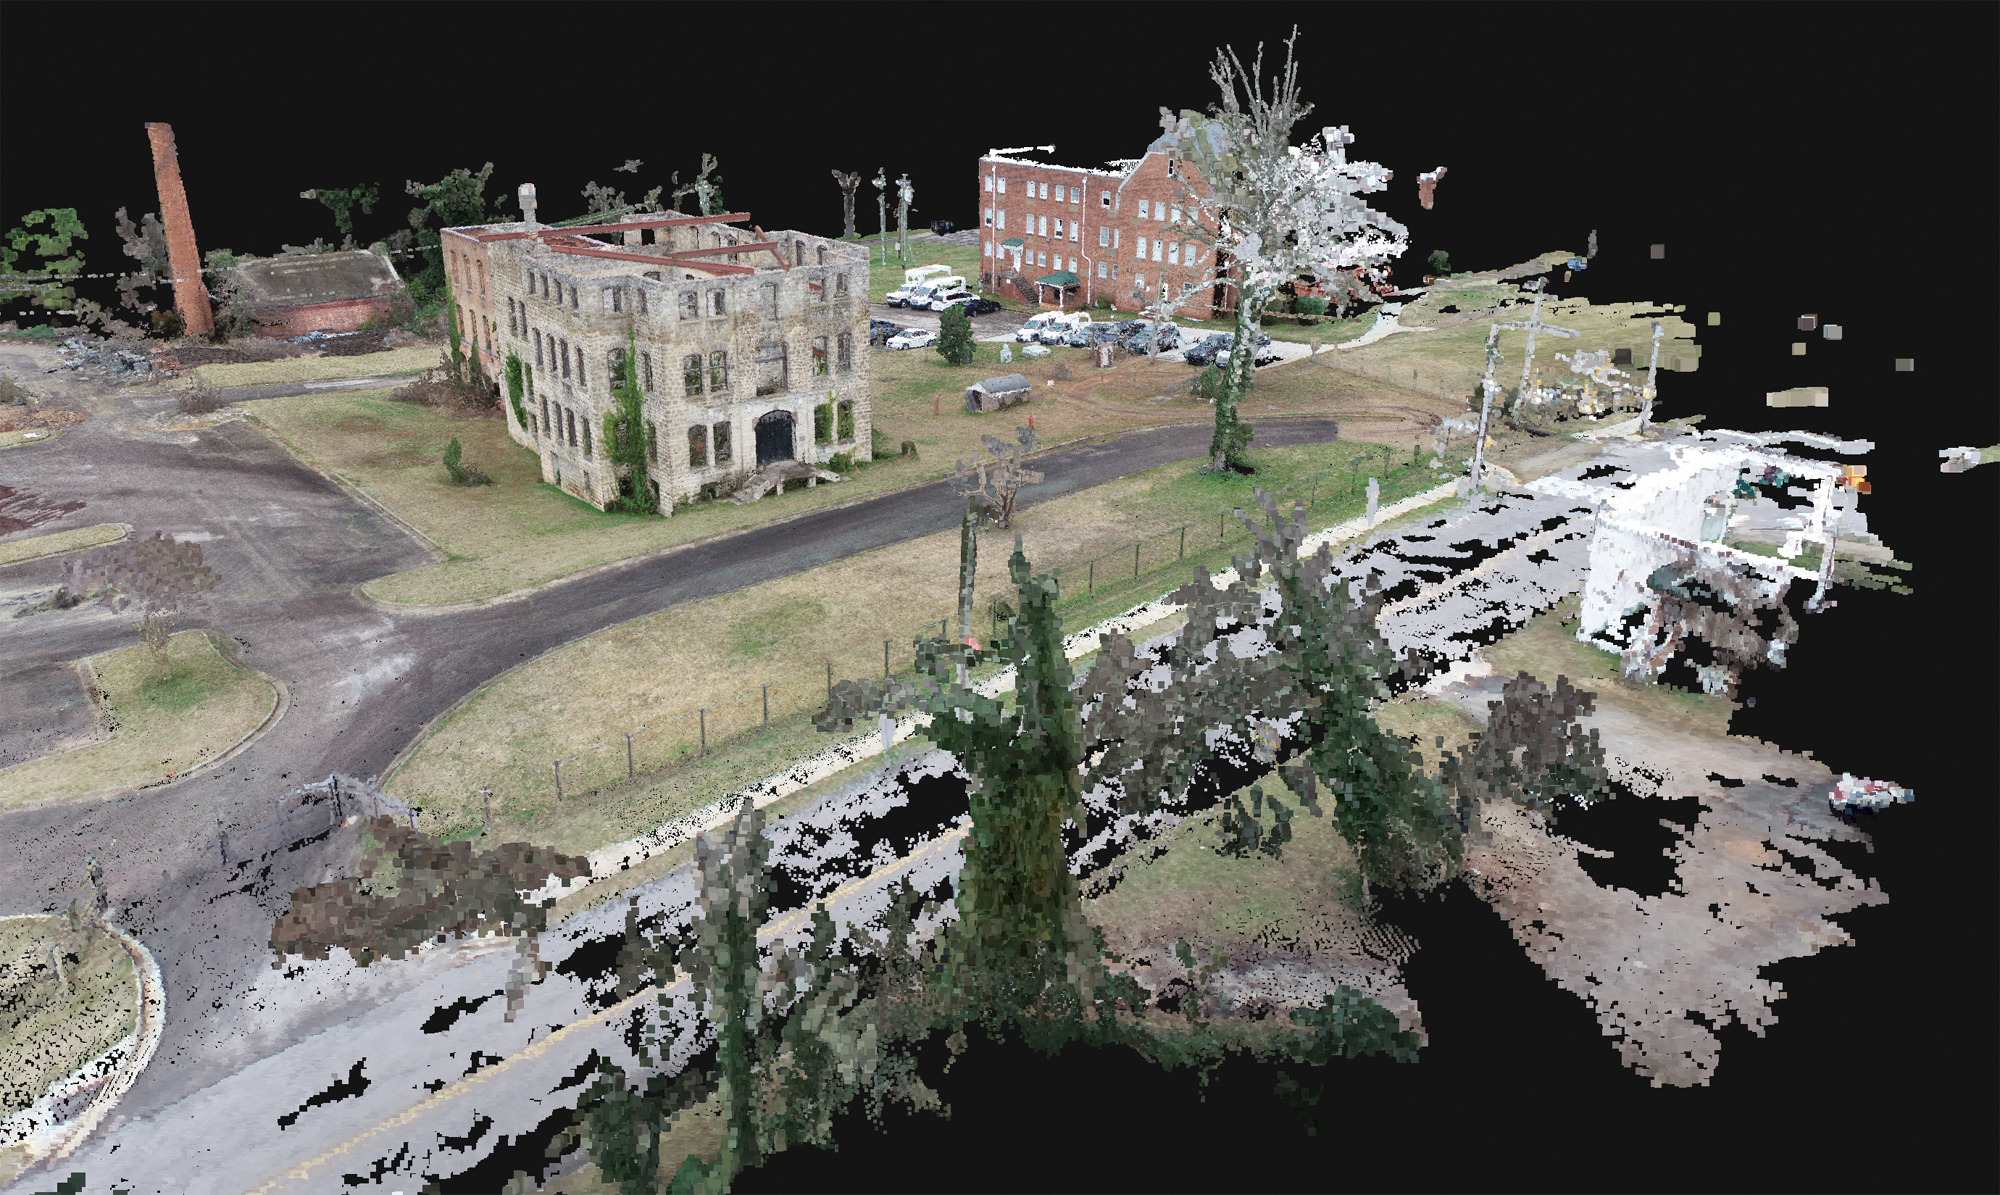
The below images are fun to explore.
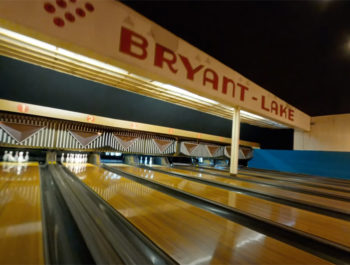
Here is a 3D Model for a historic preservation project in Raleigh, North Carolina
Final Words
I think we are just beginning to see the possibilities of what this immersive image capture can do. If for example, you had a display of your work in a gallery you could easily use the Matterport system to capture the full gallery and then share it with whoever you want. You could embed it into a web page and share it with the world.
This kind of work is becoming more and more popular in the real estate business. It’s now easy to tour a home without ever having to go visit it. Of course, nothing beats the real thing, but these virtual tours are getting better and better all the time.
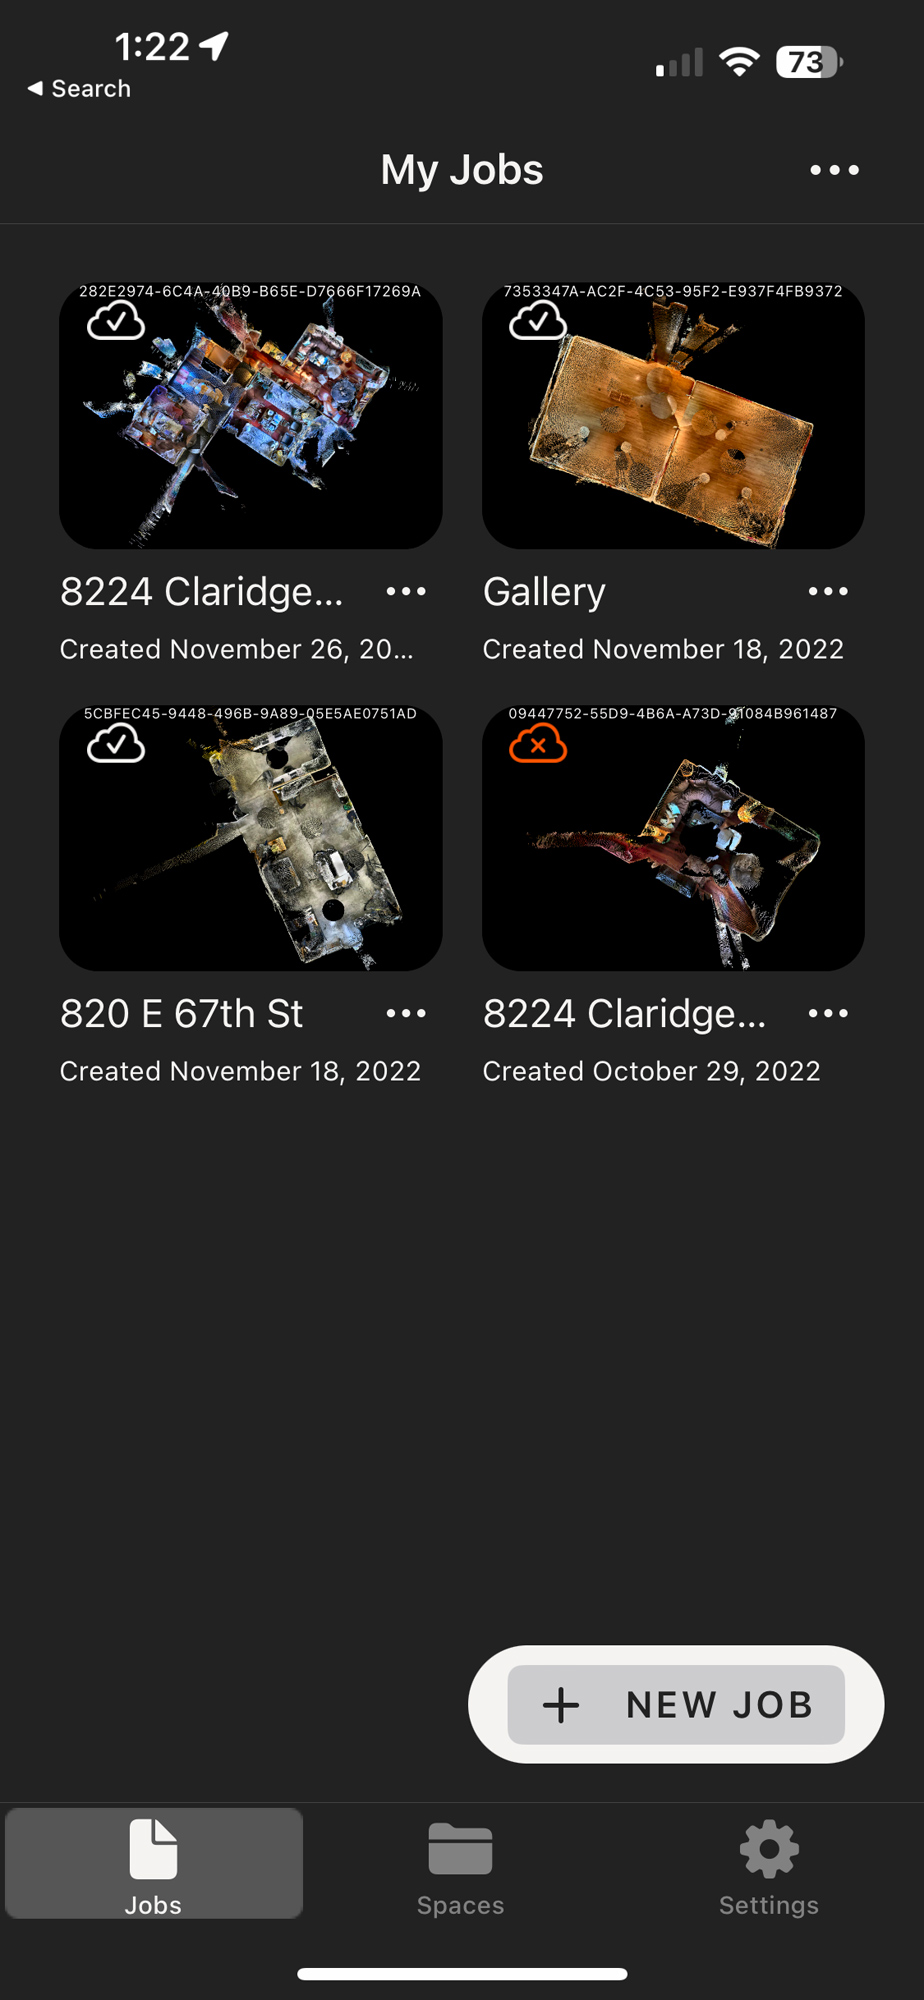
I have the 5 spaces Matterport plan and may have to upgrade it as I do more captures. I’ll share my further adventures on the forum and with a follow-up article.
Have fun. It’s easy to do, and it doesn’t cost much to get started. You’ll get hooked pretty quickly. I highly recommend the AXIS Starter Kit
Kevin Raber
November 2022
Indianapolis, IN
Photography is my passion and has been for 50 plus years. My career in photography has allowed me to travel the world, meet some of the most interesting people on the planet and see things I could never have dreamed of. My goal is to share the passion of picture taking through photographs and teaching with as many people as I can, hoping it brings them as much joy and happiness as it has me. I do this through photoPXL.com, this site, as well as Rockhopper Workshops, and other projects, as well as teaching as Artist In Residence at the Indianapolis Art Center.