Behind The Photograph: The Making Of The Tower Bridge
Follow me as I create a new photograph, like we create that photograph together. A series of short stories as I work through the photograph giving you an insight into the problems, dilemmas, solutions, and the artistic principles I apply. How I turn a normal photograph into an artistic and creative photograph. Practical, actionable knowledge to help improve your own photography straight away. I take you through how I create a photograph, from concept to finish. The first case study is a photograph called: ‘Tower Bridge, London.’ This is part one.
Please check out David’s previous article, How To Make Your Photography Connect With Viewers
Part 1: The Concept Behind The Photograph
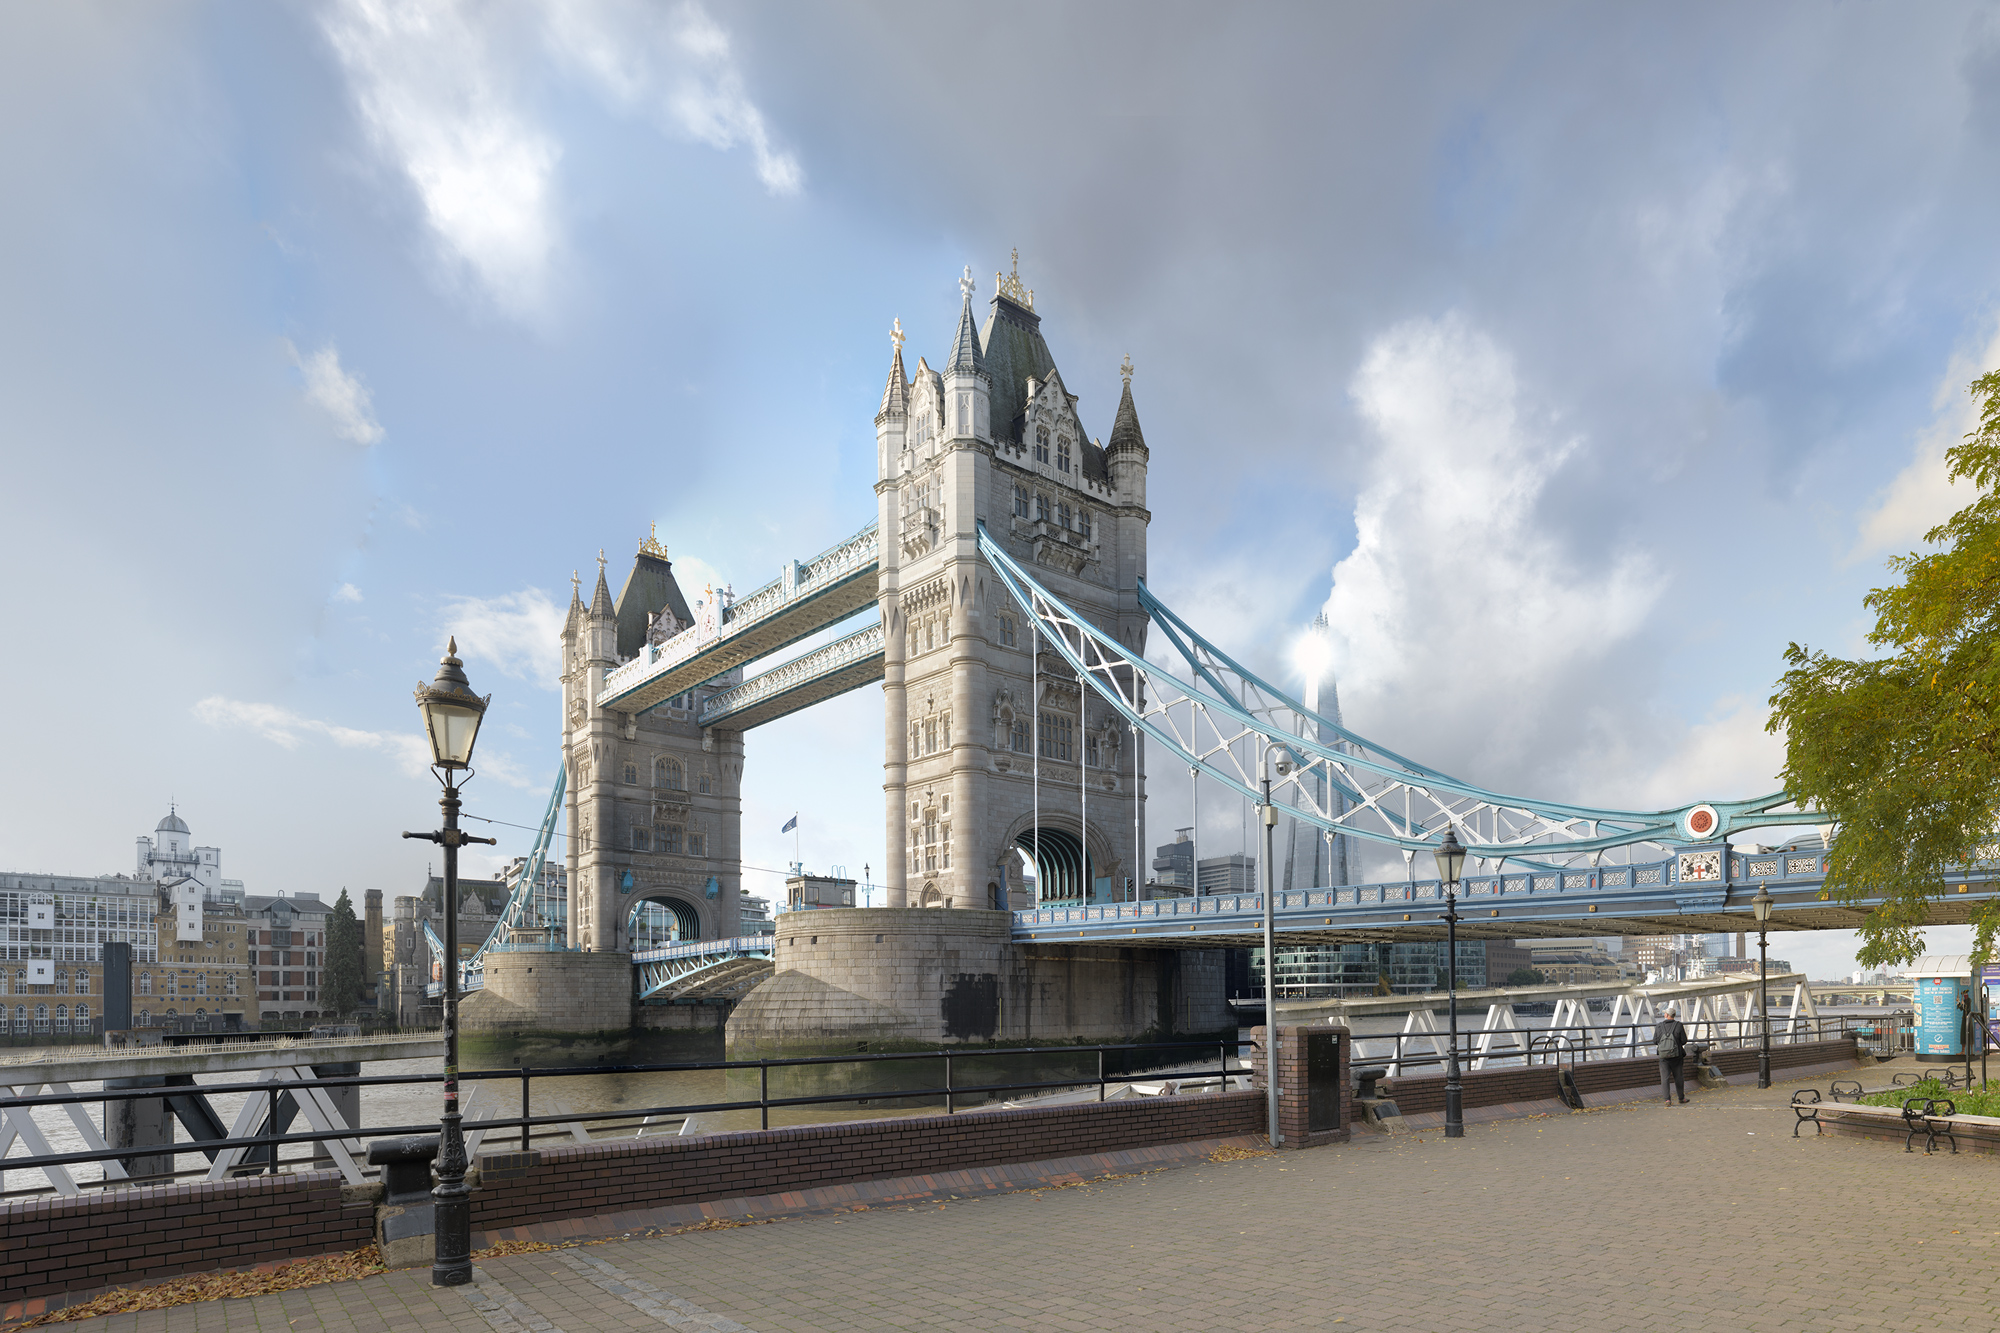
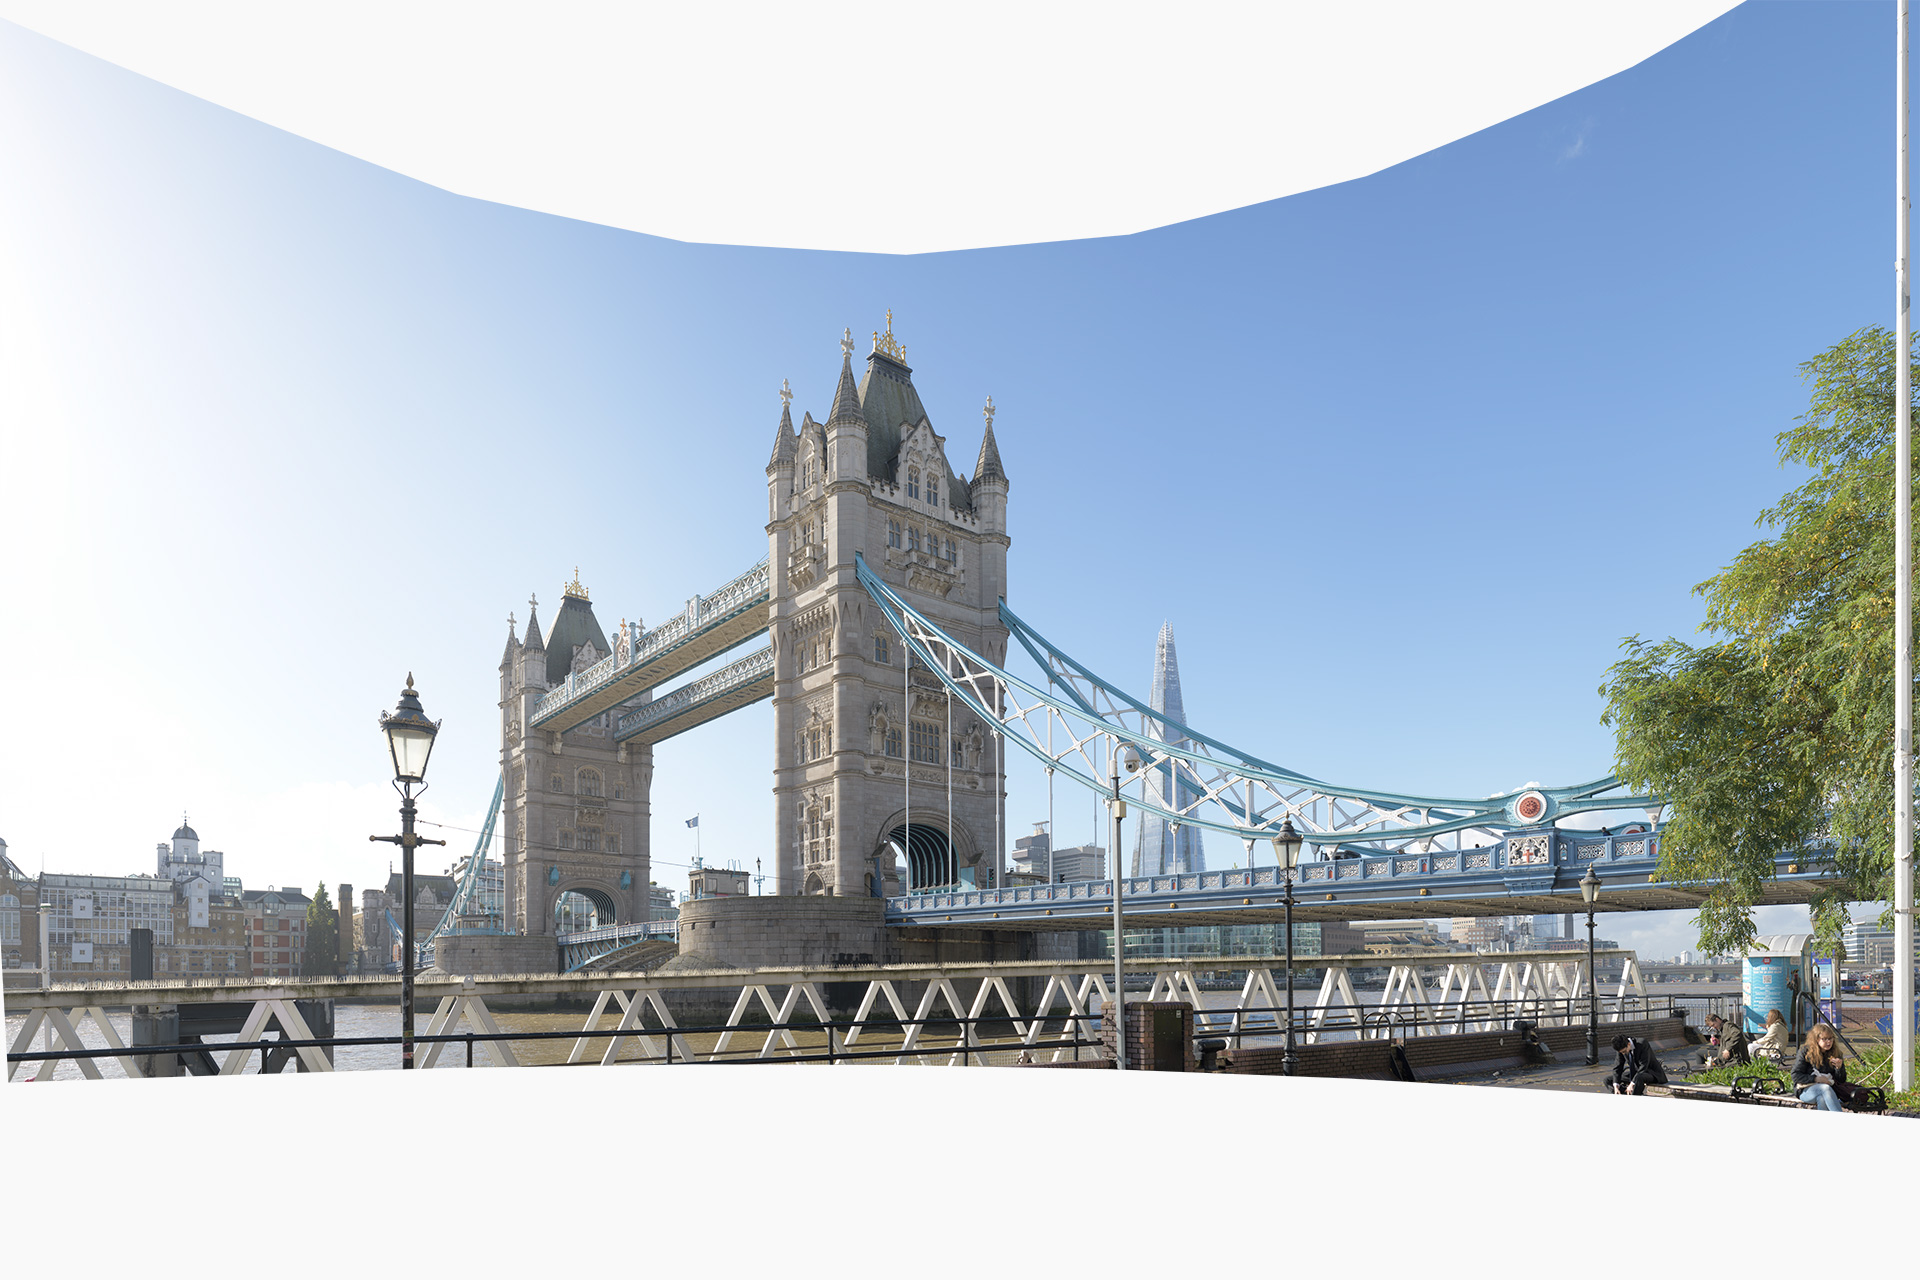
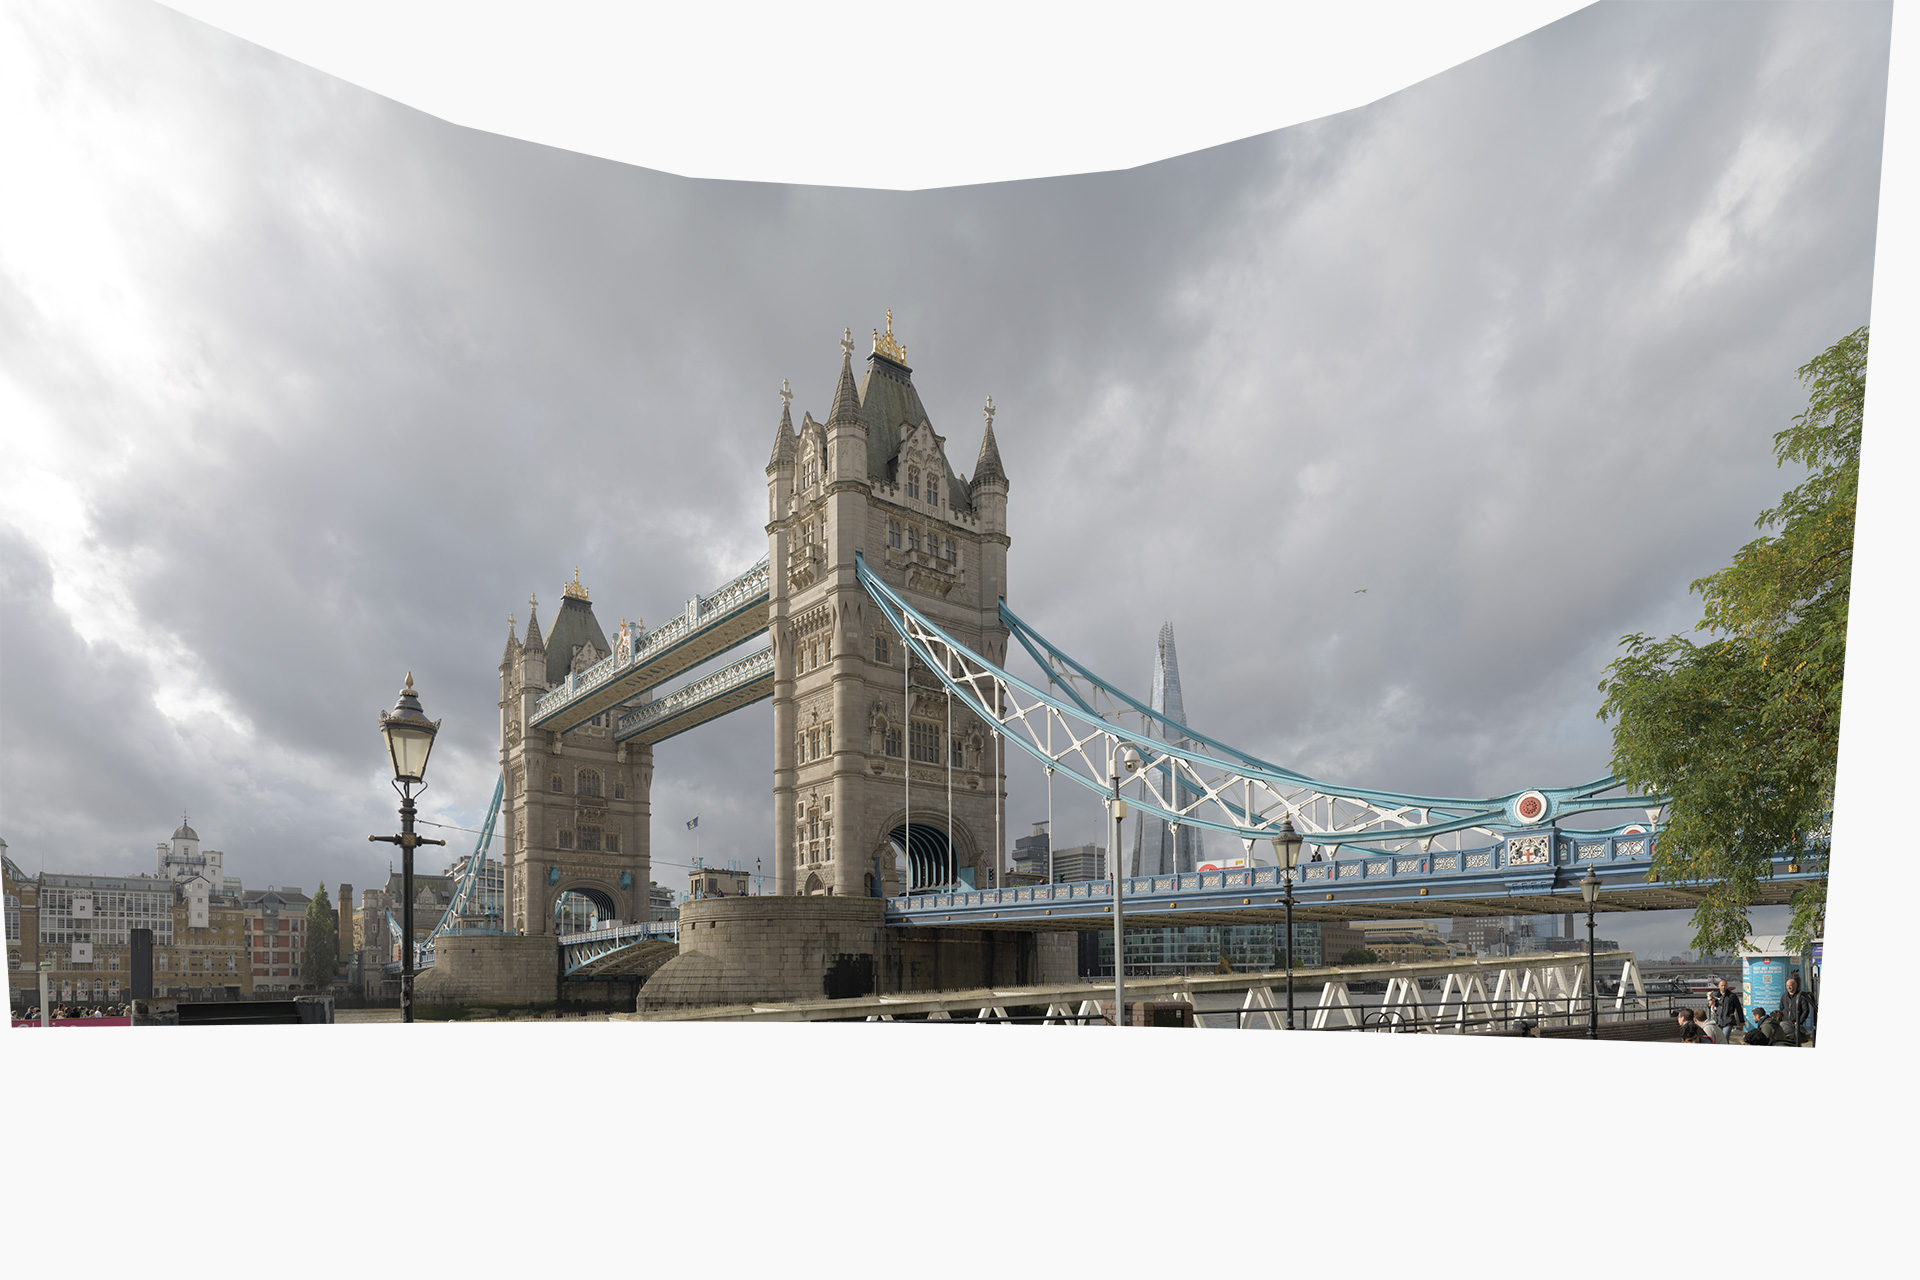
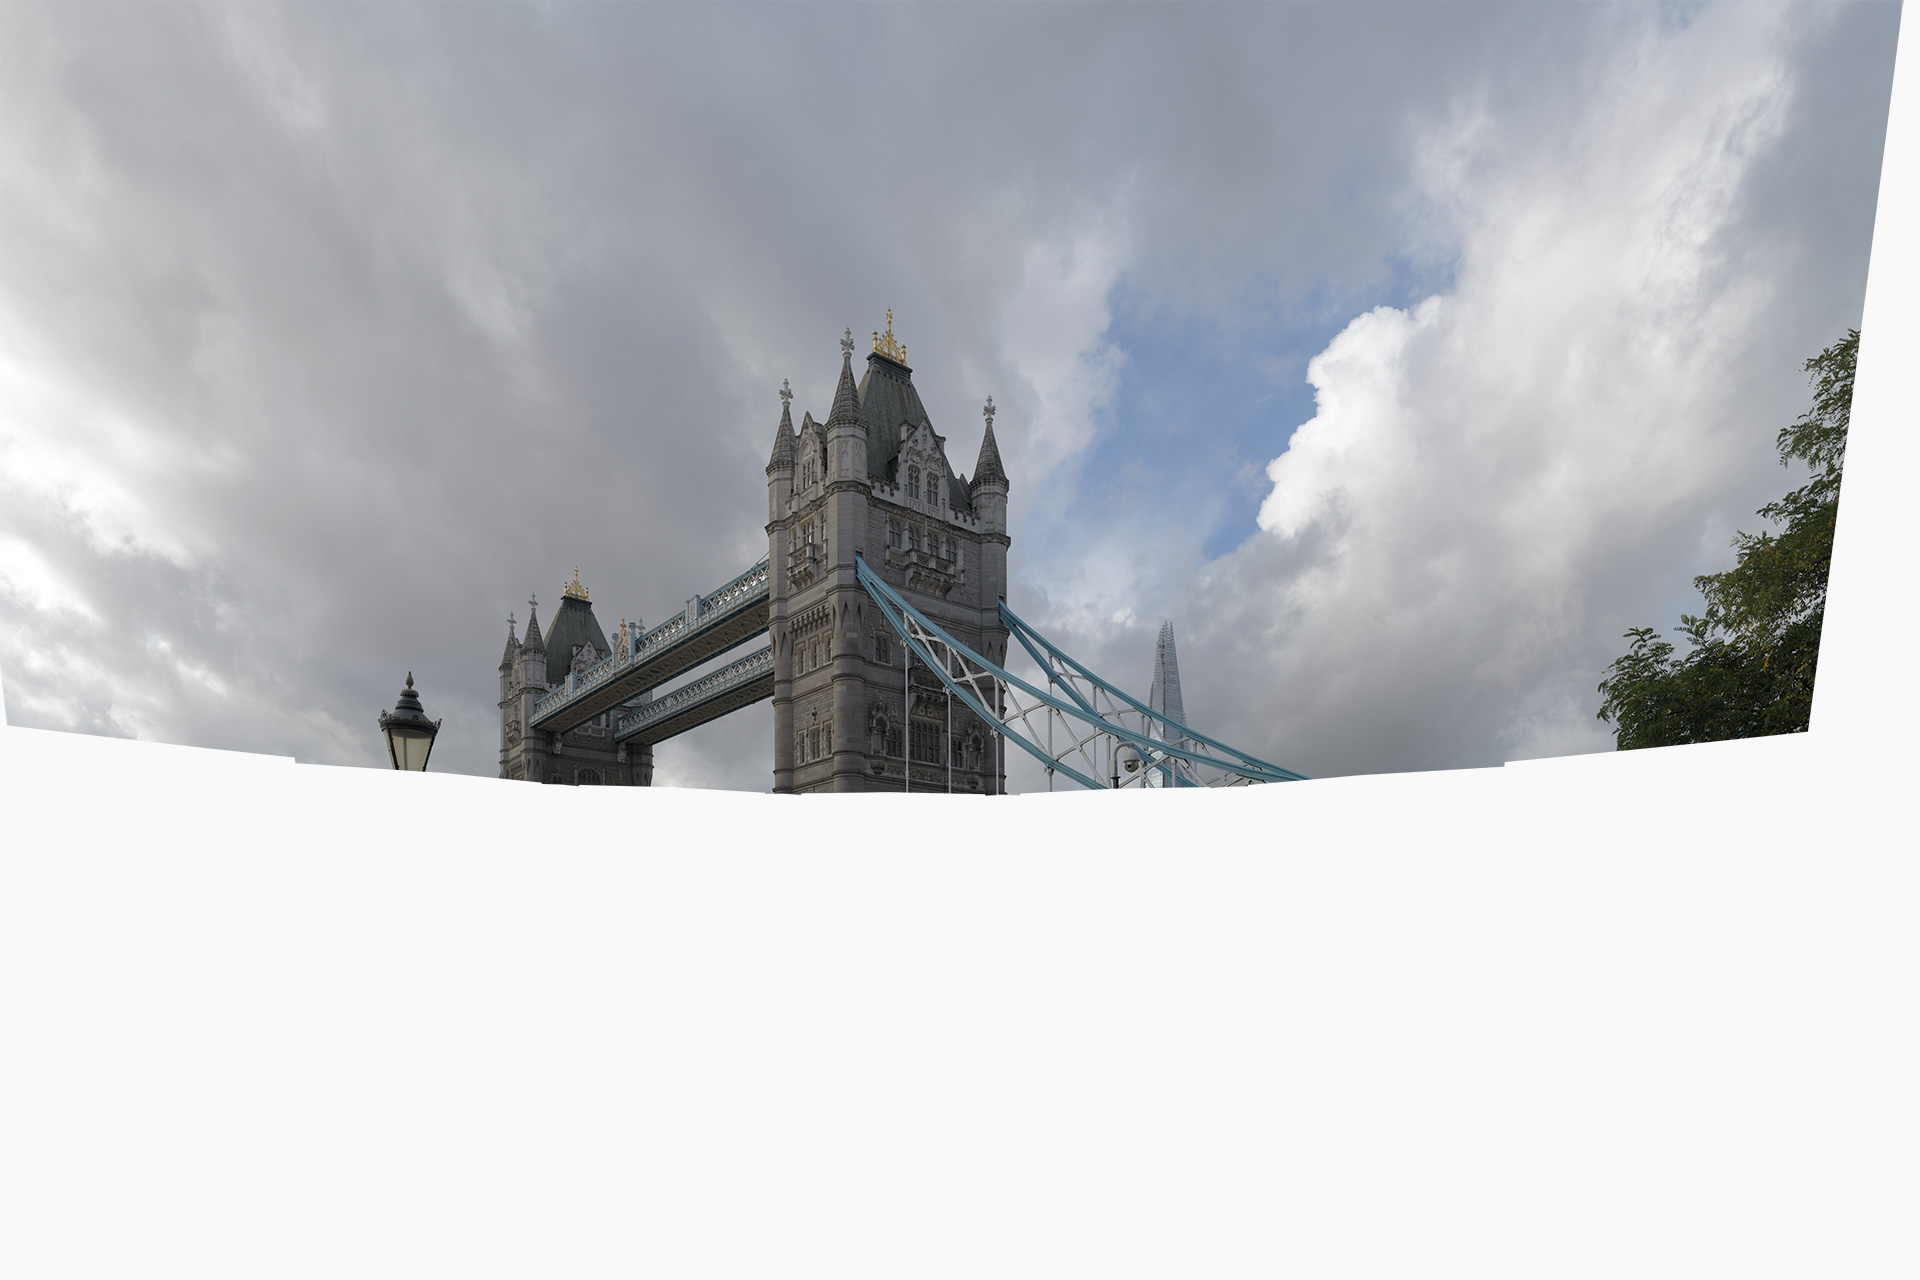
The idea is to combine and contrast the iconic Tower Bridge with London’s tallest, modern glass building, ‘The Shard’; the tall glass building behind Tower Bridge with the sun’s reflection. Ultimately, the story is about light. Contrasting a dark, warm, and moody, Victorian age Tower Bridge, against The Shard’s modern bright white, coldness, and glassy feel. I see Tower Bridge being side-lit by rich, warm, golden ‘Rembrandt’ light against a dark and moody sky. The Shard standing alone like a modern glass beacon. The picture requires human content in the foreground, but this will have to be resolved later; there was none on the day. The photograph above is a quick visual of the composition.
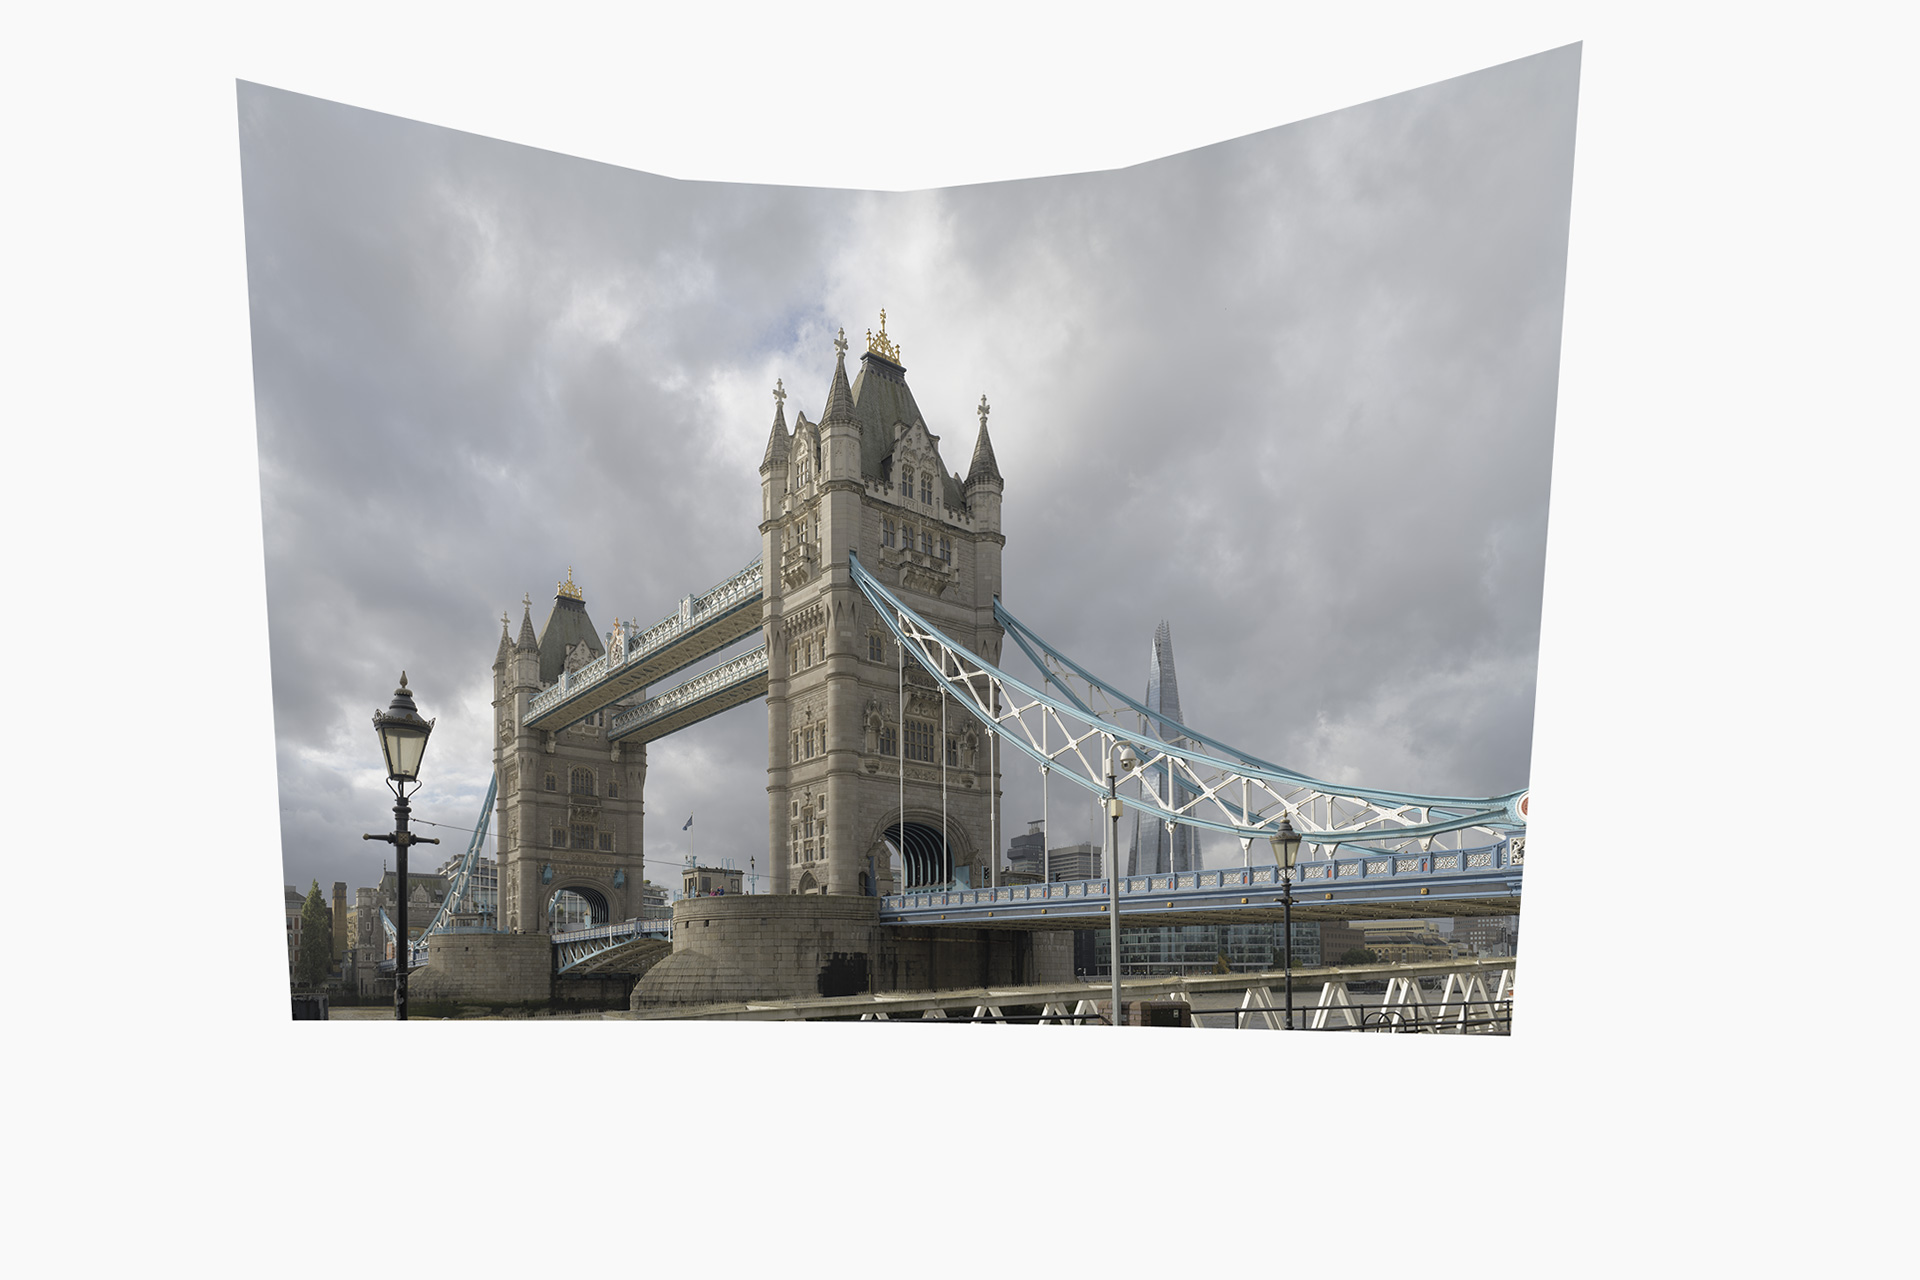
The Day Of The Shoot
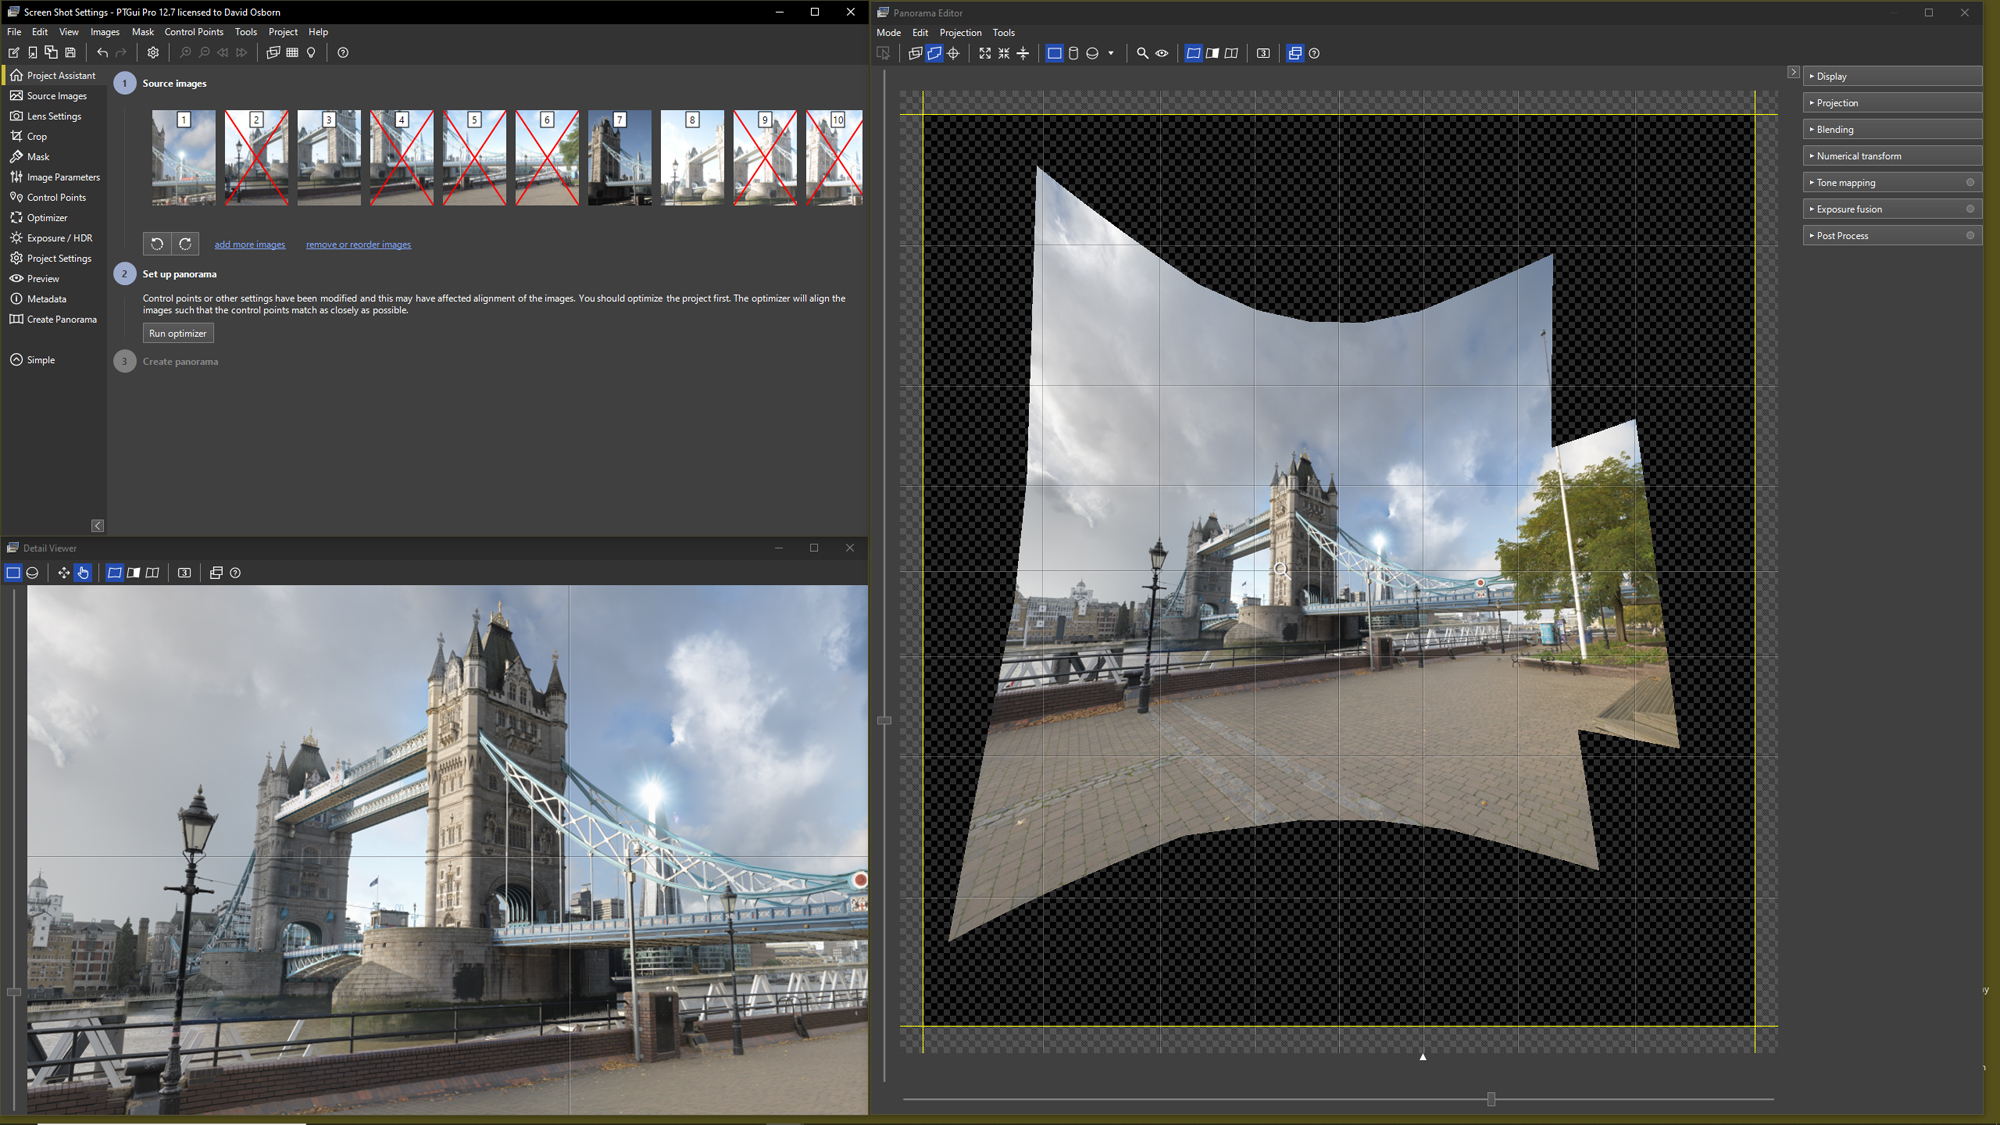
Equipment: Nikon D850. Sigma 50mm F1.4 DG HSM ART lens. A panoramic head and tripod. Duration: 4-hour shoot, taking only 1 composition. No variations. Exposures: 18 frames at f11 – 6 frames left to right, 3 frames top to bottom. Preparation: The critical elements I must get to make my picture work, are the side-lit sun on Tower Bridge. Side-lit sun on The Shard. A dark moody sky behind Tower Bridge. No people in the foreground. Before the shoot, I visited the location to check the composition and also check what time of day the sun would sidelight Tower Bridge and The Shard. Side-light makes the buildings look three-dimensional. Getting the correct weather is critical. I needed weather with a ‘cloudy, sunny and rain’ prediction on a weekday because there would be fewer people around.

Perspective
Positioning the tripod in the correct spot was critical to the inch. I prefer to keep the camera at eye level; this gives a natural-looking perspective as if you are standing looking at the scene yourself. I had to get back as far as possible to maximize the view of The Shard. Left and right were the tricky ones. I wanted to remove the security camera on the pole, just on the left side of The Shard. It’s a distraction. If the security camera covered The Shard, I could not remove it in Photoshop. I needed to make removing the security camera a top priority; easy as possible to get a high-quality result. I also needed to keep The Shard a clean composition with the bridge struts. Lastly, I needed to keep the street light on the left have a clean silhouette, in balance with the bridge, and finally, keep the small building in the middle of the bridge with the flag, also a clean, balanced silhouette. Moving even an inch, made a dramatic change to how all the elements interact with each other. The compromise had to be exact.
Please remember if you are a Silver or Gold member you can click on an image and see it larger
Gallery Images Of Captures


What Did I Shoot?
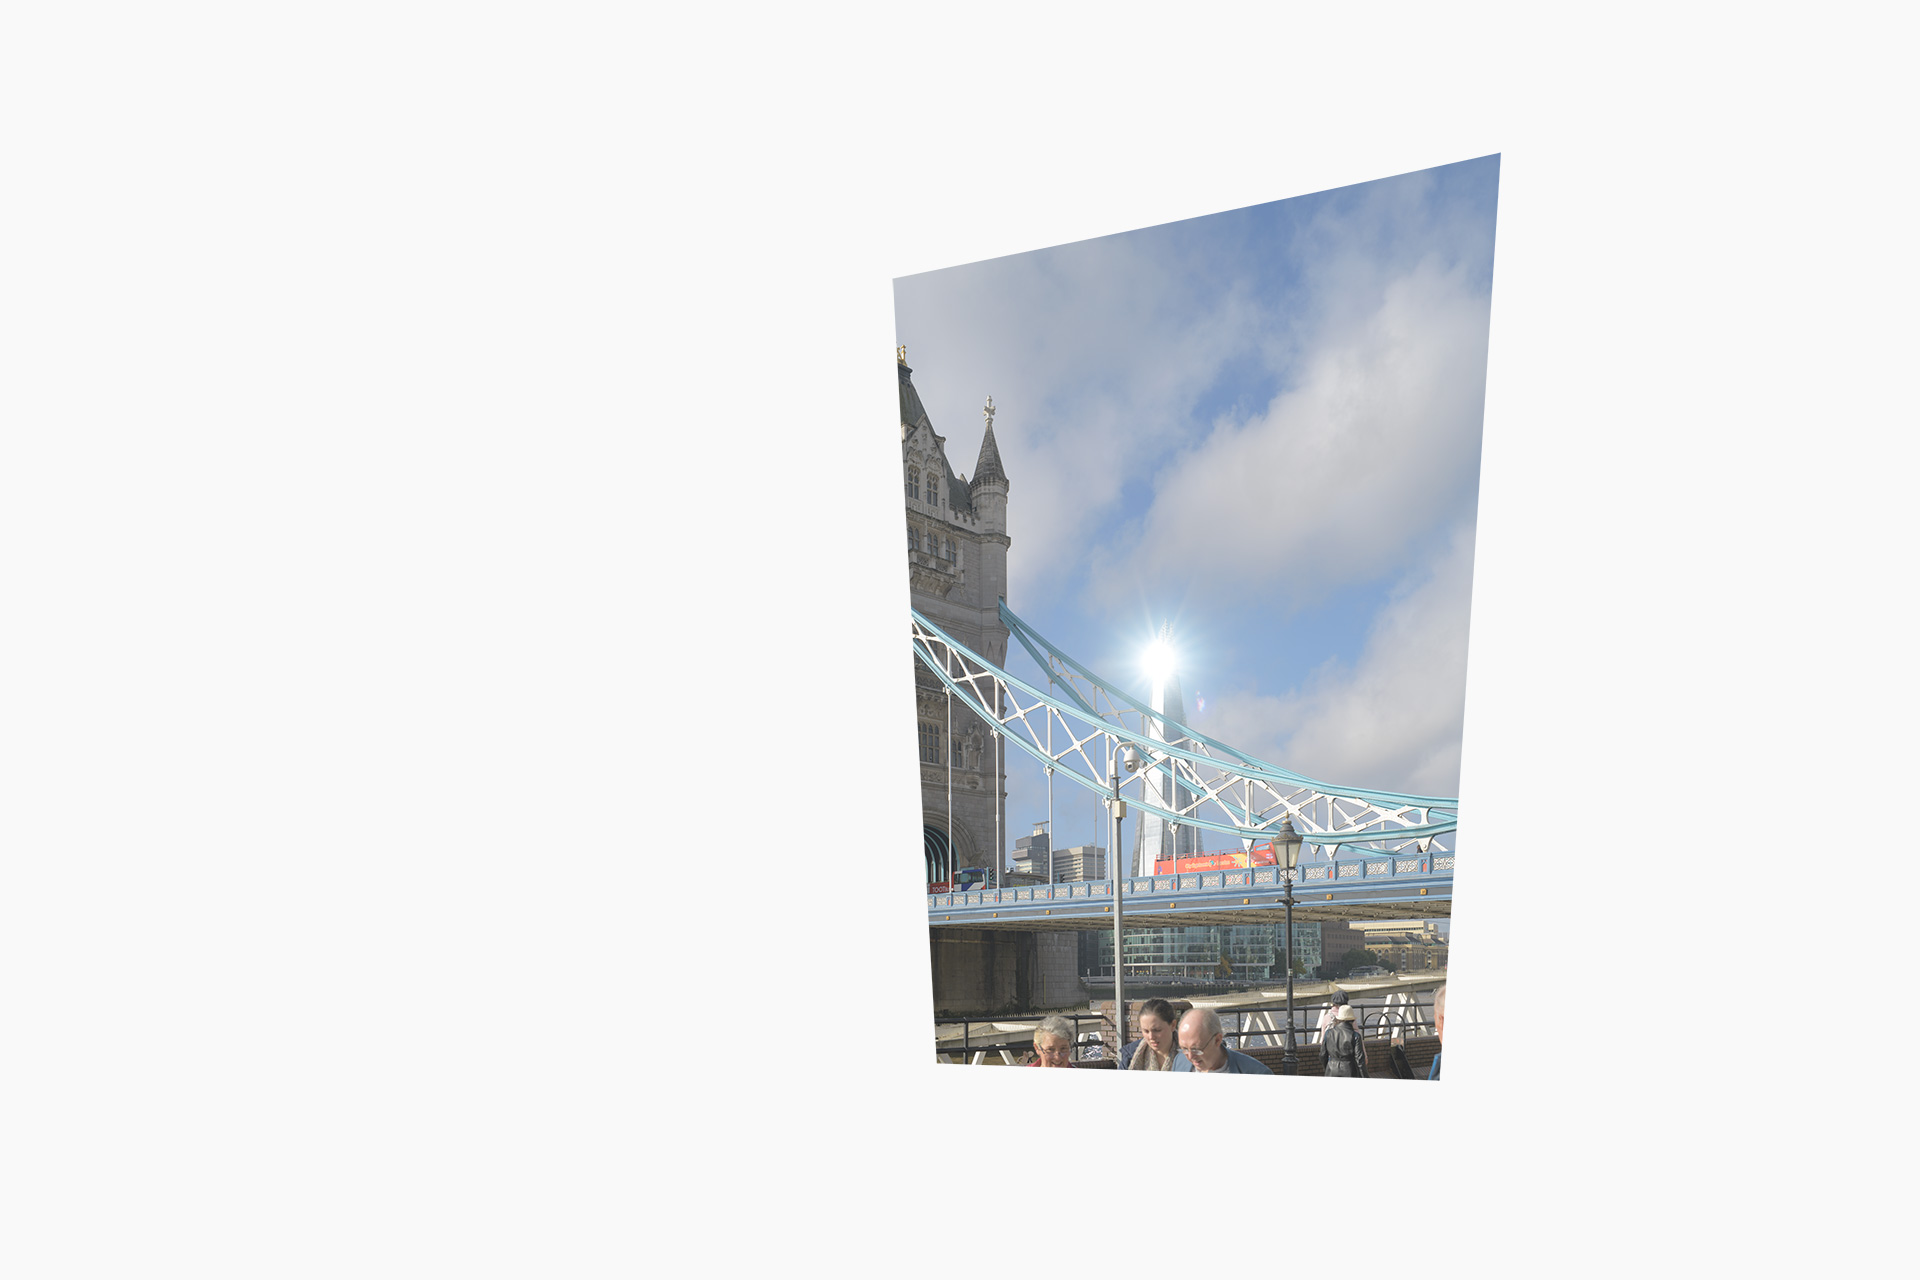
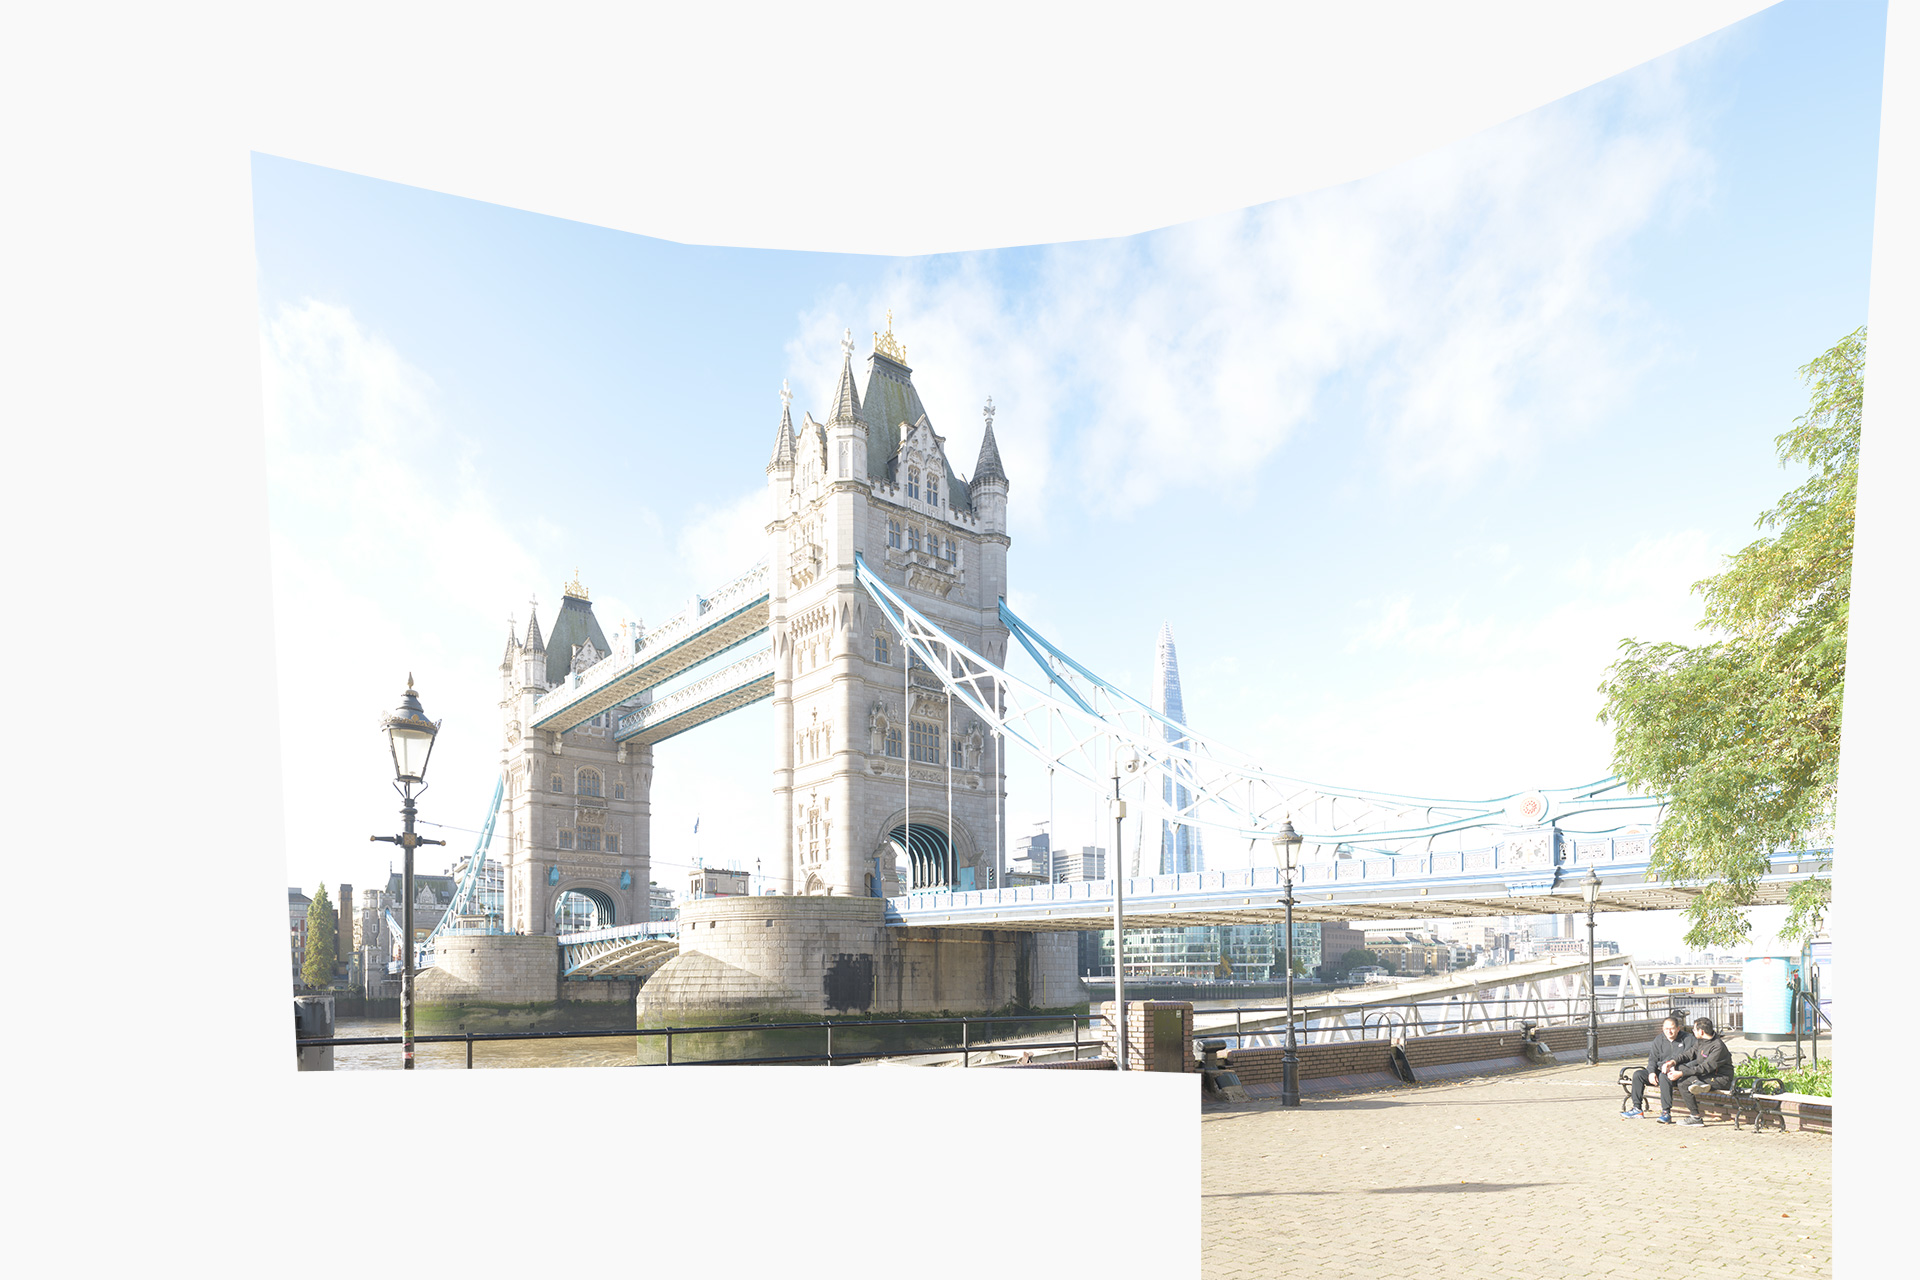
The morning began with pure sunshine. The first priority was to get a set of average exposures with the sun on Tower Bridge, followed by an overexposed set for good, rich shadow detail. About an hour into the shoot, the sun reflected off the glass of The Shard, for about 10-seconds. A perfect, unexpected shot, yet a critical shot that would draw attention to The Shard and add to my idea of The Shard being a modern, glass ‘beacon’. I only got 3 bracketed exposures, it was that quick. About two hours into the shoot, the predicted rain appeared. I shot all the variations it offered before the sun came out again and a blue sky reappeared. Details: I wanted a couple of red London buses on the bridge in the final photograph. A red London bus signifies London. Secondly, the red color will draw the eye. I photographed a number of buses as they moved across Tower Bridge. Finally, I made sure that I had clean frames to remove any people and vehicles in the image, especially on the bridge. With the blue sky returning and the sun moving behind Tower Bridge, removing all the side-lighting, there was nothing to be gained by waiting any longer, so I finished and packed up. A small selection of the images I shot is shown in the gallery above.
Theatrical Stage Analogy
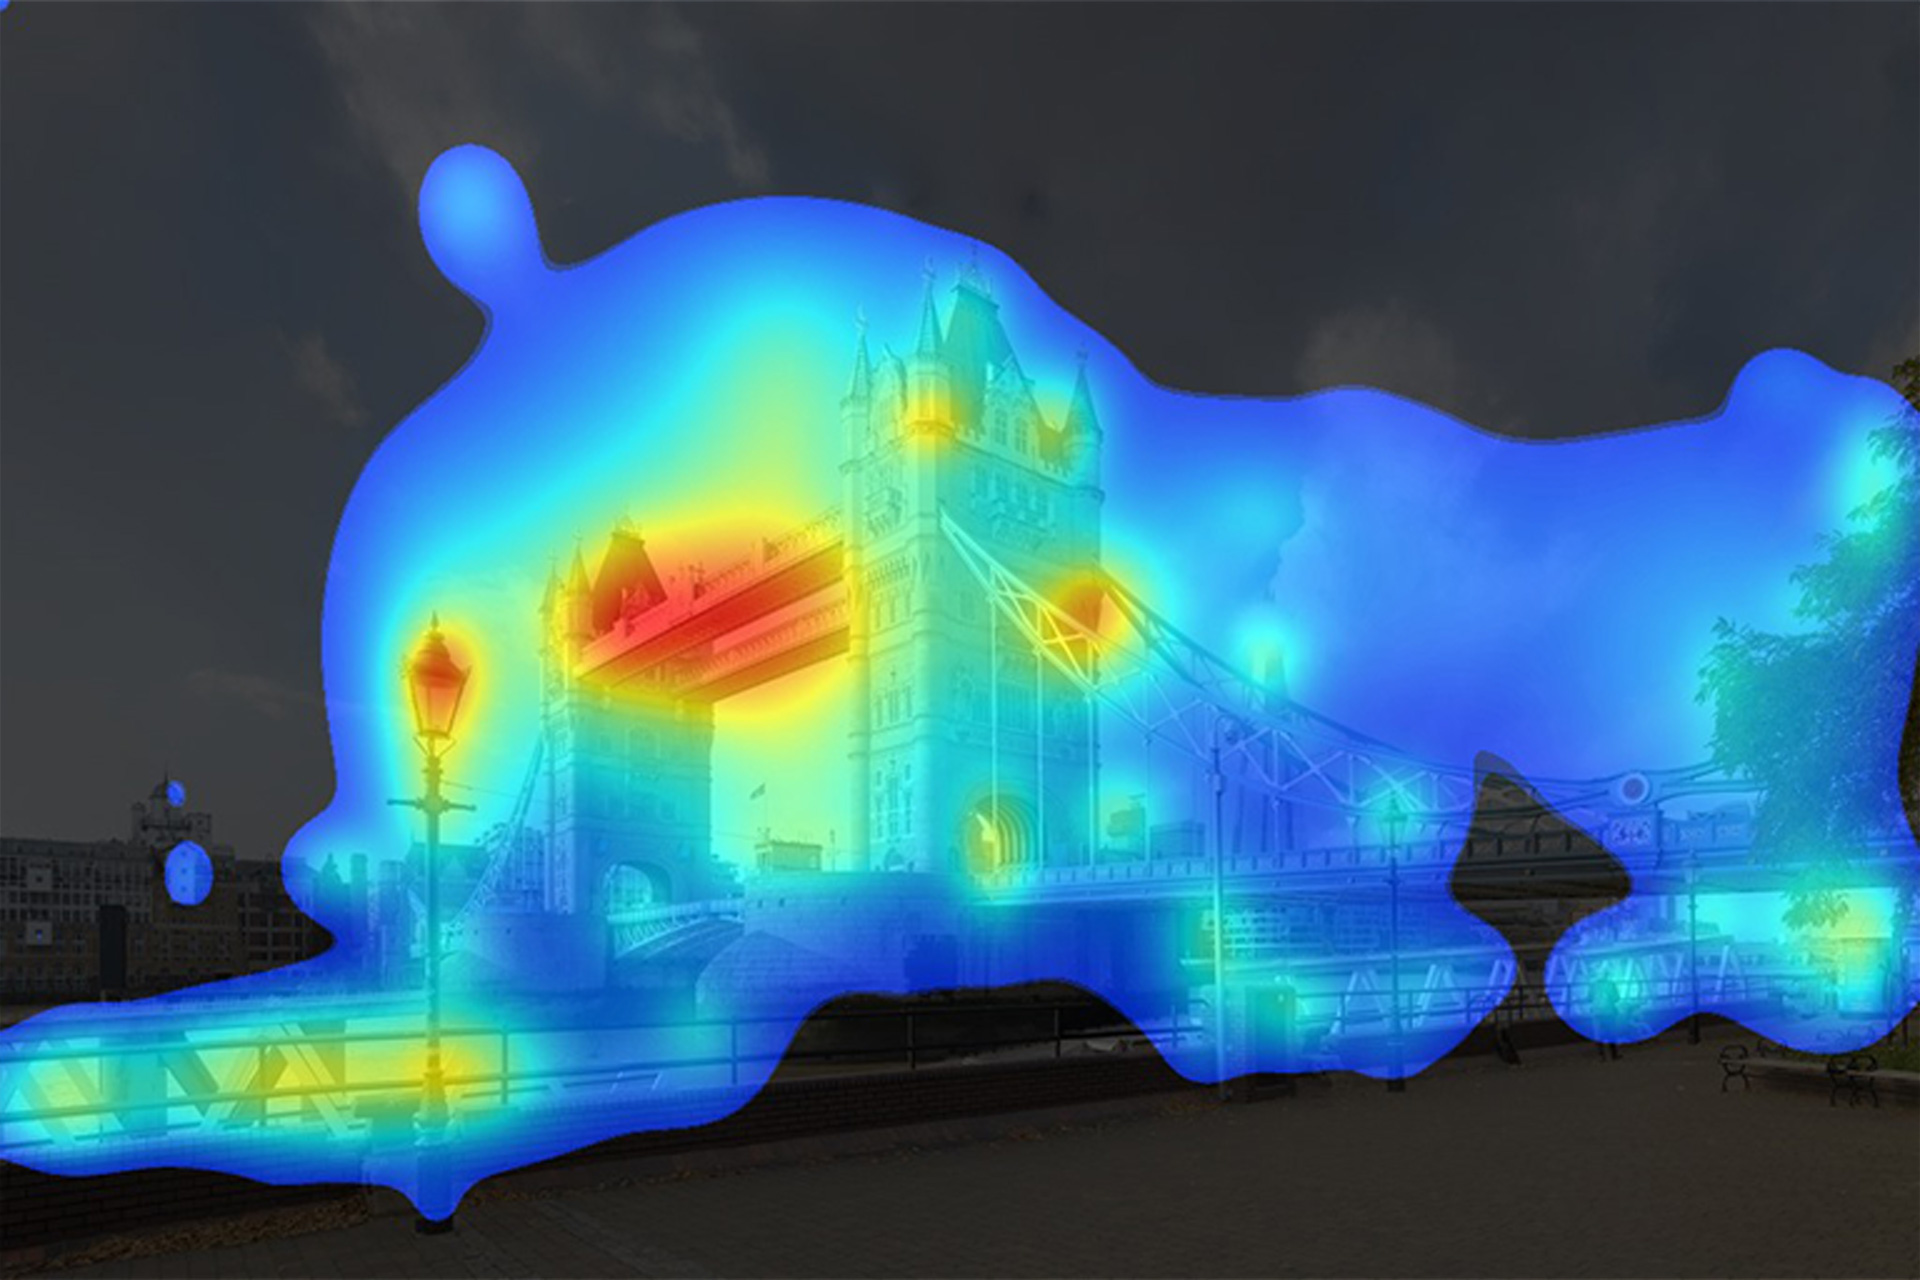
My lead actor and the main hero is Tower Bridge. My secondary main actor is The Shard. The story is about the relationship between the two and the light. The supporting cast is the old street lamps, bus, and foreground people (not yet shown). The stage backdrop is the general sky, river, and walkway. Stage lighting is created in Photoshop by enhancing and exaggerating the actual light I photographed on the subjects to create the overall light, mood, drama, and atmosphere. All the elements must work together for a polished performance. The heat-map shows a 98% probability of the red area grabbing the viewers’ attention within the first 3-5 seconds of looking at the photograph. At the moment, this shows Tower Bridge. I am curious to watch how this changes. You can test out the heat map for your images by visiting, 3M VAS (Visual Attention Software) You can do a trial with 3 of your own images.
The Actionable Takeaway
Have a clear idea of why you are taking the photograph. If you can sum up your idea as a caption, you have a clear idea: “My picture is about Tower Bridge and The Shard. The Shard is in bright sunlight, Tower Bridge dark and moody with golden ‘Rembrandt’ side lighting.” Take one complete photograph illustrating your caption. As the light changes, watch all the details. Ask: Is this better than what I have already taken? If yes, shoot it. Try improving every part of the photograph. Visualize the photograph you could make from what you have shot. Ask: What do I still need to shoot, to make this a great picture. You are not using the camera to create the final picture. You are using the camera to create the files, components you need for Photoshop; each file solving one specific problem. The final photograph was created in Photoshop. The more material you shoot, the more creative choice you have later when creating the photograph in Photoshop. If you don’t need it, don’t use it. If you don’t shoot it, you can’t use it.
The Next Story – Part Two:
The photograph needs a human element and a background correction image. Part two covers a separate shoot I made, where I go looking for some people in London to add to the image. The people I found by lucky chance333 totally transforms the whole story and look of the picture completely. Part 2 follows shortly.
My Photography Workshops Teach You:
“How To Create Fine Art Landscape Photography Full Of Light, Mood, Drama & Atmosphere From Concept To Print.”
~ Online & In-Person Photography Workshops. One To One Tuition. USA & Worldwide
Please visit my WEBSITE for my workshop information.
David Osborn
February 2022
London, London
A professional photographer for over 37-years. I began as a hard news photographer with Reuters News Agency in London before moving into corporate photography and worked all over the world culminating as chief photographer responsible for documenting the £4 billion, London Heathrow Airport, Terminal 5 Construction Project. I now teach photography workshops full time, passing on my years of work experience to help enthusiasts work successfully in a visual way while making their photography more artistic and creative.