How Big Can It Go – iPhone RAW and Gigapixel
Times are changing. Who would have ever thought we could shoot RAW images on our iPhone with a resolution of 48 megapixels? I have always been one to have a camera with me — lately, it has been the iPhone and I haven’t been disappointed. In future articles, I will cover how the iPhone fits into my photographic workflow, as well as how it compliments and assists me in my photographic adventures. The available apps can help you to calculate sunrise and sunset times for any spot in the world, on any date. There are apps to track your travels, as well as to add locations in the metadata of your images that can then be viewed on Lightroom’s map selection. Stay tuned as we explore how the iPhone can be a photographer’s best tool.
Today, I am going to cover shooting in RAW and making prints with images from the iPhone. We’ll see just how big we can make them. I think if you haven’t tried the RAW image function of an iPhone, you may be amazed.
I photograph with an iPhone 14 Pro Max. I am on the Apple plan, where I get a new iPhone with every release. I do it so I can stay abreast of the technology, plus, a fully loaded iPhone costs me around $68 a month. After 12 months, I can turn the phone in for an upgrade, and the cost stays around the same. I have over 120,000 images on my iPhone and 600 videos.
How To Shoot RAW On Your iPhone
The RAW file option is turned off on iPhones by default if you have an iPhone that is so equipped. This is because a RAW file is very large, producing a 48MP file. The image’s file size can range from 25-80 megabytes per shot. Therefore, you will find your phone filling up pretty quickly if you shoot RAW all the time.
To use RAW, you must access your camera settings and turn the RAW option on. See the illustrations below to set this up.
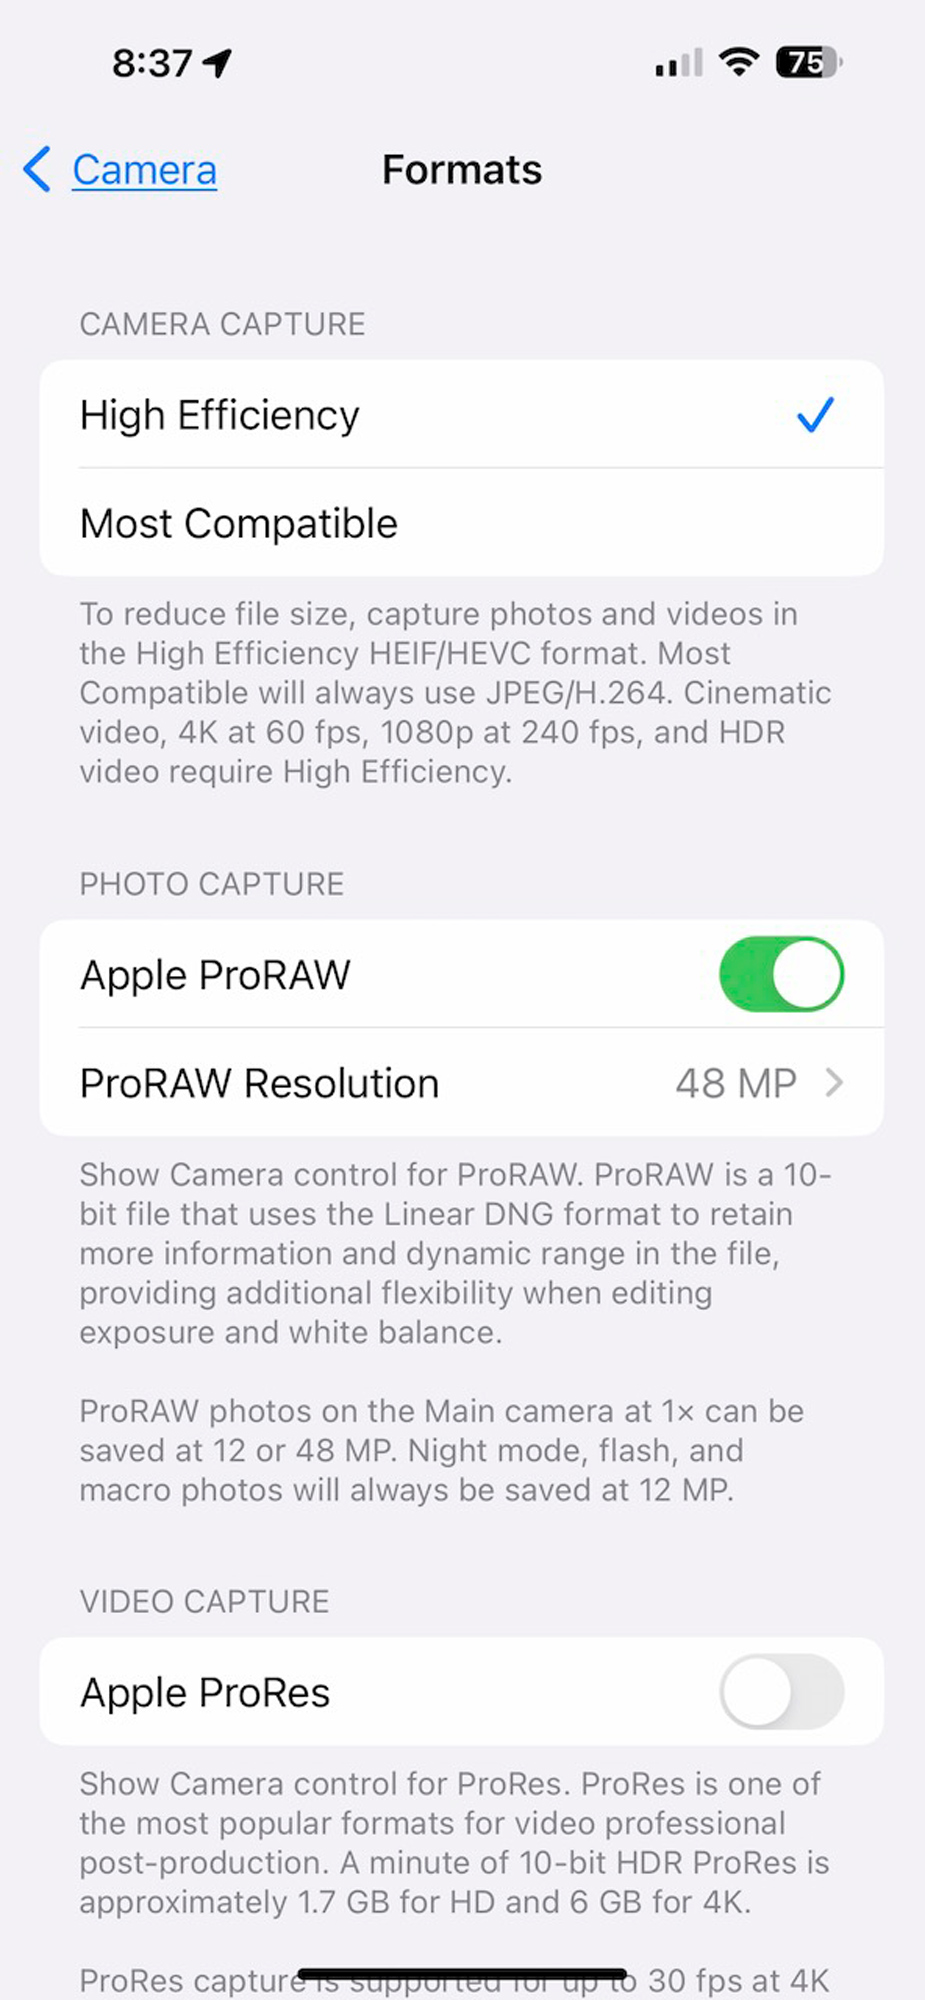
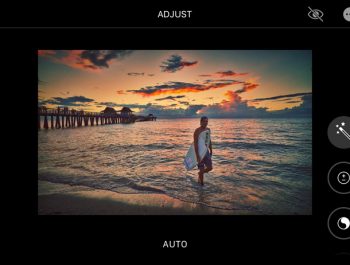
When shooting RAW, you must turn the RAW mode on. You will see a box in the upper right corner of your screen that says “RAW” and has a diagonal line through it. To activate, touch the box and the line goes away. You will now be shooting RAW files. If you turn your camera off and then back on, you will need to activate it again. It’s kind of inconvenient but it safeguards you from taking a lot of RAWs that you fill up your memory. That’s why I opt for the 2 TB iPhone.
Exporting Your RAWs Into A RAW Processor
If you own an iPhone, you should make sure you are on Apple iCloud. The cost is very reasonable, and the beauty is that all your devices are backed up to the cloud, so if you lose a device or do an upgrade, it is easy to recover. All your documents and files are also in the cloud, and your photos sync there too.
After a shoot, I let my phone sync to the cloud and then open the Apple Photos app on my desktop. Across my home and studio, I have seven laptops and desktops. I have one machine that is completely dedicated to image processing, with over 160 TB of RAID storage and 4 TB of onboard SSD storage.
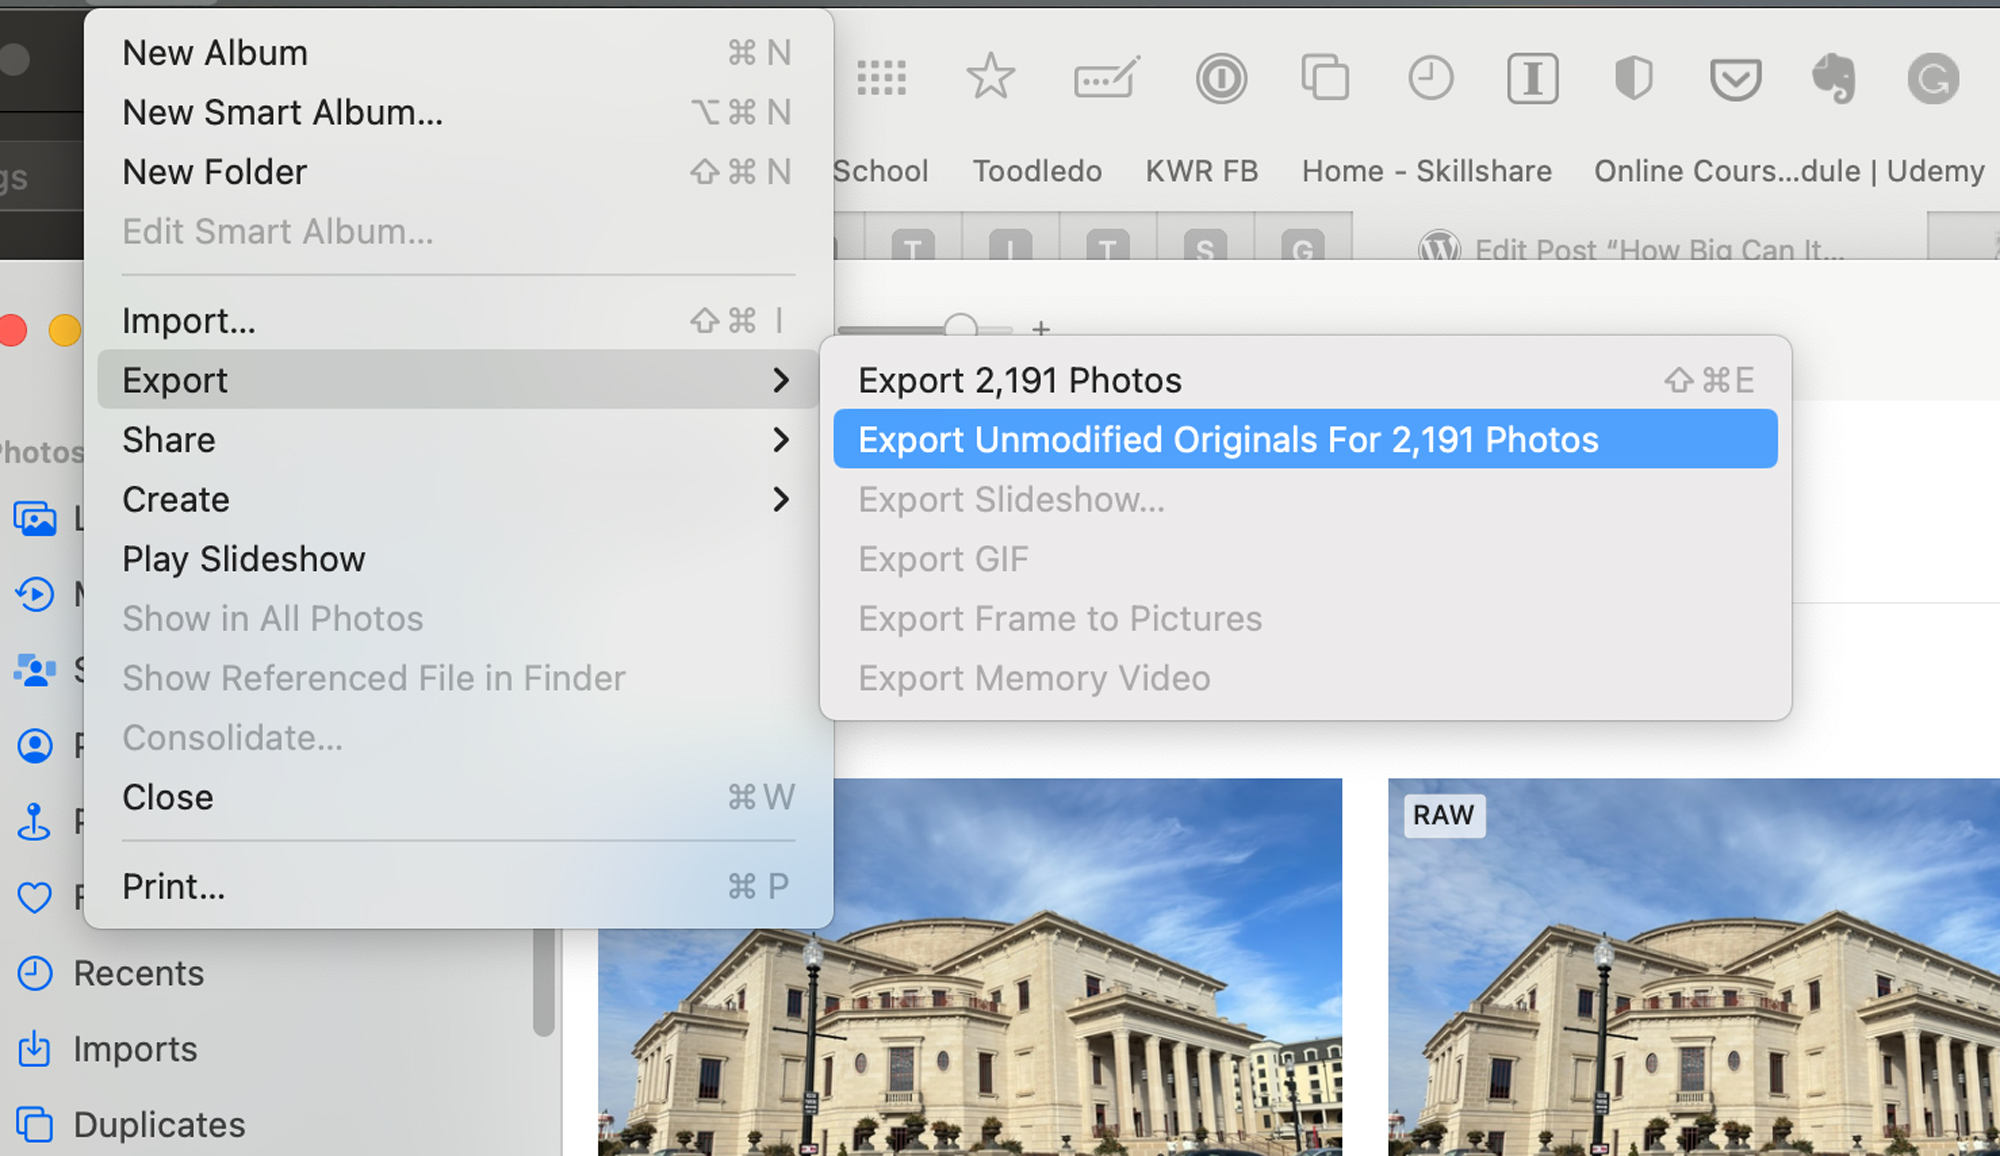
I go into the photos app on my desktop and select RAWs from Media Types under Albums. My goal is to export these files and then import them as RAWs into my Lightroom catalog.
I select the RAW files I want to export, then access File menu > Export > Unmodified Files. This will export the files as DNG RAWs to whatever destination space you set up.
I set up folders on my RAID system in a folder that I name for the year. So I select the file folder 2023, and in the dialog box, select New Folder. I name the Folder like this, [20230501_iPhone RAWs Sunday Afternoon]. This allows me to sort by year, month, day, and subject or title. Once the file is named, I hit Export, and the RAW files are exported over to the folder.
To save space on my iPhone, I occasionally delete the RAW files on the phone. Since they are safely on my RAID system, I won’t lose them and can free up space on the phone.
Now, I import the RAW files into Lightroom the standard way and make my ratings and edits.
Making Prints
In an upcoming article, I’ll explain my typical imaging workflow. For the sake of getting to the meat of this article, I export a TIFF file of images from Lightroom. In this case, I’ll export a few edited images made with the iPhone in RAW format. I shot these images with the iPhone on a tripod to take the variable of motion blur off the table. I export them as 16-bit TIFF files at full size in ProRGB color space. These files are then opened automatically in Photoshop, where I do any last-minute edits. In the case of these images, there was nothing that needed to be done. The nice thing about iPhone files is there is never a chance of dust spots.
Once these files are made, I place them in a folder on my desktop. This means they will sync to all my machines via iCloud.
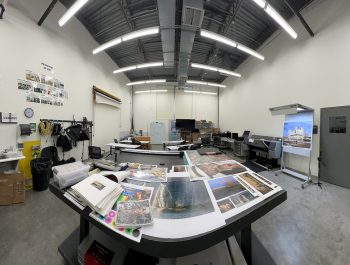
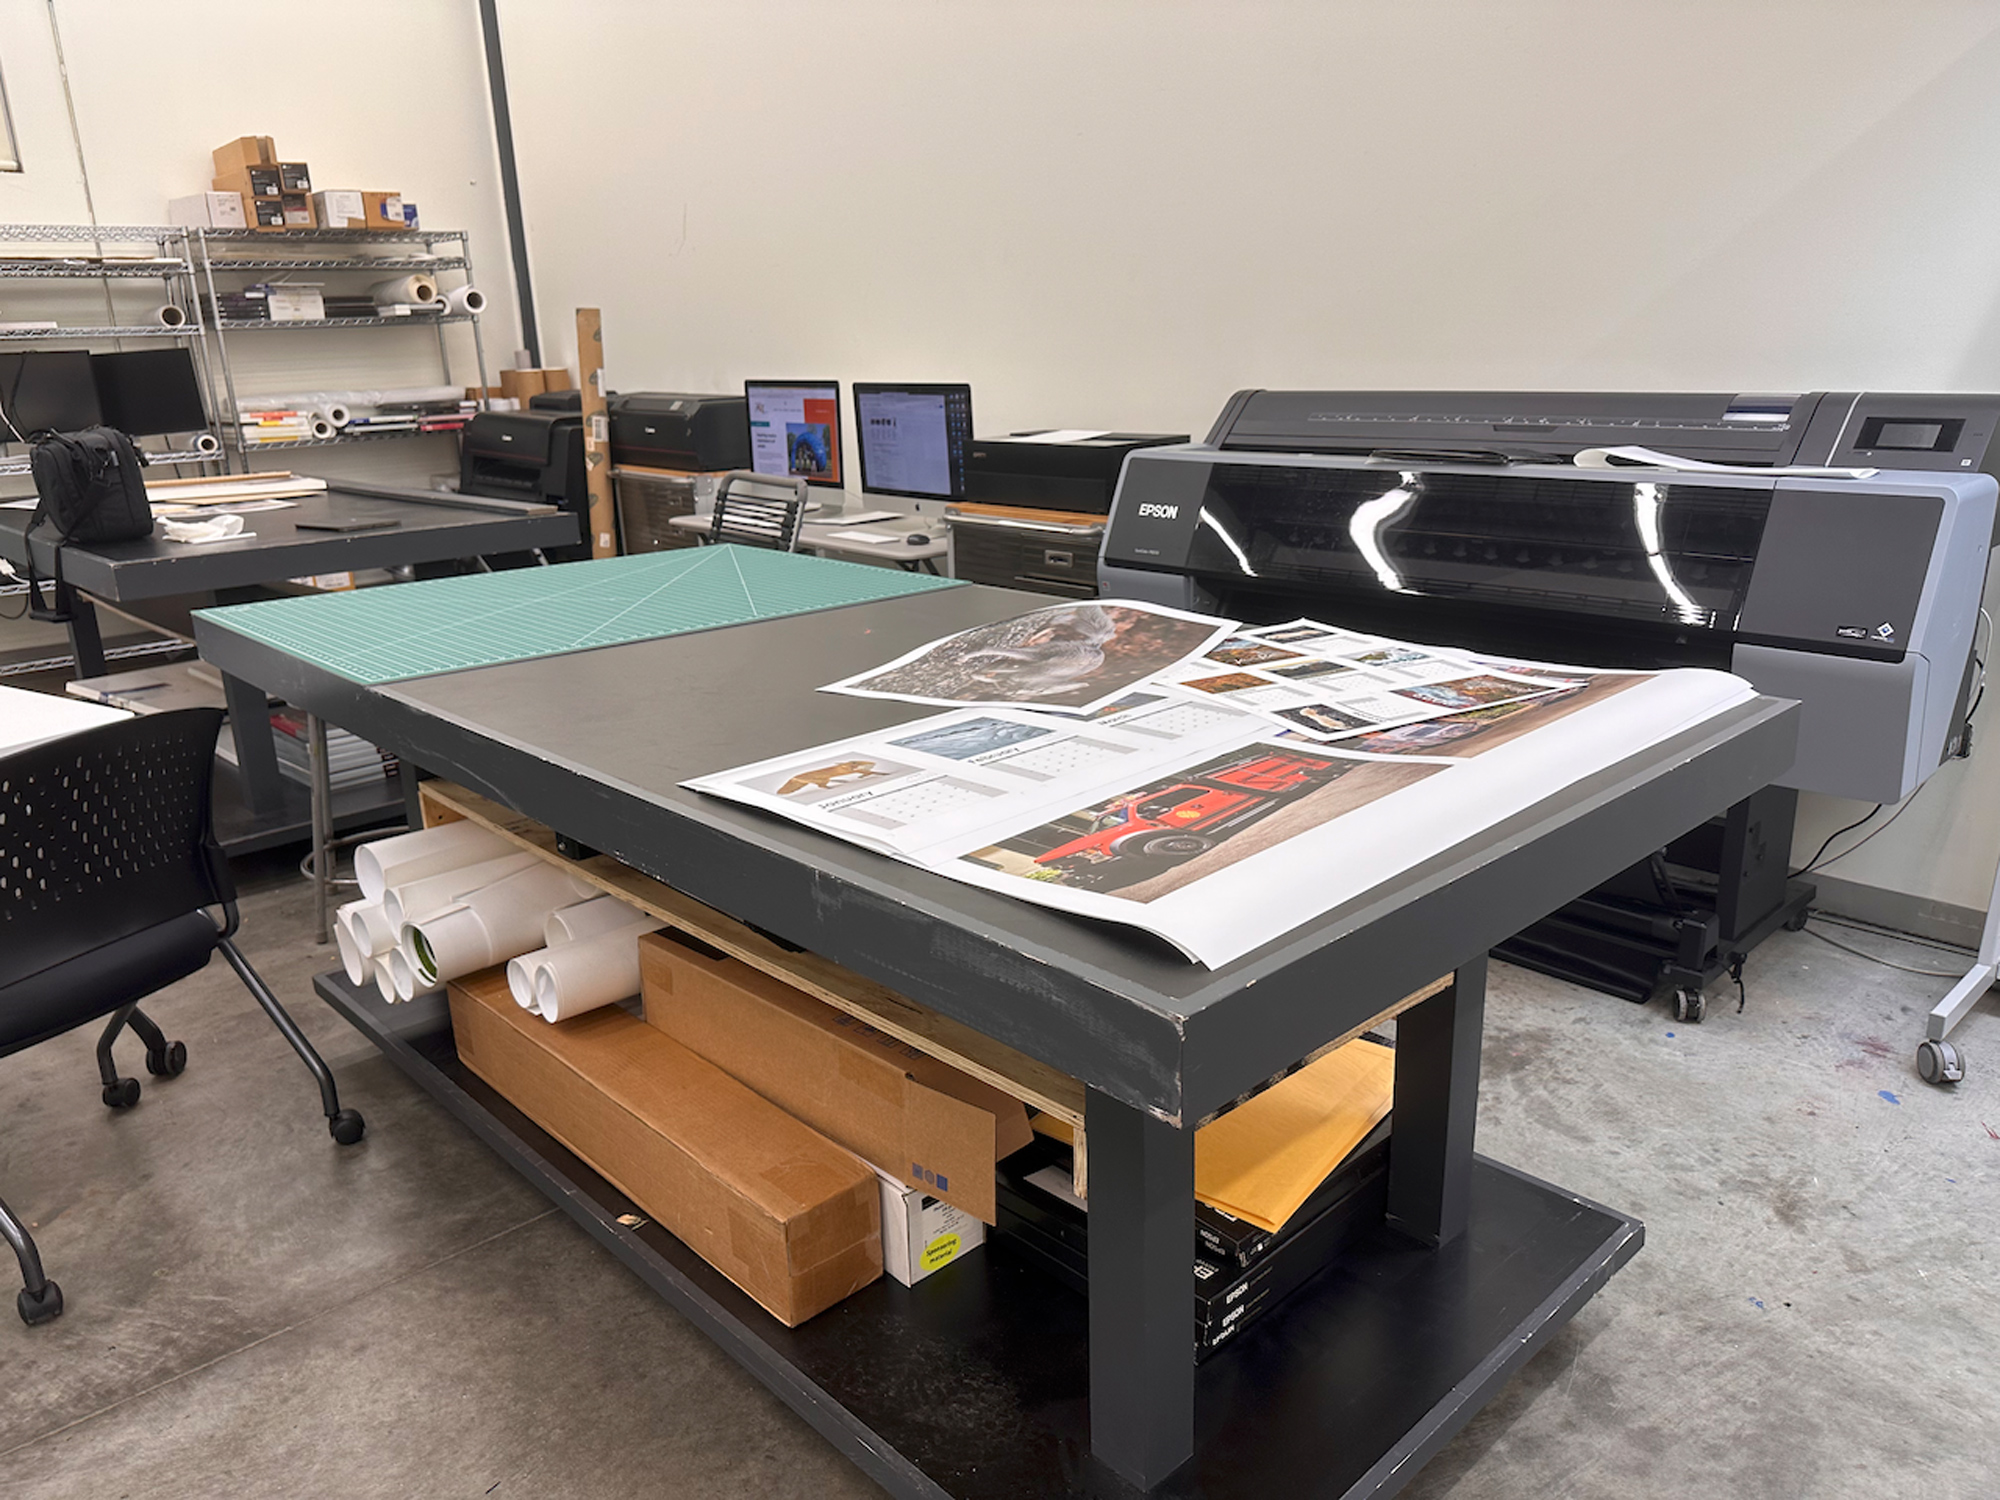
My printers are at a studio at the Indianapolis Art Center, where I am an artist in residence. I have two Canon printers and two Epson printers. I also have two computers there that drive these printers. One is used for the Canon printers, and the other drives the Epson printers.
My Printer Software
I am a firm believer in Colorbyte Software’s Imageprint Software, which is installed for my Canon P1000 and P2000, as well as my Epson P900 and 9570 printers. This is the most versatile and best software I have ever used for printing, and I have used it for at least 12 years. Colorbyte makes the best color profiles I have ever used, hands down. In addition, many issues you may run into with regular operating system drivers are not a concern as IP (Imageprint) bypasses many of these issues and drives the printer with its own software. You can learn more about IP in one of our Fine Art Printing Workshops or by visiting the Colorbyte website.
The IP software has a great algorithm for upsizing and downsizing. In my workflow, I create a master TIFF file, and that is what I use for printing. I can scale it in IP for wallet-size photos all the way to 44×72 inches, and the prints look great every time.
The iPhone Images
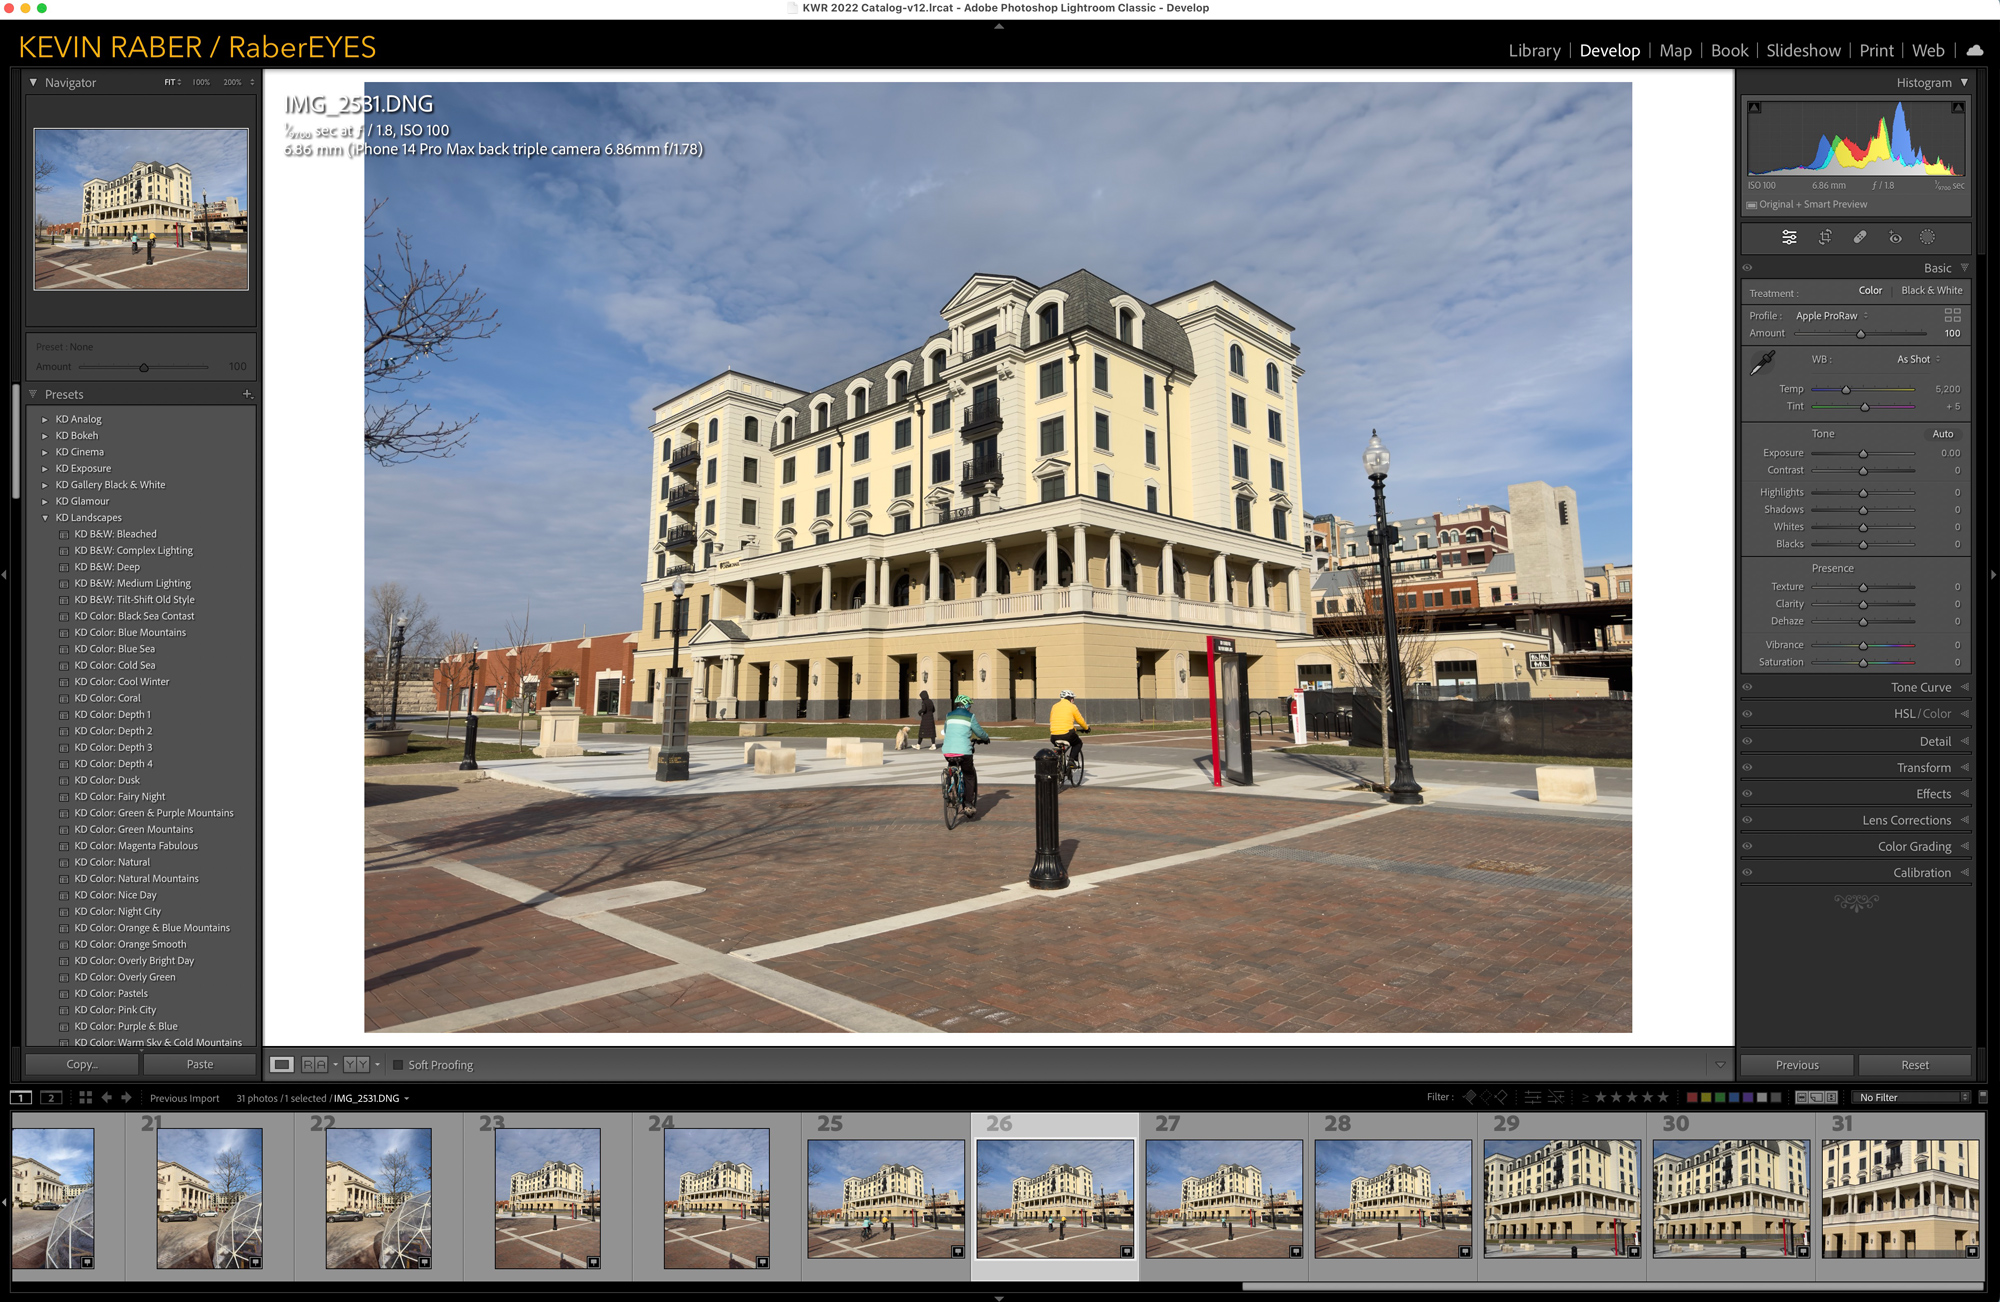
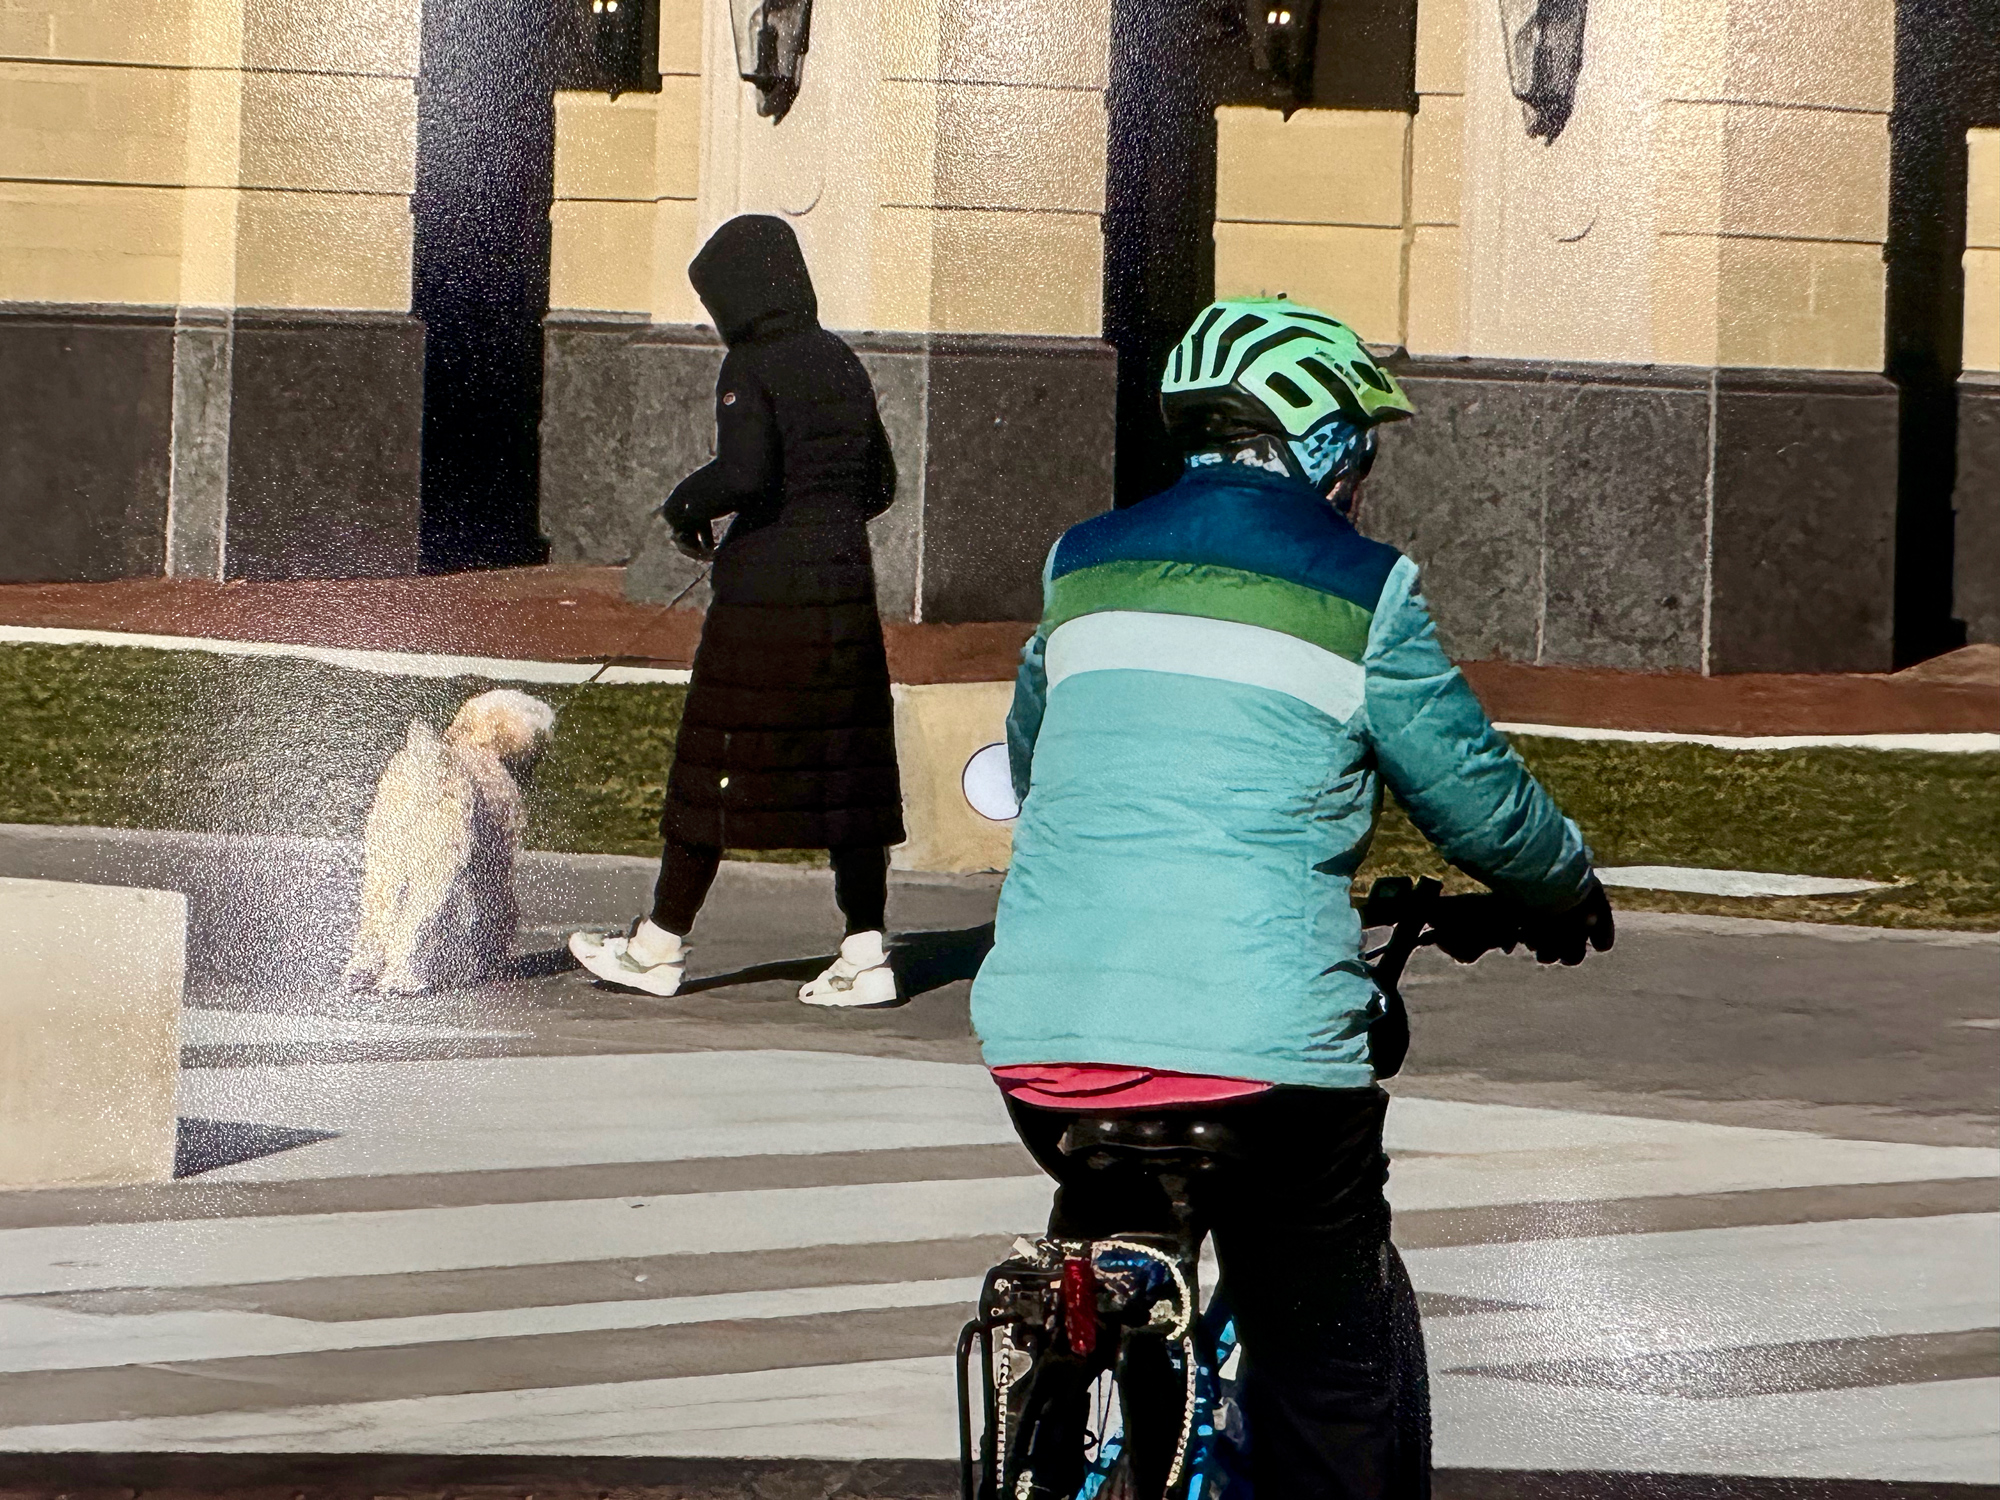
As stated above, I wanted to see just how big I could make iPhone RAW images. I selected two images, and in Lightroom,I adjusted those for basic settings and straightened out the perspective of the tall buildings so that they wouldn’t look like they were falling backward.
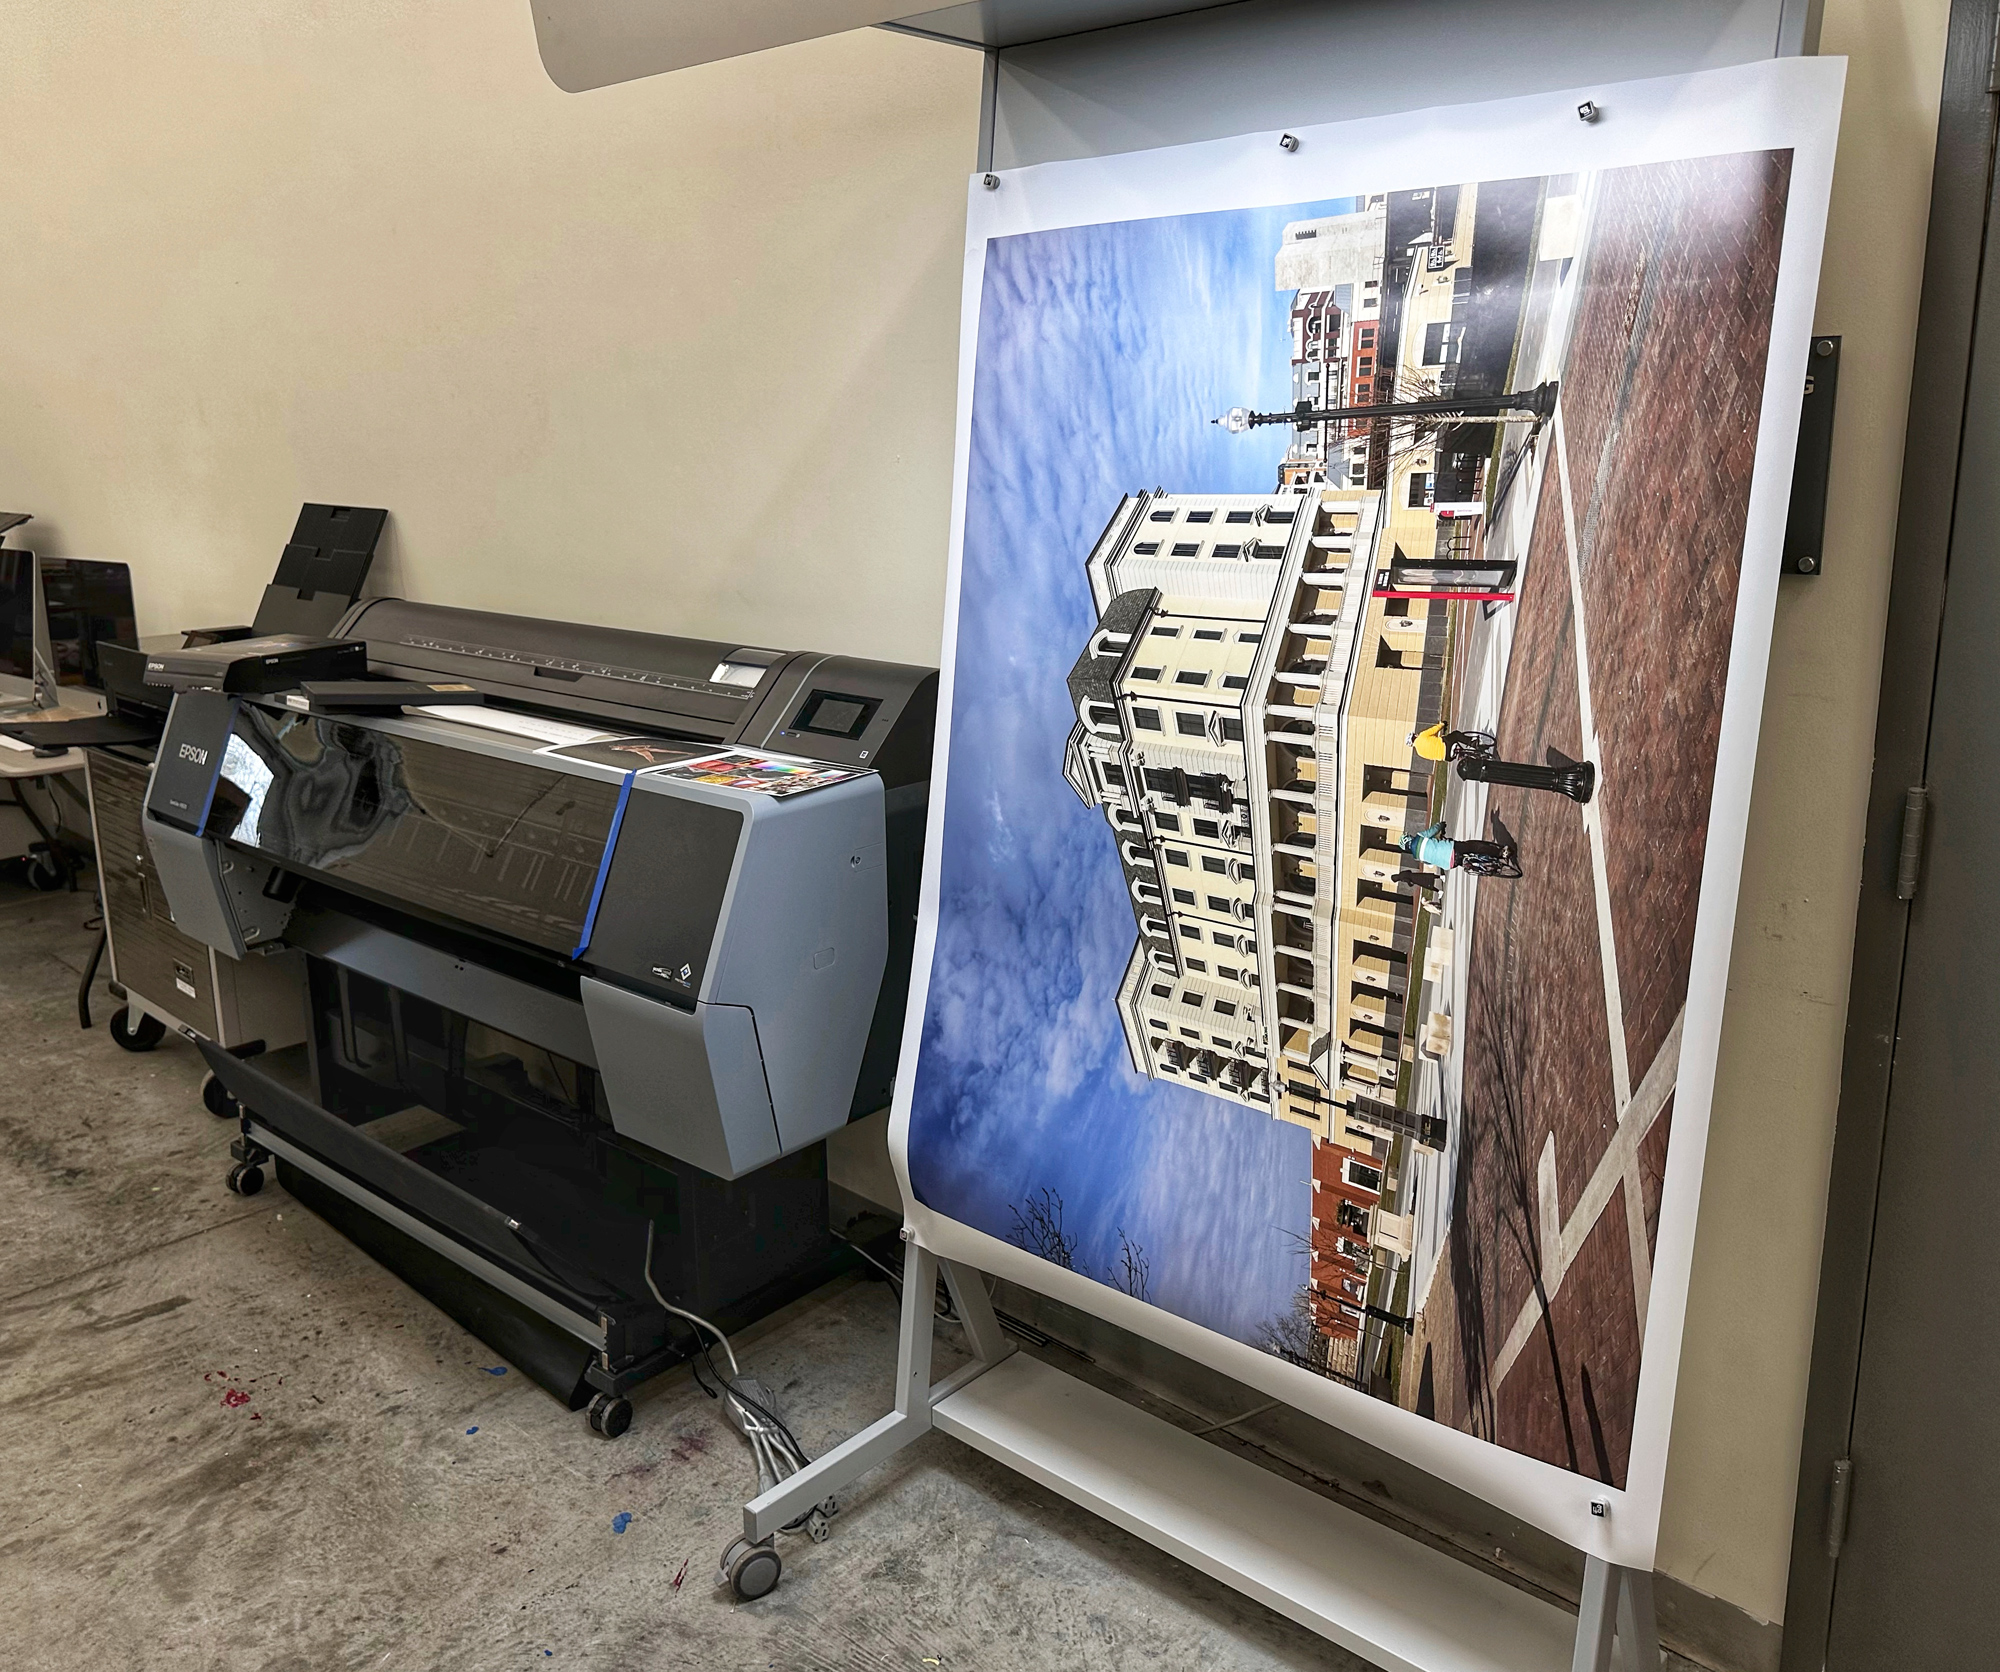
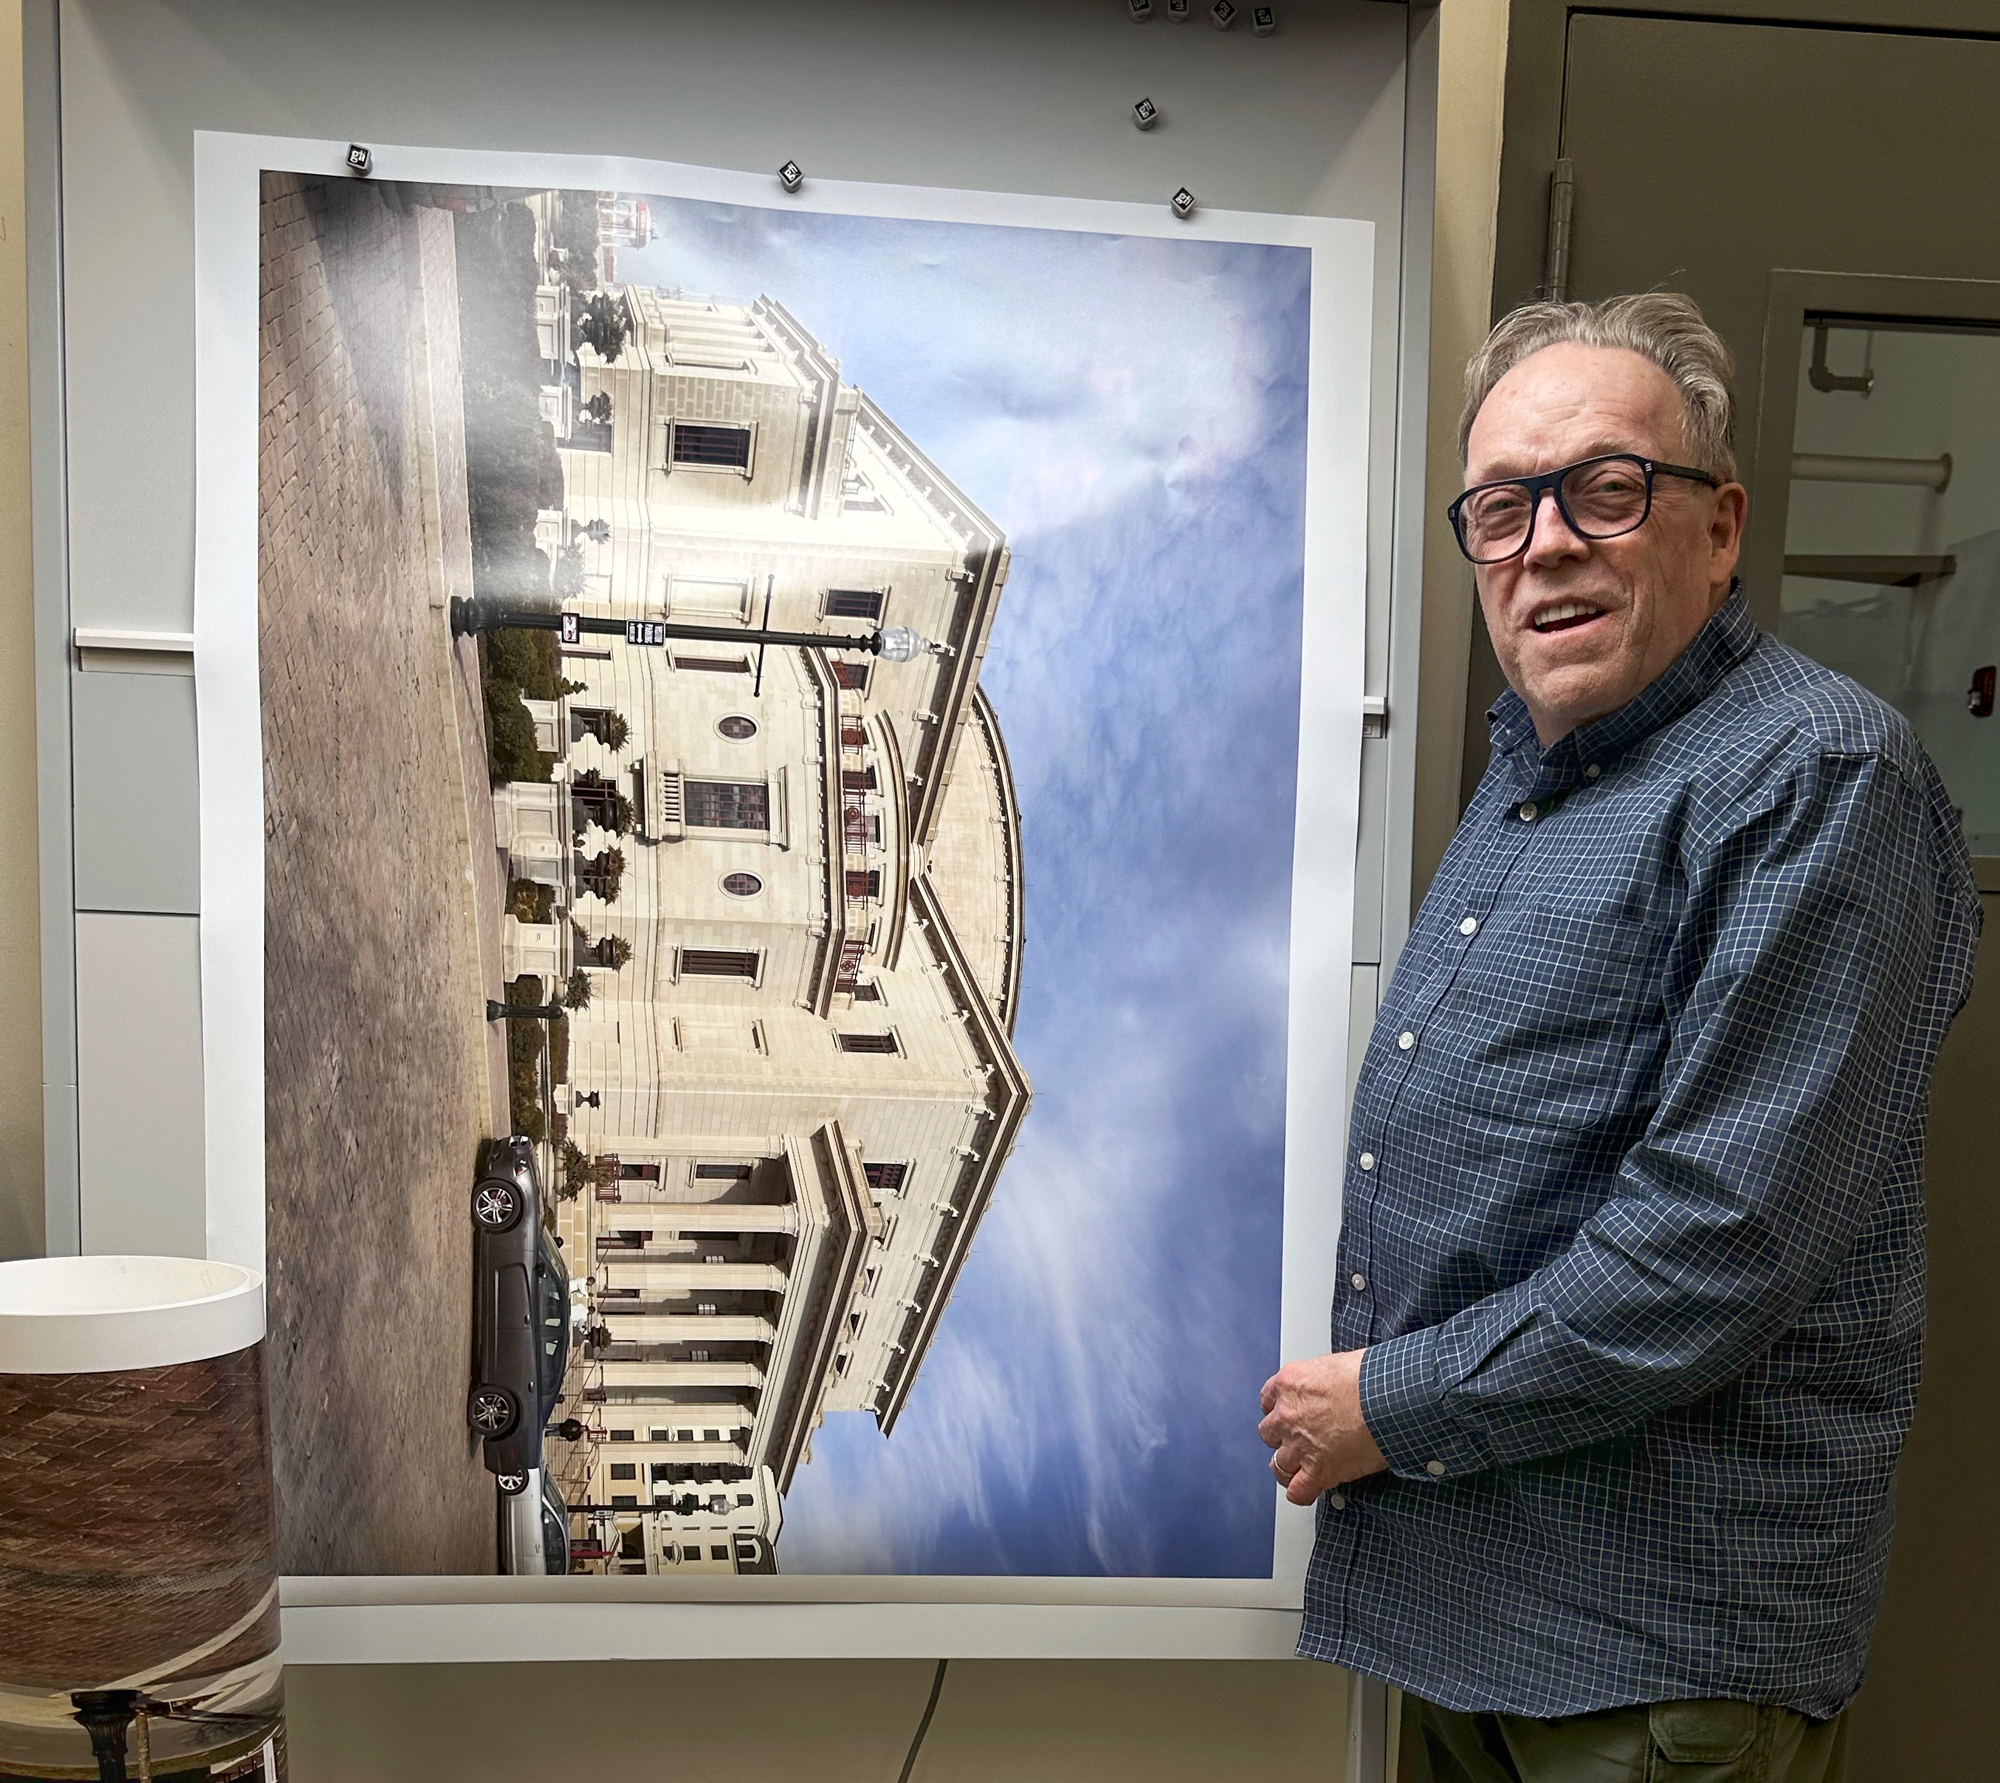
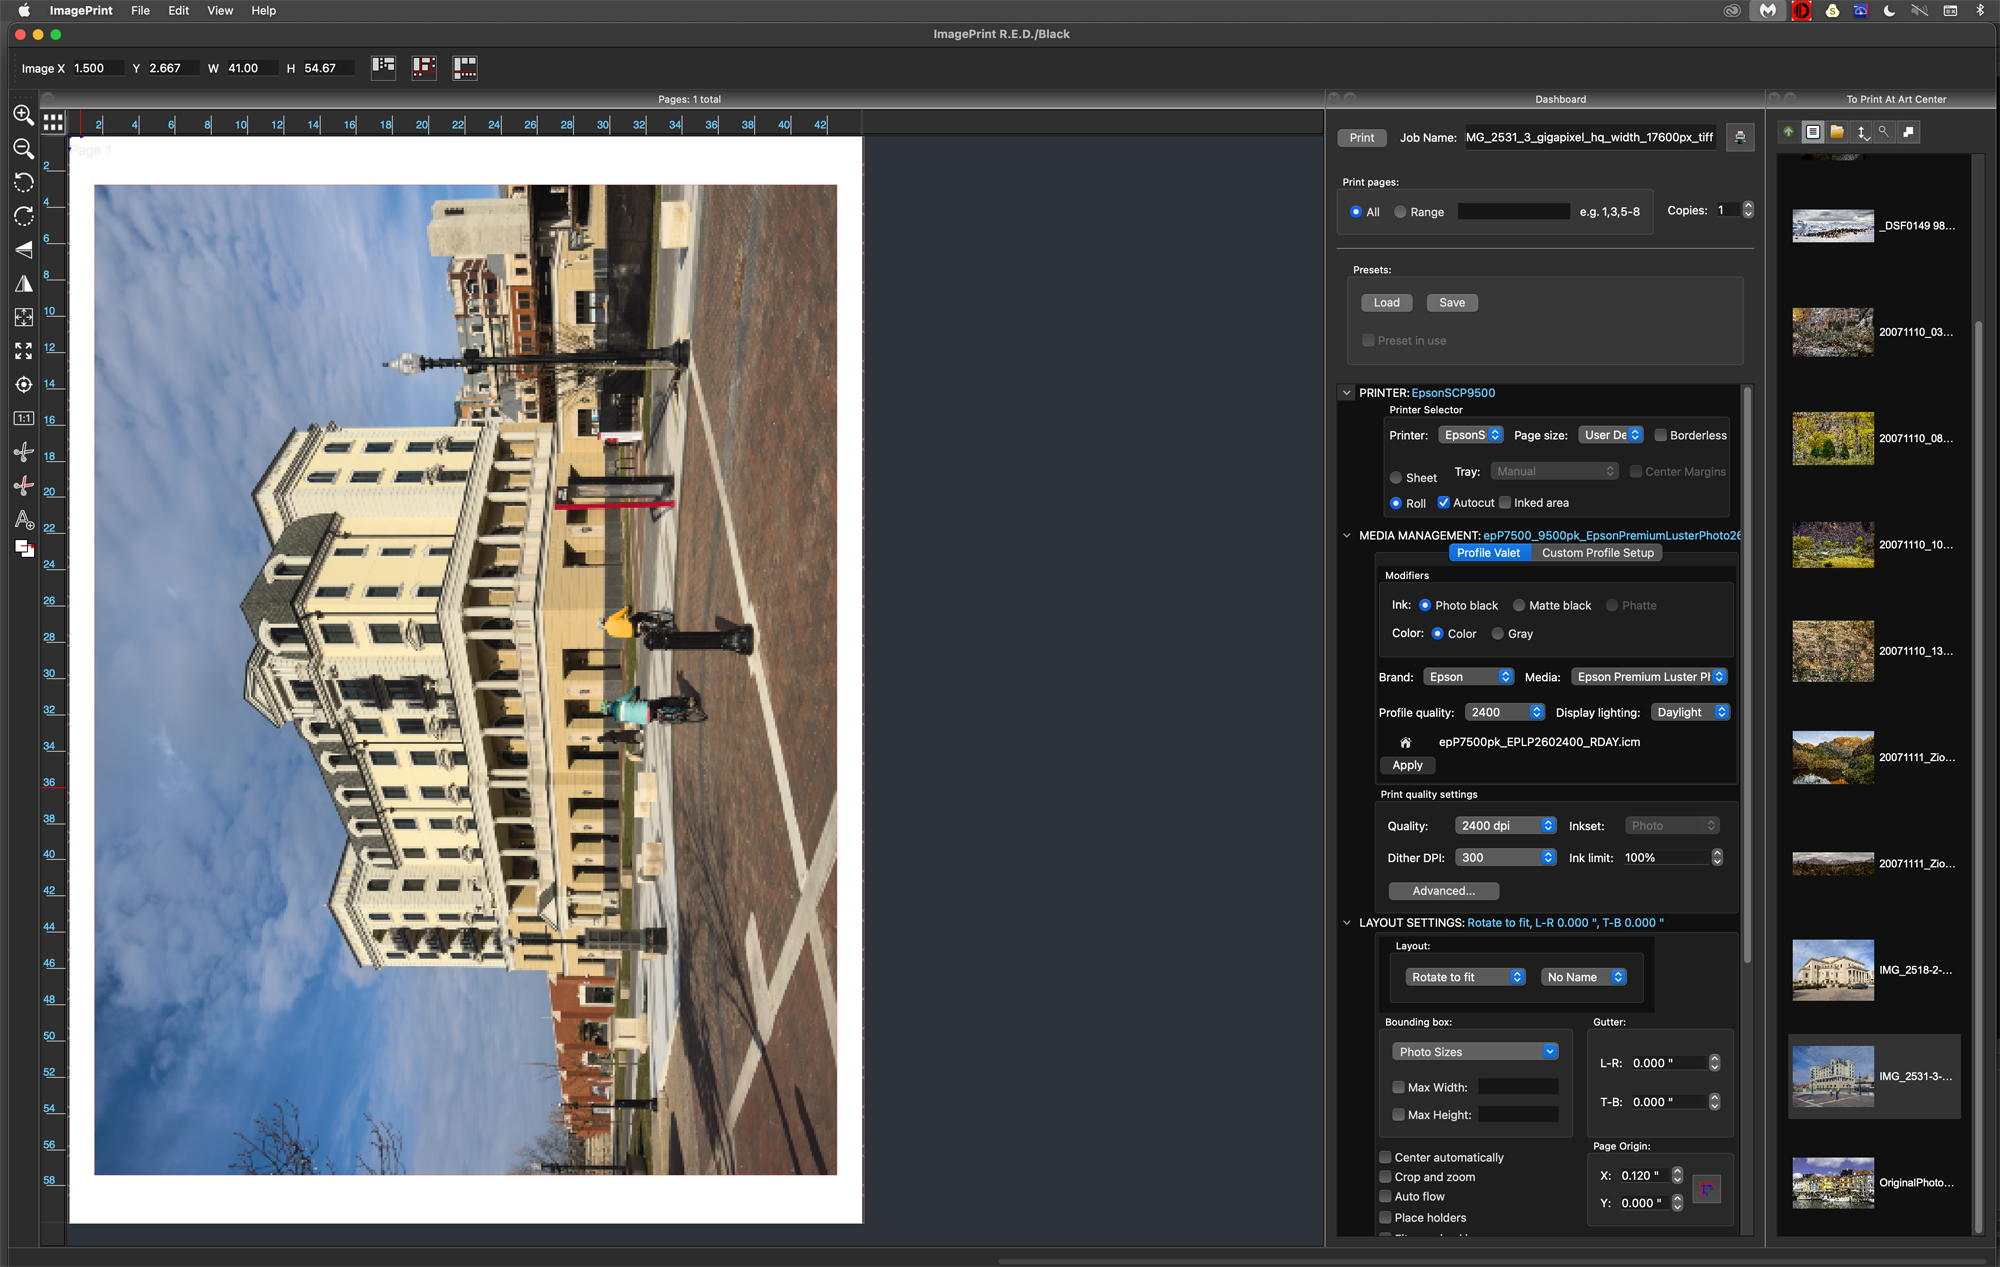
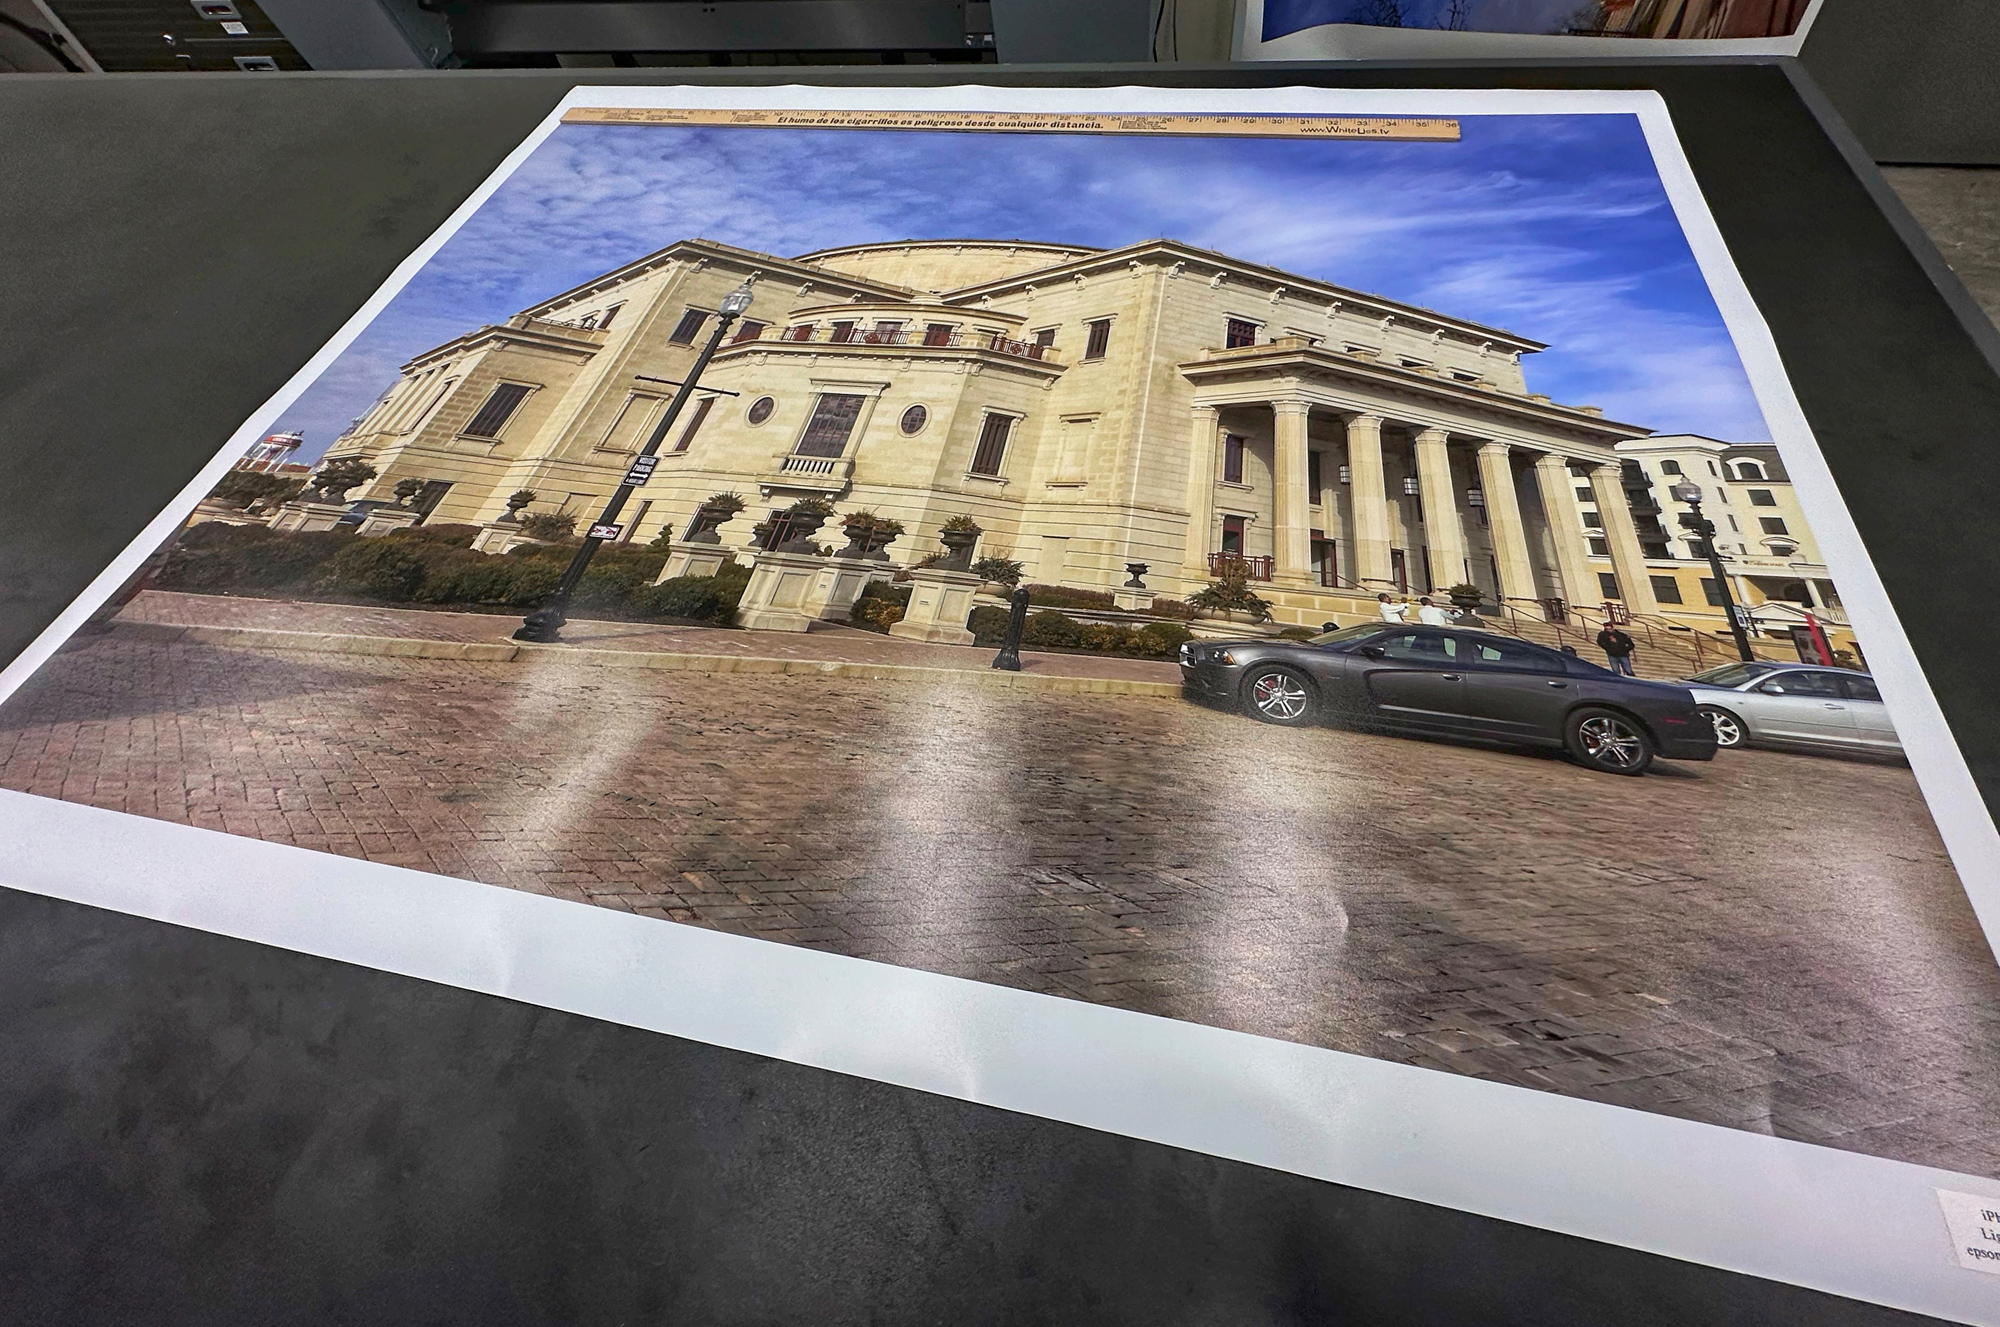
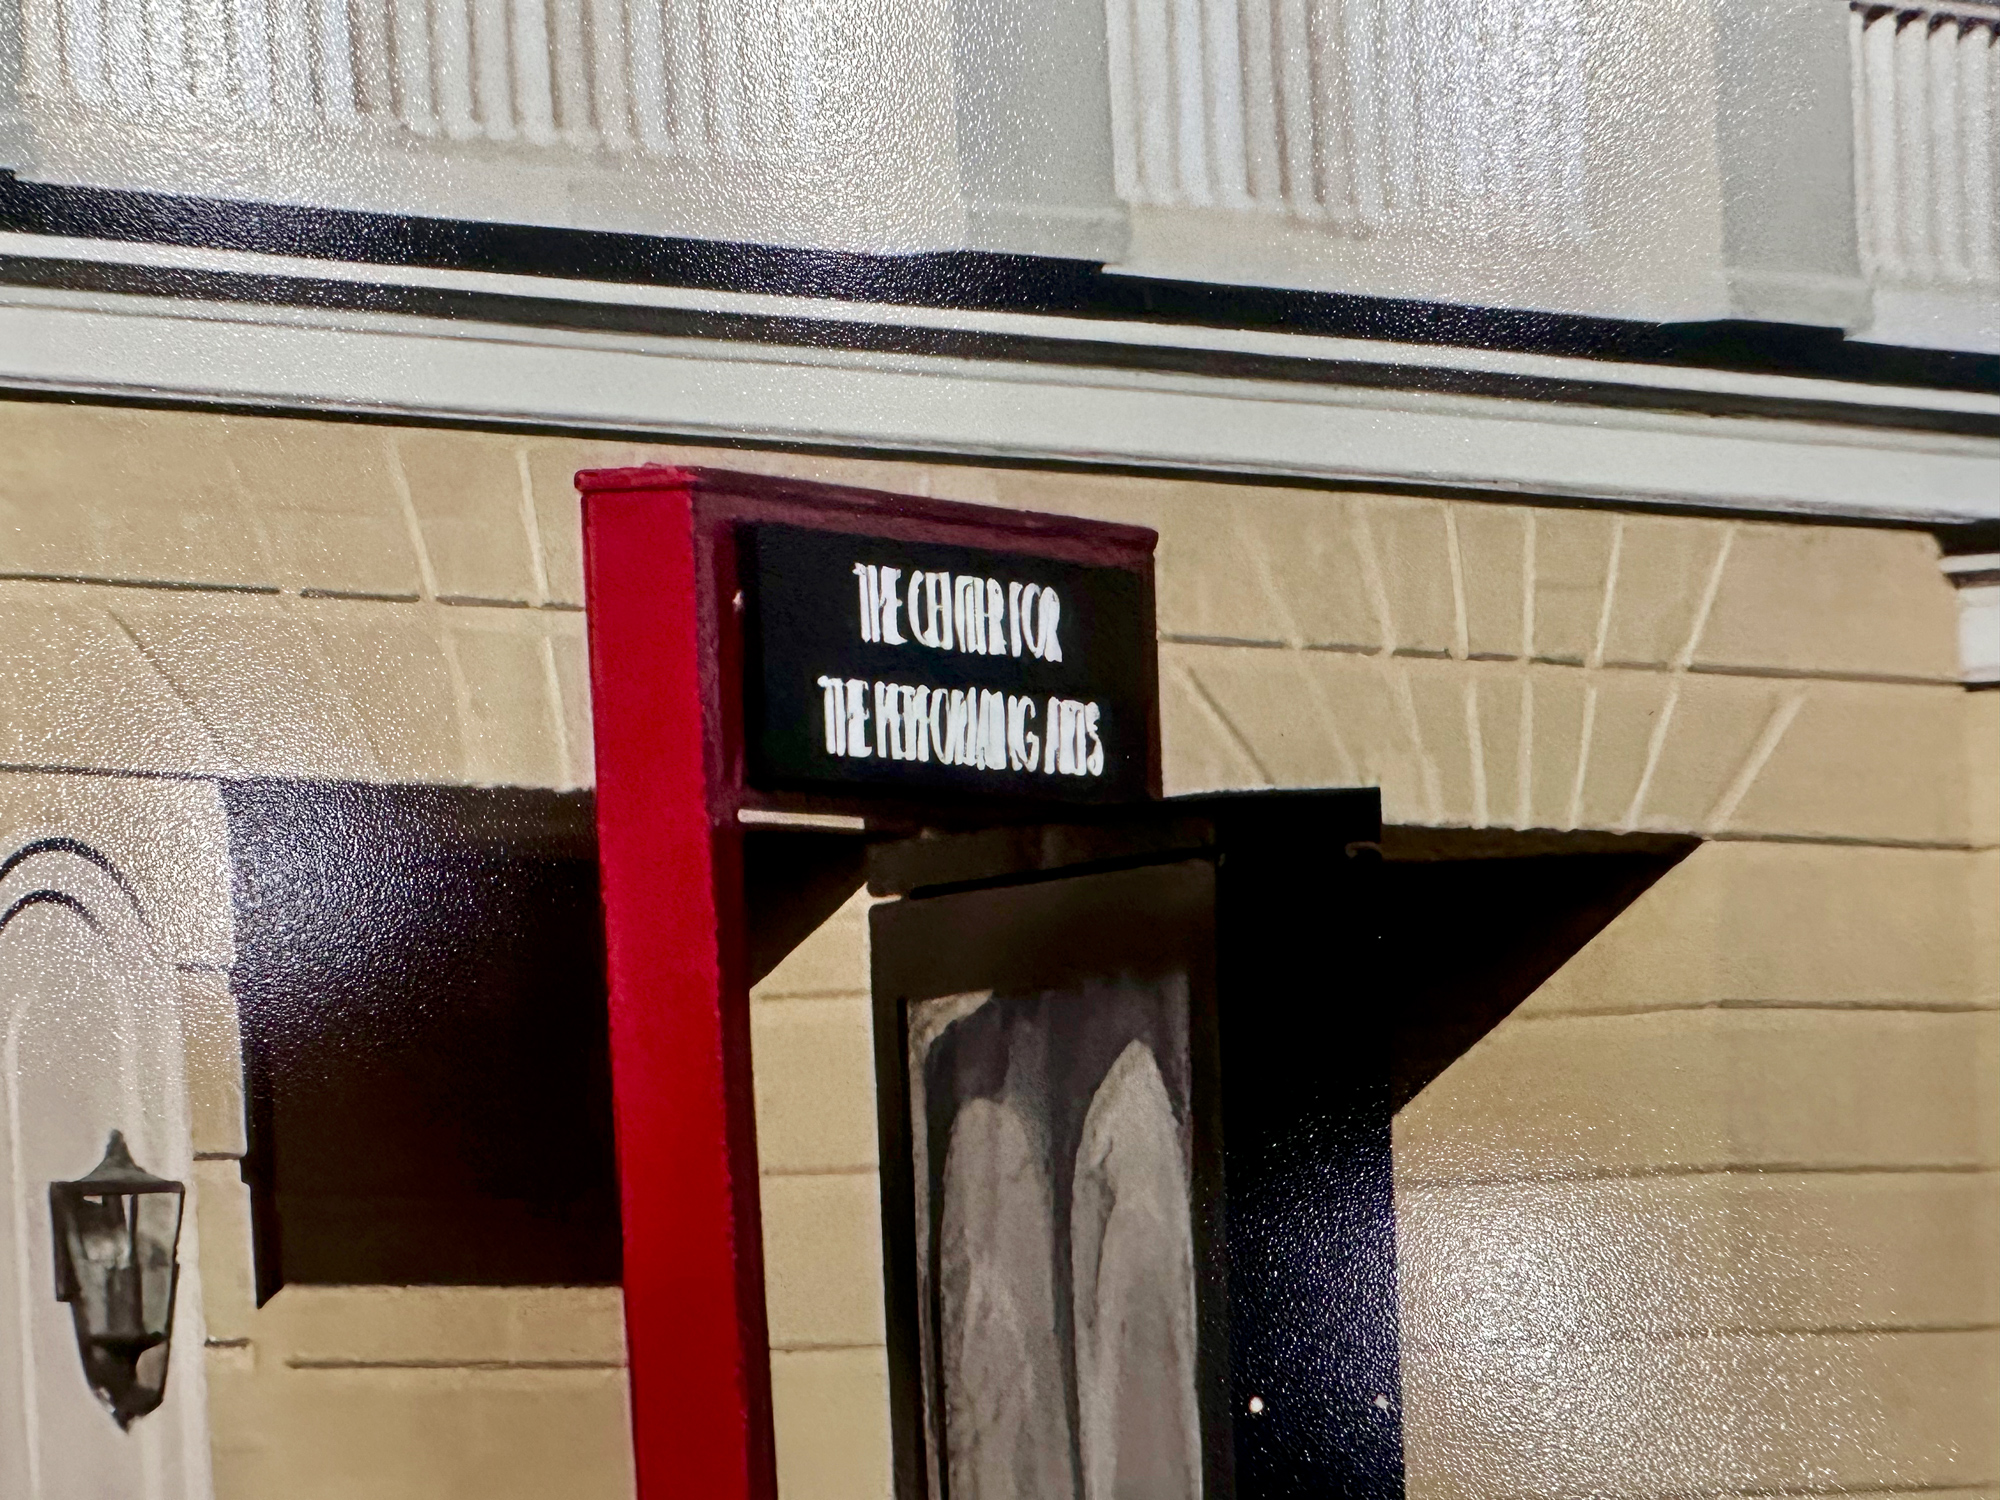
I took the first picture, which was of the Performing Arts Center in Carmel, Indiana, and called it to print on a 44-inch wide roll of paper with an image size of 42×32 inches. Using the what-you-see-is-what-you-get layout in Imageprint, I sized the file, selected the paper (Epson Luster Pro 260), as well as the Imageprint Color Profile — which is loaded automatically — and then hit “print.”
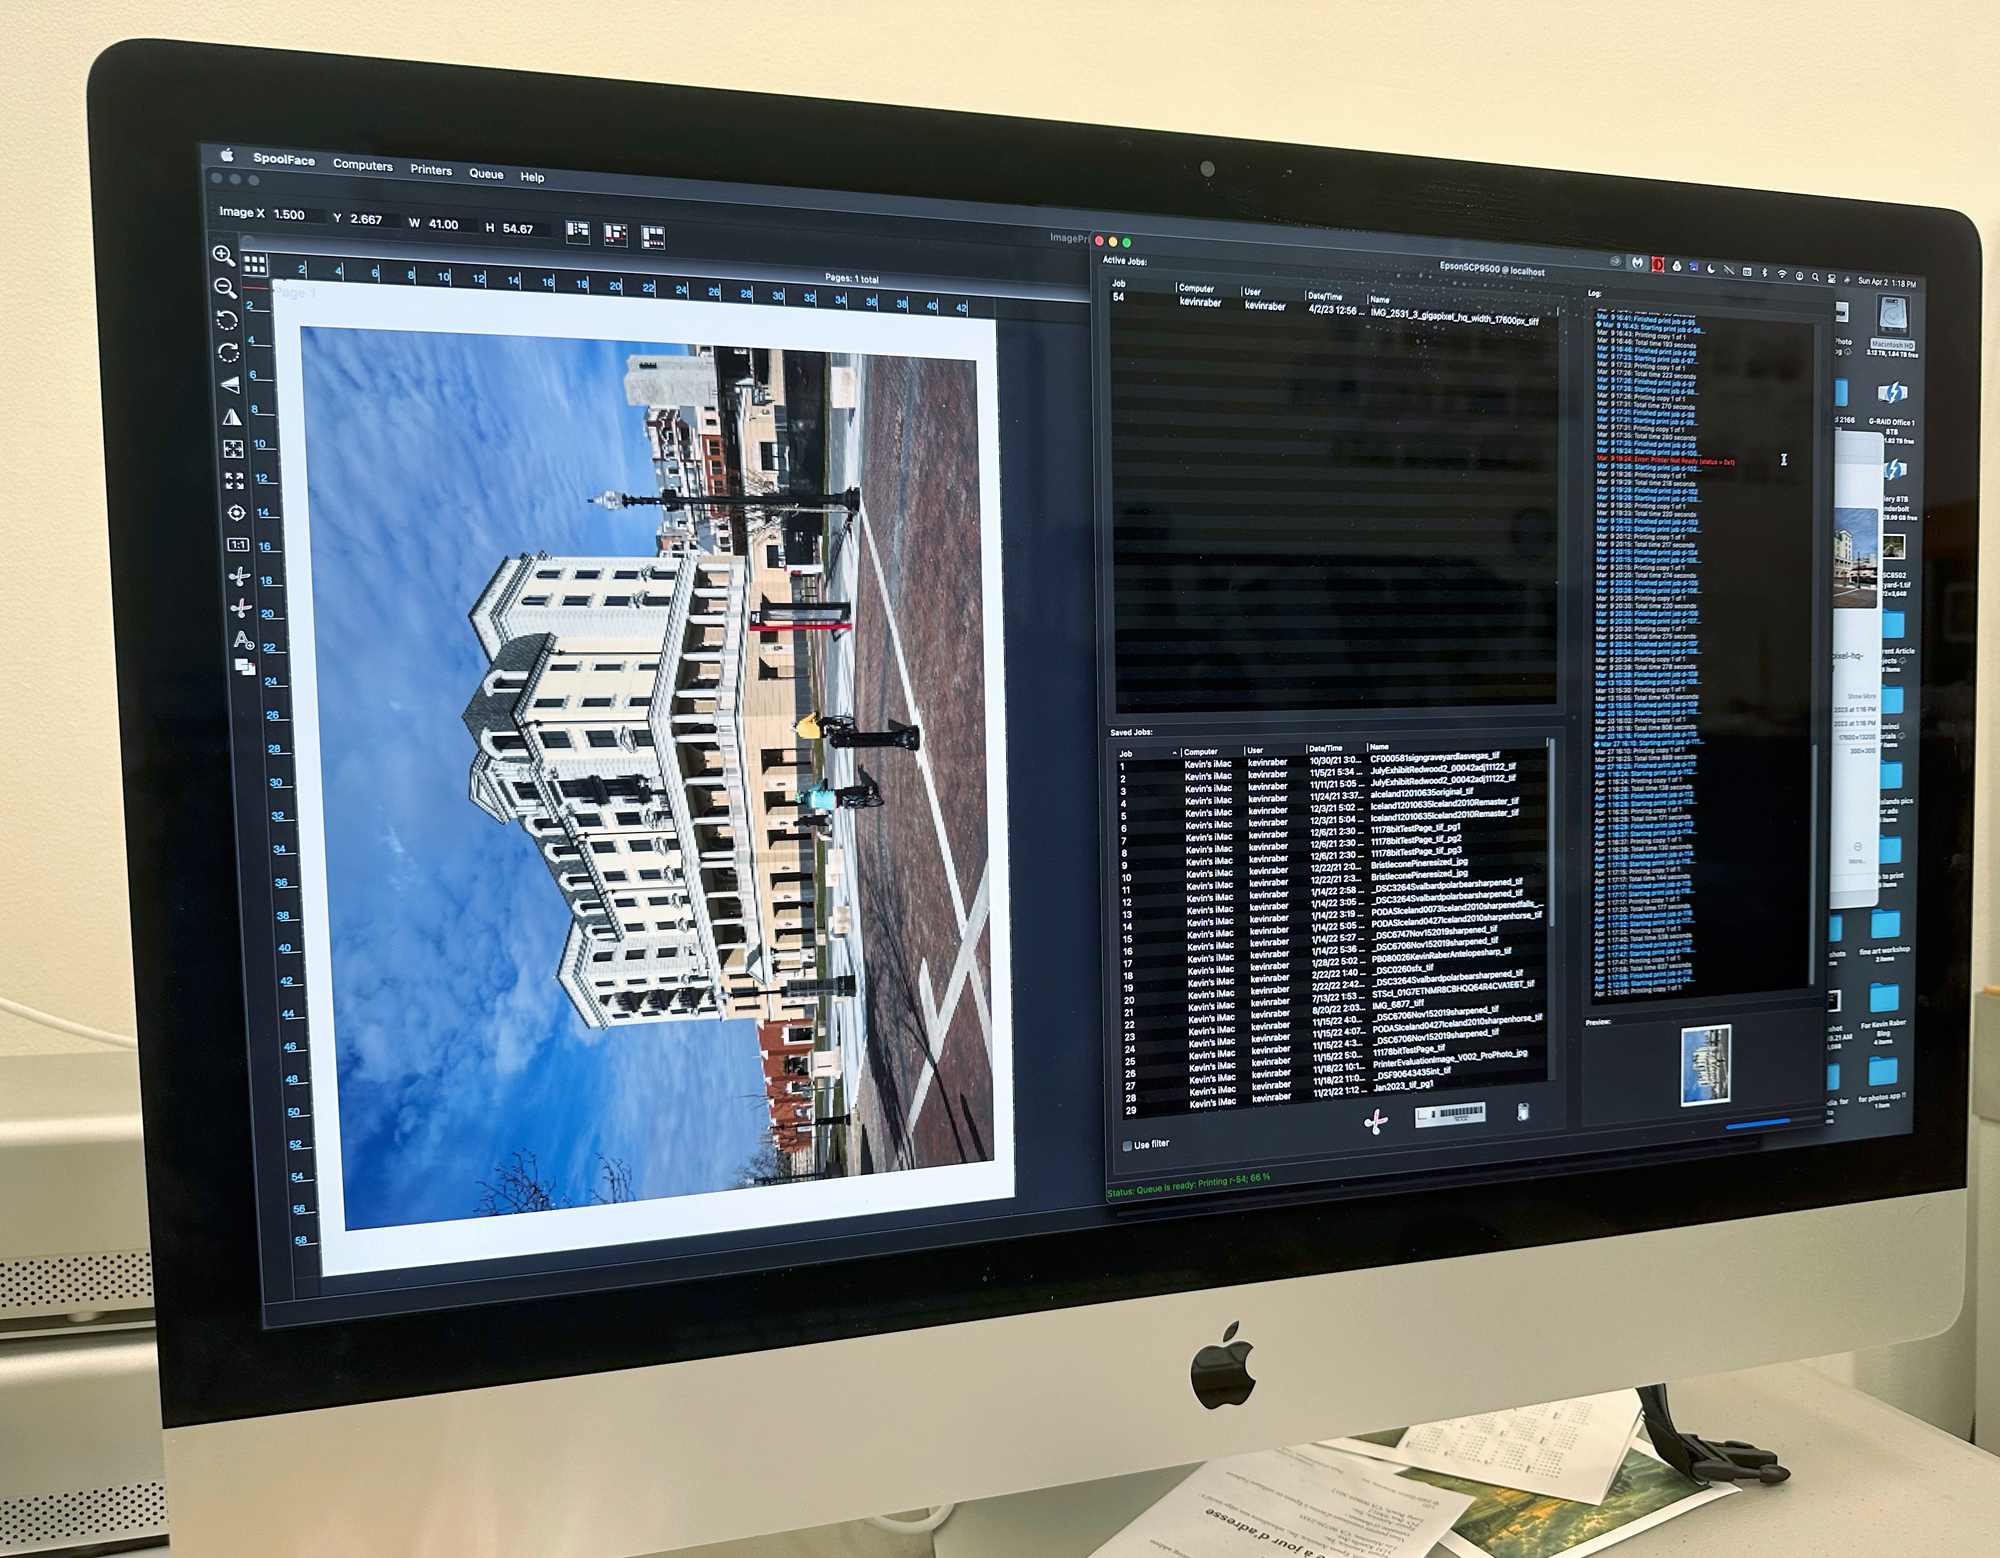
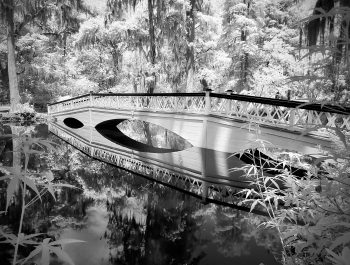
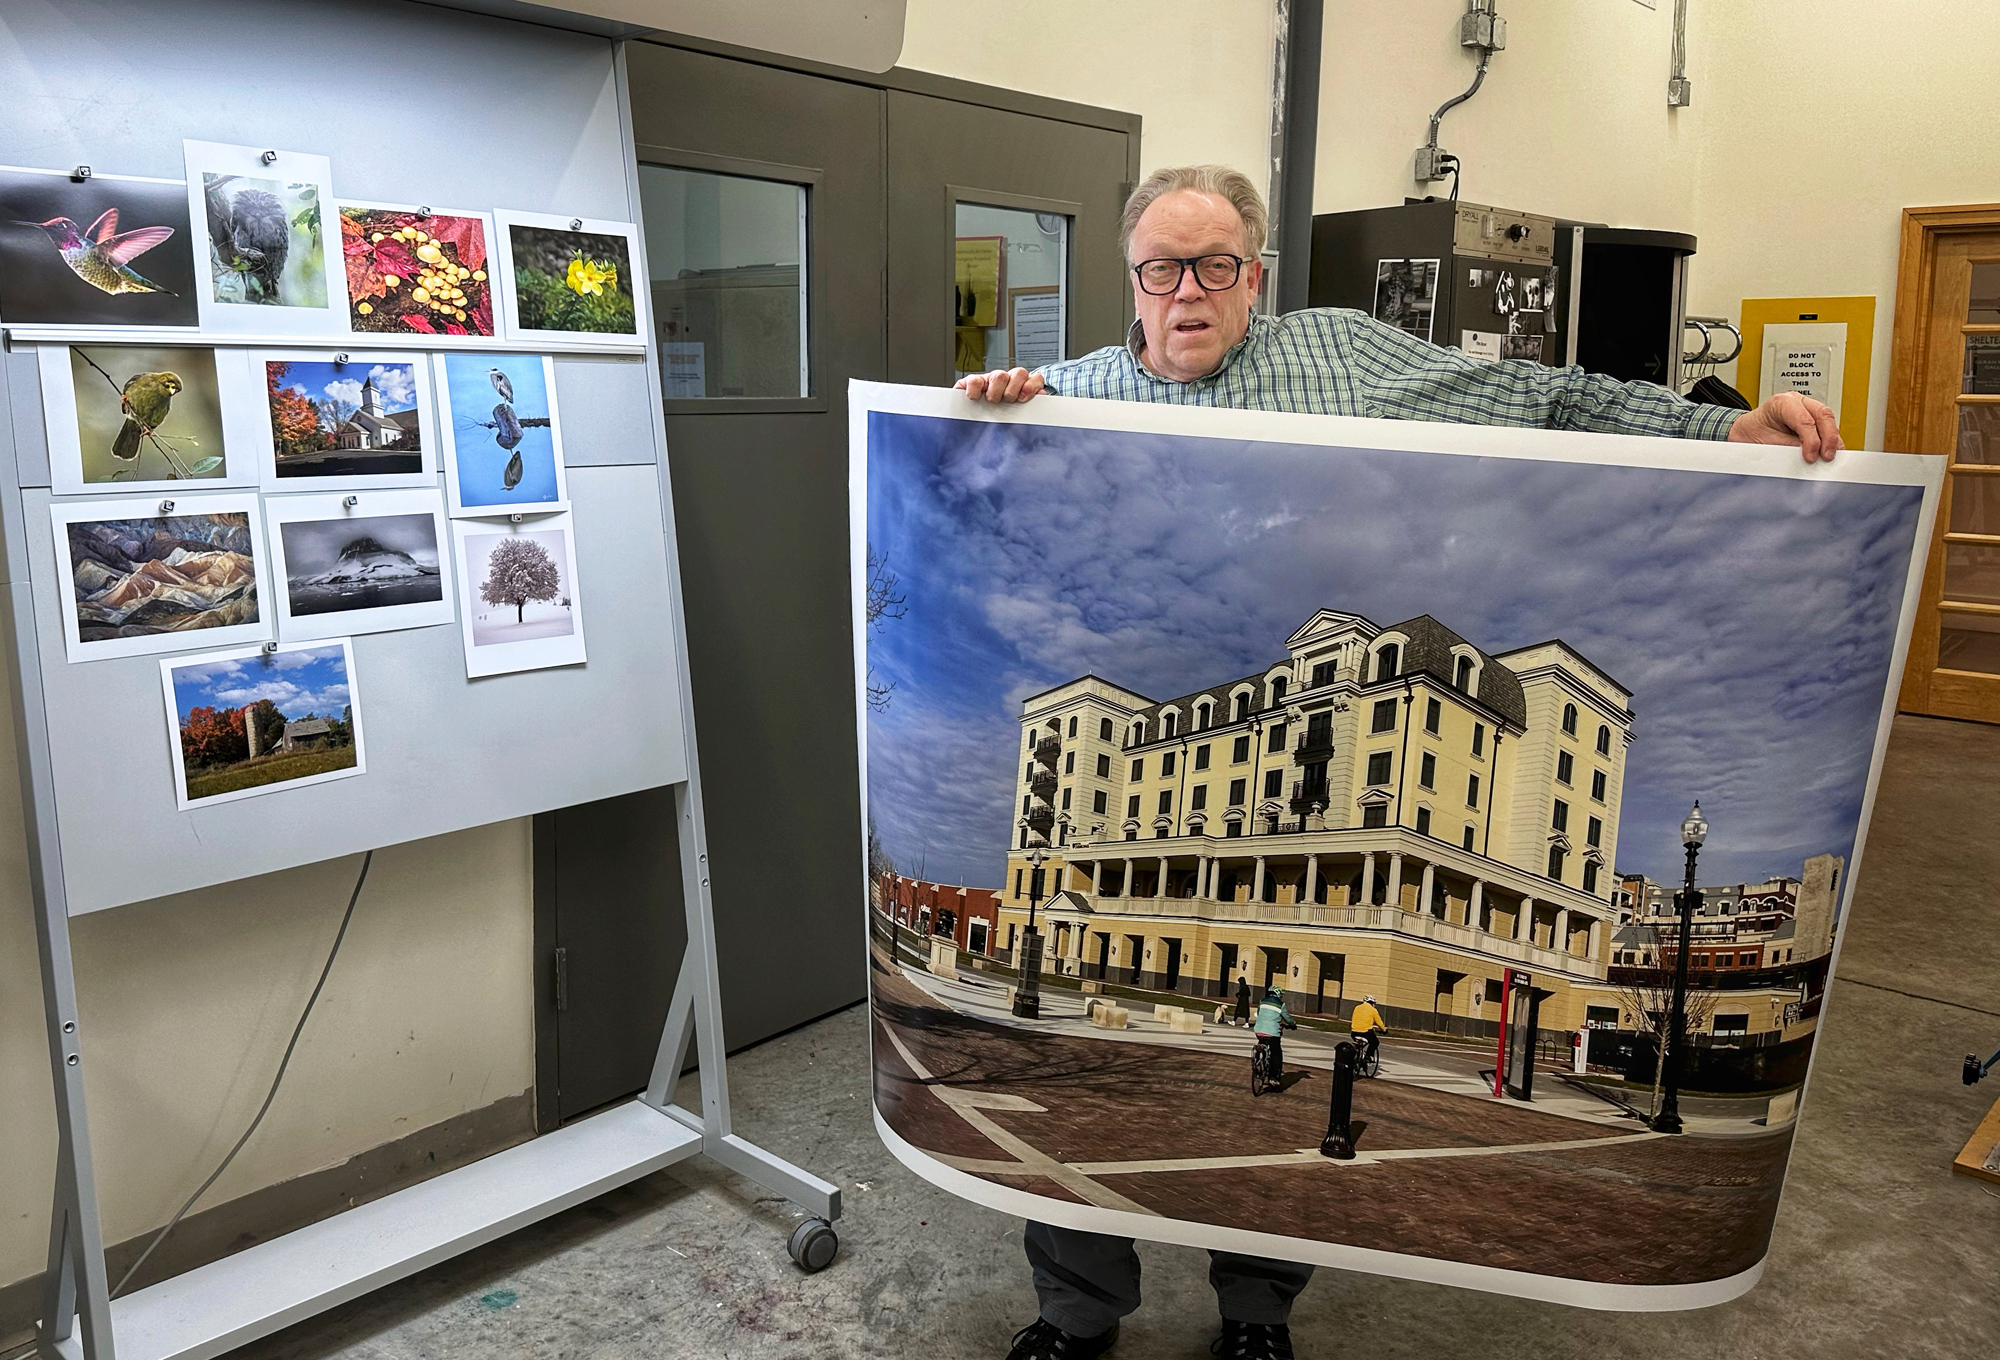
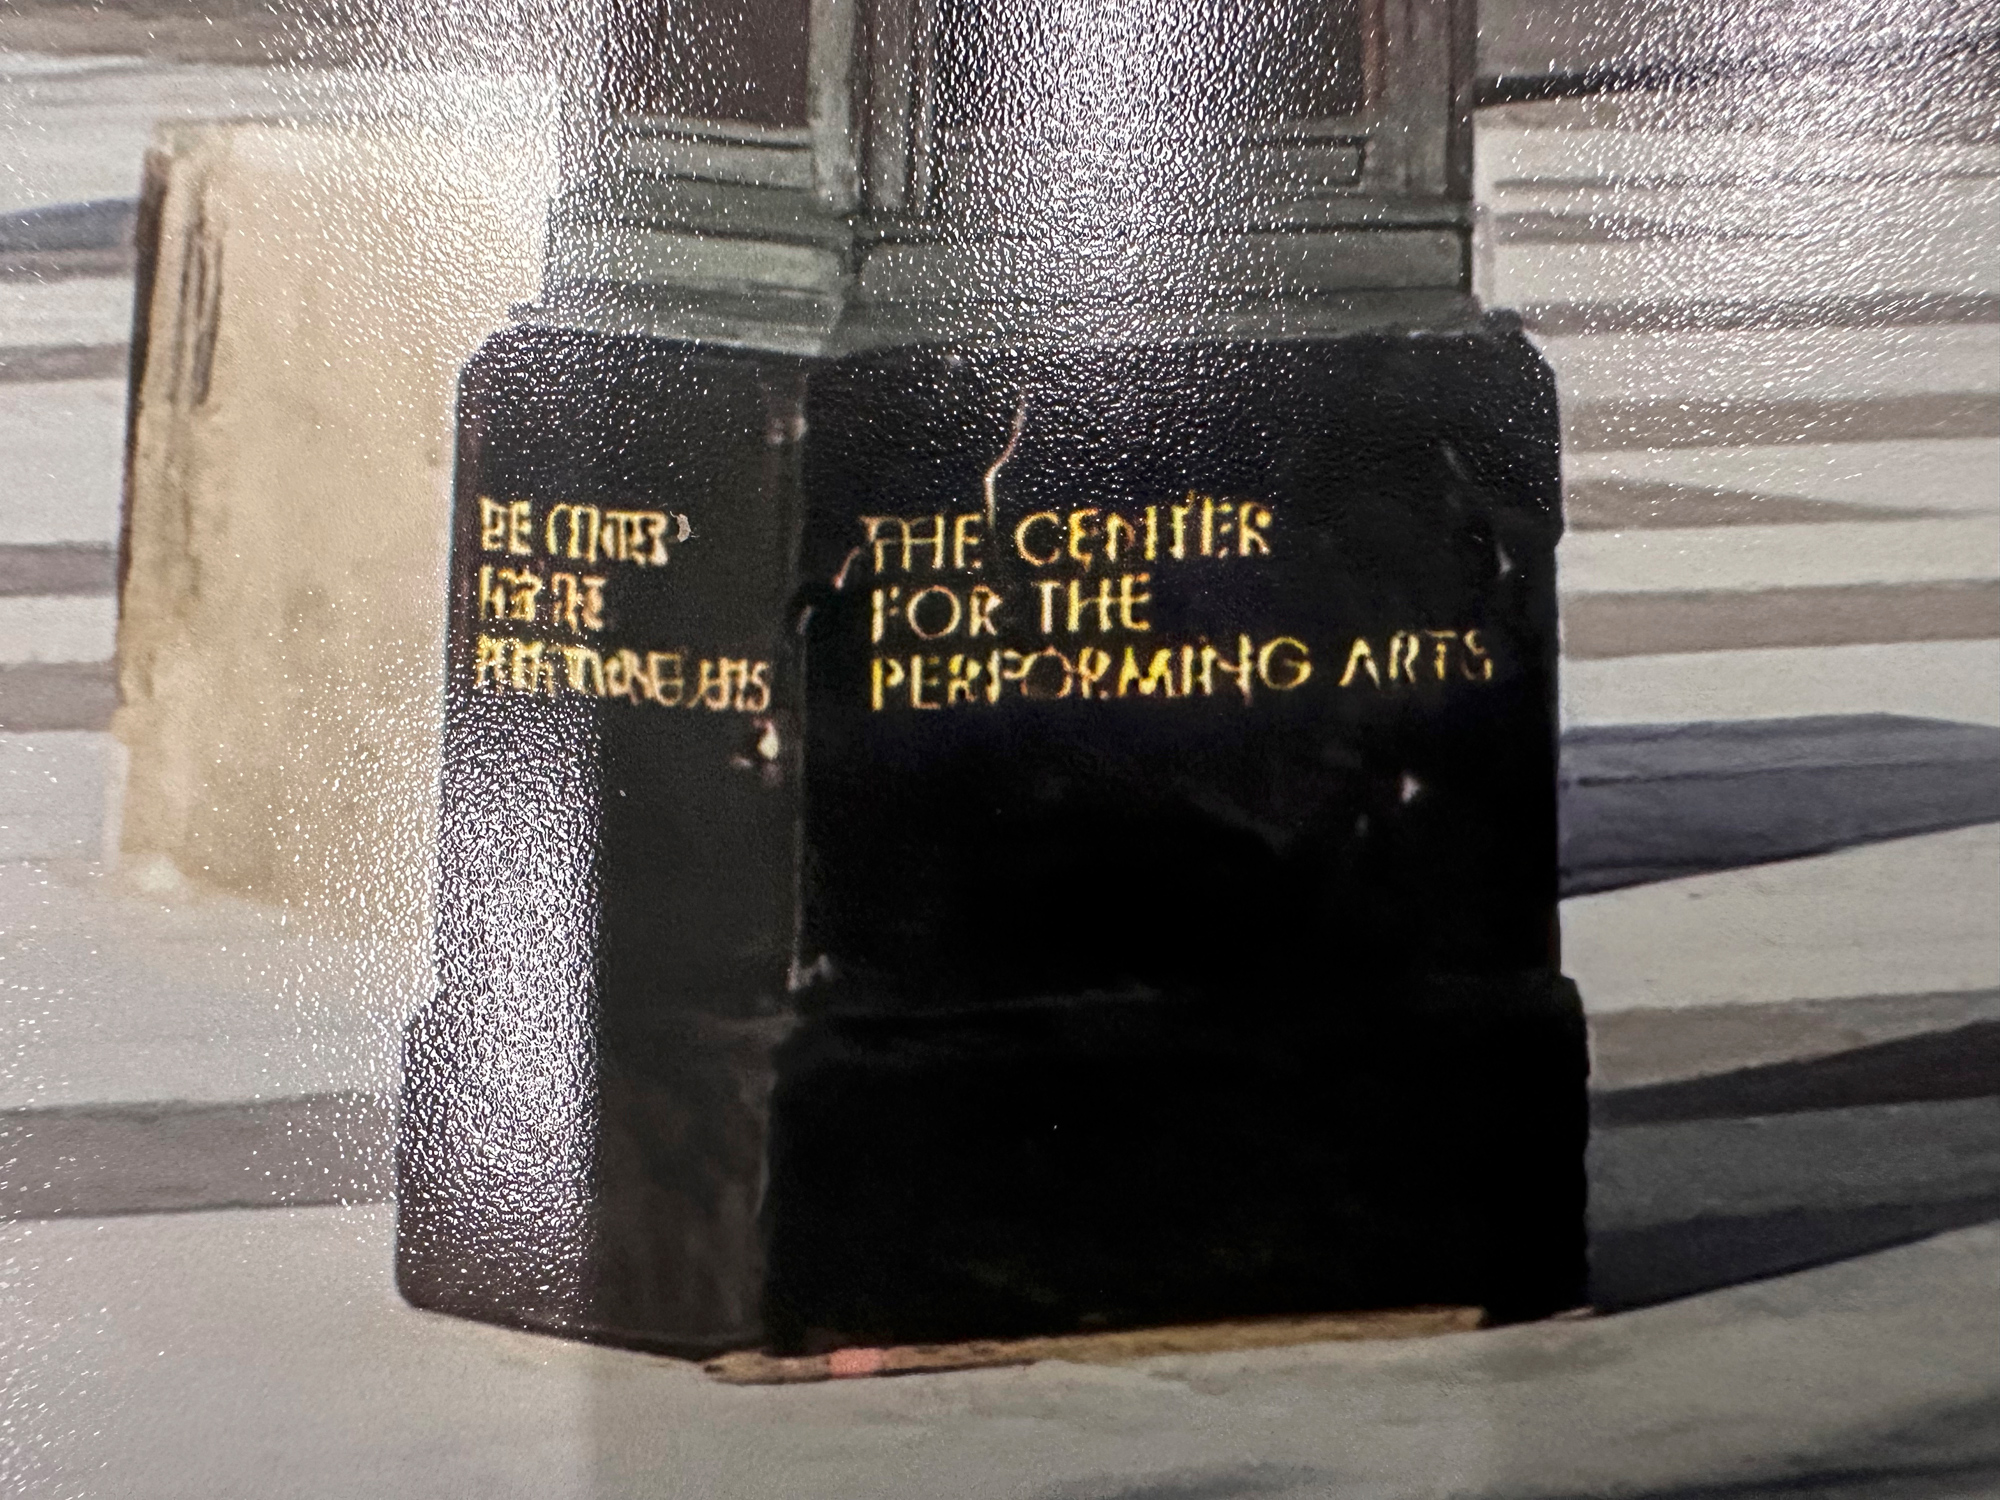
The picture printed perfectly. The detail is really good, as you can see from the images below. I would have no problem displaying this image. It is truly remarkable that I could shoot a 48MP RAW file with my iPhone and make prints of this size without doing anything special.
I wasn’t finished — I wanted to see if I could make an even bigger print.
Time For Gigapixel AI

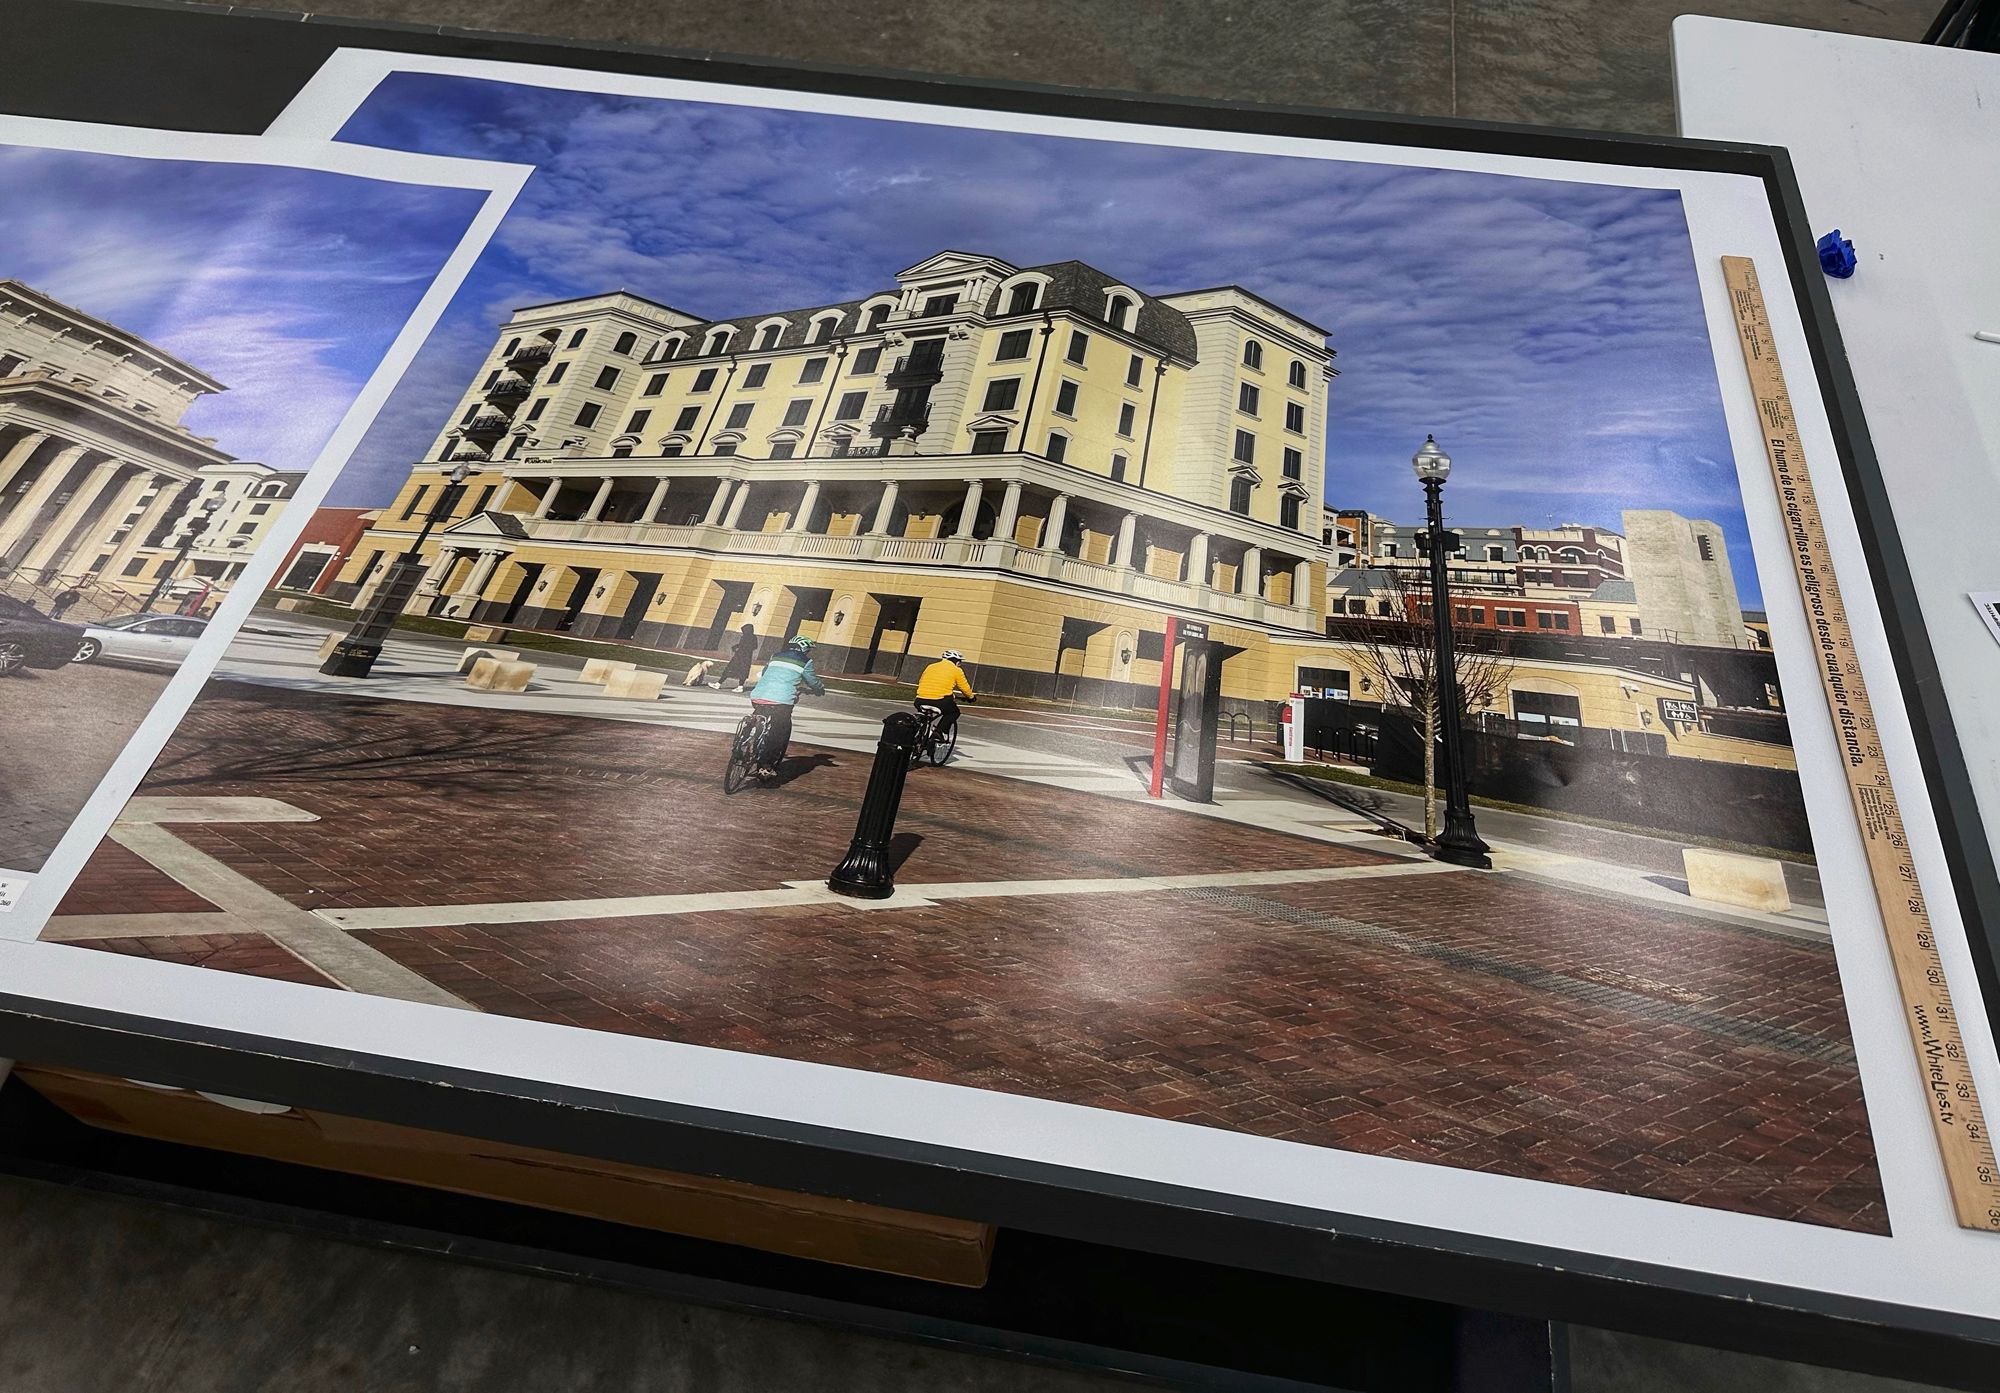
I now wanted to try something new. I decided I was going to use Gigapixel AI to scale the image to actual print size and print it to 42×55 inches. I chose another image of the hotel in Carmel and included a number of subjects.
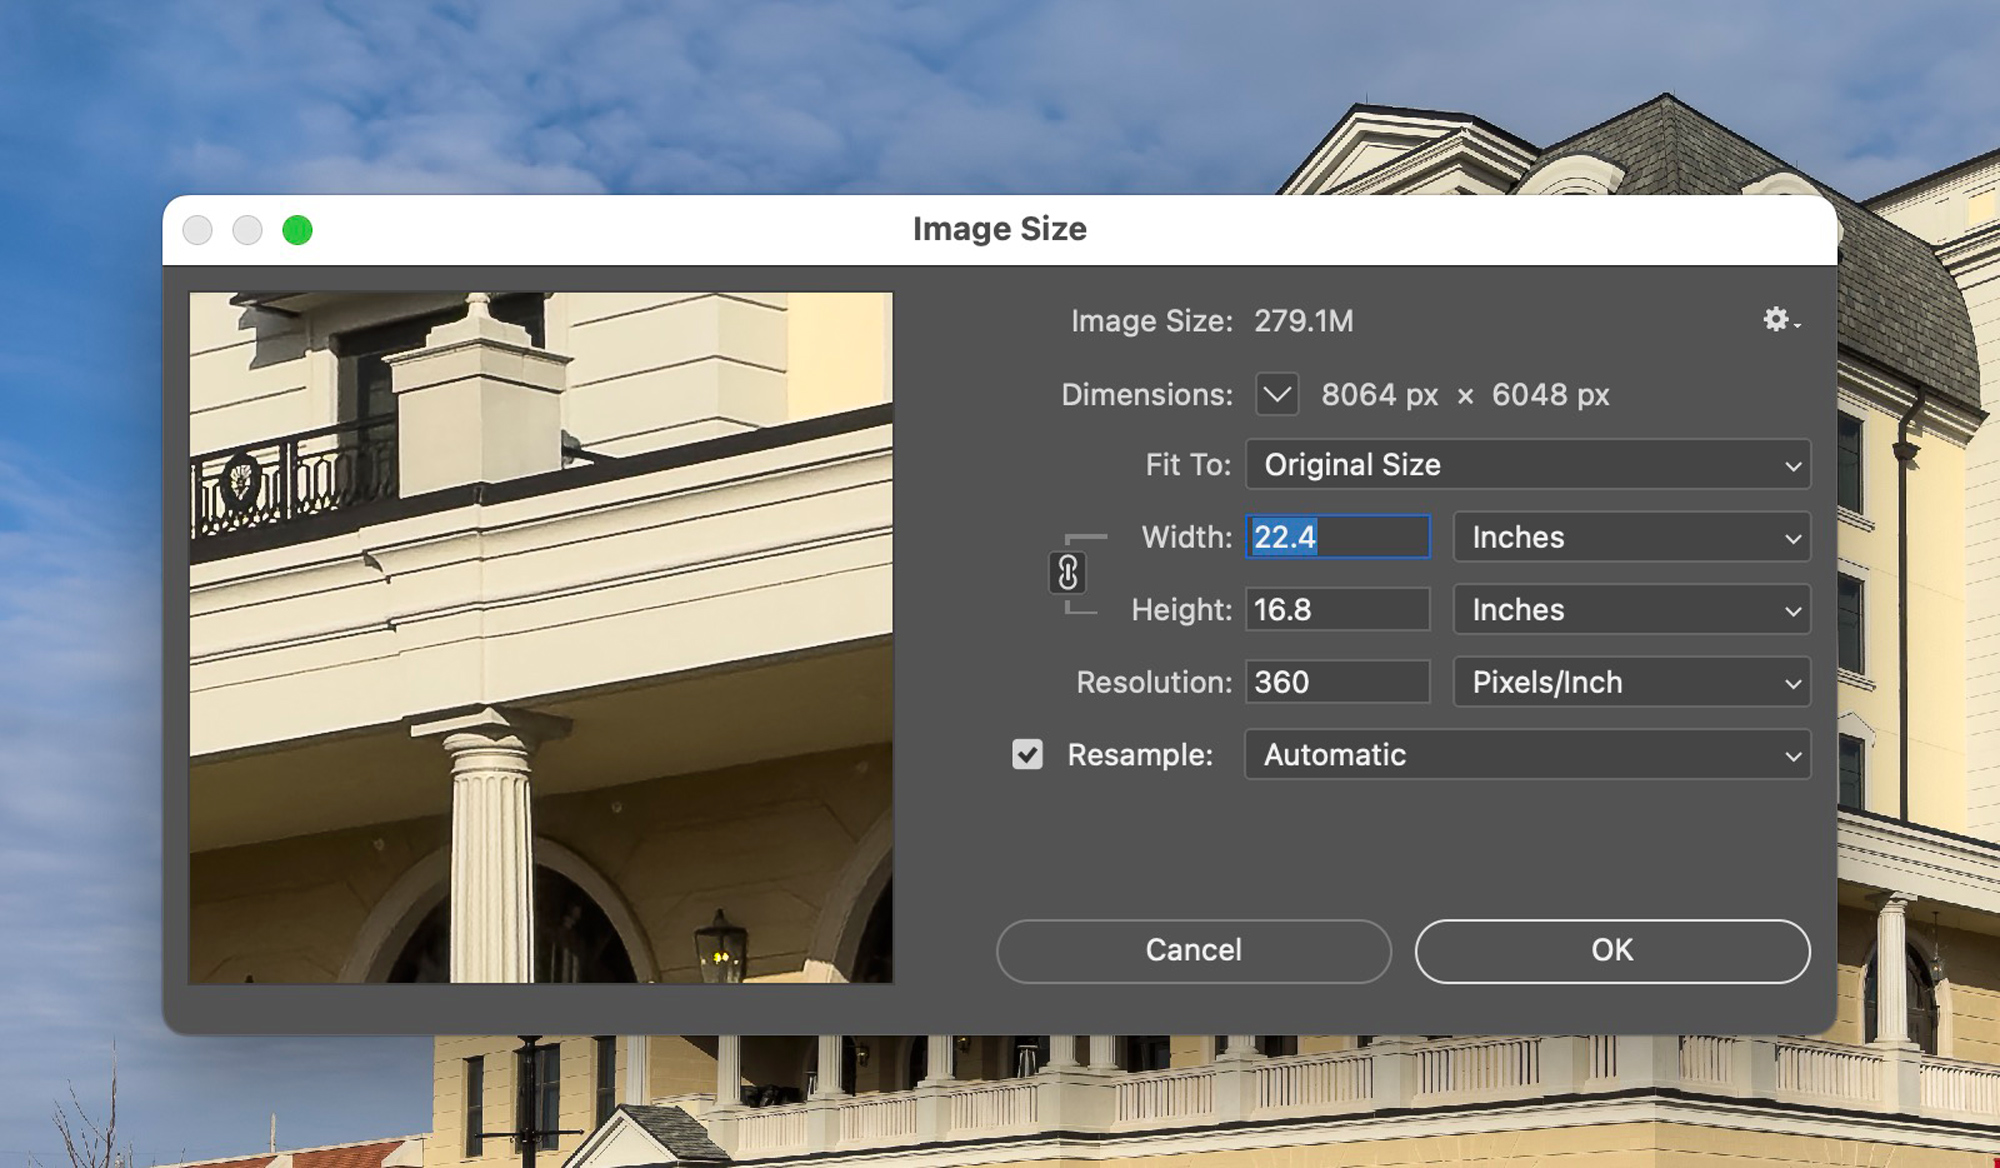
I took the processed RAW file (TIFF) and dropped it into Gigapixel AI. On the right side of the Gigapixel screen are some very basic controls, and in the preview window, you get a before and after. You can scale an image by multiples like 2X, 3X, and so forth, or size the image to a specific size. In this case, I chose to scale to size; I set the short side to 42 inches.
You can see the preview images, as well as the scale factor of what you have decided.
The settings on the right are intuitive and basic. Choose “Scale,” “Width,” or “Height.” I chose “Height” as I was going to be laying out the print. The height was relative to the paper, which was 44 inches for the Epson 9570.
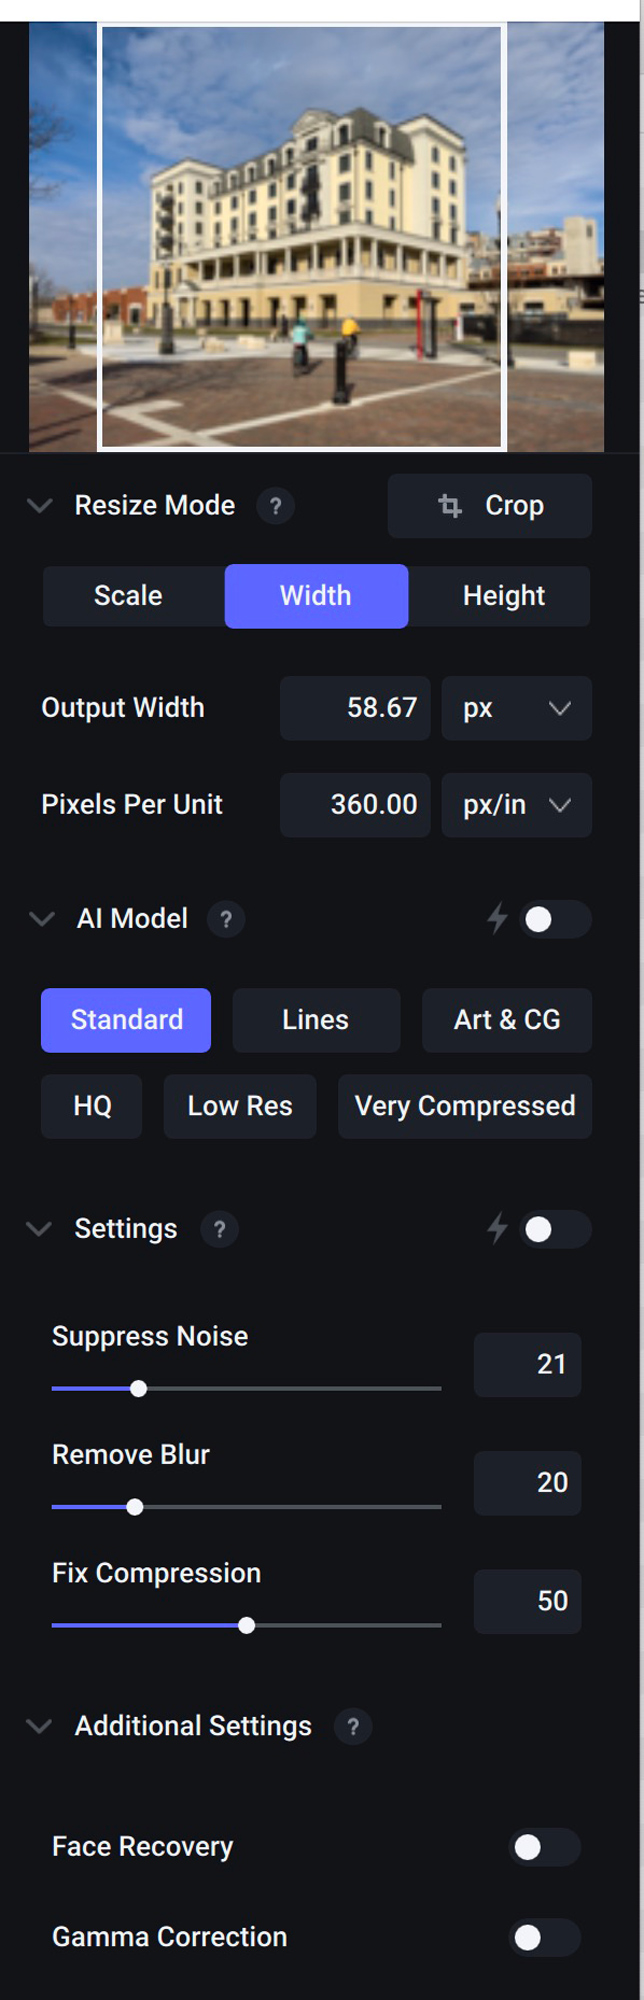
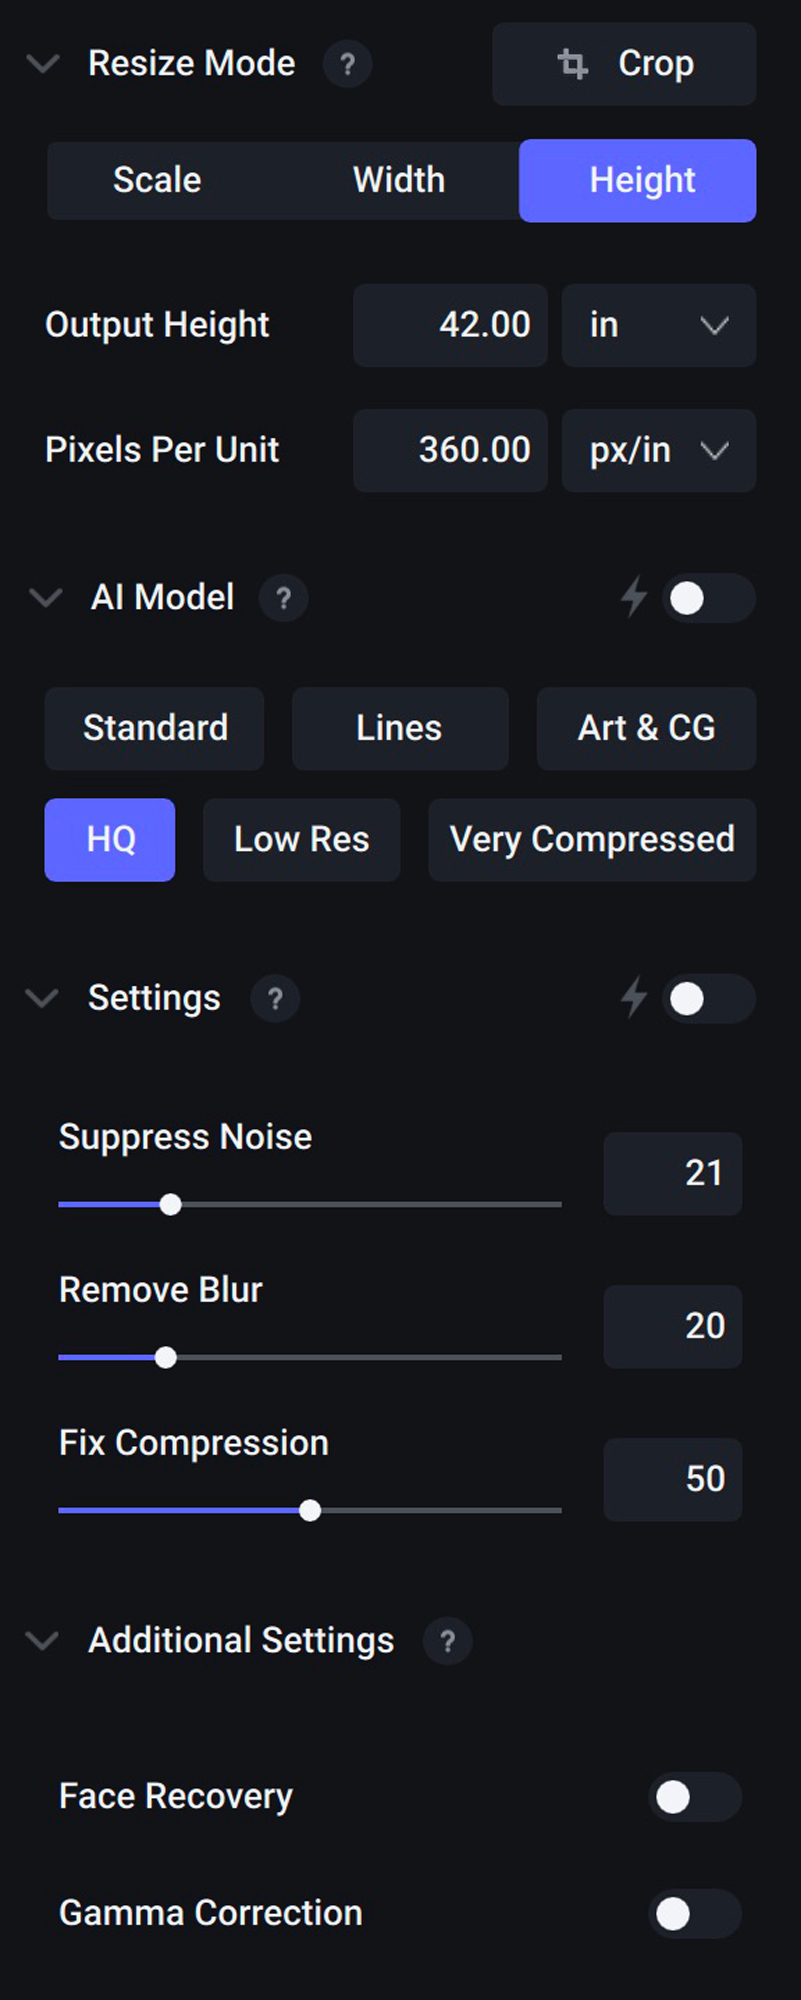
Then enter the number for height. I used the pull-down to select “inches.” Your other choices are “pixels” or “centimeters.” So far, it has been really easy.
Since I was using an Epson printer, I chose 360px/in.
You can then let AI determine what model to use to scale the image or make your own selection. I made my own, which was “Standard.”
There is a settings box next that you can turn on or off. I turned it off, but you can choose “suppress noise,” “blur,” and “fix file compression.” There was no need for these with this image. Finally, there are two more advanced choices (“Face Recovery” and “Gamma Correction”), both of which I didn’t use.
After these settings, I hit the “Update Preview” button. In a few seconds, you can see a preview of the scaled image for a section that you choose.
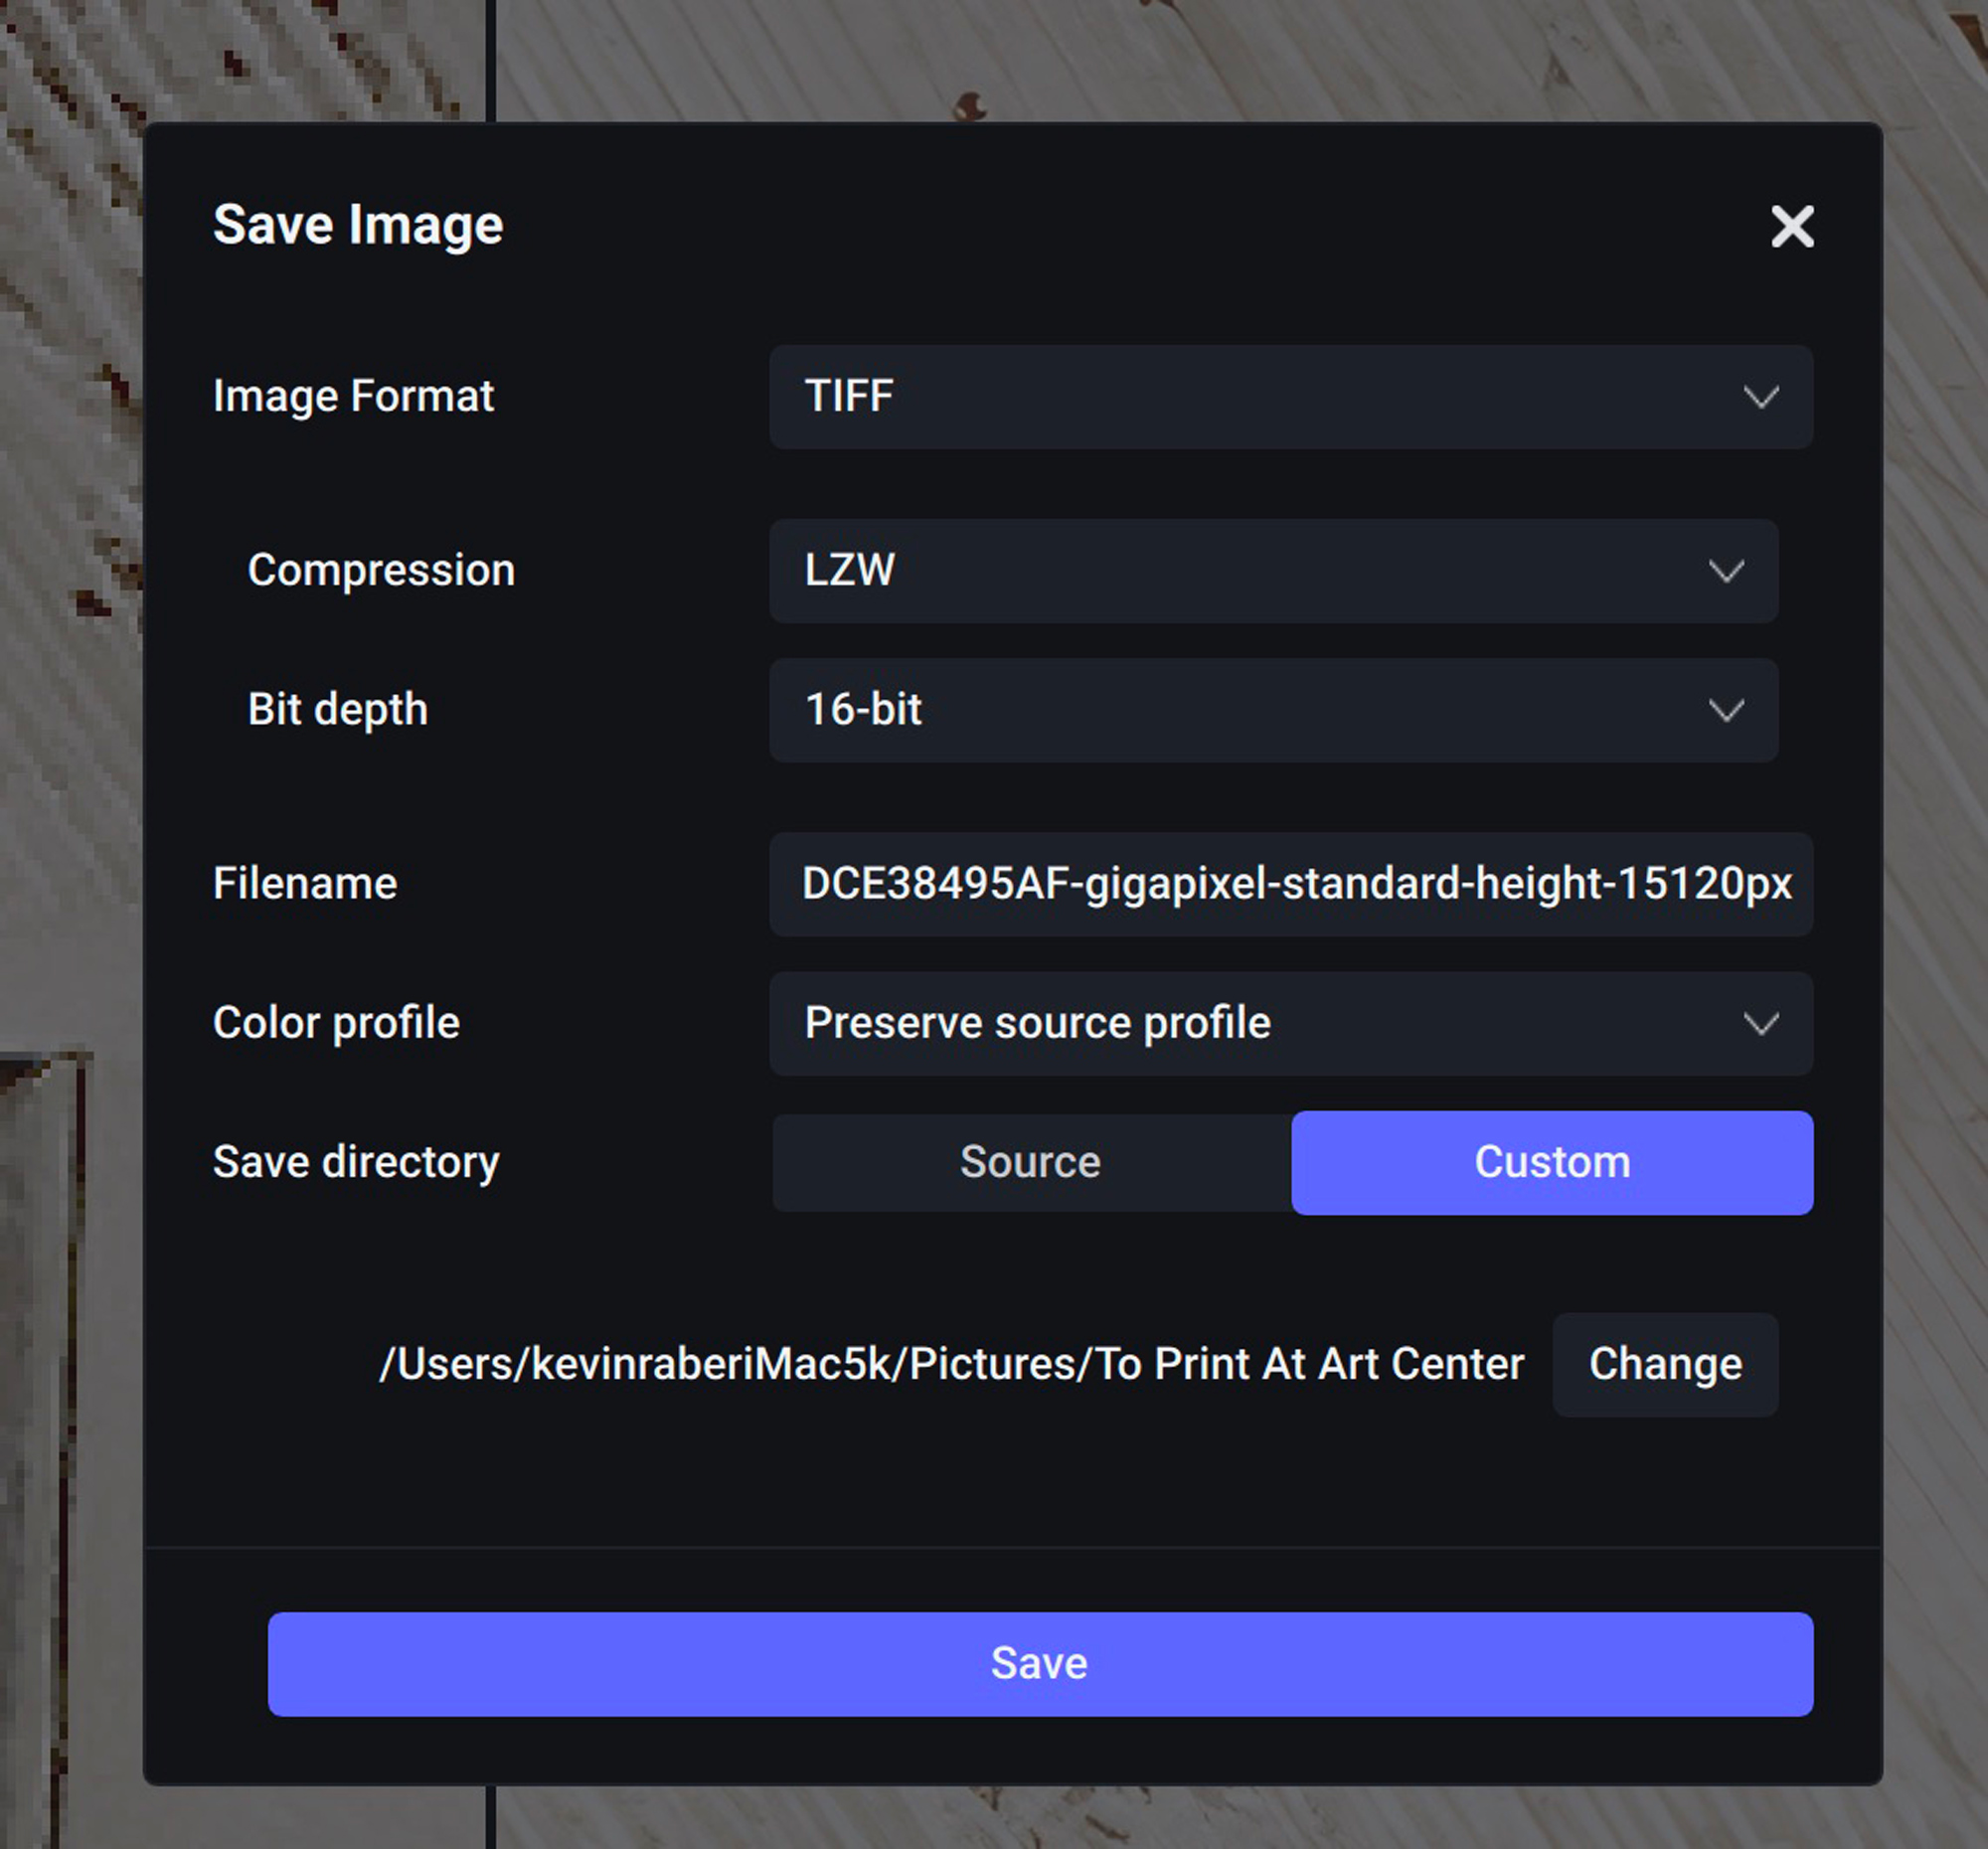
Underneath the preview are the states for what is being done. You’ll see the original size, the scaling, and the final size, as well as a summary of your settings. If everything looks good, you choose “Save Image.” This will trigger the “save dialog” box, and you can make your last choices like file naming, location, and such. Choose “Save” and let Gigapixel do its magic. There are several steps involved and the speed is specific to the computer that you use, as well as what you have asked to be done to the file.

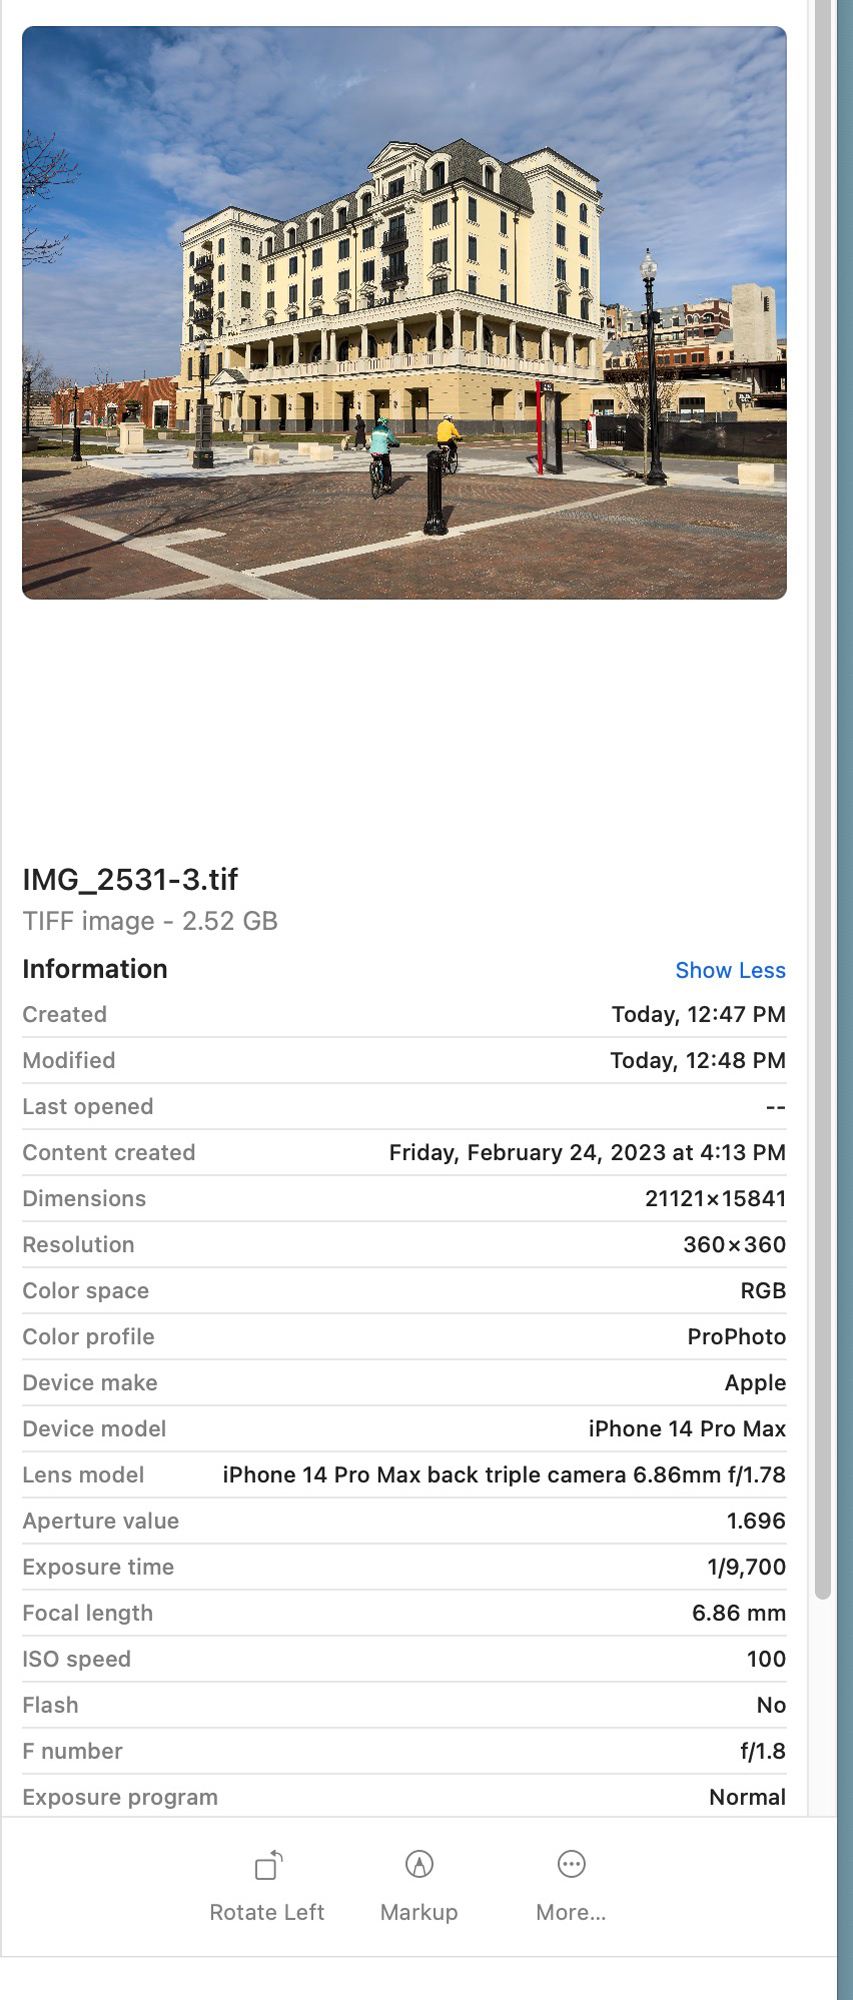
In a short period of time, the file is saved, and you can open it and view it in Photoshop. It does an amazing job and is quite an impressive piece of software.
I then took the file into “Image print” again, set the page size to 44×60 inches, and dropped the photo into the layout page. I then checked all my settings and made the print.
The Results
With the use of Imageprint and Gigapixel, I am able to take RAW files made with my iPhone, process them in Lightroom, and then print them in large sizes. In most cases, I’ll never go as large as I have in this article, as most of my prints range in size from 11×17 – 17×22 inches. But it is reassuring to know that I can make large images with the tools available to me if necessary.
Closing Words
At my last two printing workshops, I asked the attendees to look at these prints. One attendee said it best: “I would have no problem hanging a print that size on my wall.” We live in a great time to be photographers — we have a camera with us all the time that can be called on at a moment’s notice and deliver some amazing results. Our larger mirrorless cameras with high-megapixel counts can go even larger.
I encourage you to get Topaz Gigapixel as well as Topaz AI, which does even more. More than anything else, make prints. Without a print, you don’t have a photograph. Check out our printing workshops — we still have an opening or two for our July class. The fall workshops will be announced in the coming week.
Kevin Raber
May 2023
Indianapolis, IN
Photography is my passion and has been for 50 plus years. My career in photography has allowed me to travel the world, meet some of the most interesting people on the planet and see things I could never have dreamed of. My goal is to share the passion of picture taking through photographs and teaching with as many people as I can, hoping it brings them as much joy and happiness as it has me. I do this through photoPXL.com, this site, as well as Rockhopper Workshops, and other projects, as well as teaching as Artist In Residence at the Indianapolis Art Center.