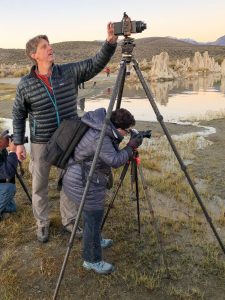
Field Techniques for Technical Cameras – Bags, Packing and Processes
The LEAN Technical Camera Process
Enough of the equipment introductions. How can these tools be used effectively and efficiently in the field? Photographing with a technical camera can either be an exercise in frustration or a joyful experience that frees you to be more creative. Perhaps I am being a bit facetious, but I think of this as the equivalent of LEAN manufacturing techniques of the Toyota Production System. Minimize waste, eliminate unnecessary tools and tasks and develop processes that improve flow.
I want to address one thought that often comes up in discussions of our art: won’t defined processes, procedures and standard methods stifle creativity? Well, that depends. If the defined process is to fully extend three legs of your tripod fully every time you set it up, then that process stifles creativity. If the process is instead to extend the bottom leg first, the middle one second and the top one last to whatever height you need, then it allows you to set up the tripod to any height your creativity desires while it prevents leaning down, falling or tipping over the tripod to reach the bottom leg after the top legs have been extended.
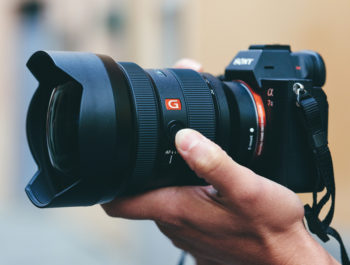
I was very fortunate to have Galen Rowell as a mentor. One of the most valuable but mundane things I learned from him almost 30 years ago was how to change a lens. It is one thing to change a lens when your bag is in the car or sitting on a picnic table. Quite a different thing when hanging from a fixed rope with 1000 feet of air below, it is snowing, and the wind is making you pendulum 10 feet back and forth. His lens changing process for an SLR went like this:
- With the camera hanging down in front of you by the neck strap: if the lens release button on the camera is on the right side of the lens barrel, grab the grip with your right hand. If it is on the left side of the lens barrel, grab the left side of the camera with your left hand. [Note you are behind the camera, so “right” is the side where the hand grip is, most of the control wheels and usually the on/off switch. Left is, well, the other side.] You want the lower fingers of your hand that is gripping the camera to be in reach of the lens release button.
- Take whichever hand is not on the camera, reach into the bag and grab the “new” lens you want to install, front element in your palm, bottom dust cap facing out.
- Without letting go of the camera, grab the dust cap on the bottom of the new lens with the thumb and forefinger of your hand that is holding the camera.
- Twist and release the dust cap. Keep the dust cap held between your thumb and forefinger.
- Put the new lens back into the bag without the dust cap.
- Depress the lens release button using your third or fourth finger on the hand that is still holding the camera and the dust cap.
- Take your now free other hand and twist off the old lens from the camera and apply the dust cap that is still held between your thumb and forefinger of the hand holding the camera.
- Put that lens in the bag.
- Grab the new lens you want from the bag, twist it onto the camera.
- Remove and stow the lens cap and install the lens hood.
Ten steps; seems ridiculous. So many steps, each one with such a detailed description? Am I crazy? Don’t answer that. I challenge you to grab a DSLR / mirrorless camera right now and try it a few times. Notice how you never let go of anything unless it is safe inside the bag? Notice how nothing switches from one hand to the other? Switching stuff from hand to hand is when we tend to drop things like dust caps or lenses. Or, something really important like a glove, crampon or ice axe.
In fact, try it a few hundred times until it becomes second nature. This is the type of process I am promoting. You want to develop processes so refined and second nature that you don’t have to think about how to do them when you need to do them, and instead you can focus on being creative. These processes need to handle rain, snow, wind, sand and waves in any combination. Oh, and not to mention they often need to be performed in the dark. They are constantly evaluated, refined and improved. “Build. Test. Learn. Repeat.” The knock against technical cameras is they are too fiddly and cumbersome in the field. As the wonderful Steve Hendrix of Capture Integration said in a recent forum post, “One person’s fiddling is another person’s pain in the ass time-suck.” Ha! Render that disadvantage moot by honing processes so well you set up faster than anyone else in the group with a mirrorless or DSLR. Sure, those cameras will always be quicker for “point and shoot” situations. But I hope you are not interested in using the technical camera for point and shoot situations.
You will also notice many of the recommended processes discussed here could be applied to other, if not all, landscape photographers regardless of type of camera used. Shhhh! What they don’t know can’t possibly hurt them. I will describe my processes that relate to my photography. My photography may have little to do with your photography. Take my processes as a starting point. Try them, modify them, improve them, whatever. Adapt them to your photography. Build. Test. Learn. Repeat.
Packing: The Heart (and Art) of it All
I have a love, interest and obsession for camera bags, how to arrange them and how to pack them. Jackson Browne was once asked, “How many guitars do you have, Man?” He embarrassingly answered, “Umm, I don’t know.” That’s how it is with me and camera bags. Right now, there are four sitting out on the floor in my studio. That is a tiny fraction of the whole stable. So don’t ask; believe me, you don’t want to know and neither do I.
We all have our favorite bags and I will refrain from suggesting which bag to get. However, there are a few things I think are important. Unless you are working straight out of a car, you will be carrying this stuff anywhere between 1 and 20 miles a day. Probably closer to 1 mile, but regardless, the bag should have at least these characteristics:
- It should be a backpack. Backpacks and technical cameras go together because almost all photos will be taken from a tripod; there is little benefit to shoulder bags that give the photographer quick access for hand-held shots. You will always be setting the bag down when photographing, and backpacks are just more comfortable than any shoulder bag I’ve ever tried. I have one of the smallest and lightest technical camera kits around, and I still find a backpack to be the best solution.
- It should have backpanel access. That means you lay it on the ground face down with the shoulder pads and hip belt facing up to the sky out of the snow, mud, muck and prickly cactus. The backpanel has a big zipper and fully opens to expose all your expensive camera gear. Don’t worry, you will pick up the bag only once after forgetting to close that backpanel zipper; you will never forget again.
- Note: Pack orientation: “Back” is the part that is next to your back with the shoulder straps and hip belt. “Front” is the part of the pack that you see when hiking behind someone. “Top” is up by your head. Bottom is down by your bottom.
- It should have some extra space dedicated to other stuff that helps you survive the elements: water, food, clothes, rain coat, puffy coat, headlamp, map, etc. How much space is an endless debate and one reason why I have so many bags.
- It should have a way to carry the tripod hands-free. I normally carry the tripod in my hand, but there are times I carry it on the pack. I might have to cross a log, slither around some branches, use both hands to negotiate down a steep section of the trail, or maybe I plan to hike a while and want to use trekking poles. It doesn’t have to be a method dedicated to holding a tripod, just something that works with a little ingenuity. In fact, most of the time I use a non photo-dedicated backpack. I use the ice axe loops and compression straps to carry the tripod.
- Most importantly, it needs to be comfortable. This used to be a tradeoff. Don’t ask me to remember being 10 years old carrying a full Kelty external frame pack with adult-sized shoulder straps and waist belt. Those days are long gone. Packs are incredibly comfortable, especially if you are willing to experiment outside of dedicated photo packs.
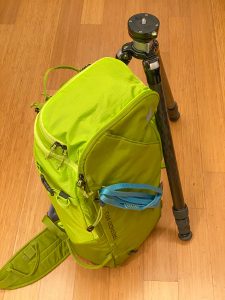
As of this writing, there are a few photo bag brands that have all the above and more: F-Stop, Shimoda Designs, Atlas Packs, Think Tank. There are also some non-photo dedicated bags you can find. I currently use an older version of the Mammut Trion Pro with a f-stop “Small Pro ICU” inside holding my camera gear. I switched mainly because of weight and comfort. The photo-dedicated packs are loaded with features; some of which I need and some I don’t. Features usually have an associated weight. A Typical photo backpack will weigh between four and five pounds. Backcountry skiing bags often have backpanel access and are about a pound lighter. However, I suggest you start with one of the camera-dedicated options. See what you like and don’t like. There is a good chance one of those will be perfect for your use.
Now to packing methodology: It should go without saying, but I see errors in this all the time: Bring only what you plan to use, don’t bring anything else and don’t have space that isn’t filled with the stuff you plan to use. A pack that is bigger than it needs to be is not just heavier than it needs to be. It will be difficult to keep things from moving out of place and will probably not be as comfortable as it could be. Constantly cinching down compression straps because the pack is too big becomes more of a chore when it is raining or snowing, and especially when you are tired. Most important, a bag that is too big is an invitation to carry more stuff.
Bringing only what you plan to use is tougher than it seems. After returning, get in the habit of taking everything out and putting it in two piles: things you used and things you didn’t use (including extra water). I am not suggesting you jettison everything in the “did not use” pile. Headlamp, hat and some emergency stuff you might want to keep. But look hard at that pile, especially the camera stuff you didn’t use. If you have a scale, weigh that pile; it will probably shock you. Doing this evaluation also helps to refine your overall field workflow. If you didn’t use something, why not? Maybe you should have! When the light started changing fast did you forget you had it? How will you remind yourself the next time to use it? Or, when the light started changing fast was it just more trouble than it was worth? In that case, maybe it should stay home.
This is a process. I am always taking little things out of my kit and putting things in, modifying what I take to make improvements. Build. Test. Learn. Repeat.
| What Goes In vs What Goes On? |
| You may prefer to keep some items on you in a pocket or around your neck, while other things stay in the bag. Consider that you wear different clothing in different weather, which gets back to one of my main themes: these processes should be as ubiquitous as possible. Putting the GND in your coat pocket works only when you are wearing a coat. Where do you put it if you are not wearing a coat? Or worse: you get up before dawn for a sunrise shoot. It’s cold so you have a coat on. You put the filter in your coat for smart, quick and easy access. After the shoot you go back to the car but now it is warmer, so you take off your coat. Driving along, you see a great subject in the distance and think the light will be perfect. You quickly pull over, grab your gear and head off to shoot. In the middle of shooting various subjects you reach for your GND, which you now realize is sitting in your coat pocket back at the car. |

A few things to consider when developing your packing strategy:
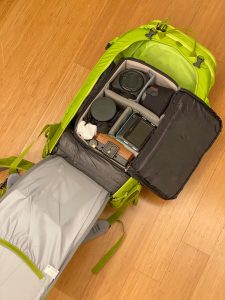
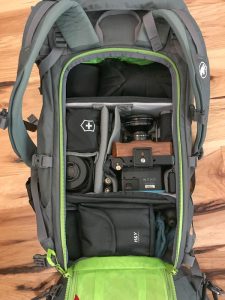
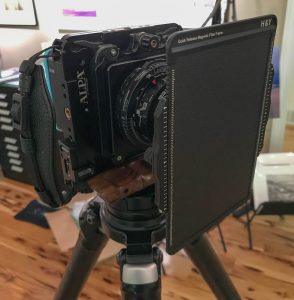
- Do you want the camera assembled with a “go to” lens attached, or do you need to have the camera completely disassembled in the bag? If your camera uses a bellows, you probably have to carry it disassembled. Mine is a helical pancake system and I used to keep the back mounted and the Schneider 60xl attached (I don’t currently). This drives your strategy because an assembled camera takes up a decent amount of space and requires creative arrangement of your dividers.
- Don’t let the pack’s dividers pigeon hole you into limited options. If you are even remotely close to having bag GAS like I do, then you have a whole storage bin of dividers from six different bag companies lying around somewhere. Mix and match dividers from different companies to get a structure that best fits your equipment. There will be no fashion police where you are taking pictures. My f-stop ICU doesn’t currently have a single f-stop divider in it. It has a beautiful smorgasbord of Think Tank, Lowe Pro and Mountainsmith dividers from an even greater selection of bags.
-
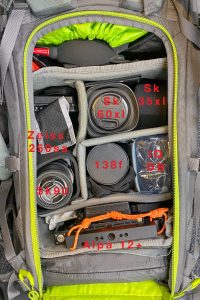
Typical arrangement while traveling with 5 lenses and camera disassembled. Think Tank “Stashmaster 13L” insert. All of the modern “digital” lenses for technical cameras use either a Copal 0 shutter or an aperture-only mount. There are reports of larger lenses becoming misaligned due to how they are transported, especially the Rodenstock 32hr. Although I have not heard any analysis, my suspicion is these issues are most likely to occur when carrying a lens like that on the assembled camera, mounted on the tripod and slung over the shoulder. The second possible source is the tens of thousands of steps we take while hiking with equipment in our bags, and the associated small shock with each step. Take care to think about lens support if you are packing the camera with lens assembled. Which lens, how will it be supported and oriented in the bag? I try to orient the assembled camera with lens facing the sky when wearing the bag on your back. That places the repeating shock forces on axis, reducing stress on the Copal 0 interface.
- Note how things relate to one another. Lenses have different filter threads. Are you carrying filters for each size or using step-up rings? I even consider filter thread size when debating what lens to buy. Are you considering a lens that requires large 150mm ND grads? Will that be your only lens that requires an entirely new filter system? Is that a deal breaker? I carry four lenses: sk35xl, sk60xl, Rodi 138f and (sometimes) Zeiss 250sa. Filter threads range from 40.5 to 67mm. I one set of filters and two step-up rings. Also, I can use 100mm grads for all my lenses. All these decisions help keep my kit small and light.
-
Where do things go in your camera bag? Not only when your gear is packed but also during your image making process. Everything has a defined place and goes in that same place every time. There is nothing added randomly; everything has a purpose. What order will you need things once you get somewhere and start setting up? If you have the bellows on top of the camera base rail, where will you temporarily put the bellows in order to access the rail to set up the camera? Are you going to put the bellows on the rock next to the bag at a precarious angle so you can grab the base rail? Try this exercise: put your bag on your back and find a staircase. Set up your tripod half way up the staircase. Take the bag off and start assembling your camera. Do you have your stuff spread out over three different steps? That’s not good; a piece of equipment lying on the steps is a piece of equipment that wants to get lost. You should be able to keep all your stuff in one of two places while setting up or tearing down: in the bag or on the tripod. This is how I suggest you think. Keep tinkering until you successfully pass the Staircase Test.
- My favorite topic: changing lenses. I gave the DSLR example from Galen. Think in those terms; what is the lens changing process? How can you arrange your bag so even the lens cap has a defined place to go? Remember, it may be dark. You don’t want to fish around trying to figure out where you tossed that lens cap. It could be your left rear pocket; doesn’t matter as long as it is the same place every time.
The point here is twofold: 1) your packaging arrangement will either set you up for success or deliver on frustration. Practice doing everything you need to do in the field while at home with slippers on and beer in hand. 2) The processes you develop in the field are intertwined with how you arrange your gear. They should complement and support each other.
The Creative Process in the Field
There are many books written about the creative process, but in my opinion, two stand out: Steven King’s On Writing (yes, that Steven King) and Guy Tal’s More than a Rock. I have no expertise in topics of creativity. Regardless, I will quickly add my two cents; it is not worth more than that. What works for me:
- Develop a sense of place. This could take minutes or years.
- Understand where your mind is. What are you thinking about? What brings you joy? What is bothering you? What is up top? What is in the basement? What were you hoping for?
- Find threads that link the sense of place with your sense of mind.
- Exploit those threads. They become the bed rock of previsualization once a scene unfolds before you.
- How do you feel, how does the scene support, detract from, or influence your feelings?
If I am wandering but cannot get my creativity to flow, sometimes just hauling out the camera and taking a few photos helps to shake off the rust. Whatever your creative process is, your equipment should complement that process. More than anything else, the purpose of all these processes is to that end. Eliminate potential annoyances and worries leaving only the joy of using these tools in order to compliment the photographer’s creative process. The great thing about photographing in the wilderness is that if things are not going right, I just relax, forget about photography and enjoy being outdoors. The least productive day of photography is still a great day outside.
We are all different, our creative process driven by different motivations. For me, finding a way to immerse myself in the landscape is the most important ingredient to my creative process. That could be from a long hike, weathering a squall, climbing a boulder or a life-long association with an area. As Steven King describes in “On Writing,” you need to find a way to your creative place:
“I’m in another place, a basement place where there are lots of bright lights and clear images. This is a place I’ve built for myself over the years. It’s a far-seeing place. I know it’s a little strange, a little bit of a contradiction, that a far-seeing place should also be a basement place, but that’s how it is with me. If you construct your own far-seeing place, you might put it in a treetop or on the roof of the Empire State Building or in the edge of the Grand Canyon. That’s your little red wagon, as Robert McCammon says in one of his novels.”
Visualization Tools
Setting up a technical camera is somewhat more involved than a traditional DSLR or mirrorless system. Setting up the camera only to find the image doesn’t work for one reason or another not only wastes time; it can pull you out of your creative groove. It helps to develop a creative “filtering” process that helps you better visualize the image before pulling out the camera.
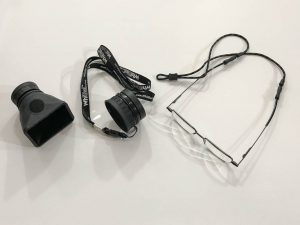
There are several tools I’ve used to help visualize images. Charlie Cramer (and many others) walk around with a framing square. This is a great, simple tool. You can make one yourself, so I recommend at least giving it a shot. The best material I’ve found is polyethylene or ABS sheet like what is used in plastic 3-ring binders or journals. You can pick one up at Staples or Amazon and cut it into a 4×3-ratio window at whatever size you prefer.
I love using the framing square. I also use the Artist’s Viewfinder app on my iPhone. It has settings for your digital back and lenses, which I find more useful once you find a scene and fine-tuning camera position. In situations like wandering along the beach or through the redwoods, I prefer the framing square.
You can, of course, purchase and use real viewfinders associated with your camera system. I find them to be not accurate enough and too bulky. Once you have the camera out, you might as well just use live view to accurately frame the subject (or shoot and evaluate if you don’t have a digital back with live view). The Artist’s Viewfinder is more accurate than any of those viewfinder frame lines and faster for situations where you are just evaluating the scene.
If I see an interesting scene with the framing square, I will launch Artist’s Viewfinder, choose a lens frame and move around the iPhone until I get the perspective I want through the app. Then I judge the position of the iPhone’s camera and begin to set up the tripod. I may even set the iPhone on top of the tripod head to get it close into position before I set up the camera.
Setup
Now we come to the most important part of the creative process in the field: How you set up the tripod. There is not one and only one right way, but the way you choose does affect your creative process. There are a few generally accepted best practices:
- While carrying the tripod, keep the bottom leg extended a few inches all the time. This keeps the lower locking mechanism above-ground, reducing the amount of dirt mud, sand and salt water that may make it grind to a halt in the field.
- If you were using a framing square, Artist’s Viewfinder app or some other tool, you undoubtedly have an idea how high the tripod should be. If your subject is far enough away that the tripod height will not affect perspective, then set up the tripod to a comfortable height. If it is windy, you may have to sacrifice comfort for wind stability and lower the tripod. I usually lay a hand on the tripod to see if I can feel it vibrate in the wind.
- The top, thicker tripod leg sections are more stable than the bottom, thinner sections. If you are not fully extending the tripod, keep the bottom section collapsed except for the few inches mentioned above.
- As you extend the tripod, start by extending the lowest section you want to utilize. Extending the top section first makes it more difficult to reach the lower sections.
Now, if you’ve placed your pack within reach but not in the way and set up the tripod so it is relatively easy to micro-adjust, your ability to move things around to get the precise perspective that matches your vision is far less cumbersome. The more difficult something is to “correct”, the less likely you are to correct it, whether that correction is raising the camera one inch or grabbing a lens cloth out of the bag to wipe off the spot of rain water on the front lens element. Again, this is the key to successful, creative image-making with technical cameras in the field. Make things easy, and you will make better images.
Finally, you open up your bag. If you have a backpack with a zip-open back panel, you simply unzip that panel. Different cameras have different efficient setup processes. A rail-based camera with bellows will be different than one with helical lens mounts. Here is my process for the latter:
- If my camera is assembled with lens and DB in the bag, I remove the assembly and mount it on the tripod in the orientation I need. Do not try to change lenses before placing the camera on the tripod. That is a recipe for dropping something and a miserable day.
- The Alpa STC mounts one way for rise/fall and another for shift (it cannot do both at the same time, just one or the other). I orient it as necessary for the image I will be making.
- If changing lenses: remove the 60xl, add rear dust cap, set in the bag in the same spot it came from.
- Add/remove 17mm spacers as necessary for the lens used.
- Take desired lens, remove and place dust cap in the bag. I do not put lens caps in my pockets because I will forget where they are. I am always going to pack the camera back up with the 60xl attached, so the caps will always go back to their lenses before I pack up and it will be visible and obvious where those caps are when I pack up.
- If the camera is not assembled, I suggest you first mount the camera on the tripod, then lens and finally the digital back. If it is raining or snowing, I’d rather have the rear lens element exposed while installing the back vs the image sensor exposed while installing the lens.
- Remove front lens cap and add any necessary filters.
- Add lens hood as necessary.
- Get in the habit of closing the backpanel / lid every time you remove gear from your bag regardless of the weather. Unless it is really bad out, I don’t zip it back up, but I do close the lid to keep things covered.
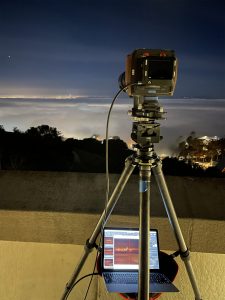
At this point, the process varies greatly depending on what tools you will use when actually capturing images. Some just use the camera/digital back. Others use an iPhone app to wirelessly control the digital back, while still others bring a Microsoft Surface Pro or even a laptop and tether during capture. An argument can be made that if your goal is the absolute best image quality, tethering to a laptop gives you the best view of the image, and therefore your best chance of success. I use just the digital back because I am so space and weight sensitive.
Image Capture
There are several things that will drive you to one of the three modes of capture described below:
- How far do you have to carry everything?
- How reliable is the weather?
- How quickly do you have to set up and tear down?
- How important is it to ensure every capture is the absolute best it can be?
Only you can decide which mode best fits your desired process in the field and which best-supports your creative process. What follows is a general description of each mode along with the pros and cons associated with each.
Capture Using the Copal Shutter:
Shutter is set and triggered via Copal shutter and sync cables. With older CCD digital backs this is the only way to capture images. Triggering occurs one of three ways:
-
Before electronic shutter was available, sync cords were required that had to be swapped and reconnected with each lens change. Set the back to “Zero Latency”. Connect the Phase One 10-pin sync cable from the lens PC connection to the back. Cock and fire the copal shutter with a standard cable release. This works, but Zero Latency does wear down the battery significantly faster and creates heat by constantly powering the sensor. Heat can possibly increase noise.
- With the back set to “Normal Latency,” cock and fire the shutter, then quickly cock and fire again. The first shutter sequence wakes up the back, after which you have four seconds to take the actual photo with the second shutter sequence. This works ok as a backup, but can be frustrating to do in time without any lingering vibrations.
- Purchase a third-party “one-shot” wake-up / sync cord system from either Alpa or The Kapture Group. This includes a switch to wake up the back, after which you fire the copal shutter. Alpa’s solution is more elegant, incorporating the switch into the single stroke of the cable release. However, Alpa’s switch and cable costs well over $500.
Advantages:
- Longer battery life vs wireless capture to an external device
- Works with all digital backs, both CCD and CMOS
- Requires only cables which are small and light
- Ability to utilize Copal leaf shutter to eliminate ES “rolling shutter” effect
- Works with strobes
Disadvantages:
- Cables need to be connected and reconnected when changing lenses
- The digital back’s screen is limited in its ability to clearly render detail compared to a laptop, making critical focus a bit more difficult. As of this writing, even the newest IQ4150 has 10-year old screen technology.
- The image is a rendered jpeg as opposed to a RAW file viewed on a laptop.
- Copal shutters are not always the most accurate tool in the shed.
Direct Capture Using the Electronic Shutter:
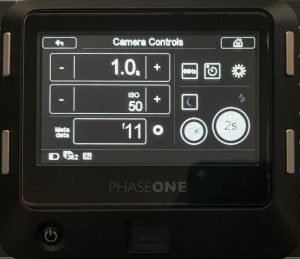
All versions of 54×40-sized CMOS sensors from Phase One include the Electronic Shutter (ES) feature. Images can be captured directly from the digital back with no need for a Copal shutter. I recommend setting a two-second delay when using ES directly from the screen on the digital back unless you are capturing waves or other subjects where timing is critical. You can fire ES either from the ES home screen or from live view.
Advantages:
- No extra equipment is necessary
- Longer battery life vs wireless capture to an external device
- Reliable; there are no external tools or connections
- Faster to assemble and disassemble; important in changing light
Disadvantages:
- If timing is critical (waves for example), you cannot employ the self-timer delay, and have to be very careful and delicate when firing the shutter with your finger.
- The digital back’s screen is limited in its ability to clearly render detail compared to a laptop, making critical focus a bit more difficult.
- The image is a rendered jpeg as opposed to a RAW file viewed on a laptop.
- The digital back screen must be not only within reach, but visible.
| Phase One’s Electronic Shutter |
| I have been using Electronic Shutter exclusively since the feature was released in an October 2016 firmware update. It changed my field process more than any other tool since I began using technical cameras in 2009. In contrast to a Mechanical Shutter such as a Leaf Shutter or Focal Plane Shutter, the Electronic Shutter (ES) works by turning the imaging sensor on and off. It’s an entirely different way of controlling the start and end of an exposure and comes with a distinct set of pros and cons. Here is an excellent summary of the pros and cons associated with ES: Digital Transitions ES Description I find ES to be a wonderful tool for shooting landscapes with a technical camera. Lens sync cables and cable releases are a thing of the past, making lens changes faster and easier, thereby removing barriers to creativity. The one main disadvantage is the “rolling shutter” or “jello” effect. I have never noticed an issue in the nature / landscape photography I do including waves, wind and moving clouds. |
Wireless Capture Using Mobile Device:
Capture Pilot is Phase One’s iOS tool for wireless communication to some earlier digital backs, while Cascable is the app used for the IQ4150. If you are using ES, you can set shutter speed, ISO and record f-stop all from your mobile device. You have the significant benefit of being able to fire the shutter without a self-timer delay and without any risk of vibration.
Advantages:
- No self-timer required, eliminates any source of vibrations from the image capture process.
- Freedom to position the camera almost anywhere and still control capture.
- Options for better screen views such as iPad or cell phone.
Disadvantages:
- Need to activate wireless functionality
- The image is still a rendered jpeg
- Consumes both mobile and digital back battery power
- Possible connection issues
- Longer setup time
Tethered (or wireless) Capture using Surface Pro or Laptop:
All the benefits of wireless capture with an even better screen! Tethering to a laptop gives you all the benefits of tethering in studio. If you are willing to carry the equipment, you have all three options of capture processes, and can use whichever is most appropriate for the situation.
Advantages:
- Great screen with wonderful detail and (possibly) calibrated color
- Viewing the actual RAW image, not a jpeg rendered in-camera
- Critical exposure and focus situations can be thoroughly and accurately evaluated
- Option to immediately make a backup copy
- Ability to charge the digital back from laptop battery power
- You have all the tools with you to pick and choose capture options
Disadvantages
- Longer setup times
- Cords to trip over in the field
- The weight and space of tethered equipment
- Need battery power for tethered equipment
- Requires a stable and reliable setup for tethered equipment (weight, space)
Regardless of what method you use, I recommend the following procedure:
- Initially set the lens diaphragm wide open, go to live view and frame image.
- Decide if you will be utilizing tilt. If so, see Tilt Section in a subsequent article for focusing process.
- If not using tilt, decide on the primary plane of focus:
- IQ3: zoom into the area of critical focus at 100% and adjusting focus to that point.
- IQ4: either zoom into the area of critical focus or use the IQ4 focus peaking feature to set critical plane of focus (or some combination of both).
- Increase diaphragm to desired f-stop. Note there is little concern for focus shift because technical camera lenses are not fast enough for focus shift to be a concern. If you are using the X Shutter, you can simply set f-stop from the ES screen.
- If you haven’t done so already, enter f-stop in the metadata field on the ES screen. This will help later if you want to enable Diffraction Correction in Capture One.
- Shoot either directly from live view via the upper right control or via the ES control screen.
- Review and make adjustments as necessary.
I’ve tried all of the capture methods described above, and have settled on the most basic: firing directly from the camera using ES. It works in every situation I find in the field regardless of weather, and requires the least equipment and setup. My priorities are unique, and others may have a different preference. Try all the methods to see which fits your photography the best. I do suggest developing a consistent workflow that works for you in all the conditions you are likely to encounter.
| Using a digital back with a CCD Sensor |
| Many photographers utilize older digital backs with CCD sensors either because they prefer the rendering a CCD provides or simply because the older backs are less expensive. For technical camera workflow, the primary difference between CCD and CMOS sensors is the availability of well-functioning live view. For older CCD sensors, the image capture process becomes more iterative. You guess at exposure and framing, then compensate based on the first captured images. The more iterative process takes longer but can ultimately produce similar results. The one exception is focusing. Without live view, you need an accurate and repeatable process for focusing. With Alpa, that involves HPF rings and a laser distance finder like the Leica Disto. Arca-Swiss uses a precise, fine-thread helical, also to be used with a laser finder. With other options you may be limited to reviewing the image on the digital back at 100% or shooting tethered, then making focus adjustments until you obtain the desired detail. |
Dark Frames
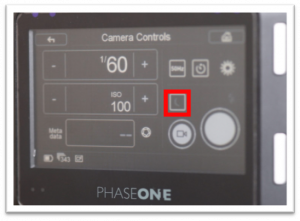
As of this writing, Phase One recently released the IQ4 Series, which eliminates much of the need for taking a dark frame. The IQ3 series, however, frequently requires a dark frame. You can set your dark frame preference on the ES screen to one of three options:
- As needed (default)
- Always (blue dot showing on the Dark Frame Control)
- First Frame Only (red X showing on the Dark Frame Control)
Unless you are in a specific situation like extended several minute exposures, I recommend using the default “As Needed” for the IQ 3100. It will require a dark frame whenever the shutter speed is greater than one second, whenever you “significantly” change the shutter speed, or whenever the digital back temperature changes beyond a defined range.
If a dark frame is required, the digital back will notify you to close the shutter while the back performs a dark frame. You simply close the Copal shutter (or completely cover the lens if you cannot manually close the shutter) and press the check box to initiate the dark frame. Once the dark frame is complete, you are faced with the most important step that we all frequently forget: re-open the Copal shutter, or your very next image will be a wonderfully jet-black photo of the backside of a Copal shutter. Don’t worry, we all have thousands of these in our raw image catalogs. One benefit of firing the ES directly from live view is that after you capture the image and dark frame, the digital back will bring you back into live view. If you forgot to reopen the copal shutter, it will be readily apparent from the black live view screen. The only disadvantage is that you are spending more time in live view, which drains batteries faster and generates heat.
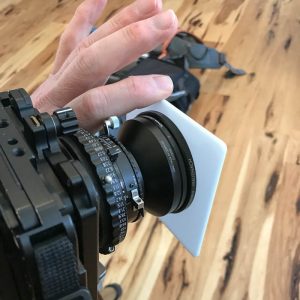
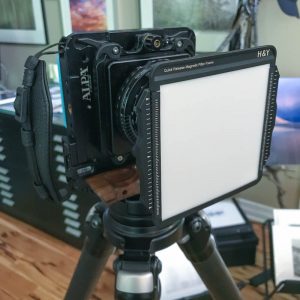
Note that newer lenses no longer have Copal shutters so there is no shutter to close for the dark frame. You need to cover the lens with a lens cap or some other light-tight method. This is one reason I prefer using the H&Y filter system. Empty magnetic filter frames can be purchased, which I fill with a 100x150x2mm sheet of black ABS. Dark frames become a simple, hands-free exercise, even when using filters.

The IQ4150 has significantly more freedom to dispense with dark frame production. Phase One created a library of “canned” dark frames for the IQ4150 that appears to have all but eliminated the need for performing dedicated dark frame, a welcomed improvement. However, if you want to ensure there are no hot pixels in the capture (something easily removed later in Capture One), you should continue to shoot dark frames when the shutter speed is greater than about one second
Depth of Field Control
Readers are assumed to have a solid grasp of depth of field. The information here is primarily intended for landscape, architecture and similar photography genres where the goal is to have all objects rendered sharp throughout the image. Anders Torger’s wonderful app, Lumariver DoF, has an equally wonderful manual and description of the factors that play into determining DoF with today’s technology. His section on Depth of Field and Circle of Confusion is a must-read.
To review, Depth of Field is the distance between the nearest and the furthest objects that are in acceptably sharp focus in an image. Regardless of aperture, there is only one “plane of focus” where the image is critically sharp. Anything in front or behind that plane becomes quickly or gradually out of focus depending on the chosen aperture.
“In acceptably sharp focus” is a loaded phrase that includes quite a few assumptions. The traditional Depth of Field tables and lens-engraved ranges were based on a simple Circle of Confusion (CoC) ratio of image diagonal divided by 1500. For a 54x40mm sensor, that is a CoC equal to 0.044mm, or a 6 megapixel sensor! Whether sensible or not, most digital photographers today want to extract more detail from their images than the traditional DoF range provides.
Most images taken with technical cameras are the type that benefit from deep depth of field. The balance between enough depth of field and too much diffraction is generally between f/8 and f/22. With today’s 100 and 150 megapixel digital backs, shooting much beyond f/22 degrades the image unacceptably, while shooting less than f/8 provides too little depth of field and/or requires an inordinate number of images for focus stacking. Probably 80+% of images shot on technical cameras with digital back are between f/8 and f/16, while 80% of those images are shot at either f/11 or f/13. Some of the newer Rodenstock lenses, like the 90hr-sw, should be shot at the lower end of that range if possible; they just have so much available resolution and detail. Some of the older lenses, and most of the Schneider apo-digitar lenses, should be shot at f/11- f/13 in order to render the outer edges of the image in greater detail (especially when using the outer portion of the image circle by incorporating rise, fall or shift).
If f/16 does not provide enough depth of field and focus stacking is not an option for you, I always suggest dialing in a smaller f-stop (even f/22 or higher) in order to get the required depth of field. Capture One has a very effective diffraction correction tool, and it may improve over time. However, you can never get back depth of field lost in your capture. The next article will cover how to cheat these limitations with lens tilt.
How to See What You Are Doing
The new IQ4150 has what looks like a very well-designed focus peaking that helps immensely for focusing. The IQ 3100 is a bit trickier, but non the less quite capable. Reading glasses help almost regardless whether or not you are farsighted. I use a pair that are stronger than my normal prescription in order to see better in the dark.
A loupe can also help if you are so inclined. I bring both. Charlie Cramer uses a “closed loupe”, one with a black bezel designed to cover the screen like a mini hood. In bright sun, you may need a closed loupe, sun flag or hat to shield the rear screen depending on your specific vision and personal preferences. Don’t forget you can turn a loupe around to be used as a magnifier in dark situations to see f-stop on the copal shutter or focus setting.
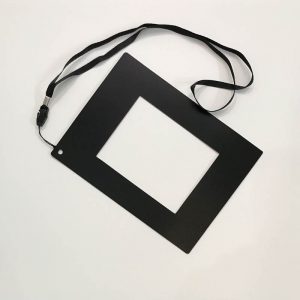
LCC Process
Lens Cast Correction (LCC) is the process of placing an opaque white plastic card in front of the lens and exposing a frame to use later in post processing as a reference image. Software like Capture One or Camera Raw / Lightroom will analyze and process that LCC image into a neutral reference that will then be applied to your images. Capture One has the added benefit of analyzing the LCC for dust spots making your dust removal step much easier.
The LCC process does an amazing job cleaning up lens cast from a variety of lens/sensor combinations. However, it is important to realize the LCC image is referenced to the following things:
- Specific sensor/lens combination
- F-stop
- Shift/rise/fall, i.e. where the sensor is in the lens image circle
- Focus distance

All the above means you essentially have to take an image each time you use a lens that requires an LCC. There is just no way to amass a library of LCC images that covers every combination of f-stop, movements and focus distance. That is the bad news. The good news is not all lenses have noticeable color cast and therefore do not require an LCC. Rodenstock lenses are designed with exit pupils further away from the sensor so they suffer less from color cast issues. However, they generally have more distortion than their Schneider counter parts.
As of this writing, lenses fall into three categories depending on the digital back used: LCC necessary (N), LCC optional (O), and LCC not required (NR). “Optional” means depending on the scene, how sensitive you are to color cast and whether you want to remove lens vignetting. A snow scene will obviously be more sensitive to lens cast than a deciduous forest in full fall color.

What drives lens color cast is the angle of incidence at which light rays strike the sensor, along with the sensor design itself. One of the primary benefits of the new IQ4-150 is the back-side illuminated (BSI) sensor from Sony. The shallow well design drastically reduces lens cast to the point where almost no lenses fall into the Necessary (N) category.
| LCC Requirements for a Few Lenses | ||
| Lens | IQ 3100 | IQ 4150 |
| SK 35xl | N | O |
| Rodi 32hr | N | O |
| SK 43xl | N | O |
| Rodi 40hr | O | NR |
| Rodi 50hr | O | NR |
| SK 60xl | N | O |
| Rodi 70 | O | NR |
| SK 72 | O | NR |
| Rodi 90hr-sw | O | NR |
| SK 120 | NR | NR |
| Any lens longer than 120mm | NR | NR |
Because the LCC is dependent on f-stop and because covering the lens with a chunk of plastic reduces the amount of light reaching the sensor, you generally must increase the shutter speed to get a useable LCC image. The one exception is if the sun is behind you, you can sometimes get away with swinging the camera around into the sun and take the LCC without increasing shutter speed. I do this quite often.
LCC Process:
- Shoot the desired image.
- Increase shutter speed by 1.5 – 2 stops without changing anything else including focus distance.
- Place the LCC card in front of the lens
- Take the photo with the LCC card completely covering the lens.
- Review the image histogram. It should be dead center or a bit right of center. The brighter the better without clipping any part of the histogram. If not, adjust the shutter speed and reshoot the LCC.
- Note you may be prompted to shoot a new dark frame because of the change in shutter speed.
There are some situations where I modify this process. Often, I am creating a panorama by shifting the back 18mm right and 18mm left, then blending these together in Photoshop to create a 2.25:1 or 2.33:1 panorama. During these situations, I am often waiting for the sun to rise or set, taking many photo pairs in the process (one right, one left) as the light changes. In this case, I will wait until I am done shooting all the images, then create the LCC’s at the end (first right, then left – in the same order I took the images). Because I haven’t changed the focus distance or f-stop during the entire set of images, those two LCC’s will apply to every set of right images and left images, respectively.
That’s it for this long-winded installment. Next up should be the most interesting: Typical camera movements employed when using technical cameras, and how to use them effectively in the field.

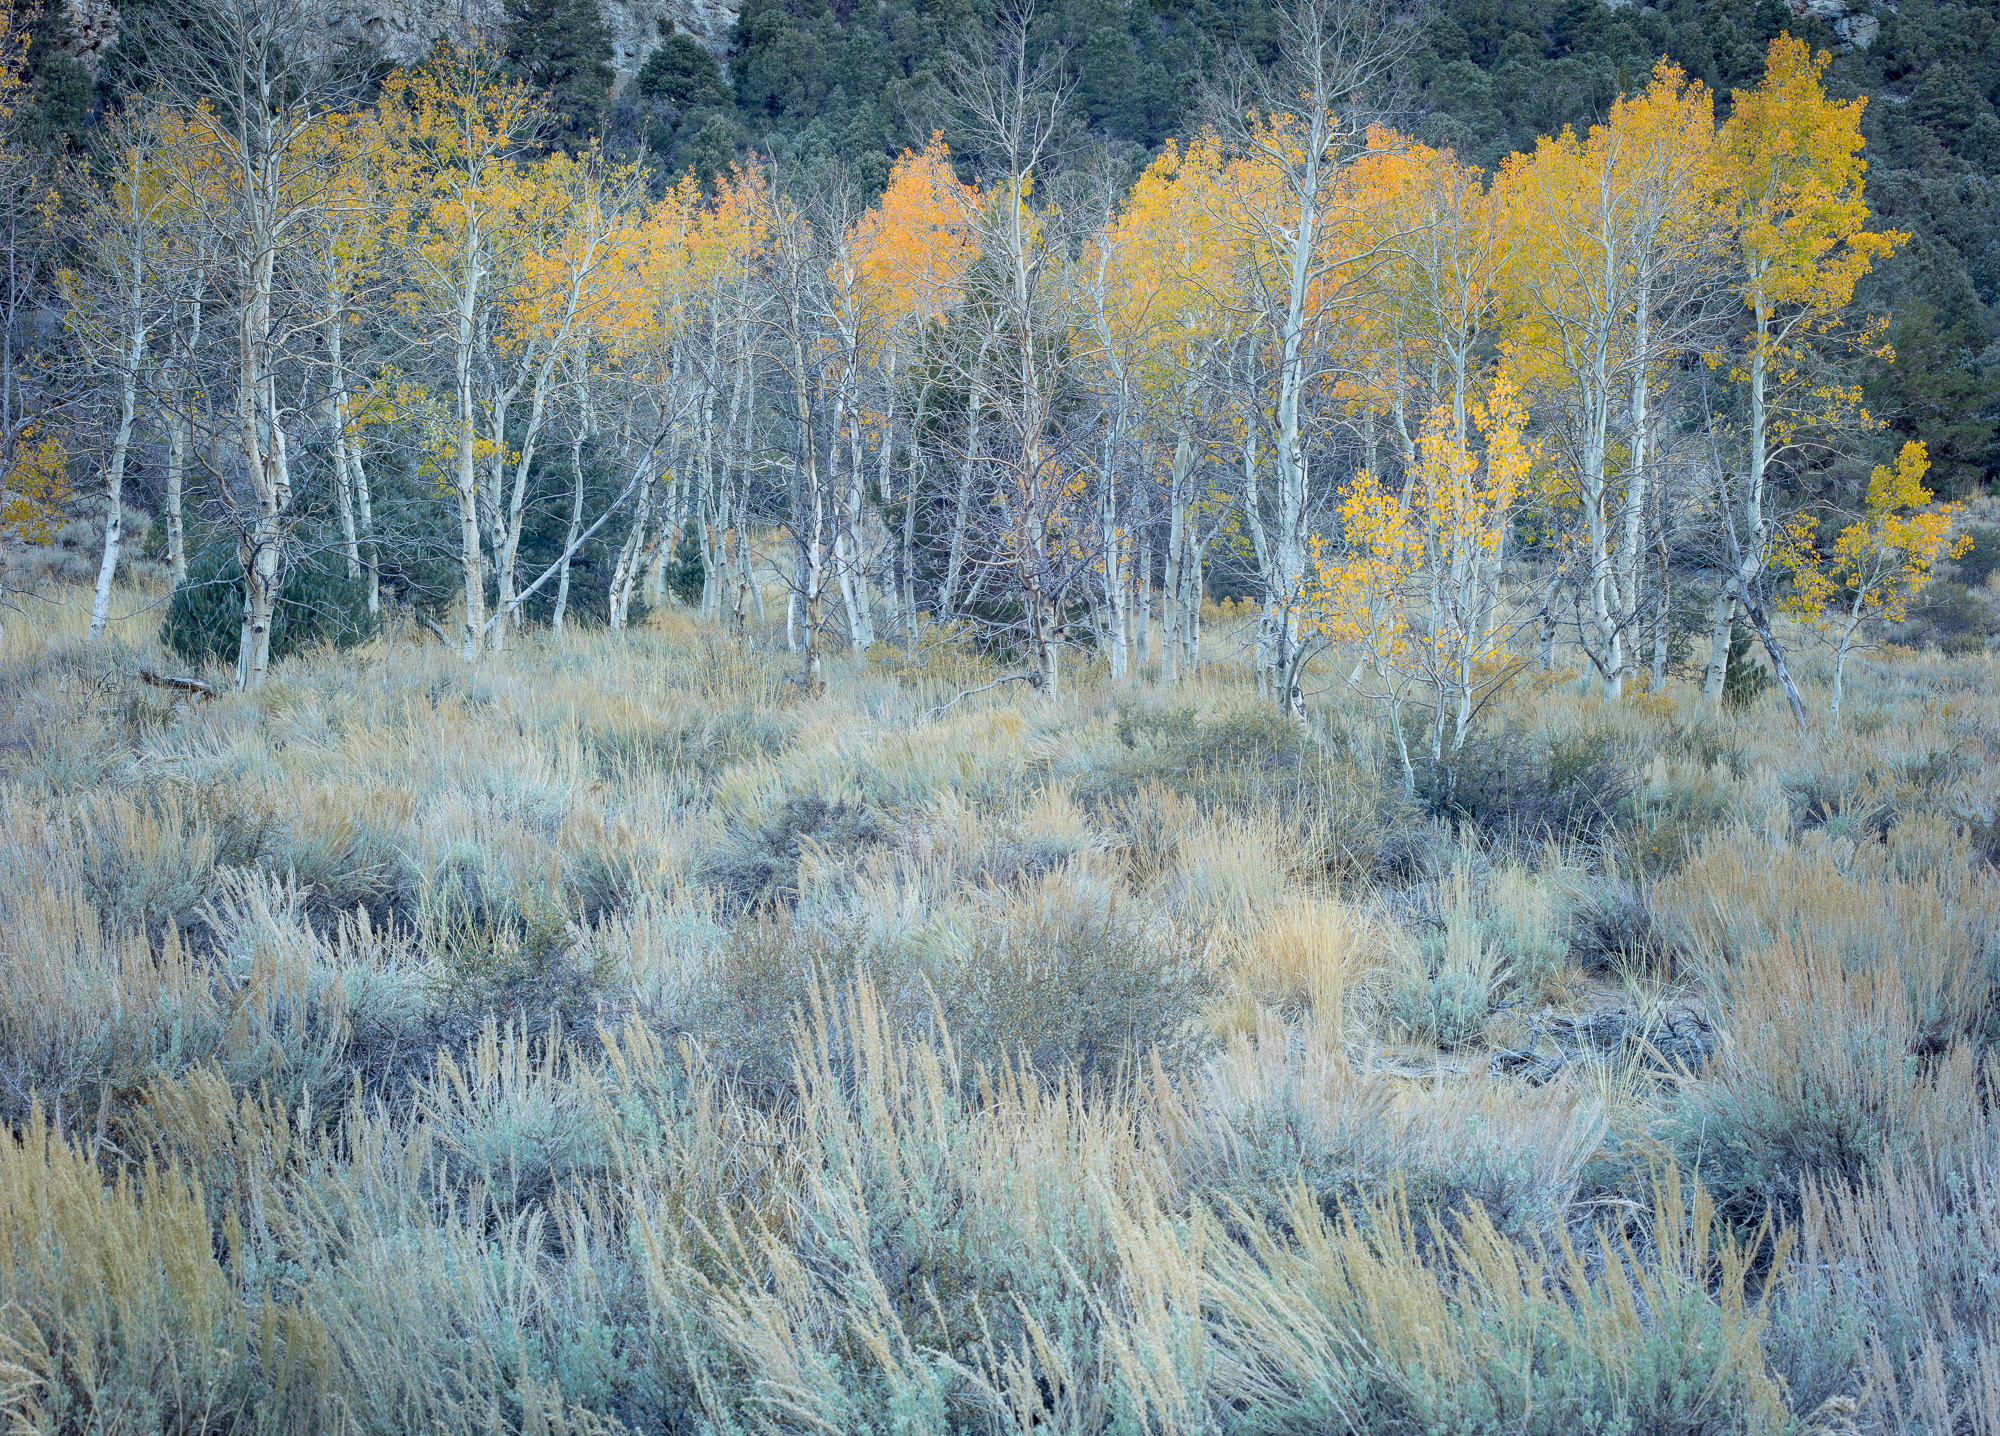
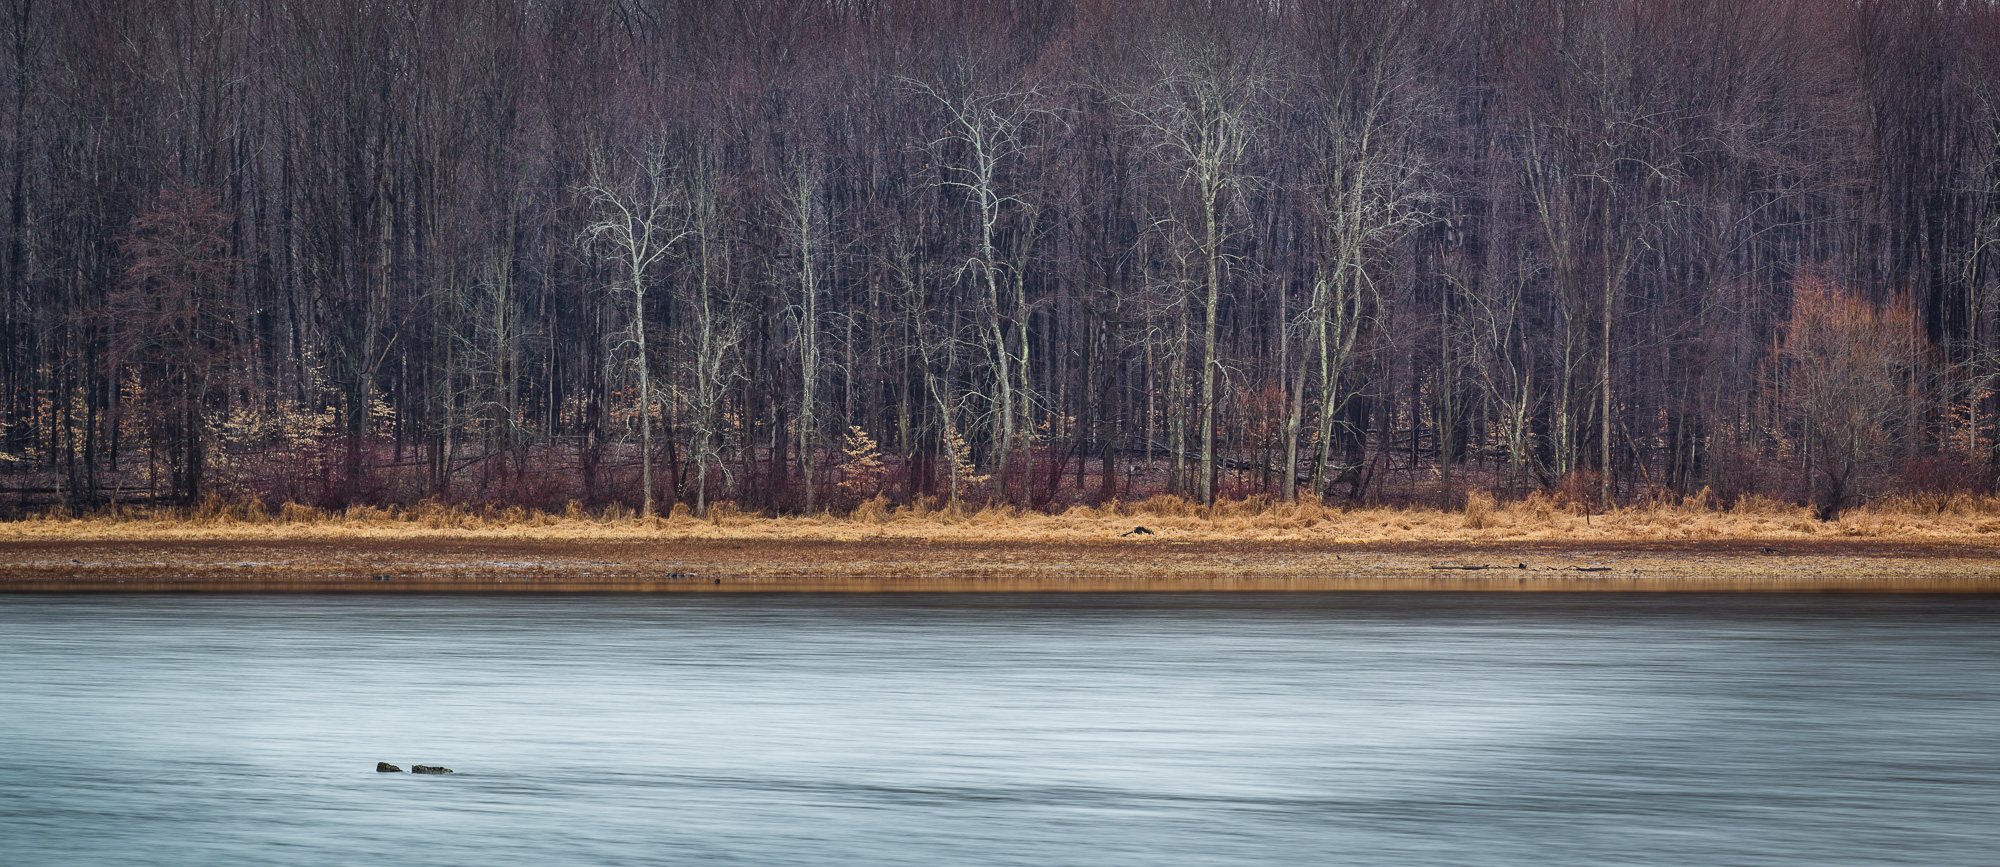
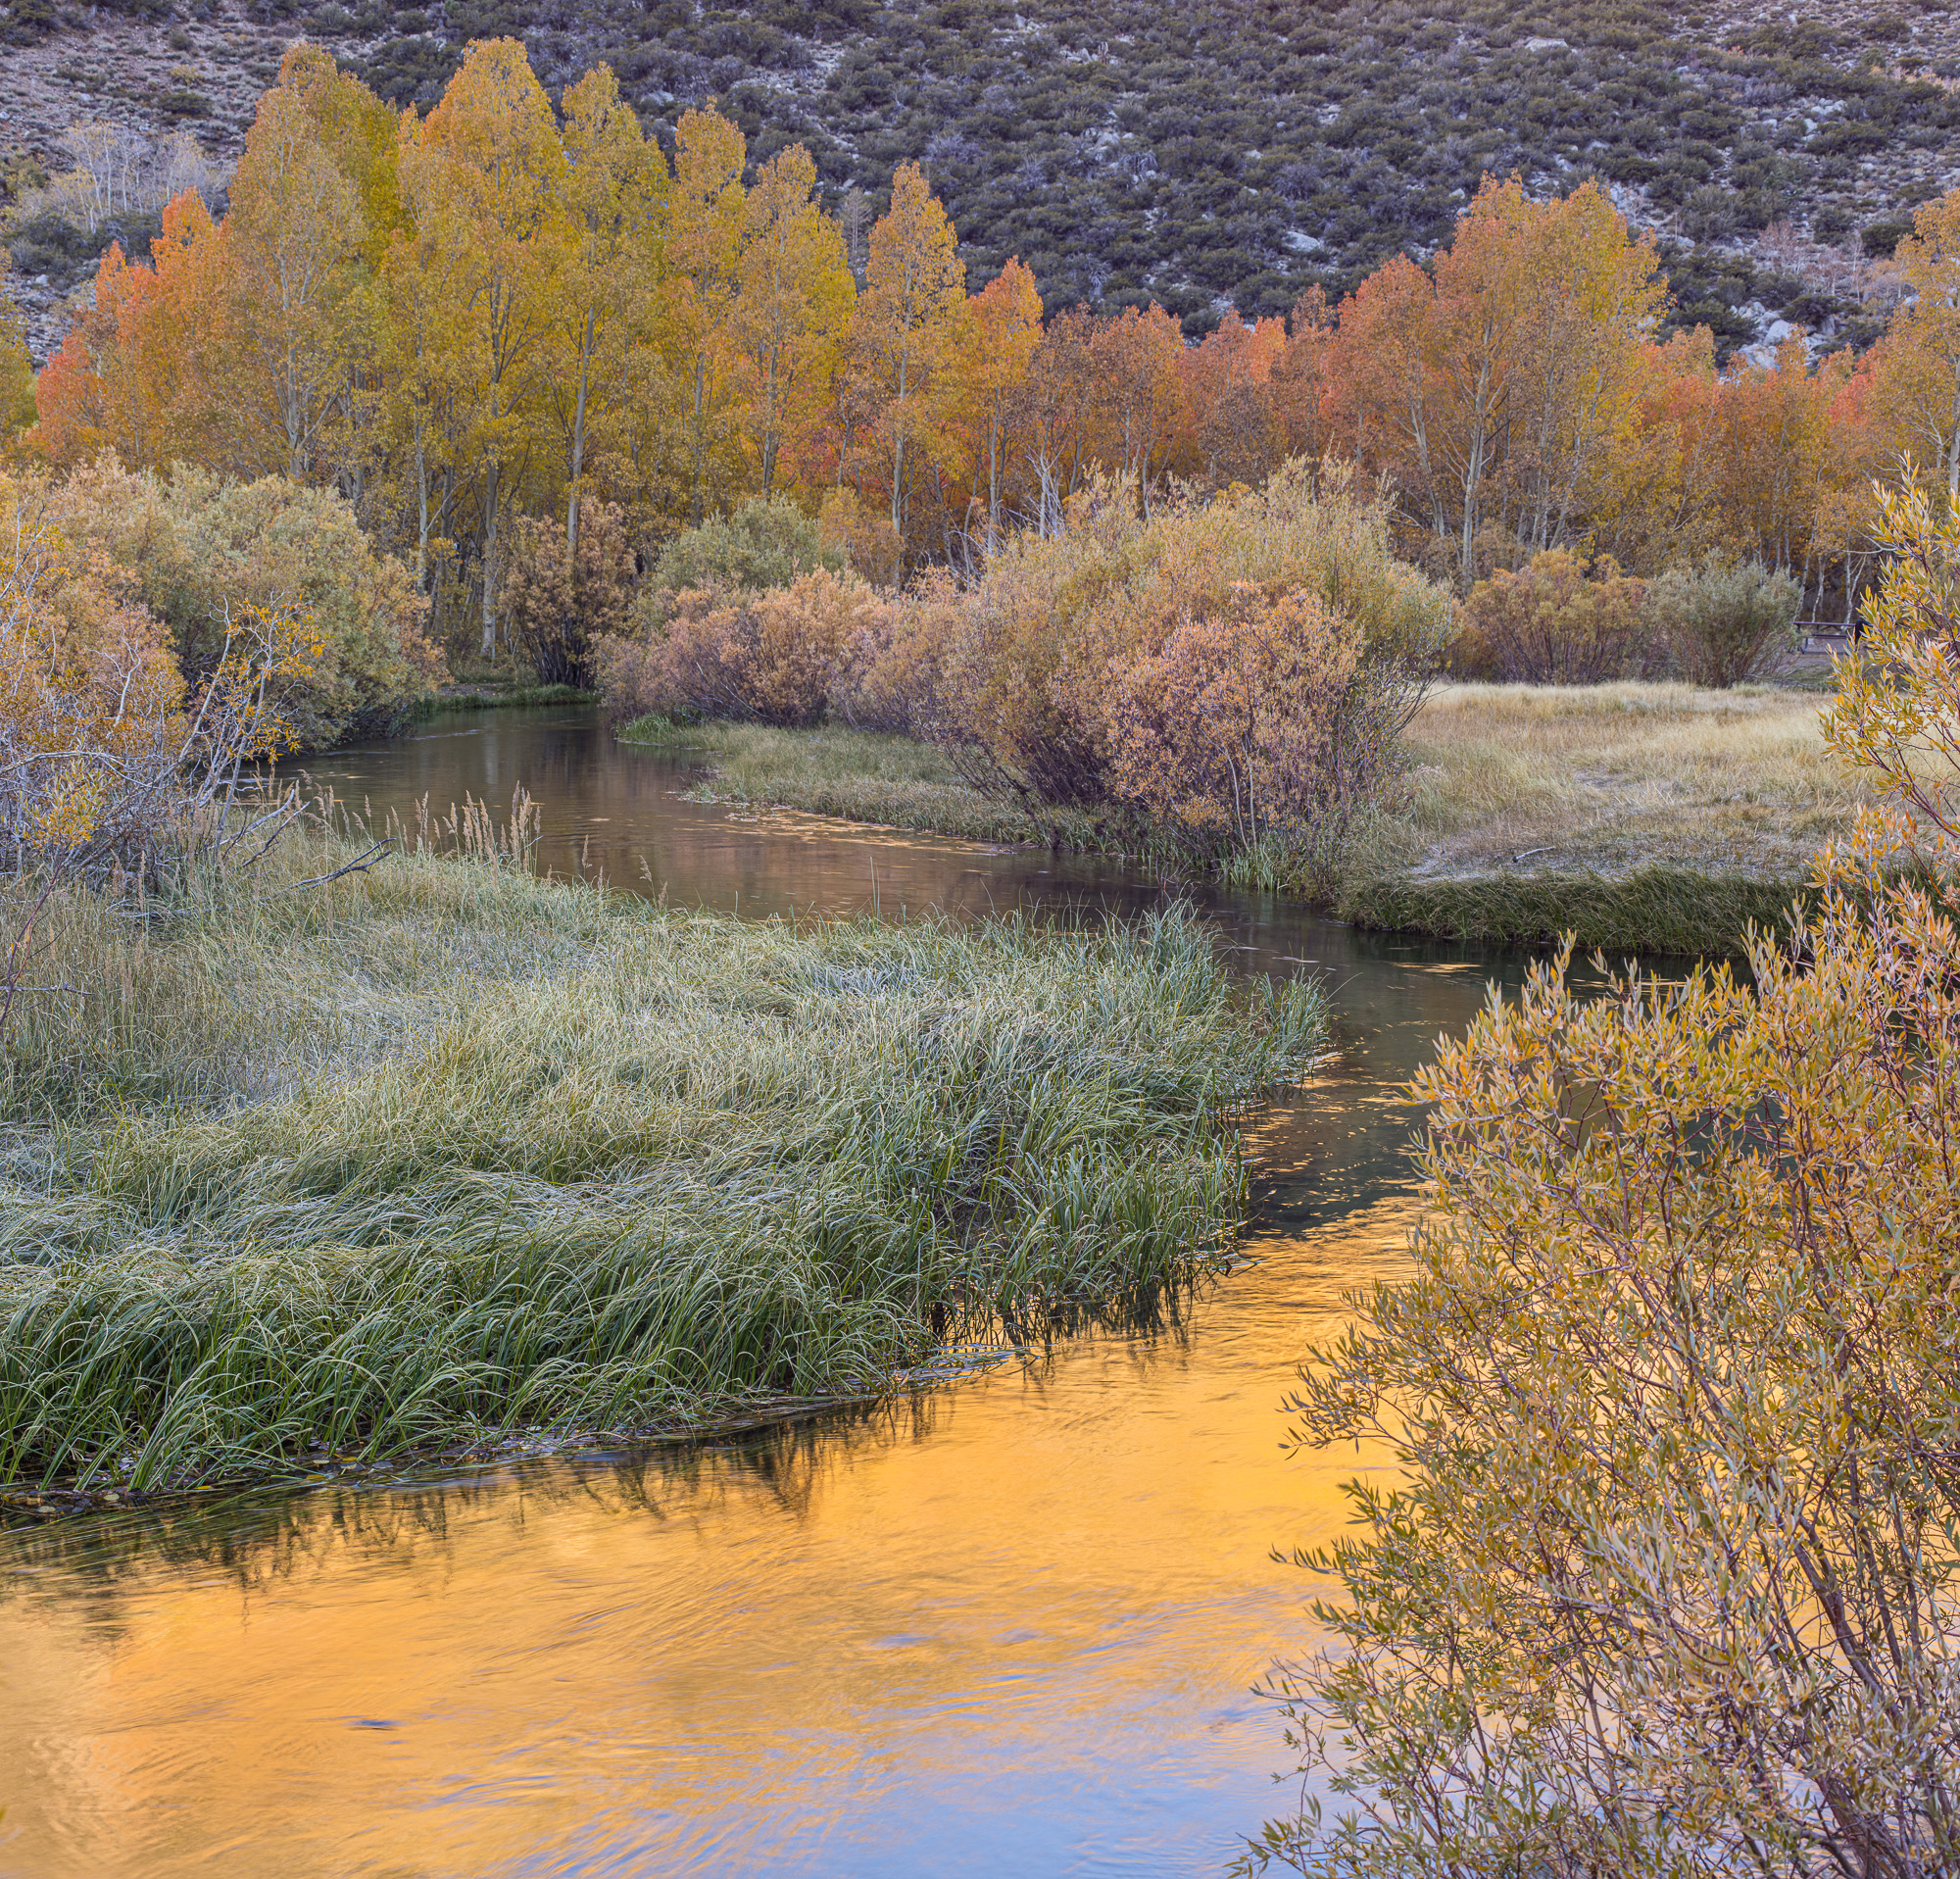
Chagrin Falls, Ohio
I was born and raised in Northeast Ohio where my outdoor experiences defined my life from an early age. From living in Western Geauga County next to what became one of the Western Reserve Land Conservancy’s oldest and largest holdings, to spending summers on staff at Camp Stigwandish and family vacations that included backpacking, climbing and mountaineering, I developed a deep appreciation for the wonder and diversity of the outdoors. My photography represents an effort to notice, appreciate and celebrate the incredible detail of the natural environment. While living in Northern California, I took a camera backpacking in the Sierras. That experience brought so many questions and so much curiosity around how cameras and film see the world. More importantly, it gave me an entirely new view of the world that made me notice and appreciate the outdoors at another level. I then learned that my office in Emeryville was two blocks down from Galen Rowell’s studio. Galen quickly became a great mentor, and he and his staff were an endless, patient resource. I am a chemical engineer with a career in the industrial, municipal and residential water industry.