Rolling Shutter on a Planetary Scale
HiRise, the High-Resolution Imaging Science Experiment, is a camera on the Mars Reconnaissance Orbiter (MRO). HiRise is a project of the University of Arizona’s Lunar and Planetary Laboratory, LPL, in Tucson, AZ. The mission is to photograph the surface of Mars in high resolution. From its altitude of ~250 km (155 miles), it achieves a surface resolution of 30 cm (~1 foot) per pixel.
We have a simple philosophy: HiRISE is “the people’s camera” because we believe that knowledge about Mars belongs to everyone. This is why we release our acquired images to the Planetary Data System faster than any other active NASA mission.
All of the images produced by HiRISE and accessible on this site are within the public domain: there are no restrictions on their usage by anyone in the public, including news or science organizations. We do ask for a credit line where possible: Image: NASA/JPL/the University of Arizona.
Some Samples
A good place to get a preview of the possibilities is the HiRise YouTube channel. Most of these YouTube videos are brief descriptions of the scientific significance of various images, but some are purely artistic.
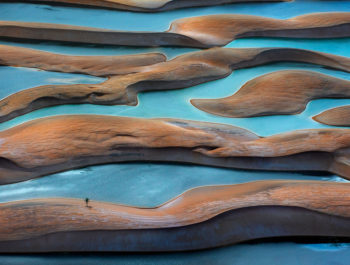
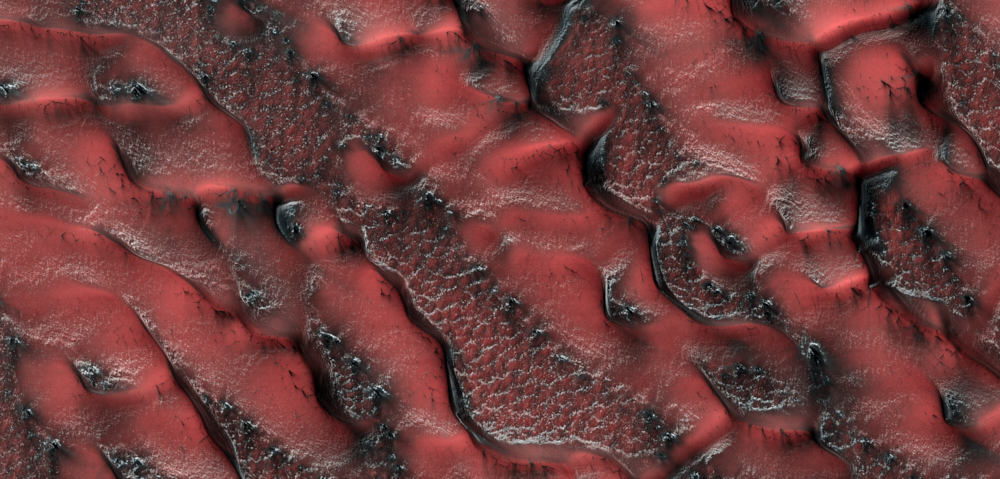
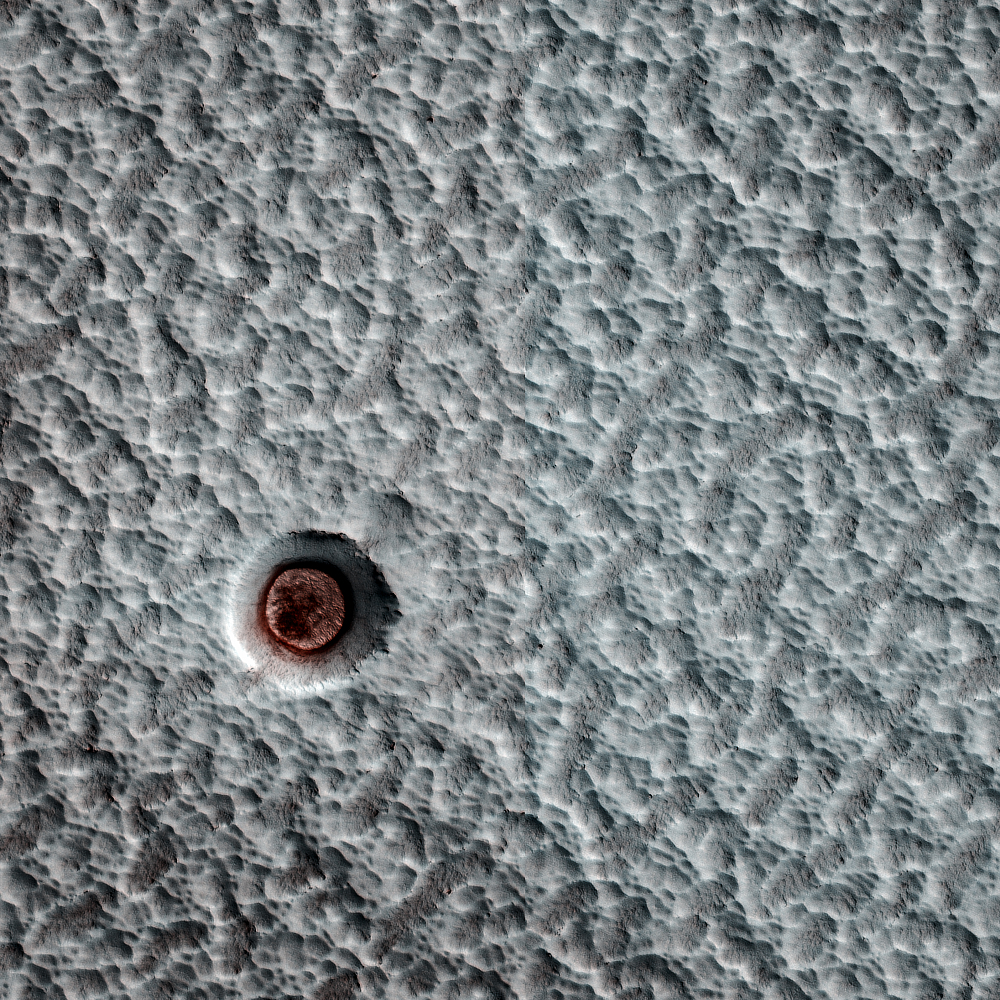
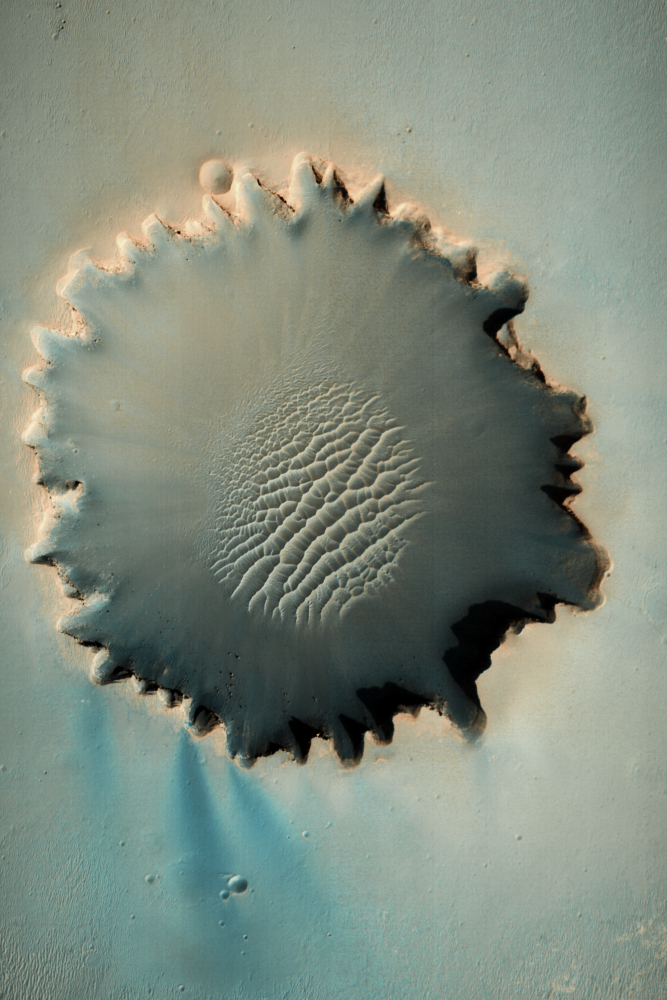
Here are a few images that I created in Capture One and Affinity Photo.
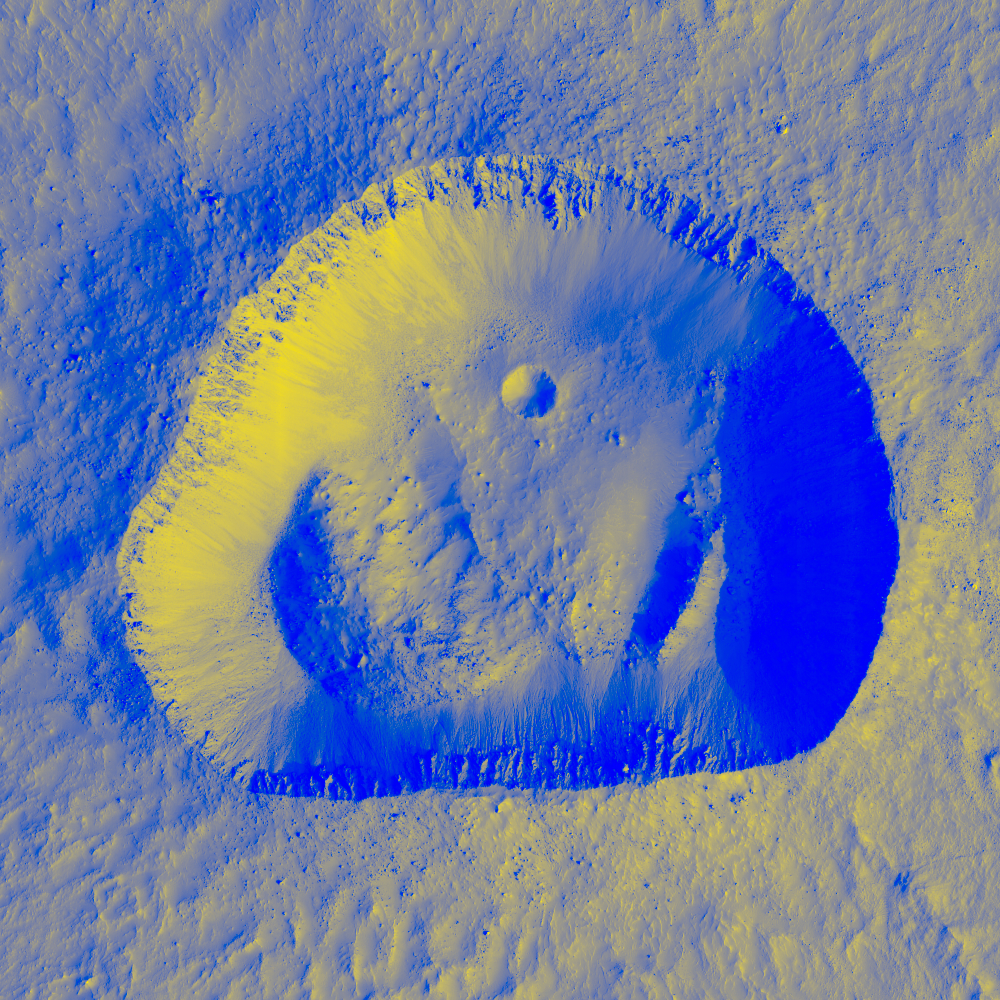
The example beyond goes beyond contrast and color adjustments. I created the image below using a black and white HiView image as a layer mask for a yellow fill layer on top of a blue base fill layer. (I know enough to use complementary colors.) I’m sure there are readers that could do much more creative compositions of this kind.
Accessing the Image Data
The primary goal of this article is to provide a guide to download HiRise raw images for processing in your favorite photo processing software. The University of Arizona LPL provides access to HiRise images from the HiRise web page. This article provides a roadmap for those resources.
You can download various kinds of image files. The full-resolution files, however, can be 1-2 Gpix, that’s Gigi-pixels! Furthermore, HiRise provides full-resolution only in JPEG2000 files, which most photo-processing software doe not support.
No problem! LPL provides an app, HiView, that allows you to scan the HiRise images using it’s low-resolution Viewer and Navigator windows to select an area for download. HiView will download that just that selection as a full-resolution JPEG or TIFF. It is similar to an ordinary JPEG image that renders initially in low-resolution and then pops into full-resolution as processing catches up. HiView does that with JPEG2000 on just selected areas without downloading and rendering the entire file to full-resolution.
The amount of source material is astronomical. The Catalog on HiRise website currently has ~2,700 pages and each page has 24 image thumbnail links to image capture data. (Fortunately, there are some efficient ways to search this catalog, which I’ll get to below.)
A Fascinating Camera
The Mars Reconnaissance Orbiter has a nearly polar orbit. In one orbit HiRise images a 6 km wide swath of the surface as it passes from north-to-south (or vice versa). Think of HiRise as a camera having a sensor with only a single horizontal row of pixels. It takes a succession of row shots as it transitions from north-to-south, thus constructing a vertical swath image one row at a time. It is the motion of the MRO’s orbit that moves the row-capture from top-to-bottom (north-to-south) across a very tall image. The HiRise literature calls this a “push-broom” system. Photographers will recognize it as a rolling shutter on a planetary scale.
The Color Space
There are three color channels: near-infrared (NIR), red, and blue-green. The HiRise native color space is called IRB, where I is for near IR, R is red, and B is blue-green. While there is a large overlap, IRB does not cover all the colors of human vision so colors in HiRise images are necessarily false colors.
The Sensor
The actual sensor consists of fourteen 2048 × 128 pixel CCD component sensors. An effective 20,000 × 128 pixel array for the red channel, which covers a 6 km swath on the surface, is created by digitally combining data from 10 of the CCD sensors. That’s the HiRise version of demosaicing. That 20,000-pixel width is physically 200 mm wide on the focal plane, which is four times as wide as a medium format sensor. The NIR and green-blue channels are effective 4,000 × 128 pixel arrays, each created from two of the fourteen CCD sensors. They cover a 1.2 km swath on the Martian surface. You can see the CCD sensors arrangement on the focal plane here.
Even by 2004 (the year HiRise was built) standards, the CCD sensor size = 2048 × 128 = 0.26 Mpix is quite small. The reason for this is that these sensors are designed to survive the accelerations and vibrations of launch, and operate in extreme temperature ranges, far beyond the capabilities of our terrestrial camera sensors. In addition, unlike Earth, Mars does not have a magnetic field that deflects the powerful radiation of the solar wind. So MRO electronics must be radiation hardened. All this increases the size of the CCD pixels.
Exposure Parameters
HiRise is a Cassegrain design with a primary mirror diameter D = 500 mm. The red channel sensor width is ~200 mm corresponding to a 6 km wide surface swath, and the spacecraft altitude is 250 km. Thus, the focal length is f = (250/6) × 200 mm = 8533 mm and the f-number is N = f/D = f/17. The pixel dimension on the surface is w = 30 cm and the orbital velocity of the spacecraft is v = ~4000 m/s. Thus, the base exposure time over one ground pixel is Δt = w/v = 75 μs (microseconds) or 1/13,333 seconds.
Noise Reduction
The base exposure parameters are constrained by the size of the primary mirror, the altitude of the MRO, and the gravitational constant of Mars. Noise is a problem. HiRise has two methods to deal with noise.
The first method is time-delay integration or TDI, which uses the fact that the actual CCD sensors actually have 128 rows of pixel elements, not just one. A CCD is an analog electronic device that counts photons and stores the count as an electrical charge. After a pixel element captures its photon count, it passes its charge to initialize the pixel element in the next row. In this manner, the captured photon counts are accumulated as successive sensor rows pass over the same geographic pixel. This effectively multiplies the exposure time. HiRise can be configured to use TDI over 8, 32, 64, or 128-pixel rows, which yields exposure times of 600 to 9600 μs. The slowest “shutter speed” is about ~1/100 second.
The second method HiRise uses for noise reduction is pixel binning, whichn is just averaging over n × n pixel groups. Averaging reduces noise. It also reduces the resolution and file size. HiRise uses up to 16 × 16 binning, which corresponds to a 16 × 30 = 480 cm surface resolution, or ~15 ft surface resolution.
You might ask why not always produce images in full-resolution and do pixel binning in post-processing back on Earth? The answer is that HiRise image captures are limited by the onboard (radiation hardened) memory, and by the bandwidth of the communications link back to Earth. These are limited resources allocated appropriately for the scientific mission of each HiRise image capture.
At 6 km wide, a pole-to-pole swath image would have a huge height to width ratio, but the image size is limited by MRO memory. Typical images on the order of 10-to-1 height-to-width ratio.
Downloadable Image Data
EDRs and RDRs
Image data is downloadable in two general forms: Experimental Data Records (EDR) and Reduced Data Records (RDR). EDRs contain the raw data from the 14 CCD sensors. I don’t think most photographers would be interested in working directly with EDRs.
RDRs have been demosaiced across the multiple CCD sensors and “radiometrically adjusted.” Those adjustments include dark current (black level) subtraction, and scaling so the pixel values are calibrated to ground reflectance, denoted I/F, within each channel.
Searching the Catalog
The Catalog tab of the HiRise website provides pages of links to RDR data. As noted, there are ~2,700 pages of links. At the bottom of a catalog page, you will find a list of links, two of which are useful for narrowing your catalog search. The Caption link shows just the ~100 pages that have been given descriptive captions. These are most likely to contain interesting images. The Advanced Search link supports keyword searching. You can search on words like “crater,” “dunes,” “ice,” “restaurants,” “sports bars,” etc. Clicking on a thumbnail on a Catalog page will direct you to an RDR page that has several download links for various RDR files. Let’s walk through the file-type options.
JPEG vs. JPEG2000
An RDR page provides links to both of these file types. The ordinary JPEGs are low-resolution previews of the RDR data, which are very useful for catalog surfing. Once you find something interesting by previewing JPEGs, you can then explore the JPEG2000 files in HiView.
Color Options
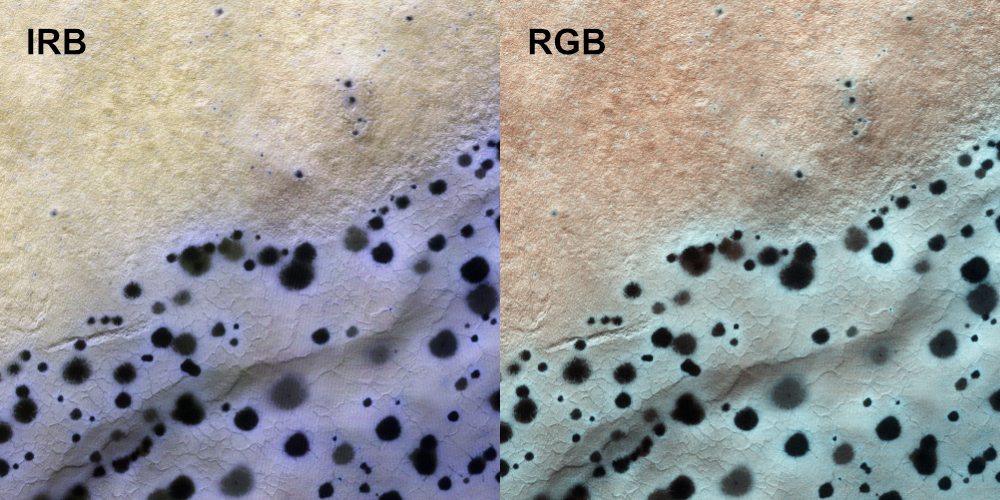
The color options are black & white, IRB, and RGB. The black & white files are monochrome data for the full 6 km wide swath from the red sensors. IRB and RGB files are 1.2 km wide three-channel swaths.
IRB is the HiRise native color space. RGB is a transformation of the IRB channels deemed to be a good approximation of colors as would be perceived by a human observer. Below is a side-by-side comparison of IRB and RGB images below. I’ll explain more about how IRB colors are rendered in the next section on HiView. Further information on HiRise color is found here.
Merged Files
Files labeled IRB and RGB provide only the 1.2 km color swath (4000 pixels). Files labeled “merged” IRB or RGB provide the full 6 km red channel swath (in black & white) with the 1.2 km color swath running down the center. Merged files are probably not useful for photographic art.
Mapped vs. Non-Mapped
Non-mapped images provide a tall rectangular image. The mapped images have projected the image onto a latitude-longitude map of the surface of Mars, which is essential for scientific purposes. However, these mapped images appear tilted in the HiView Viewer window because the MRO orbit is tilted off a perfect polar orbit. That tilt restricts the rectangular selection in HiView. So, I recommend using only the non-mapped images.
Stereographic RDRs
Stereographic RDRs contain a pair of images taken on different orbits that view the same surface terrain from different angles, to provide terrain altitude. There are two types of stereographic images. First, a Digital Terrain Model (DTM) is a black & white image where the pixel value is terrain altitude (as opposed to ground reflectance). Second, an anaglyph is a red-blue altitude encoding that can be viewed with 3D glasses.
I’ll not be covering the stereographic data products further, but if you have a 3D printer you might have some fun with DTMs.
HiView
The HiView app page is here. You will find tabs for Download, a short Tutorial video, a Quick Start page, and the User’s Guide. Some important details are not explained well. So, read this overview first. I think this will save you some hours of frustration.
The primary window is the Viewer. Additional tools are provided by the Navigator, Statistics, and Data Mapper windows. These additional windows are initially docked to the Viewer, or you can “tear-off” to floating windows. I recommend using the floating windows because there are restrictions when docked.
Pay attention to the activity indicator dot in the upper right of the Viewer because HiView is constantly downloading partial JPEG2000 RDR data. The dot is red when data is downloading. Otherwise, it is blue.
Viewer and Navigator Windows
You open a *.JP2 file in HiView by simply dragging the file link from the Catalog RDR page to the Viewer. HiView remembers these links in a drop-down list. That list will get cluttered and it is not immediately clear how to clear the list. Clearing the file history is done in the app Preferences under the Sources tab.
The first step is to get used to scaling (zooming) and positioning the selection shown in the Viewer. Scaling is performed using a vertical scale slider in both the Viewer and Navigator. Positioning the selection can be done either by scroll bars on the Viewer, or just dragging the selection box in the Navigator.
At the bottom of the Navigator window the Image Scale box. I would prefer to call this the “Viewer scale” because it only relates to pixels in the Viewer screen and does not determine the resolution of the output. Image Scale = 1.0 means there is a one-to-one correspondence between source HiRise pixels and screen pixels in the Viewer.
Saving and Scaling for Output
You save the Viewer selection to a TIFF by selecting Save in the File menu. That opens the Save dialog, which has a Scale box that is preloaded with the Image Scale value from the Navigator. Scale = Image Scale just reproduces the Viewer screen pixels. To get a full-resolution TIFF, type 1.0 into the Scale box of the Save dialog. This does not change the selection area. It does cause the saved TIFF to have the full-resolution of the HiRise image.
The Save dialog will also show you the image size in pixels after you change the Scale setting and before you hit the Save button. If Scale = 1.0 produces larger file than you need, set Scale < 1 to reduce file size. I don’t expect HiView has a highly tuned interpolation algorithm on par with photo editing software. So, if you downsize from full-resolution, I recommend you set a Scale value that results in simple pixel averaging. For example, Scale = 0.5 results in averaging 2 × 2 pixel blocks.
IRB-to-RGB Channel Assignment
For IRB images, the Navigator lets you assign IRB channels, indexed by 0, 1, 2, to the output RGB channels. The default assignment is 0: red, 1: green, and 2: blue. IRB channels 0, 1, and 2 are, respectively, NIR, red, and blue-green. Thus, the default assignment puts the HiRise red channel on the output green channel. This explains the unnatural color look of the IRB images in the above side-by-side comparison of IRB to RGB. Mars is, after all, the red planet – not the yellow planet.
You can reassign IRB channels to RGB channels as you wish (like assigning IRB red to Display red). No matter how you do it, however, it looks a lot worse than the default mapping. If you want something closer to the actual colors of Mars, use the RGB transformed images.
Statistics and Bit-Width
The Statistics window provides a histogram and other statistics. At the bottom of the Statistics window select Source or Display Data. Source data is 10 bits, so the histogram horizontal axis runs from 0 to 1023. Display Data is data as displayed in the Viewer window, or output TIFF or JPEG data. The Display Data bit-width is 8 bits, so the histogram runs for 0 to 255.
The histogram vertical axis is labeled as pixel-counts. It has an auto-scaler for the count axis, but that doesn’t always work (especially when you’ve done some data mapping as explained below). You may have manually set the vertical axis scale.
As explained above, HiRise RDR data has been adjusted to represent ground reflectance (I/F). This is linear data, much like data stored in a (linear) DNG file. Standard RGB color spaces (sRGB, ProPhoto, etc.) use a tone reproduction curve (TRC), sometimes called the “gamma-curve”, to expand the data dynamic range. For example, 8-bit sRGB data has a dynamic range of nearly 12 stops. HiRise does not use a TRC. Therefore, the output 8-bit data has only ~8 stops of dynamic range. You’ll want to use every bit of that dynamic range, and that means you’ll want to have a different data mapping for each of the output channels. That brings us to the Data Mapper.
Data Mapping
The Data Mapper lets you set the Source levels that map to Output black (value 0) and Output full-scale (value 255). This is similar to the Level’s tool in CaptureOne. If you tear-off the Data Mapper to a floating window, you’ll also get a “curves” window. I say “curves” in quotes because while you can add control points, the curves are piecewise straight lines, not the bezier curves we are used to. So save your curves adjustments for photo-editing software. The IRB channels can have significantly different ground reflectance, so you’ll want a different data mapping for each channel.
HiView provides a “default contrast stretch” in the Data Map menu (along with “restore original”). It does a good job. The menu also shows the icons for those actions, and then you can just click the icon in the Data Mapper window. I recommend using the default stretch for both IRB and RGB images.
Processing the TIFF Images
Now you have a TIFF! These are the most stripped-down files you’ll likely ever work with. There is no metadata and no embedded ICC profile that indicates the color space. Whenever a file has no embedded color space profile, the standard assumption is sRGB. Indeed, HiView RGB colors are sRGB colors.
Processing in Affinity Photo
Affinity Photo is a pixel editor similar to PhotoShop. I expect the PhotoShop experience would be similar.
Upon opening the HiView TIFF, Affinity Photo presents a dialog box indicating that it has assigned the “working color profile” to this image. I usually have that set to ProPhoto, but for HiView RGB colors we need it to be sRGB. If you save the TIFF, Affinity Photo embeds the sRGB profile in it. It is still 8-bit data. So, instead of saving, I recommend that you Export to a new 16-bit TIFF with the ProPhoto color space. That doesn’t change the colors, but thereafter it will save the new colors you create by processing – even the ones that are outside the sRGB gamut. After export, remember to switch the working color profile back to ProPhoto. Then open the 16-bit ProPhoto TIFF and start doing your layer work.
CaptureOne is a non-destructive RAW processor. It will open a HiView TIFF and automatically interpret it as sRGB data (as indicated in the info tab). You don’t need to create a new TIFF file because of the way RAW processors work. They store the original file (non-destructively) with a list of rendering instructions. The rendering instructions are applied within an internal wide-gamut (perhaps ProPhoto) working color space with extended bit-width precision. So, you don’t have to do anything to expand the working color space or data bit width.
If you try processing with other photo editors and have a significantly different experience, please let us know in the PhotoPXL forum.
Conclusion
I hope this article will jumpstart your workflow for getting HiRise RDR images into your photo processing software. It took some time to figure out some of the important details here.
John Sadowsky
June 2020
Charlestown, MD
John S. Sadowsky is a retired wireless system and signal processing engineer, with both academic and industrial experience. Now, I'm an amateur landscape photographer. I've done a lot of shooting in America's southwest, mostly in Arizona and southern Utah. Today I live in Maryland, where I'm learning to photograph an entirely different landscape.