Phase One’s Capture One 20 Is Released
Phase One Launches Capture One 20
Driven by user feedback, the most powerful photo editing software Capture One 20 is now more dynamic, more intuitive, more agile – and better than ever.
As many of you know, I am a big fan of Capture One, and it has been my main RAW processor for over 19 years. I will point out that I am somewhat biased since I worked for Phase One, the makers of Capture One for 13 years. However, for the last six years, I could have used any RAW processor I want, and I have tried them all and have become quite proficient at many of them, especially Lightroom. They are all good tools and work well. Today though, Phase One has raised the bar again with the release of Capture One 20.
Capture One 20 is a departure from the previous naming nomenclature, as it has now jumped from V12 to v20. Most likely to correspond to the new year 2020. So, in a year, I suppose we can look forward to Capture One 21. Makes sense primarily because the next version would have ben Capture One 13 and who would have wanted to be trusting their images to a superstitious number as 13.
Diving In
The development of this newest iteration of Capture One was geared intently on user feedback from the Capture One community to deliver a refined design with new processing capabilities and significant workflow enhancements. There are a host of robust new capabilities, improvements upon the already class-leading suite of features like the powerful Color Editor and Noise Reduction Tool. These developments all stem from user-input and Capture One’s commitment to satisfy requests and deliver beyond.
The highly responsive tools and new functionality give creators of all levels the power to develop stunning images from RAW files in a time-saving workflow that can be customized to fit each user’s needs. Coupled with the highly intuitive and functional interface, Capture One 20 is now easier than ever for new users, more useful, and more efficient in everyday work, yet remains without compromise.
“We want to enable creatives to achieve their best photos as effortlessly as possible, and that is why we drew heavily on feedback from our community to develop Capture One 20,” said Jan Hyldebrandt-Larsen, VP Software Business at Phase One. “It is our commitment to support them by providing a seamless photo-editing experience defined by developing the features they ask for and need, as well as innovating new features. Capture One 20 is an exciting moment for us, and we look forward to continuing working hand-in-hand with creatives.”
New Camera and Lens Support
Capture One provides users with the most accurate and powerful image editing available, and the wide-ranging support of cameras and lenses is a hallmark of the software. For enthusiasts and professionals alike, Capture One is continually evolving to handle the newest cameras and lenses.
Phase One carefully evaluates and interprets each camera’s RAW formats, allowing Capture One to present images with the utmost fidelity, often bringing out nuances that other programs can’t even perceive.
Capture One is offering RAW support for all the major camera brands and provides profiling and image correction support for lenses. As with the RAW file interpretation, Phase One carefully measures the optical characteristics of each supported lens and builds correction algorithms that compensate for the various visual imperfections of multiple designs. As a result, Capture One can correct for numerous common optical issues such as vignette and chromatic aberration as needed for each of the supported lenses, providing you the best version of your image possible. And they are always adding support for the newest camera bodies and lenses.
Learn what’s new in Capture One 20 Learn more about Capture One 20.
New features and tools in Capture One 20
There is a suite of new features and functionality for Capture One 20, but the Capture One team is dedicated to providing its users with long-term support that extends beyond creating new features and new camera profiles; It means continually evaluating all aspects of the software and improving upon features that already exist and even those that are much loved.
New Basic Color Editor
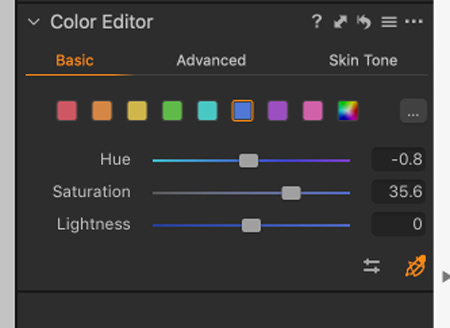 The Basic tab of the Color Editor has been redesigned to be more compact and at the same time, provide more options than previously available. Two new color ranges have been added, splitting the spectrum into eight fields instead of six, with each available from color patches and adjustable with sliders that now show gradient colors, indicating their effect. Additionally, the Basic Color Editor now works on Layers.
The Direct Color Editor is the new Cursor Tool in the Basic Color Editor. It allows you to click and drag anywhere on your image and have the corresponding color change. The direction of your movement when dragging determines which slider you change and the third option is available using the ALT key. The sensitivity can also be adjusted.
If you need to change the ranges, the spectrum is available from the (…) button. Any changes made to the spectrum will be reflected in the color patches and gradients on the sliders.
(New) Crop Tool
The new Crop tool is at once the most advanced crop tool to be implemented in Capture One and the most straightforward to understand and use.
With Capture One 20, it is now easier to crop with more easily visible edges of the crop thanks to new handles. New modifier keys have also been introduced, allowing cropping from the center [ALT] and locking the current aspect ratio [Shift]. Additionally, freehand rotation can be accessed by either moving the cursor outside the corner of the crop, or by using the modifier key [CMD/CTRL], and upon request, Hitting return/enter while using the Crop Tool will now switch to the Pan Cursor Tool and show the image in its cropped state.
All of this builds on the existing Crop Tool which allows users to do the industry standards such as setting aspect ratios and specific crop size by value, but also allows you to Crop to Path where Capture One will embed the crop outline and dimensions as a Photoshop Path when using a PSD file; auto-crop for lens distortion, and change the crop grid from the standard to specialized grids like the Golden Ratio, Fibonacci Spiral and so on.
(New) High Dynamic Range Tool
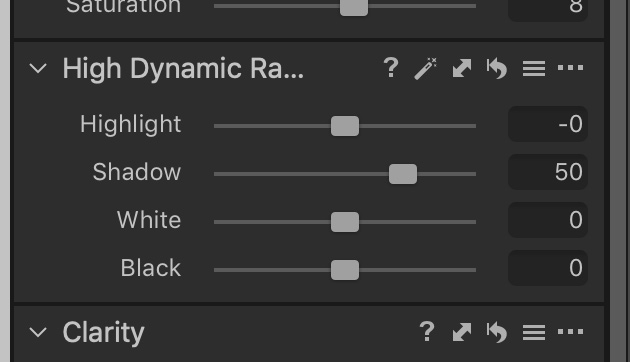 The High Dynamic Range tool targets primary areas of detail recovery and contrast along with the tonal range. Historically for Capture One that has been the Highlights and Shadows, controlled via sliders that could strictly move in the direction of recovery without a way to amplify either the shadows or highlights.
Capture One 20 brings a new, improved, and expanded feature-set to the High Dynamic Range tool with the addition of white point and black point sliders. Now all sliders zero out in the center and can be moved left or right to either recover detail from the shadows and highlight or exaggerate them and boost contrast.
This means the High Dynamic Range tool is now more powerful than ever, as it enables fine-tuning of contrast in a fast and easy way. It’s intended for fast workflows, and as a supplement to the more advanced control, one can achieve with Levels and Curves.
(New) Noise Reduction
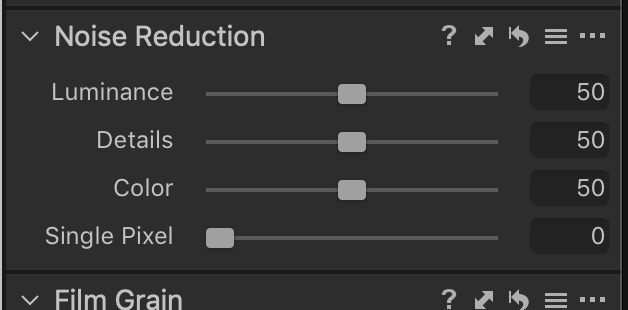 Capture One’s approach to noise reduction has been a tailored one as all cameras have their own noise reduction for each ISO and Capture One optimizes for each supported camera.
In Capture One 20, the Noise Reduction Tool has been re-engineered for improved performance. It tackles noise on two fronts: luminance noise and color noise, while Capture One 20 brings improved recognition of patterns and edges, better color noise reduction, more significant impacts from the Amount slider, and stronger noise reduction for images shot with a high ISO. Not only does it provide a higher level of noise reduction and detail retention, but it also holds color accuracy. This will be a boon for any low light shooting, particularly for genres such as weddings, events, concerts, and more.
The tool is intelligent. The default setting will provide noise reduction results based on the ISO setting. Because of this, Capture One 20 will give pleasing results – even without tweaking noise reduction.
(New) Scrolling Tools
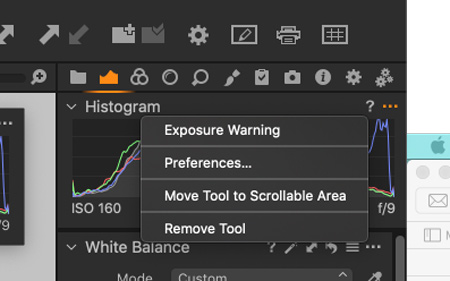
The redesigned Tool Tab navigation makes it easy to work more quickly and intuitively, allowing users to scroll through all tools with ease and pin favorites to the top for instant access.
As suggested above, every Tool Tab now has two sections; a pinned section and a scrollable section. The new default workspace for Capture One 20 has tools divided into both sections, the purpose of which is to allow the pinning of weapons to the top of the tool tab while scrolling below.
Tools can be easily moved between the two sections, either by dragging or by opening the tool submenu (…) and selecting “Move Tool to Pinned/Scrollable Area.”
If preferred, users can, for example, put all tools in the pinned area, effectively making Capture One 20 function just like previous versions.
(Enhanced) Appearance & Interface
With Capture One 20, creatives can Identify tools more easily with labels, instantly access Masking tools, and adjust the viewer background color with one click. Plus, users get even more precision and consistency with a redesigned white balance picker.
(Enhanced) Improved copy/apply of Layers
 Capture One 20 opens up for a more flexible, layer-centric workflow. It is now possible to select which layers to copy to other images, where previously one would have to copy everything or nothing. Additionally, the Layers that get applied to other photos will now be added on top of any Layers that might already be present, instead of replacing them.
It is now possible to copy and apply Layers between images of different dimensions as well, making it much easier to streamline a workflow where, for example. Multiple cameras are used, and Styles are applied to Layers.
(Enhanced) Support for DNG files
DNG files come in all shapes and sizes. If Capture One has implemented support for a camera model, the DNG file it creates will have individually tweaked colors with our custom profile. With Capture One 20, DNG files from camera models that are not supported will still look great. This opens up for excellent color profiling of all smartphones, drones, and camera models that capture in DNG format.
(New) Select Next When
For shoots that involve high-volume sorting, like weddings or other events, culling has been made easier with Capture One 20. You can now enable automatic switching to the next image once you star rate or color tag an image. These can be toggled independently. Find the new feature within ‘Select > Select Next When.’
This functionality also works with Sets (a selection of multiple images). Select multiple photos and disable ‘Edit All Selected Variants.’ When star rating or color tagging, the selection will move through the Set and switch to the Next Set of the same size once the last image is rated.
General User Experience Improvements (New)


License keys for all variants
Capture One 20 will require a license key for all variants to run. Capture One will automatically detect the variant based on the license key, eliminating the need to pick the correct variant on the start-up screen.
(Enhanced) Adjustment Clipboard Improvements
When copying adjustments to the clipboard with ‘Auto-select adjusted’ enabled, groups without modifications will be collapsed, providing a clearer overview of what will be included when pasting to other variants.
(New) Toolbar text and icons

The icons in the toolbar now have text under them as default, making the interface easier to understand. This can be toggled on and off by right-clicking the toolbar.
(Enhanced) Browser thumbnail resolution
The resolution of the thumbnails in the browser has been increased by 50%.
(Enhanced) White Balance Picker
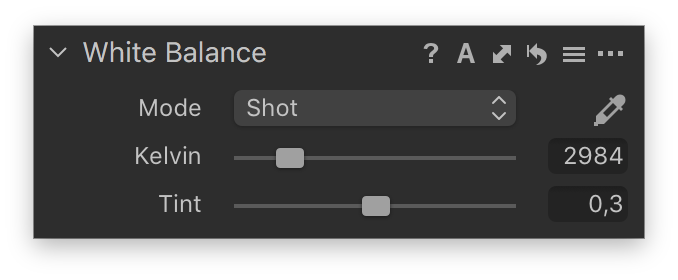
The White Balance Picker has been re-engineered to provide a much higher consistency. Previously, results could deviate based on the noise on the image.
Keyboard shortcuts
Edit faster with new default shortcuts for zoom, full screen, Focus Mask, and much more. Plus, customize the shortcuts further to create your ideal workflow.
Capture One In Use
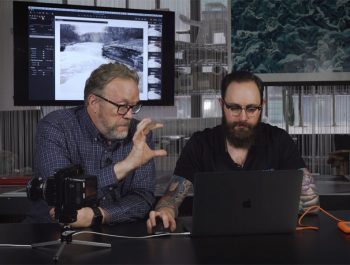
For several weeks now, I have been using Capture One 20 in beta form. In many ways, a lot of what has been good about Capture One remains unchanged. There are no real super game changer features in this new version. I wonder if there is anything significant that can be added to Capture One or any other RAW Processor. Maybe AI and computational additions will be the next big thing, but in this version, we don’t see these.
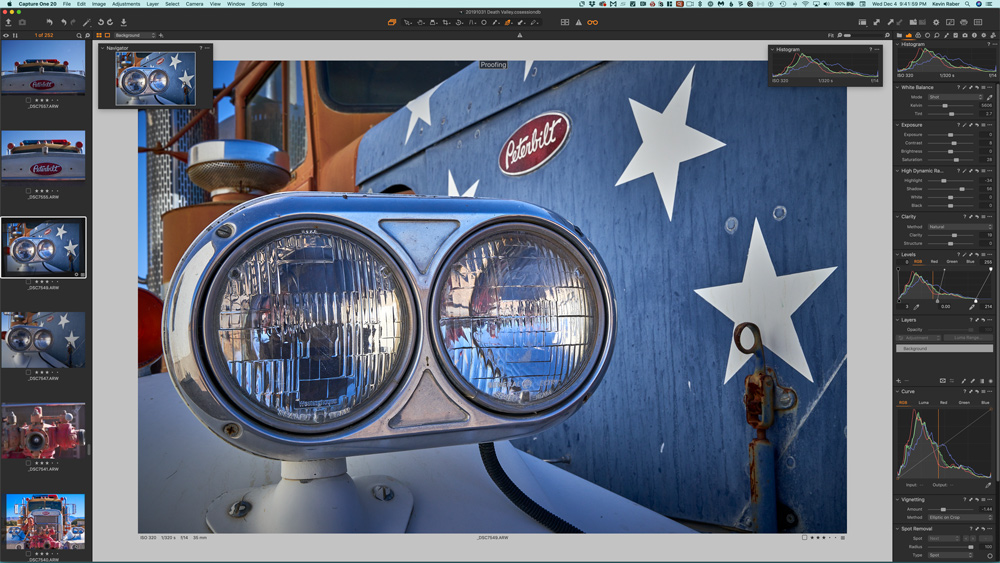
In Capture One 20, I love the new scrollable menus. In the past, especially when I was using my laptop with limited screen real estate, I had to close tool windows to make space for windows I wanted to work in. Now I can keep them all open and scroll up and down depending on what I am working with. Also, I can pin certain ones to the top. I typically spin the Histogram to the top and in some cases, the color and exposure setting panels. All else is set to be scrollable. The Histogram is something I always want to see so I can see how adjustments being made affect it.
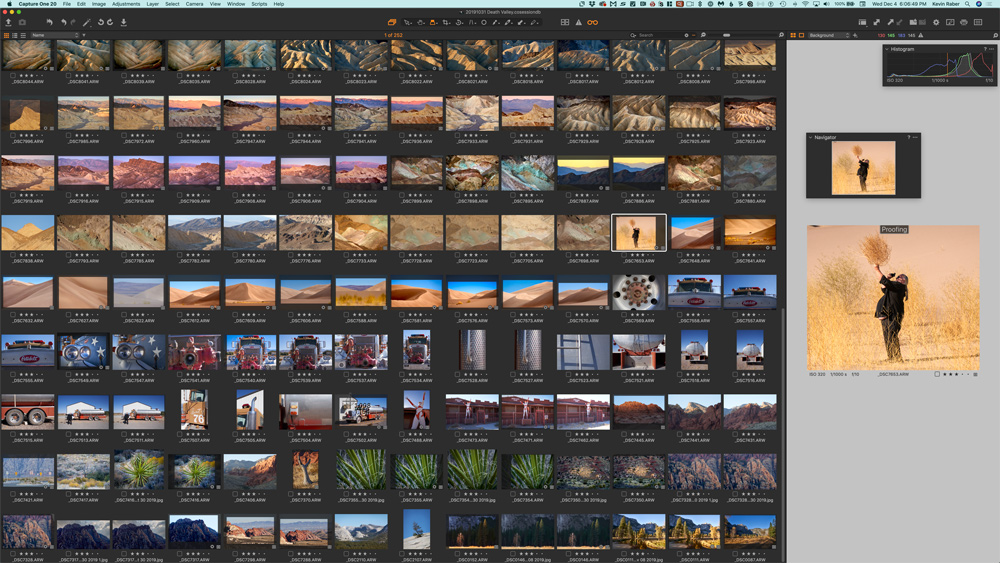
Capture One is fast. I can scroll up and down a column of thumbnails super fast using a mouse with a scroll wheel. There is no slowing down of waiting for capture to be created. There is a loupe tool that allows me to see enlarged areas of thumbnails as well as on the preview image without having to use the zoom-in tool.
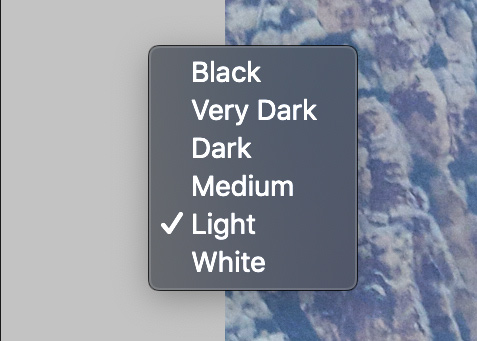
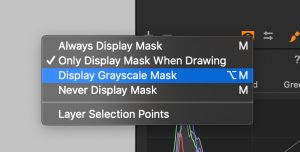
The layer tools in Capture One are super, and now there is Luma Masking, and this allows me to do luminosity masking of my images. I can now achieve a lot more editing on the RAW image than ever before without ever having to go out to Photoshop. A new tool in layers is the greyscale of the mask so you can see what the mask looks like. It just keeps getting better.
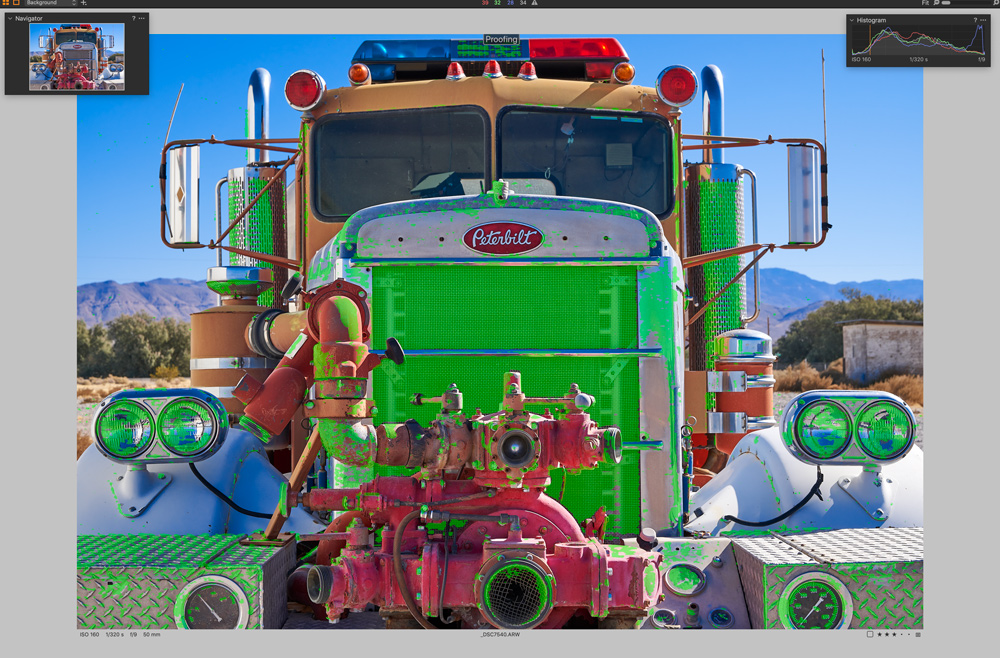
A focus mask (see above) is an excellent tool for checking focus depth for an image. In the layers tool, there is now a grayscale button that allows seeing the affected areas in a black and white mask image. Processing is still a breeze, and you can output several different output formats at the same time. You can also add watermarks or even comments. Typically for articles I write, I like to imprint certain parts of the metadata on output so that I can show them on published photos.
I’m still disappointed though that Capture One is still lacking some basics I have been asking for quite some time. There is no history panel that will allow users to go back to a specific edits spot and make changes. More than anything else, there is no before and after button. There is an awkward keyboard command you can use. (Which is in case you need it, can be applied to all adjustments at once by holding the Option/ALT key and long-pressing the global reset button in the top left corner.). If that can be done, why can’t they add that to a before and after switch like just about every other RAW editor has.
It would also be great to be able to do panorama stitching in Capture One. This would be so helpful. I need to output the images to be stitched and take them to Photoshop or other programs to stitch. And, I’m still frustrated by the Keystone tool. It works great but the lines to set the perspective are so thin they blend into many of the images. How hard would it be to make these a few pixels wider or even allow them to have a set color like yellow or red?
Hopefully, Phase One and the Capture One team will add these features in the future. I plan to do some small tutorial articles on power user tips over the coming months. We also plan to do a complete Capture One 20 tutorial as soon as possible. So, stay tuned.
The bottom line is the power of Capture One is unmatched. The image quality that can be produced is fantastic. There is a learning curve, especially if you are migrating from another program, but the result is worth it. Speaking of migrating, Capture One makes it easy to migrate from Lightroom.
The ability for Capture One to work with both sessions and catalogs is a great feature. Sessions make it easy to work on individual projects and move these around to different machines quickly. I typically work with sessions while in the field shooting. When I return, I move the session to my main work computer (an iMac Pro), and then I can add it to a catalog. We’ll cover more on this in the future. You can refer to an article and video I did with Drew Altdoeffer, where he uses catalogs all the time. https://photopxl.com/capture-one-12-with-drew-and-kevin-part-1-and-part-2/
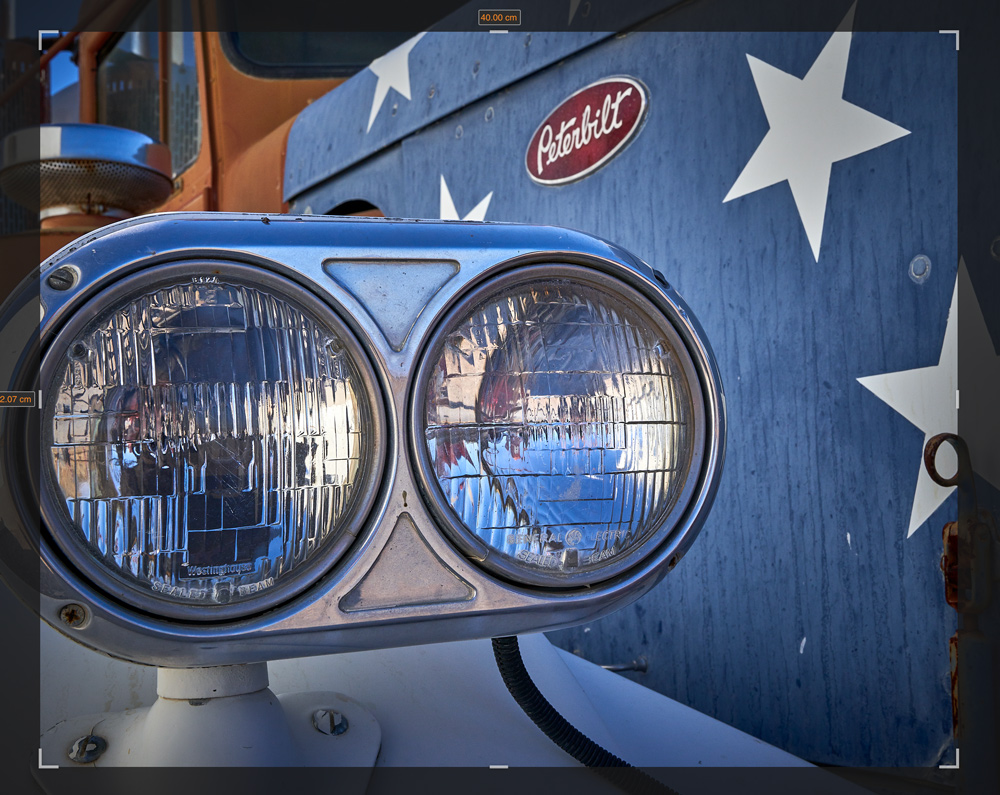
I have created my own workspaces in Capture One. I made one for initial edits, much like the grid in Lightroom and one for main editing. (see the top of this article). I was able to set the tools up in the order I want them as well as adding floating tools that are present all the time. I also moved the thumbnails to the left and the tools to the right. So, no matter which way you work, you will be able to work in a workspace that works for you.
If you are not using Capture One, you owe it to yourself and especially your images to check it out. There is a free trial period as well as some excellent Phase One tutorial. You can find out more information about Capture One by going to the Capture One site.
For pricing and purchase information please visit the Capture One website. A license for Capture One is $299 USD or $20.00 USD a month for a subscription. There are usually a number of value-added specials available so check out all options.
We look forward to bringing you more information on tips, tutorials, and videos in the near future.
Kevin Raber
December 2019
Indianapolis, IN
Photography is my passion and has been for 50 plus years. My career in photography has allowed me to travel the world, meet some of the most interesting people on the planet and see things I could never have dreamed of. My goal is to share the passion of picture taking through photographs and teaching with as many people as I can, hoping it brings them as much joy and happiness as it has me. I do this through photoPXL.com, this site, as well as Rockhopper Workshops, and other projects, as well as teaching as Artist In Residence at the Indianapolis Art Center.