Colorado Tripod Centennial Tripod Review
I looked in my closet this morning as I started this article and realized that once again, I have more gear than I need, especially tripods. I seem to be a professional collector of tripods. I have small tripods and large tripods; some of them cost over a thousand dollars. I suppose I am to blame for this, as I am always looking for the newest and best tripods.
I have small desktop tripods, medium-sized tripods, super-heavy, and big tripods — basically, a collection going back to the 1970s. Over the last few years, I have been looking for several things in my tripods. First and foremost is the weight. Like many, I am tired of hauling around heavy gear, especially tripods. I want a tripod that performs and is steady under a variety of conditions.

Usually, to find these requirements, you have to spend a lot of money to get a lightweight carbon-fiber tripod. There are many out there, and one thing they have in common is a high price. Oh, and let’s not forget the ball head that needs to go on the tripod. There are many of these as well, and they are also usually expensive.
If you are new to photography, you may really crave a fine tripod. Save your money, and one day you can plunk down nearly two grand to finally buy the tripod of your dreams. Luckily, you don’t have to upgrade your tripod as often as your camera. It is an investment that lasts a very long time.
One company, though, has become very popular, as they have not only made a fine tripod and ball head, but they have also made it affordable. Quite simply, I think it is one of the best (if not the best) values out there when it comes to tripods. This tripod must also be very successful, as there is quite the waiting list to buy it; it is in perpetual back-order status.
I am talking about the Colorado Tripod Company’s Centennial Tripod Series 2. This tripod costs $299.99 USD and has an impressive set of features. I know the owner of the company; he is a photo enthusiast who has made some interesting products for the industry. His commitment to design and value is a big asset in helping photographers get the best value for their money.

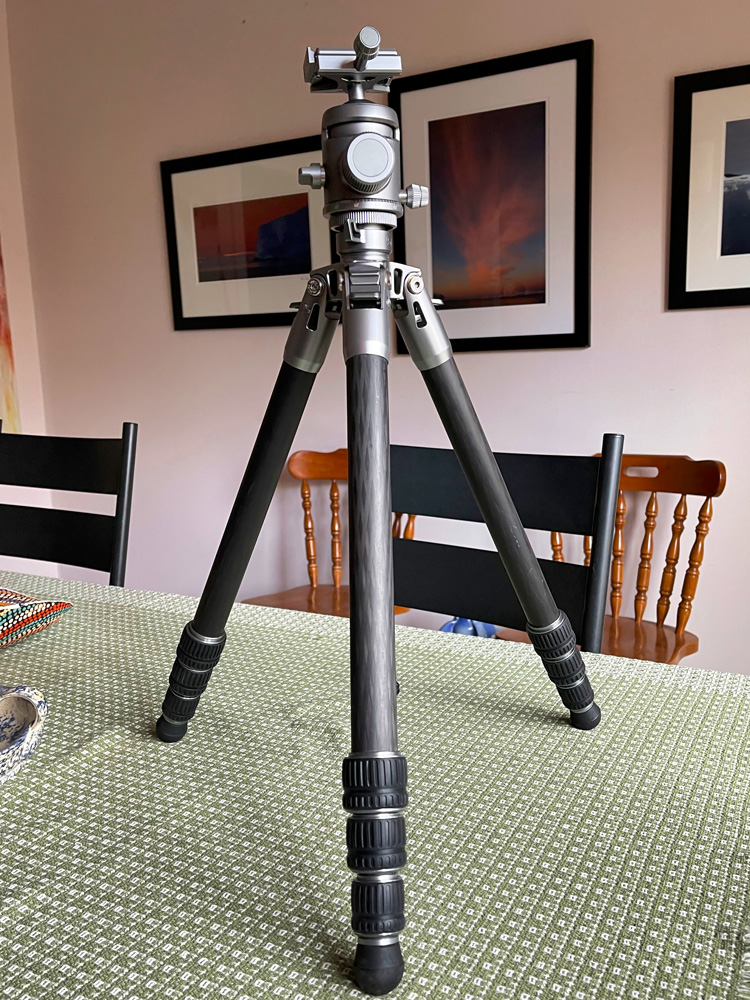
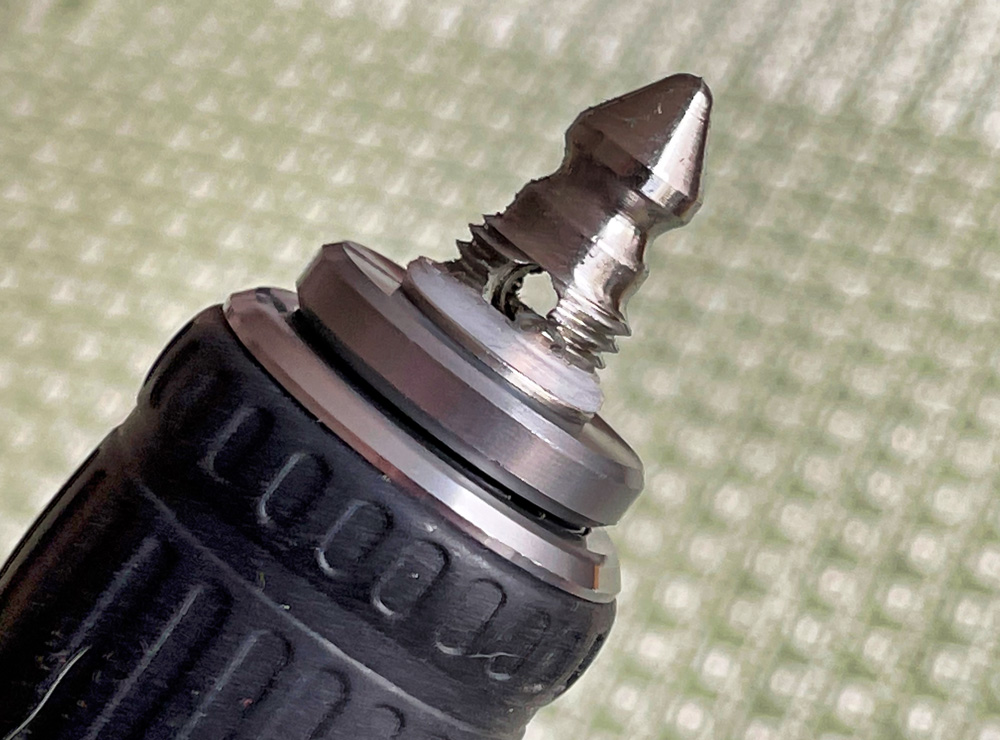
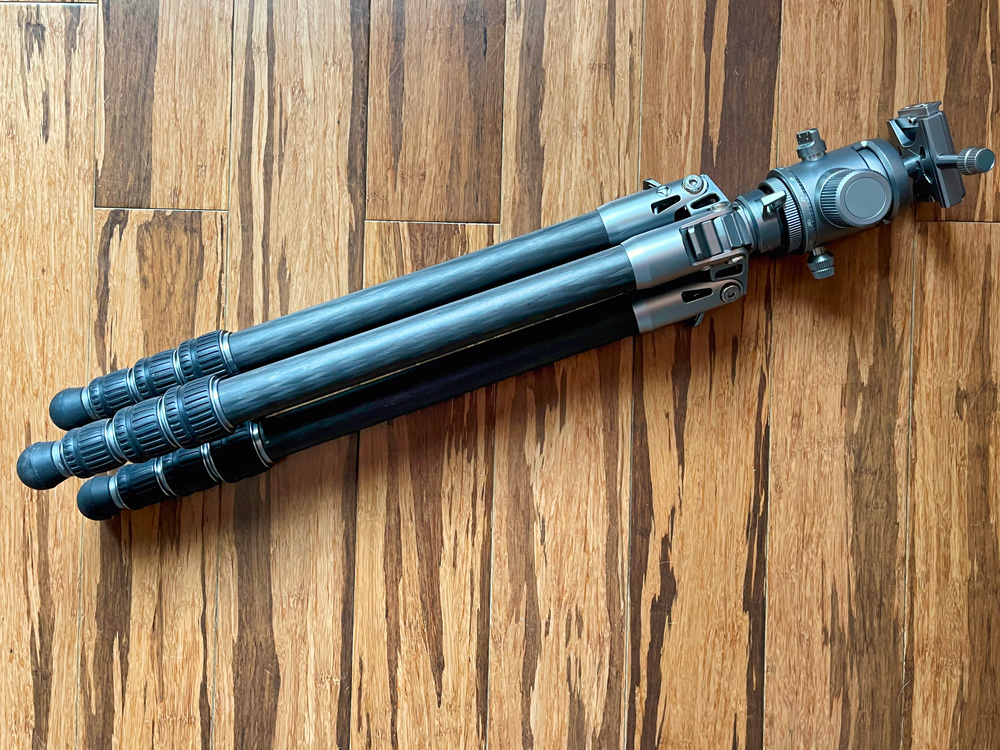
The Centennial Tripod is made of Japanese carbon fiber. The tripod comes with a center column and weighs in at 3.4 pounds. I am not a big fan of center columns, but this one is pretty sturdy and steady. The extended height of the tripod without the center column is 50 inches and 58 inches with the center column. That is a comfortable working height for most photographic needs. If you unscrew the rubber feet, you will find stainless-steel spikes. That’s a plus, as most other tripods make you purchase a separate set of spikes that must be screwed in; just one more thing that needs to be carried.
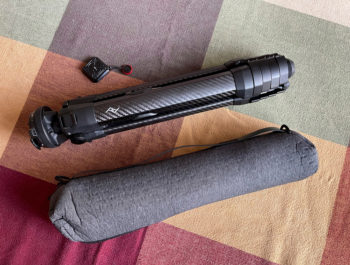
The collapsed length is 20.5 inches and is TSA-compliant if you want to bring it onboard a flight as carry-on baggage. Included in the price is a tripod bag as well as tools.
The Centennial Tripod Video
The Ball Head
On top of this, Colorado Tripod has made a cool, affordable, and surprisingly good $99.00 USD ball head. As you can see in the video and images within this article, the ball head is simple to use and has a unique feature to tilt your camera to a vertical position.
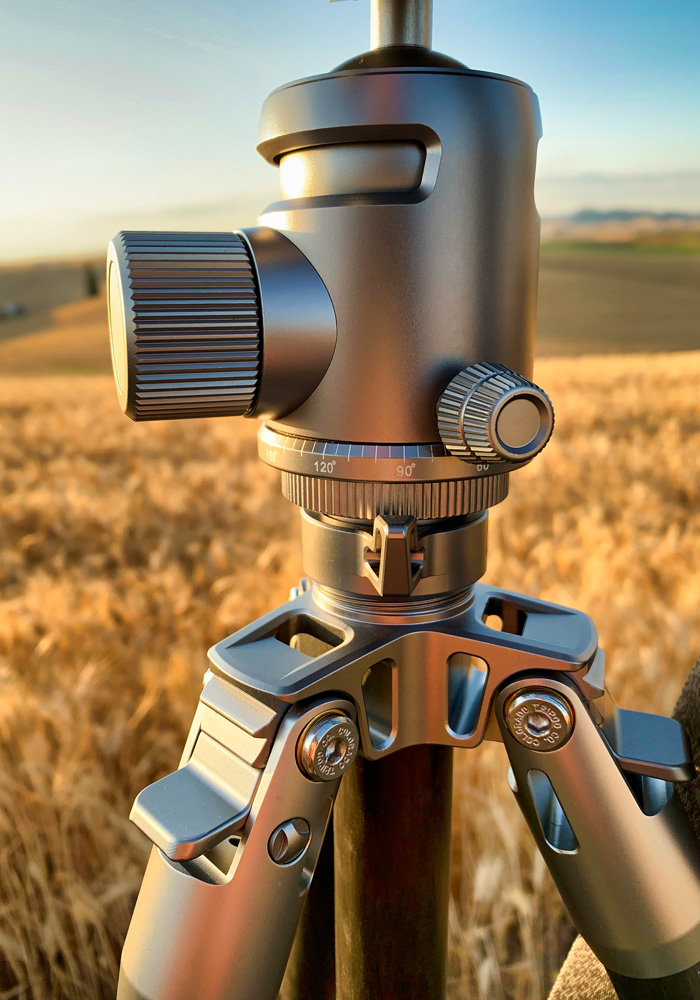
The ball head is simple to use, with three knobs that control horizontal rotation, the ball head’s tension, and the tightening of the ball head and camera to the desired position.
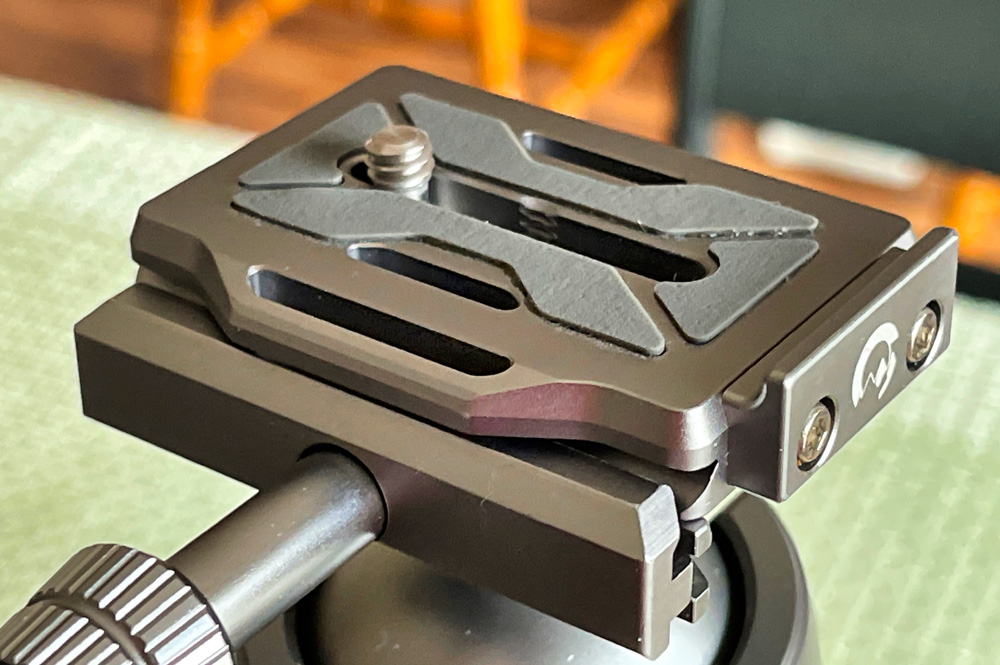
The camera attachment is a standard Arca Swiss mount. There are two ways to secure the camera to the tripod: a hand-tightened knob, or what I prefer the most, a locking lever clamp. The locking lever clamp makes it simple to lock the camera, and there is a safety button that prevents an accidental release. I prefer this mount, as I have had more than one experience where the hand-tightened method was not tight enough.
Using The Tripod
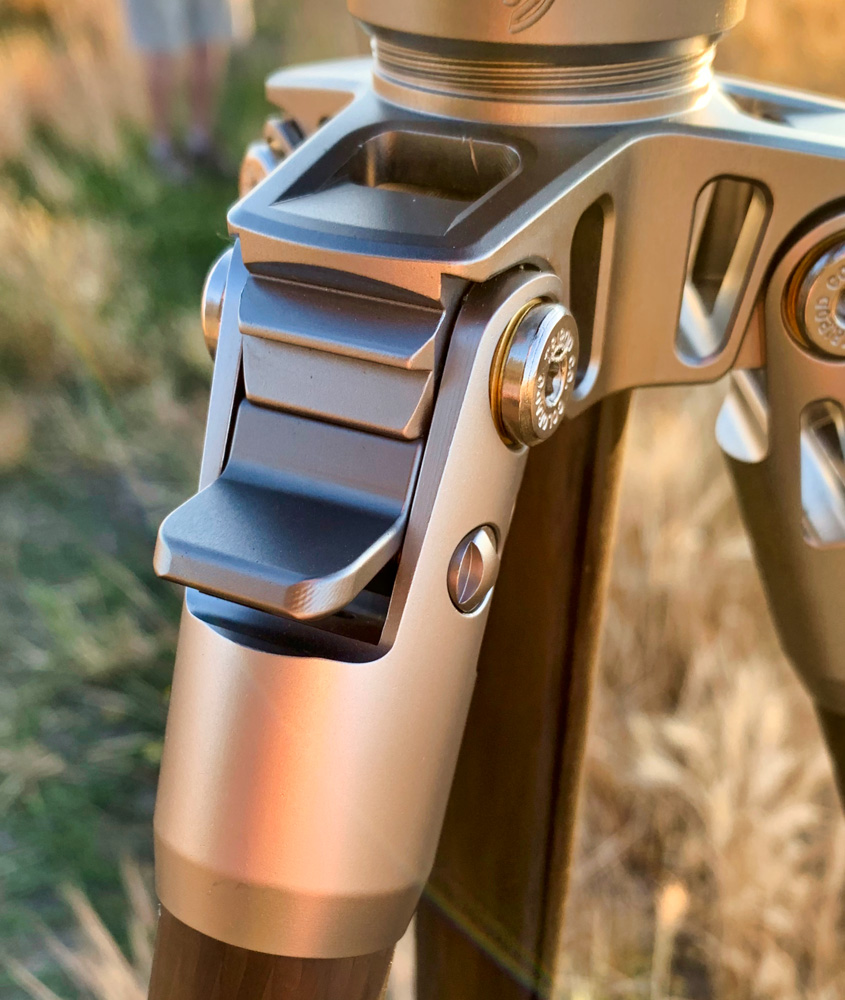
The first step to using the tripod is to extend the legs of the tripod to the height you want to use it. To do this, you have four locking rubber-covered knobs on each of the legs. If you have big enough hands, you can loosen all of them at once, then extend the legs to the desired height, then tighten each leg.
You can then decide if you need to adjust the legs further (such as for use on uneven ground). You can adjust the spread of each leg by using the spring-loaded leg locks. Simply release the leg lock and tilt the leg out to where you want it, and then just pull back on it to lock.

If you are on soft or slippery surfaces, you can remove the rubber feet and expose the spikes built into each leg of the tripod for a firmer grip on the surface.
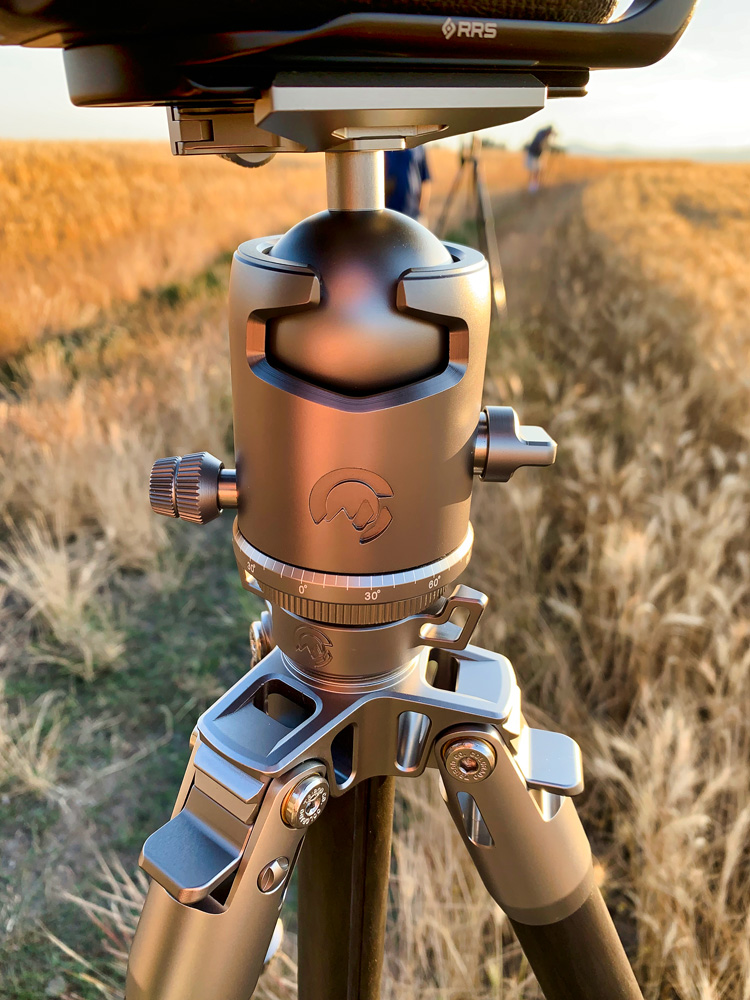
At the apex level of the tripod, you’ll find a unique apex design. This part of the tripod is where everything comes together. There are several carved-out holes to lessen the weight of the tripod.
You’ll also find a locking collar for the center column. You can loosen it and raise the height to where you want it, and then tighten it.
The Ballhead
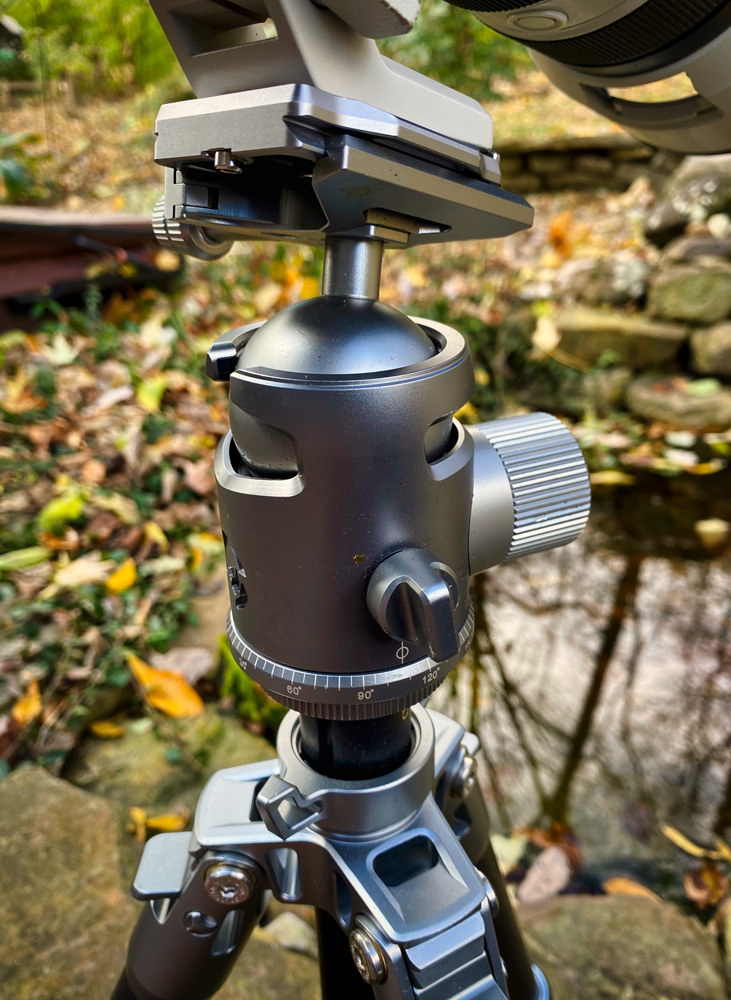
The ball head is simple to attach to the apex, just by screwing it on. Once attached, there are three knobs to make adjustments. The bottom knob is used to rotate the ball head. Once you have it in position, you tighten the knob to lock it in place.
There are two other knobs: one for tension and one to control the camera position. Attach the camera and loosen the large knob while holding the camera. Now adjust the tension knob (the smaller knob) until you get the positioning of the camera moving in a smooth, comfortable way. When you find the right camera position, then tighten the larger knob. The camera should now be securely locked.
Please make sure you secure the camera properly. With Arca Swiss mounts, you need to make sure you attach the plate correctly; most importantly, tighten the clamp very hard. Make sure you hold the camera at all times when making adjustments with the larger knob on the ball head.
The Final Word
The Centennial tripod and the Highland ball head are quite the bargain, coming in at under $400 USD. The performance of this tripod challenges tripods at four times the price. The weight of this tripod makes it great for travel. The height works well for 90% of the photography you most likely will do.
I have been working with this tripod for months now and have made it a point to make it my main tripod, with no regrets. The only issue I encountered were the legs sometimes becoming loose. This is common on many tripods after frequent use. It’s a simple adjustment to correct, using two Allen wrenches on the screws that attach the legs to the apex. Tighten the screws using a counterclockwise motion with both Allen wrenches at once until you get the desired tension. You want the tension tight enough to keep the legs in place when folded toward the center column but loose enough so that they are easy to deploy.
If you are interested in this tripod, you will most likely find it on back-order, as the price value and challenges of manufacturing in the pandemic have made it a sold-out item. I’d put an order in and be patient. This is a tripod that should last for many years, and the wait will be worth it.
Colorado Tripod still has yet to ship its higher-end titanium tripod. Its primary difference will be its weight and strength. There is also a Series 4 tripod that is a bit stronger, at the height of 70 inches and weighing around 5 pounds.
I have included links below where you can purchase the tripod. I wouldn’t hesitate for a minute to recommend this tripod. The value and return make it a worthy investment.
You can purchase the tripod at Colorado Tripod Company.
Kevin Raber
January 2021
Indianapolis, IN
Photography is my passion and has been for 50 plus years. My career in photography has allowed me to travel the world, meet some of the most interesting people on the planet and see things I could never have dreamed of. My goal is to share the passion of picture taking through photographs and teaching with as many people as I can, hoping it brings them as much joy and happiness as it has me. I do this through photoPXL.com, this site, as well as Rockhopper Workshops, and other projects, as well as teaching as Artist In Residence at the Indianapolis Art Center.